Why You Need a Home Photography Studio
 by
Contrastly
by
Contrastly

When you are starting out as a photographer, the world is your studio, but after a while you may get tired of having to fight the sun and weather. That’s when you know it’s time to work in an area where you can control the environment.
And, for the more casual photographer, a home studio is a great way to learn how to work in a studio environment.
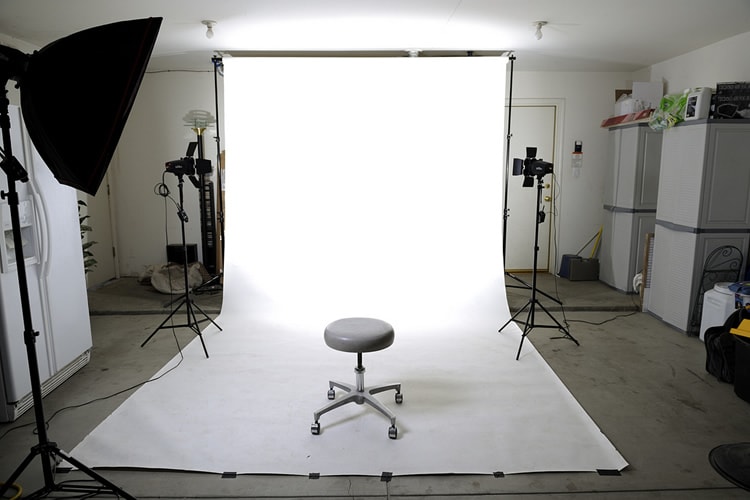
photo by Illusive Photography
Using the Advantages of a Home Studio
One of the benefits of having a studio inside your home is that you will feel very comfortable. If you are just starting out, being comfortable and confident can help you capture a great shot or help you work well with your model.
In a home studio, you also are able to control the environment to a much greater degree than if you were outside. Waiting for clouds to move, the wind to die down or for passersby to clear your frame can be an annoyance that a studio does not have to deal with.
A home environment also means that you have easy access to amenities such as food, water, restrooms, makeup and so on. This means you will have less of a wait time for your models and other crew members.
Picking the Room
Now that you are convinced that a home studio is the best option for you, there are a few things you have to think about when picking what room to put your studio in.
First, choose what kind of photography you want to focus on. Let’s say you decide to do portrait work. You then need to decide if you will be doing exclusively head shots or full body shots as well. In the first case, a much smaller room will suffice, but the latter will need a larger room to accommodate the model, equipment, camera and lens selection. For instance, with a 50mm lens and a full-frame camera, you will need between 10 and 13 feet between you and your subject to give comfortable head room. So, before deciding on your room, approximate these considerations because few things will kill the momentum of a photo shoot like realizing you’re going to run into a wall to get the shot.
Another point to take into consideration is the window layout of the room. A room with a south-facing window is best and easiest to control, but a north-facing window will also work well. These directions are optimal because they give the most consistent lighting throughout the day and tend to provide a softer light. On the other hand, east and west facing windows will change the most throughout the day and tend to be harsher.
Setting up Your Studio
Don’t worry if your windows are not placed optimally because there are options to make them better. Window treatments and modifiers are your best friends in this case. For example, if you want a dramatic and moody look, use slatted blinds to get a high contrast film noir look. Or, if beauty shots are more your style, a thin muslin or paper blind can give you a soft glow that will highlight your model.
Having a good background also will help your photography stand out. Making an infinite backdrop will give you a lot of flexibility in terms of the colors and textures you can use while being relatively easy to make.
Home studios can be a great idea as they give you a greater degree of control over the environment without the expense of renting a studio space. They can help you feel comfortable, which in turn will help put your model at ease. Overall, you won’t regret this move.
About the Author: Contrastly
Our mission at Contrastly is to help photographers all around the globe improve their craft and learn new skills. We create unique Lightroom & ACR presets, Photoshop actions, ebooks, and video courses. We also publish a popular blog with instructional articles, reviews, and tutorials.
Follow Contrastly on Twitter, Facebook, and Instagram. And make sure you subscribe to the bi-weekly Contrastly newsletter.