The Challenges of Lightning Photography

People have often raised the question: What makes a good photographer, the person, or the equipment? In truth it is a little both. It takes a good photographer who knows their equipment as well as their subject matter to create images worth treasuring for years.
Lightning can be one of the most frustrating images to capture. You can be at the right place, at the right time, with the right equipment, and still have nothing but a bright blur for your efforts. Although Lightning is considered one of the more challenging subject matters to tackle it can be accomplished with a little work.
Every photographer has their favorite type of camera for different projects, but in my personal opinion a DSLR (digital single-lens reflex) camera is the best option for capturing lightning. A DSLR camera gives users the ability to shoot in RAW, change lenses, and adjust settings to battle the elements. A point and shoot or film camera have their limits, but a DSLR is only limited by your imagination and the size of your pockets.

image by Gabriel Millos
Besides the camera, I also highly recommend using a tripod and cable release or remote control for shooting lightning shots. Placing the camera on a tripod and adding a cable release will reduce chances of vibrations. The standard lens that comes with most DSLR cameras will work just fine for this type of photography. However, a wide angle lens can come in useful if you are setting up from a distance.
Capturing lightning is similar in some ways to photographing fireworks. The difference here is that fireworks are typically only set off at night. Lightning can be captured day or night and the settings between the two can vary a bit. Photographing lighting can be tricky since you are technically dealing with two different types of exposures. The aperture and shutter speed will need to be adjusted to fit the amount of light outside. The aperture controls how bright the flash will be, and the shutter speed is used to control the surrounding light.
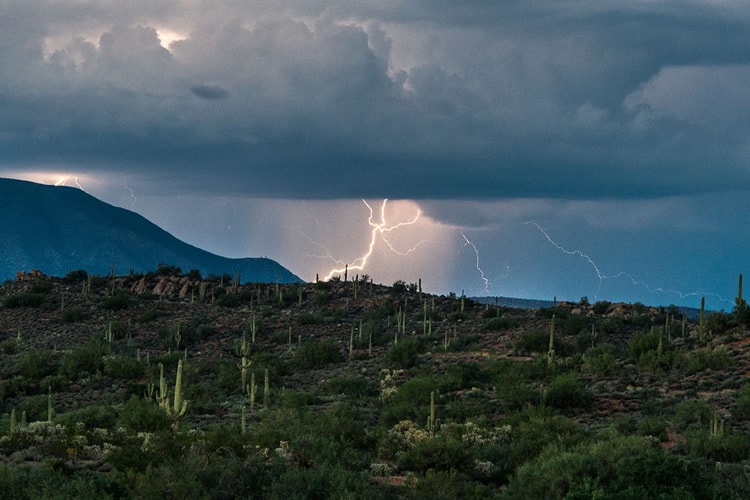
image by ed ouimette
Daytime Lightning Photography: Starter Settings
Photographing lightning during the day can be more difficult than you realize. The cloud cover produced by a storm will create a mixture of lighting to work with. It can sometimes be similar to shooting at night since the sky will darken, but on occasion a good storm will still have a fair amount of light. Knowing what settings to use for each situation is the key to capturing excellent lightning photographs.
Switch the DSLR camera into manual mode so you can change the ISO, aperture, and shutter speed as needed. The following is a starting point of recommended settings for capturing daytime lightning shots.
- ISO – 100
- Image Format – RAW
- White Balance – Auto
- Aperture – F-10
- Shutter Speed – 6 seconds
- Release Mode – Continuous
Nighttime Lightning Photography
Lightning photography goes much smoother at night if you can find a nice dark spot to set up. The lack of light means you can leave the shutter open until lightning strikes without fear of ambient light interfering. The above setting for daytime shots can also be applied to night, but will need to be slightly adjusted. Night shots are better starting out with an aperture of F-8. The aperture may need to be increased to F-10 – F-16 if lightning is occurring more frequently. For slower strikes than you may need to lower the aperture to F-6 – F-8. Taking several test shots is the best method to getting a high quality lightning image.
Shooting continuously is the easiest way to capture several bolts of lightning at once. The downside of shooting continuously is the memory card will fill up quickly and most of the shots are going to be useless. It can be a pain sorting through hundreds of RAW images, but the few good images usually make up for it.
Safety Tips
There are several factors that need to be considered while photographing lightning. Above all else, should be the safety of the photographer. Second to that, should be the protection of the camera and equipment. Some may argue that order, but equipment can be replaced.
The best location to photograph lightning is at least a mile away from the actual storm. Scout out a location ahead of time that provides a wide open area overlooking the oncoming weather. If possible, find a location that provides some shelter just in case you get caught in the storm. Don’t stand too close to trees or structures that could attract a lightning strike. The chances of being hit by lightning are very slim, but that is not a good enough excuse to put your life in danger for a few quick shots.
Once a location has been chosen, it is time to protect the camera and all other equipment from water damage. The easiest way, but not the cheapest, is to purchase a waterproof case for your camera. For those of us on a budget you can make your own. There are a few excellent tutorials out there for creating your own waterproof camera bag using everyday items such as a Ziploc bag and Tupperware containers. You can find tutorials for making your own waterproof camera case on Instructables. Happy shooting!
About the Author: Sheena Koontz
 Sheena is a jack of all trades freelancer who dabbles in photography, writing, editing, and web design. She specializes in abandoned, landscape, and travel photography. She currently resides in Bristol, VA with her hubby and two kids. You can follow her on Facebook or check out her website here.