How To Make The Most Of Natural Light

Most photographers are keenly aware of the impact that lighting has on photography. Light is the basis of photography, and the right lighting can make a tremendous difference in your work.
It’s often said that light can make or break a photo, and learning to work with light is one of the best ways to enhance your photography.
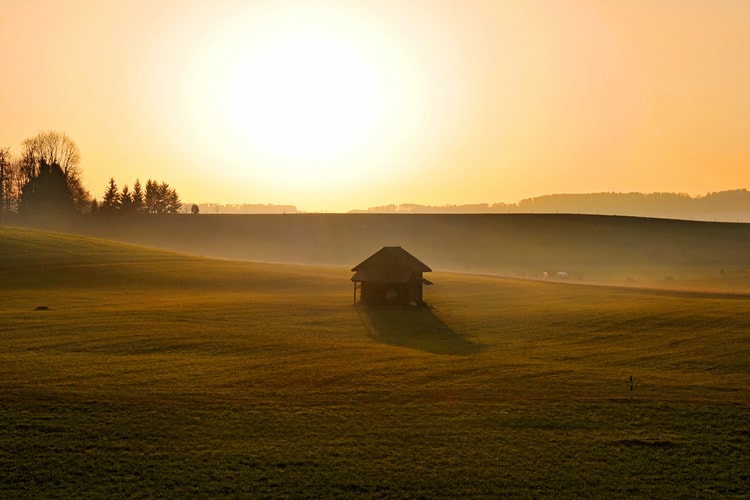
image by Tambako The Jaguar
Natural lighting can vary considerably – depending upon a number of different factors. The time of day, season, and weather will all affect the quality and direction of light and can help you to determine the best camera angle, subject position, camera settings, and more.
Light can also drastically impact the feel of a photograph. For example, while a bright, sunny day may work well for capturing a fun, energetic portrait; a dimly lit evening may be better for pensive or brooding images.
Learning to work with natural light involves being aware of the quality and direction of light. This will help you to compose your images for maximum impact.
Here’s how you can make the most of natural light, and use it to your advantage.
Quality of Light
Natural light comes in a wide range of intensities. Depending on the time of day and the weather, you may encounter lighting situations that are bright and harsh, softly diffused, completely dark – or anything in between.
-
Harsh Lighting (Mid-Day)
Clear, sunny days when the sun is directly overhead result in harsh lighting conditions. Mid-day light is often regarded as a difficult light to work with. Harsh lighting can result in strong shadows and overexposed, washed out images. Not to mention squinting subjects. But if you are aware of the challenges that this time of day presents, you can work to overcome them, and can even capture some amazing images. This time of day can result in some bright, vibrant photos that are full of life and energy.
When shooting portraits in bright sun, you may want to use a fill flash or reflector to help fill in dark shadows. You may also want to use a polarizing filter to soften the light and prevent washouts. Bright, sunny conditions are great for black and white photos since these images can benefit from high contrast lighting conditions.
A clear day is also ideal for capturing some unique coastal shots. Since the bright light penetrates the water better, the water will appear more transparent than any other time of the day. Of course, if the light is too difficult to work with, you can always head for the shade. The overhang of a building or branches of a tree can work well to diffuse the light.
For bright lighting conditions, the “Sunny 16” rule can be a good place to start. Set your camera to f/16 and the shutter speed to about 1/125, and work from there; increasing the shutter speed to allow less light in, or slowing it down for more.
-
Diffused Lighting (Shade and Overcast)
Soft, diffused lighting is the type of light that you’ll find on an overcast day – or in the shade on a bright sunny day. Unlike harsh lighting, diffused lighting has very little contrast. However, this type of lighting is ideal for many situations – especially portraits since you don’t have to worry about the harsh sunlight casting strong shadows.
This type of lighting is also great for macro photography – and other situations where you want the entire subject to be in focus. Golden Hour is another ideal time to find soft, diffused lighting. The sun is lower in the sky during this time of day and casts everything in a soft, golden glow. This type of lighting can help you to capture beautiful portraits as well as spectacular landscape images.
Diffused lighting is the perfect chance to get creative with your photography. For portraits or close-up images of nature, try setting a wide aperture (low f-number) to draw your subject into focus while softly blurring the background. Something like f/4 or lower is ideal. If the sun is low enough in the sky, you may even get some nice bokeh.
Direction of Light
In addition to the quality of light, the direction of light can also impact the resulting images – especially when it comes to portraiture. Knowing the direction of light can help you to know which way you should angle your camera and position your subject to get the best image.
-
Back Lighting
Back lighting is often used for both landscapes and portraiture. Backlighting can results in great rim lighting – a glowing effect on the edges of the subject – especially during Golden Hour. Positioning your subjects with their backs to the sun can also result in some great highlights around their hair.
-
Front Lighting
Front lighting can result in an evenly lit subject with fewer shadows. Unfortunately though, the absence of shadows can result in flat looking images, so you’ll want to gauge whether or not this type of lighting is ideal for your composition. And of course, keep in mind that having your subject face the sun can cause them to squint! As a general rule the softer the light, the better the resulting front-lit images. Early morning or evening is ideal for front-lit photos.
-
Side Lighting
Side lighting is ideal for both portraits and landscape photography. Unlike front light which tends to be flat, side lighting creates a nice range of highlights and lowlights, resulting in images that have more depth and interest. For landscapes, side lighting can emphasize the texture of the land and make for creative and interesting photos. Side lighting is also ideal for “window portraits” – images that are captured indoors, beside a window. The light gently diffuses as it comes through the window, and presents an ideal opportunity for portraiture.
When trying to determine the best direction of light for portraits, if in doubt, position your subject and have them rotate. Walk in front of them as they turn, and you’ll soon be able to see which direction provides an optimal amount of light and shadows.
While some photographers prefer to work au naturale – and rely solely on outdoor, natural lighting for their images, making the most of natural light doesn’t mean you have to forgo your flash. The right equipment, such as a reflector or polarizing filters, can help to enhance a number of outdoor lighting situations. Using a flash outdoors can help fill in dark shadows, and create powerful photos. It’s all about how you use your flash – and the available light as well!
While mastering light is a life-long learning process, it’s one that’s extremely rewarding. The next time you’re out with your camera, pay special attention to the available light. You’ll be encouraged as you notice the tremendous difference that optimal lighting can make.
Do you have a photo that demonstrates excellent lighting? We’d love to see it! Feel free to share your thoughts and images via Twitter or Facebook.
About the Author: Christina Harman
 Christina is a part time blogger and full time photography enthusiast living in Southeast Alaska. She enjoys travel photography and has taken pictures in countries such as Mexico, England, France, and China. She likes sunny days, new lenses and drinking good coffee. You can visit her at Tangled Thoughts.