Nightclub Photography Tips And Tricks

No matter how good your creative eye is, taking photos inside a nightclub is one difficult challenge. Aside from the fact that you’ll be shooting in low light, you’ll also have to consider all the exciting things happening in the club.
It’s a party scene, so there’s going to be a lot of movement, particularly dancing. Taking photos of people moving can be really tricky if you do not know how to do it properly.
So, unless you want blurry shots, you should consider studying all the tips and tricks you can find about taking good nightclub photos. There’s a lot more that you need aside from using the most technically advanced camera. But, yes, it always starts with choosing the right equipment.
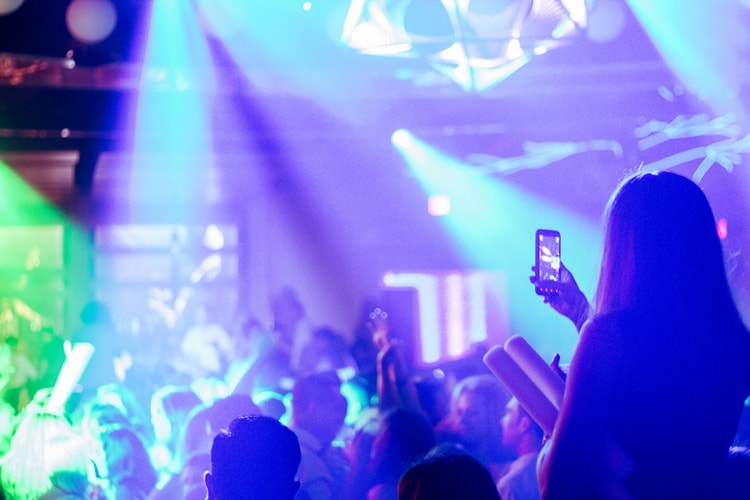
photo by demxx
The Right Nightclub Photography Equipment
Nightclub photography is different from regular photography because it involves you working with dim lights and fast movements. There are techniques on how to properly work around these issues, but it is also important that you know what camera and lens to use. Personal preferences matter, especially because not all people agree on which brand works best for them, but these are the basic requirements for taking good nightclub photos:
A camera body with high ISO
- 18 to 50mm lens – your kit lens may work fine, but an f2.8 would be much better
- Wide angle lens – which is best if you want to capture the whole club scene (or the widest that you can)
- A good UV filter
- An external flash gun, aside from the on-camera flash, and with a flash strength of 1/18
- A flash diffuser to help control or even out the light
- A lens with a longer focal length – often makes portraits more pleasing
Generally, it will be good for you to have a variety of lenses so you can easily adjust according to the effect or scene you want to create. Just keep in mind that you’re taking photos in a place filled with people. You’ll also need to consider the house lights when adjusting the shutter speed.
Adjusting the Settings of Your Camera
Knowing the right settings can also help you take good nightclub scene photos. Actually, your settings will depend on the kind of nightclub you are shooting in. Some clubs are too dark, while others are too bright. Some clubs have different lighting in various areas. If the club is very dark but has colourful lighting, it is best to go with an ISO that falls anywhere between 800 and 3200. Your shutter speed, on the other hand, should range from 1/8th to around 1/100th (depending on your focal length and crop factor of your camera). Keep in mind that when you’re in a nightclub people dance and move around a lot, so you need to use a fast enough shutter speed to freeze the action.
If your shot is to be taken on the dance floor, adjust your shutter as slow speeds are only best outside the dance floor area, where it is usually darker. Increase your shutter speed, but only a little.
The aperture should be at a minimum of f/4 and must be increased only when you need to take photos with more people in the scene. This helps increase the depth of your subjects, which results to better shots. It is likewise necessary to use a more powerful flash if you’re taking a photo of a large group of people.
Capturing The Vibe
The style of your photos helps in getting your message across. You’ll want your photos to capture the real essence of what it’s like being inside a nightclub. Don’t hide or disguise the neon lights, the vibrant atmosphere, people doing crazy faces and the movements in your shots. Your photos shouldn’t just show smiling people posing against dark backgrounds. At the end of the day (er… night) do your photos capture the essence of a fun time in the nightclub?
In order to capture the right atmosphere or feel, you will need to use a lot of ambient lighting. Don’t depend too much on the power of your flash. Experiment with a scene first by trying out different angles that catch the best ambient light.
You can also position yourself by the sides or edges of the dance floor and take a photo of your subject with the dance floor behind him. This will result to more colourful photos and eliminate ghostly effects brought on by the dancing lights.
Some Things to Remember
- When moving around the club, especially on the dance floor; keep your camera protected by holding it above your head.
- If there are mirrors all around the club, don’t run away from them. Find a way to use them to create an artistic shot. Be careful, though, that your reflection won’t show on any of the shots you take. Also, do not make your flash reflect on the mirrors.
- Be observant. Look around the club to find interesting scenes you can take photos of. If your assignment is for an event, don’t forget to take photos of important people, like the VIPs invited by the organizers. Find more interesting scenes to shoot; don’t just go for people smiling and laughing. Your viewers will easily get tired of these shots. There should be variety in your photos.
Here are some examples of shots that you should take inside a nightclub:
- The crowd: different angles, different areas of the club, different stories.
- The DJs: spinning, close-up shots, the equipment, a bird’s eye view shot showing him or her spinning while people are dancing on the floor.
- People: at the bar, dancing, by the door, on the ledge, by their tables, etc…
- The venue: what the place looks like (inside and out). You can also take pictures of the venue’s tables, cocktails, glasses, disco / neon lights, logo, etc…
- If it’s for an event or a particular client – or for the club – take photos of the staff. Make sure, though, that they’re not just standing there. They need to be doing something so that the shot won’t look like it’s staged or choreographed.
As much as possible, use ambient light when taking these shots. They’ll come out more natural and realistic.
Finally, Practice
As always, practice makes perfect. So don’t forget to do so. Go to different nightclubs, use a variety of cameras and work with different settings. This will help hone your skills and your creative eye.
About the Author: Michael Gabriel
 Michael Gabriel L. Sumastre is an experienced writer who loves to take pictures of the countryside as well as aerial photographs. He maintains his professional writing portfolio at TheFinestWriter, and you can visit his photography portfolio at Sumastre Photography. Michael was hired by Booking.com to photograph 10 of the most beautiful beaches in Palawan, Philippines.