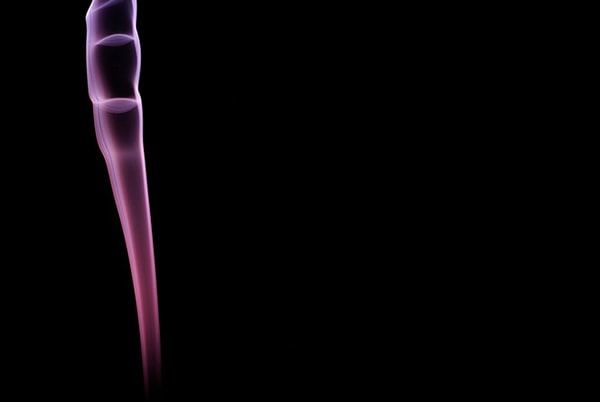
What Is Smoke Art Photography?

Smoke art photography is one of those genres that’s an acquired taste. You can’t really appreciate it right off the bat, but as soon as you learn about it in greater detail and get to appreciate its highly unique artistry, you begin to fall in love with it. In its purest and simplest interpretation, it’s photography where the subject is smoke.
One of the best descriptive terms for smoke art photography is aleatoric. It is an aleatoric art form because it is art that’s created through chance, relying heavily on randomness to give it its spark. The photographer’s attraction to this genre lies in capturing smoke in any of its variously indeterminate shapes, sizes and wispy strands.
Smoke photo by Steve Dean
Once you see the limitless beauty of capturing smoke on film, you’ll never look at smoke the same way again!
The Correct Equipment
Smoke art photography depends on capturing fine details, so get yourself a camera that features control over the shooting mode. Ideally, you want to use a DSLR since you’ll want to manually control the aperture, shutter speed and focus. It also won’t hurt to have an off-camera flash standing by to illuminate the smoke.
You need a source for the smoke you’ll capture; incense sticks with holders are the answer. These will distribute an agreeable smell throughout your studio. Oh yeah, don’t forget to use something to catch the falling ash!
To really make the smoke the big star of your shots, use a pitch-black background to capture all the finest points of the smoke’s details and contrast. As a bonus for using a black background, you won’t have to spend that much time in post processing with Photoshop. A black background is ideal because it reduces the chances of stray light bouncing off of either the camera lens or your background.
A tripod isn’t a requirement. Still, using a tripod makes it a bit easier to shoot smoke since you won’t have to deal with a shaky hand.
A reflector isn’t a necessity either. However, if you want to have more light reflected on the smoke for exceptional effect, use it!
A portable light is essential due to your need to illuminate the smoke long enough for you to lock focus. A small torch in your dark studio will do the trick just fine.
The room you’re using must be well-ventilated! This is highly important since the smoke’s going to fill up your room in several minutes. The more smoke’s in the room, the lower the quality of your picture, so air the room out from time to time.
How to Set up Your Studio
Arrange your photography equipment so that you stop all light from reaching your black background or camera lens. The background should be set up first in one section of the room. Your incense sticks should be approximately 3 to 4 feet from this background. Position your off-camera flash just 1 to 2 feet away from the incense sticks, either to the right or the left.
If you’re utilizing a reflector, put it at the opposite side so that it’s directly pointing at the incense sticks. Your camera should be placed on your tripod right in front of the incense sticks, about 2 to 3 feet away.
Finally, you want to avoid glare in your photos. Make sure that zero light reaches your camera lens when you fire the flash. Sometimes, though, a bit of glare can give your smoke art photography shots some added character, so you may want to experiment with no glare versus a bit of glare.
Your Camera and Flash Settings
To get the nicest-looking smoke art photos, you have to stick to these four settings (unless you want something completely underwhelming to turn out):
- Quick Shutter Speed – Since the smoke is continually moving, you have to capture this motion.
- Low ISO – You want to avoid a higher ISO at all costs since smoke will appear grainy on a photograph. A lower ISO will improve or reduce this graininess, while a higher ISO will make it very pronounced.
- Small Aperture – This is used for a much-improved depth of field. Smoke is very unpredictable, and choosing a small aperture permits you to capture a great amount of it in case of abrupt alterations in its shape.
- Light – Light should be abundant! Thanks to your reliance on the quick shutter speed, the low ISO and the small aperture, there just won’t be sufficient light to expose your picture. That’s why you’ll have to light up the smoke suitably, and that’s why you have your flash or strobe. The ideal scenario would be flash or strobe that will be triggered remotely. If this isn’t an option, you can always have your camera connected to the flash directly via a sync cord.
Taking the Perfect Shot
Catching smoke on film is such a delicate process that you can’t be disturbed, so make sure that your studio is completely sealed up and airtight. Make sure that not even a draft gets into your room, as it’ll cause thin and unstable plumes of smoke to appear, which will be hard to capture on film.
Now, light the incense sticks. If you’re going for more unique and thicker swirls of smoke, then put two sticks into the same holder, and light them at the same time.
Before you snap away, turn off the camera’s auto-focus feature since it’ll be of no help at all. After you turn out the lights in your studio, the smoke’s going to strive to locate a focal point. Follow the smoke closely with your eyes, and manually focus the camera on the spot you believe the smoke’s going to be when you finally release the shutter.
It’s highly recommended that you focus on the spot approximately 2 to 3 centimeters over the tip of the incense sticks. Don’t be afraid to use your small torch to light up the smoke enough, so you can correctly adjust the focus.
Some photographers like to experiment with shooting in both a darkened room and a room with light. However, the best results are available in a completely darkened room since the amount of ambient light—which lessens the contrast—is not a factor.
It’s helpful to snap some test shots so you can double-check the exposure and configure your settings suitably. You want the background underexposed to a real black, yet the smoke’s brightest part ought to be white. As you’re shooting the smoke, see if you can shoot smooth swirls and shapes in sharp detail and from various points of view.
Just Wing It
The beauty of smoke art photography is that there isn’t a rulebook in place to dictate what the exact, correct way of photographing smoke is. This allows you quite a bit of freedom in this genre, which is ideal for a bit of experimentation! Don’t be afraid to snap a lot of pictures. You may end up discarding most of them and retaining just a couple, but that’s all part of experimentation.
Don’t be discouraged if the first several shots don’t turn out how you envisioned; after all, smoke’s a notoriously hard subject to shoot! Smoke art photography epitomizes the trial-and-error process.
One swirling whip of smoke may all of a sudden look like the most aesthetically pleasing thing you’ve ever seen, while another may be lackluster. To a degree, it’s all somewhat subjective, so play around with this style and see what develops.
About the Author: Marc Schenker
 Marc is a copywriter and content marketer who covered photography. These days, he runs The Glorious Company, a content marketing agency.