Decoding Chiaroscuro: How To Shoot Glorious Clair Obscur Photos?
 by
Adam Welch
by
Adam Welch

Chiaroscuro. Come on, say it with me… key… are… row… scuro. Congratulations! You’re speaking Italian! Well, you’re speaking an Italian derivative of two Latin words: “clarus” meaning clear or bright, and “obscurus” meaning dark or obscure.
Chiaroscuro is the name for a style of art which became quite popular during the Renaissance. As the name origin suggests, it is a method of painting which imparts a sense of very directional light falling on the subject.
The light source was often singular and resulted in dark shadows and backgrounds with the overall scene being highly contrasted between lights and darks. Here a couple of works from the Renaissance which were painted in the Chiaroscuro style:
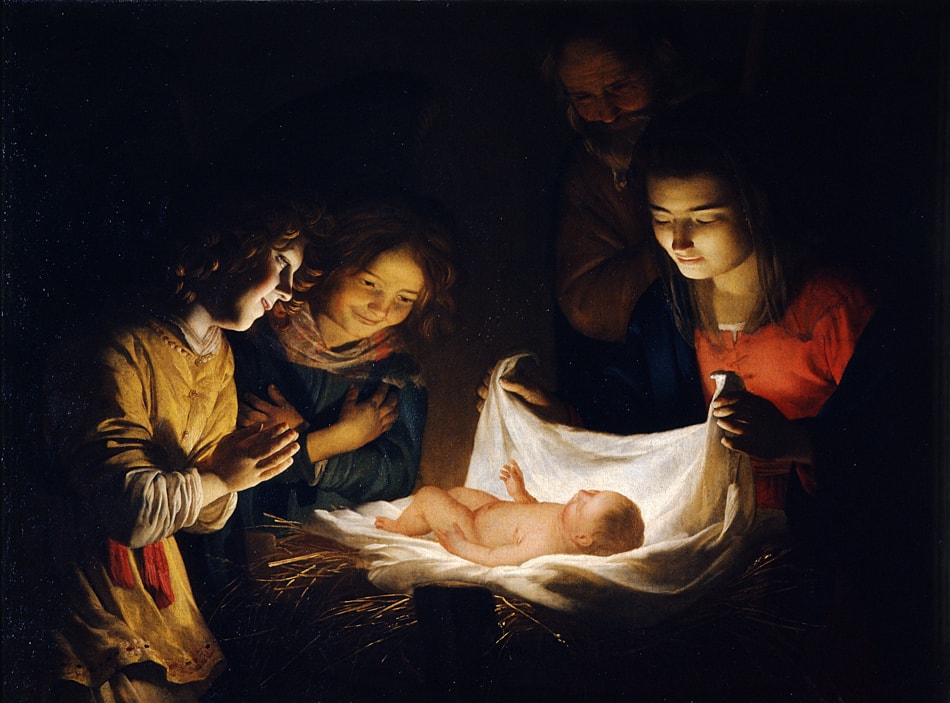
“The Adoration of the Child” by Gerard van Honthorst [Public domain], via Wikimedia Commons
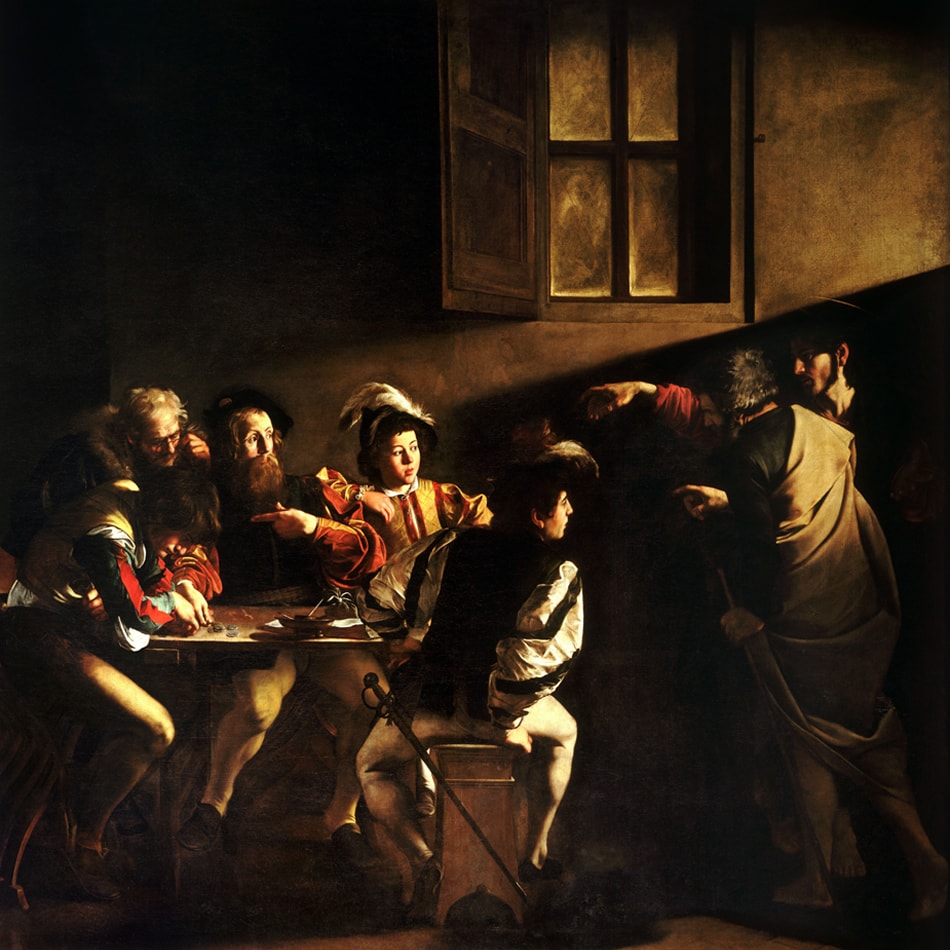
“The Calling of Saint Matthew” by Caravaggio [Public domain], via Wikimedia Commons
.jpg)
Examine each of the above paintings critically and with a photographers eye. Pay attention to the direction of light and the use of shadow. Notice that in both pieces the illumination originates from a single source and casts deep shadows.
Translating Chiaroscuro into Photographs
Creating an image in the Chiaroscuro style is actually quite simple and can be accomplished using either natural or artificial lighting. The basic principles of Chiaroscuro painting also apply to its photographic counterpart. Once you understand the basic guidelines you will be able to make photographs with high contrast and stark tones using the Chiaroscuro style. Contrastly’s own Jon Phillips has compiled 35 gorgeous examples of Chiaroscuro photographs which can be found on The Photo Argus. We will also cover a few shooting and processing tips which will help you make the most of your Chiaroscuros and expand your image making arsenal.
Below are some selections of my own work shot in the Chiaroscuro style. Refer back to the paintings above and relate the similarities.
Below we have a black and white image composed in strong Chiaroscuro. The light source was natural sunlight from a window at the left of the subject. The hands were placed on a dark wooden table to add contrast. This made for a hard shadowing and really brought out the textures in the skin.

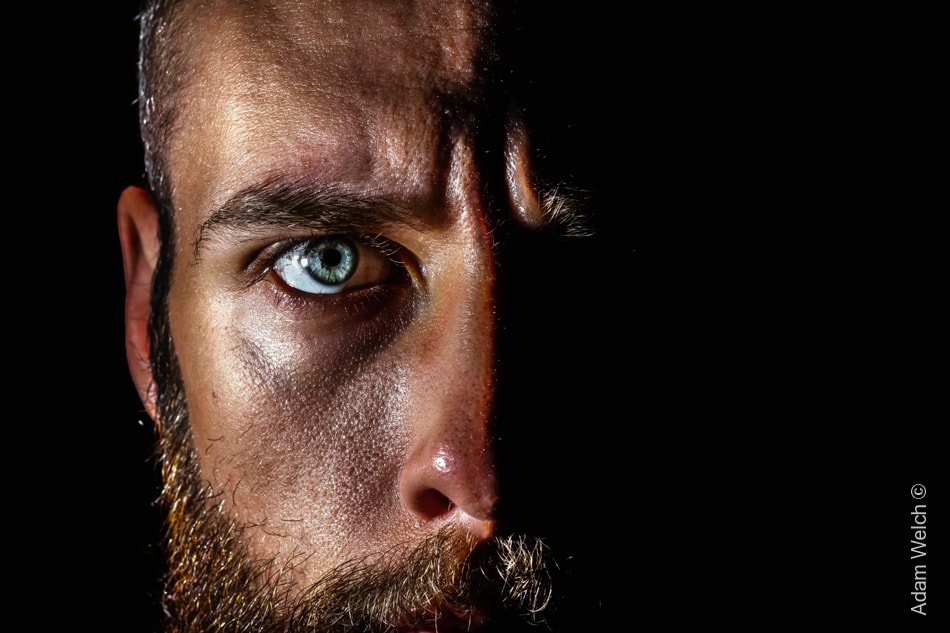
The next one is a nice example of color Chiaroscuro. It was produced using a single speed light held just out of the frame. The illumination displays the eye quite well and lends a sense of rawness to the photo.
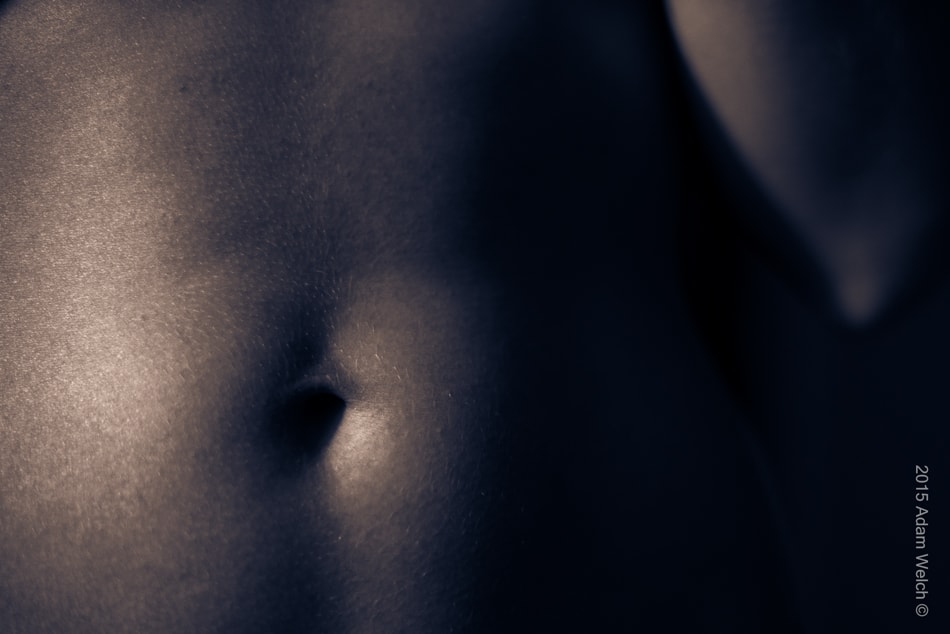
The following image is one of my favorite self-made Chiaroscuro photos. A delicate and nearly abstract capture which was lit by a single constant incandescent bulb at the model’s right side. It is monochromatic but not black and white… more on this shortly.
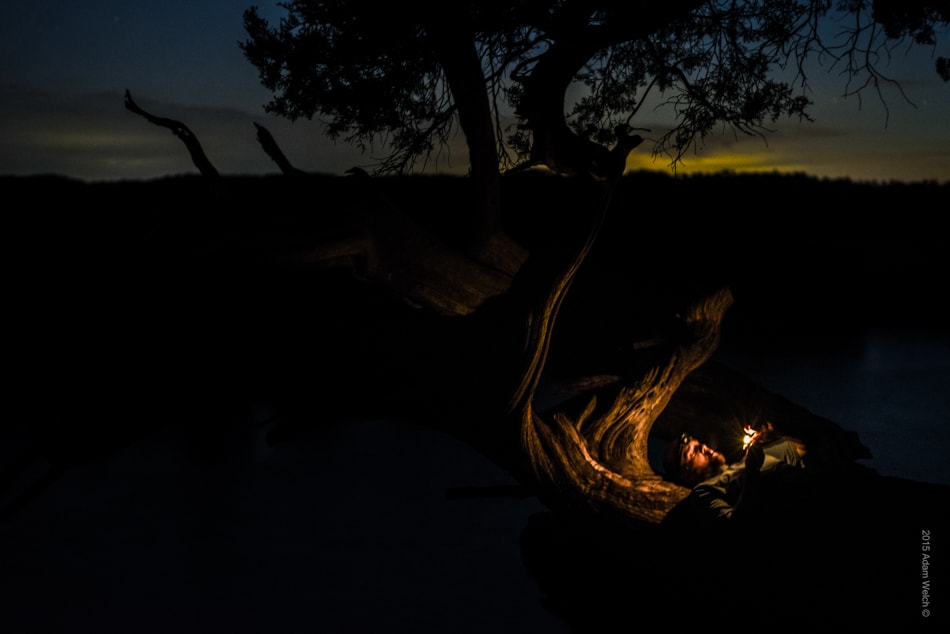
This last selection illustrates an example of a Chiaroscuro photograph which employs two sources of light. In this case, the subject is illuminated by a solitary flame. The setting sun is in the background of the frame and adds supplemental lighting for complimenting structures.
Tips for Shooting Your Own Chiaroscuros
-
Use one light source
Though it is perfectly acceptable to use multiple light sources, the idea of Chiaroscuro is to make the image APPEAR to be only be lit from one source. The most straightforward way to accomplish this is of course use only one light. This light source could be a single off camera speed light or strong natural light such as that coming in from a window(my preferred method). The key here is to shoot relatively perpendicular to the direction of the incoming light.
-
Position the light directionally & close to the subject
Horizontal usually works best. Place your light source or your subject so that the shadows are optimized to your discretion. Usually, have the light enter the frame very horizontally in relation to your subject will ensure you get create contrast between the lights and darks of the scene.
Remember, light diverges (hardens) as it travels away from its origin. Therefore, it is ideal to place the light source very close to your subject. This soft lighting will add richness to the deep shadowing and bright highlights which are the trademarks of an effective Chiaroscuro.
-
Choose an environment which is dark toned
As your objective is to produce an image with very dark tones the environment must be well controlled. Choose a room with dark walls and avoid shooting around objects that can reflect unwanted light such as mirrors or brightly colored paint. Just as you need to be very deliberate in what you exclude from the scene, so too should you carefully consider what to include within your composition. Experiment with cultivating elements into the frame that will add interest.
Again, non-reflective objects and items with high textures work well but there are no real rules here!
Tips For Processing Chiaroscuro Photos
-
Monochrome Loves Chiaroscuro
While certainly color has a very welcomed place in the Chiaroscuro style, quite often images which are monochromatic work well due to the high contrast. This is not limited to strictly black and white. Try using split toning and adjust the hues. This will make your photo stand out. For polychromatic(full color) images, try decreasing the vibrance to slightly mute bright colors which might distract the viewer.
-
Increase the contrast and darken shadows
The shadow and contrast controls will be your best friends when processing your Chiaroscuro photos. Adjust the contrast to bring out the… well… contrasts of light and dark. Deepen the shadows so that the blacks become rich and deep but be careful. Try and keep details within the lights and darks of the image and that means not over-darkening shadows or blowing out highlights. Maintaining textures in all areas of the frame is a hallmark of well exposed photographs.
Dodging and burning is another great method for gaining more control over your Chiaroscuros. Learn how to dodge and burn an image in Lightroom here.
Chiaroscuro was born out of antiquity and is a uniquely interesting way of making photographs. It adds depth, mood, creativity, and flare to images. Now that you have an understanding of the basic principles of making Chiaroscuro photos you are free to experiment and explore the style.
About the Author: Adam Welch
Adam is an author, adventurer, photographer and a jolly co-founder of Contrastly. You can usually find him on some distant trail making photographs, in his darkroom or at his computer writing and planning his next project. Follow his work over at his
website , Facebook, Instagram and YouTube .