In this Photoshop tutorial, we’ll edit a photograph and give it a great film and analog look. Light leaks, vignetting, flares, noise, & blurs all are part of the vintage aesthetic.
I’ll show you how you can add vintage coloring to your images in Photoshop. You’ll learn how to wash out details, use blend modes to target shadows & highlights, and add textures to give your photo a worn & faded look. Without further ado, let’s get into it.
Tutorial Resources
You can download the image I’m using in this tutorial from Unsplash [1], as well as this Grunge Texture [2] pack we’ll be using from PSD Stack.
Step 1
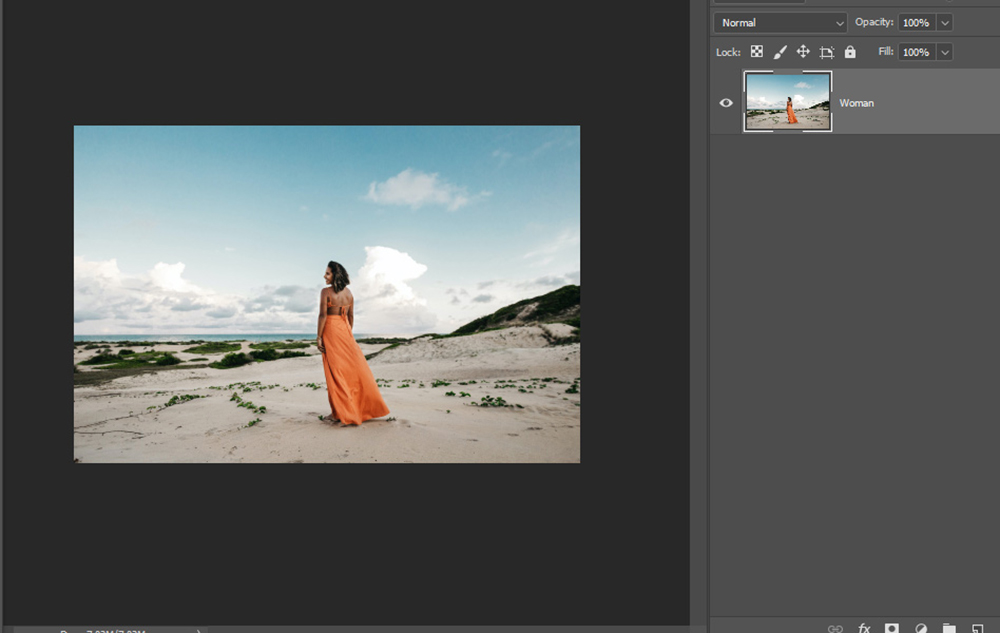
Open up Photoshop, go to the top menu, select File > Open, and open the sample image in Photoshop.
This is the image that I am going to use to simulate the film look, but you can use any of your images instead. You can download this image from the resource section above if you want to follow along. Here is the image opened in Photoshop:
Step 2
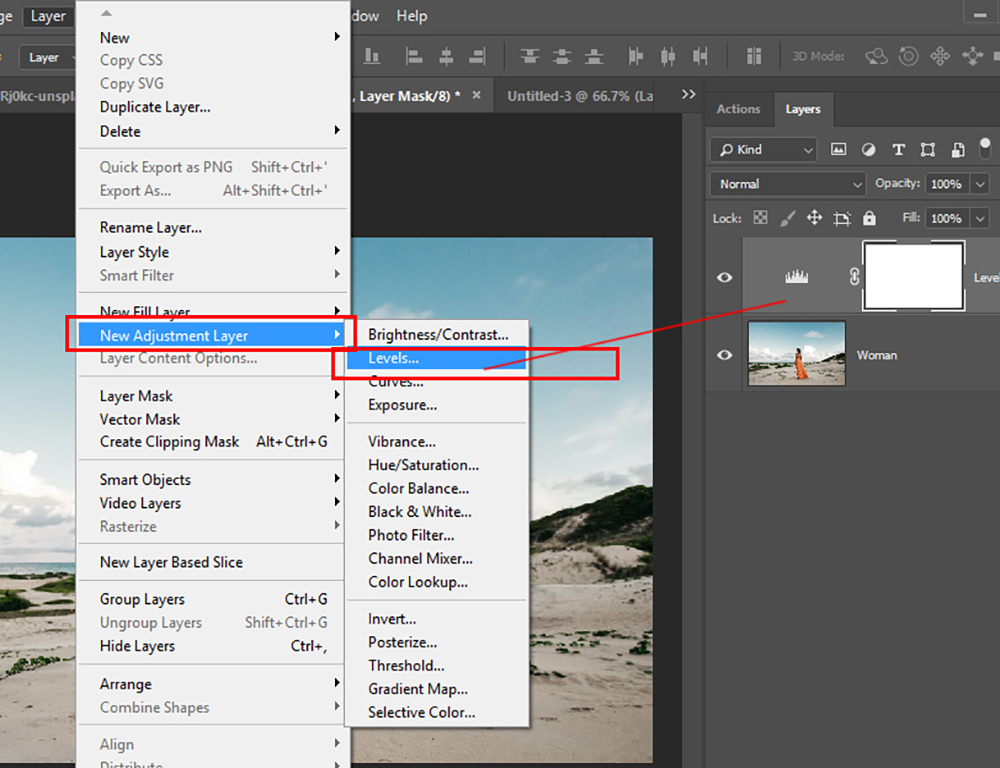
First, I am going to remove some shadow and highlight details so I can create more of a faded effect. To do this, go to Layer > New Adjustment Layer > Levels to create the Levels adjustment. I dragged the Blacks towards the Whites and dragged the Whites towards the Blacks to remove some details in the shadows & highlights.
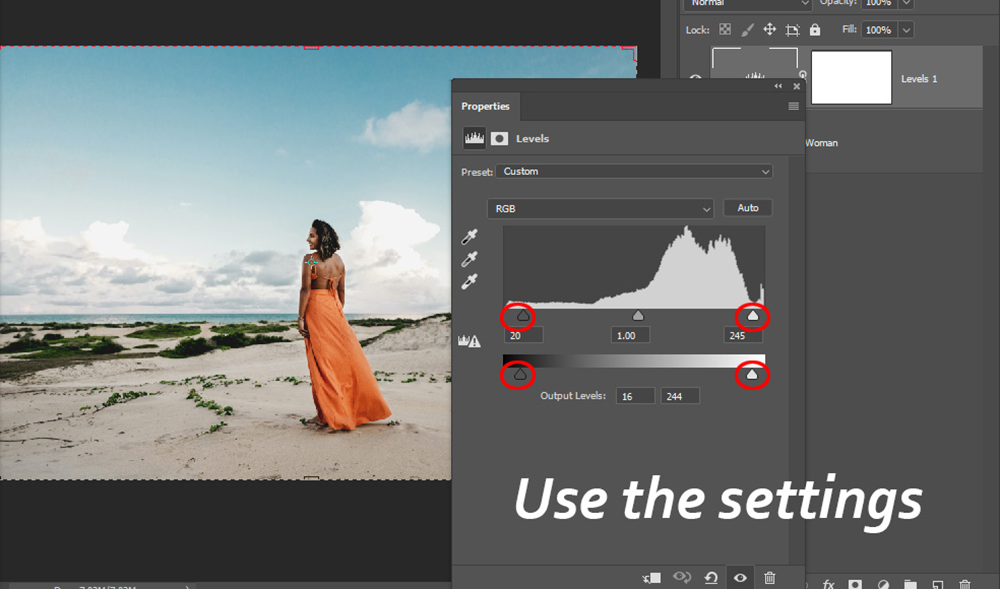
You can use the settings shown in the below image. The effect is very subtle and you might not see a big difference unless you turn the visibility of your Levels layer on and off.
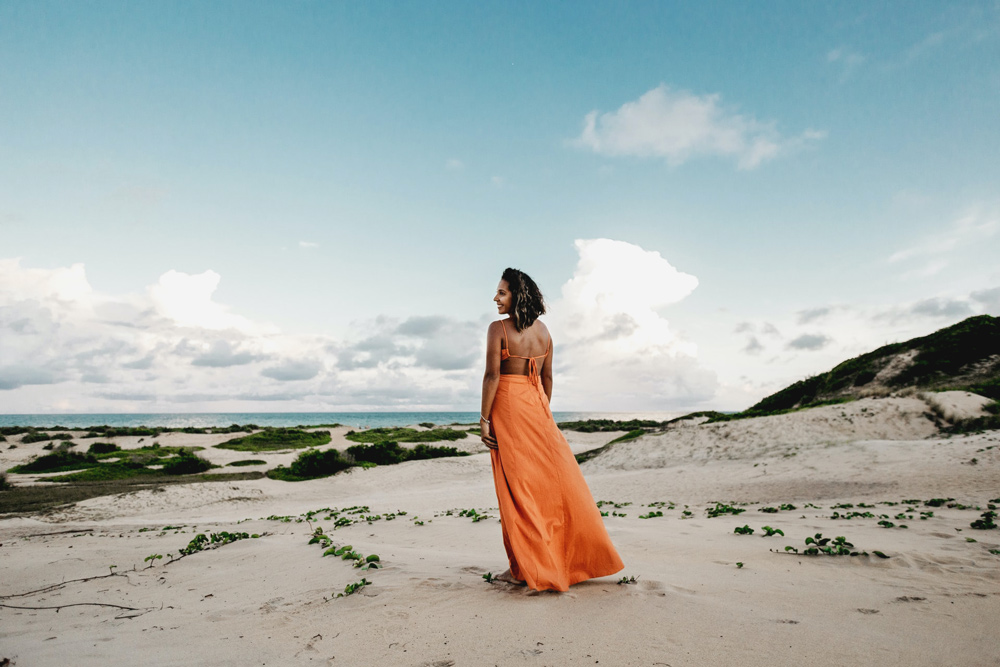
Here are the results so far:
Step 3
Then, we’ll add a color to the shadows using a Solid Color adjustment layer. Go to Layer > New Adjustment Layer > Solid Color. I chose a dark orange color (#604128), as you can see in the image below.
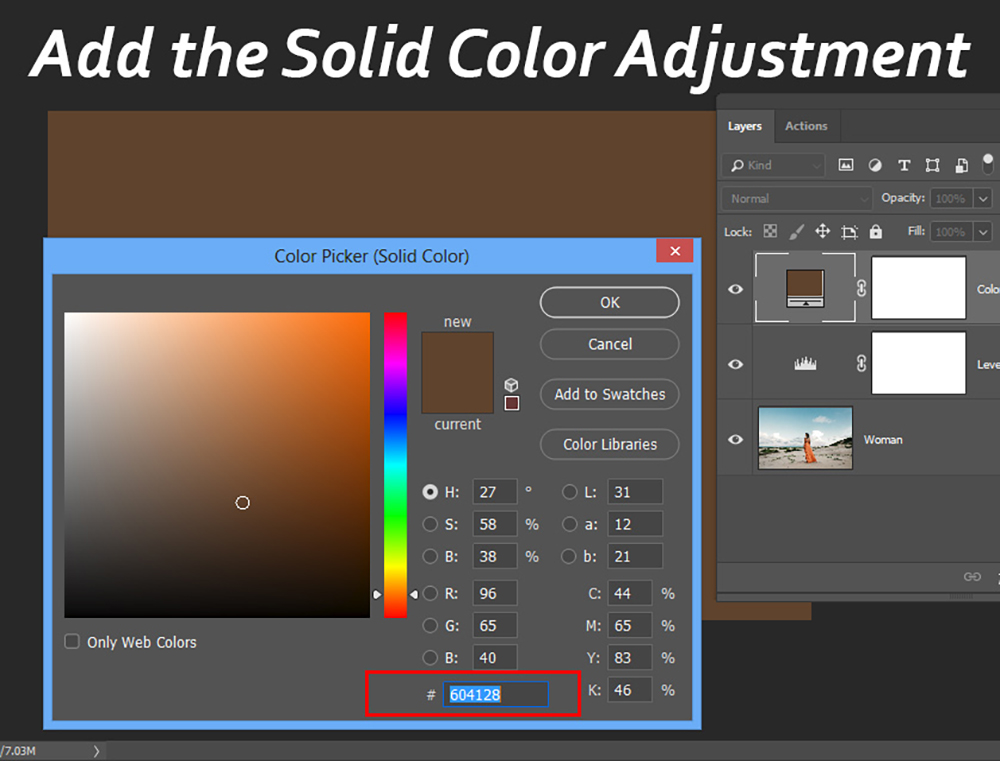
To make this layer only visible on the shadows, change the blend mode of that Solid Color layer to Lighten and reduce the opacity to around 50%.
Reducing the opacity depends on you how strong you want the adjustment layer to affect your image. Also, the Lighten blend mode combined with a saturated color always affects the shadows of an image. Here you can see that the orange color is now added to shadows of the image:

Step 4
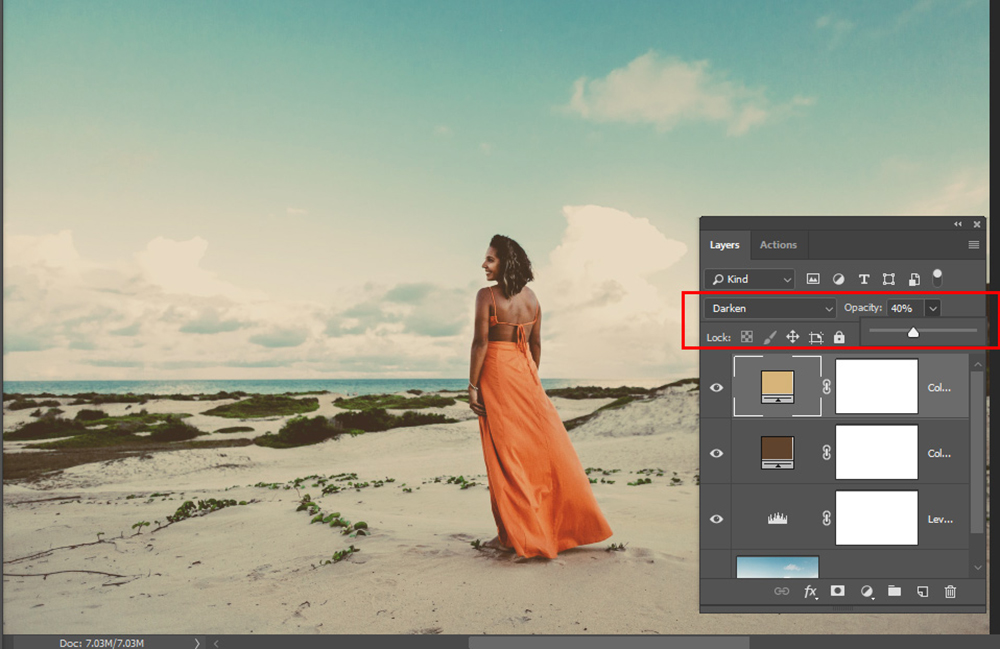
Now we’ll color the highlights of the image using the Solid Color adjustment. To do this, create a new Solid Color adjustment. I choose a bright yellow color (#d7b57a), which you can see in the image below.
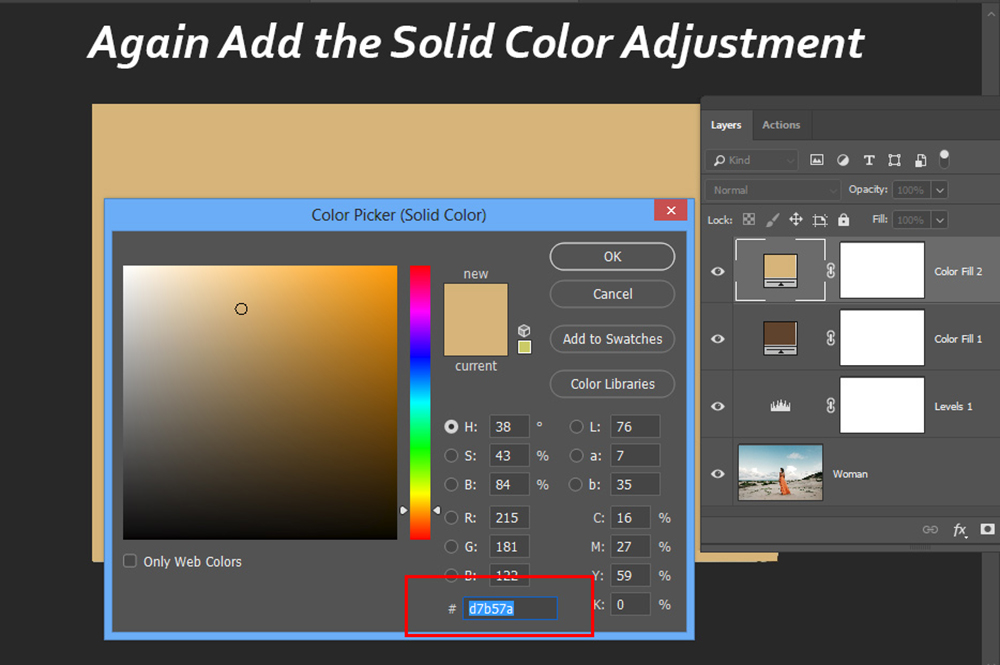
I changed the blending mode to Darken and reduced the opacity to 40%. As you can see, the color was added to the highlights of the image. The Darken blend mode with a bright color will affect your highlights.
Step 5
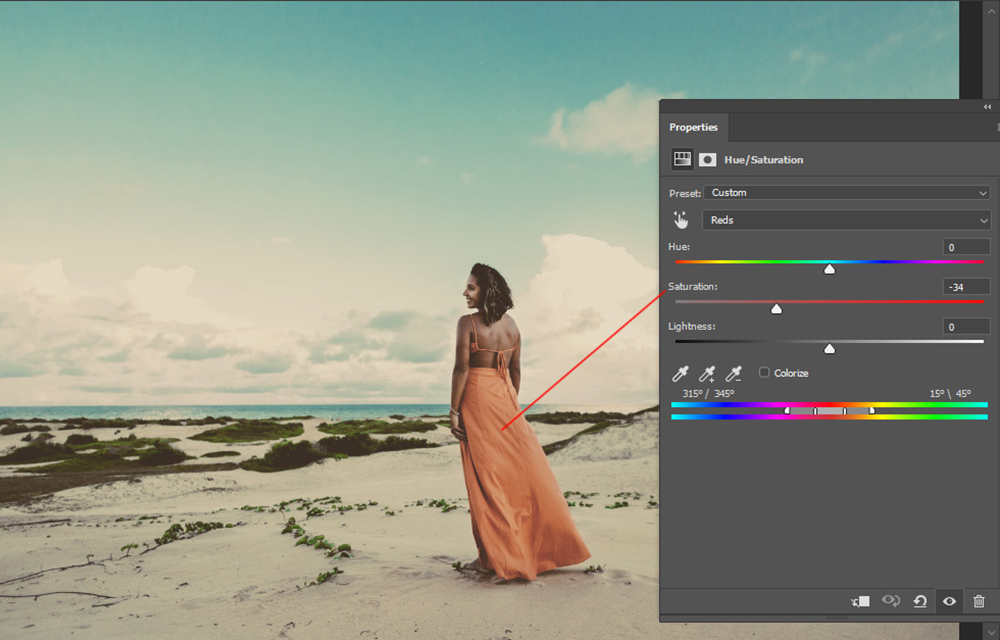
Notice that the color of the dress is too bright compared to the background. To fix this, create a Hue/Saturation adjustment layer. Select the Reds and reduce the saturation level to around -30.
This will match the woman’s dress & skin color with the rest of the image.
Step 6
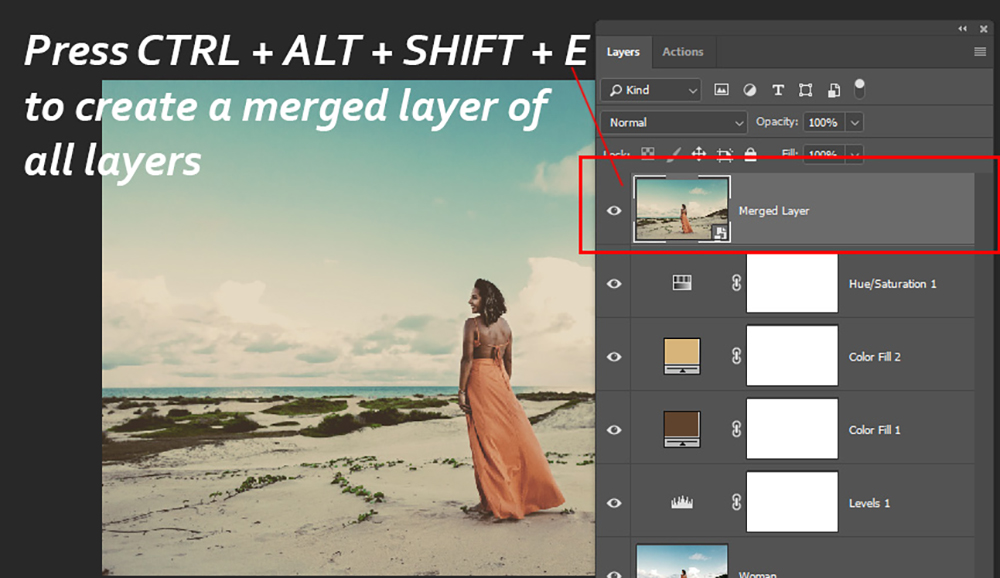
Next, we’ll use Adobe Camera Raw Filter. Press CTRL + ALT + SHIFT + E to create a merged layer of all your existing layers. This will create a layer that will sit on top of all your existing layers. It’s essentially a new layer made of all of the layers you previously created.
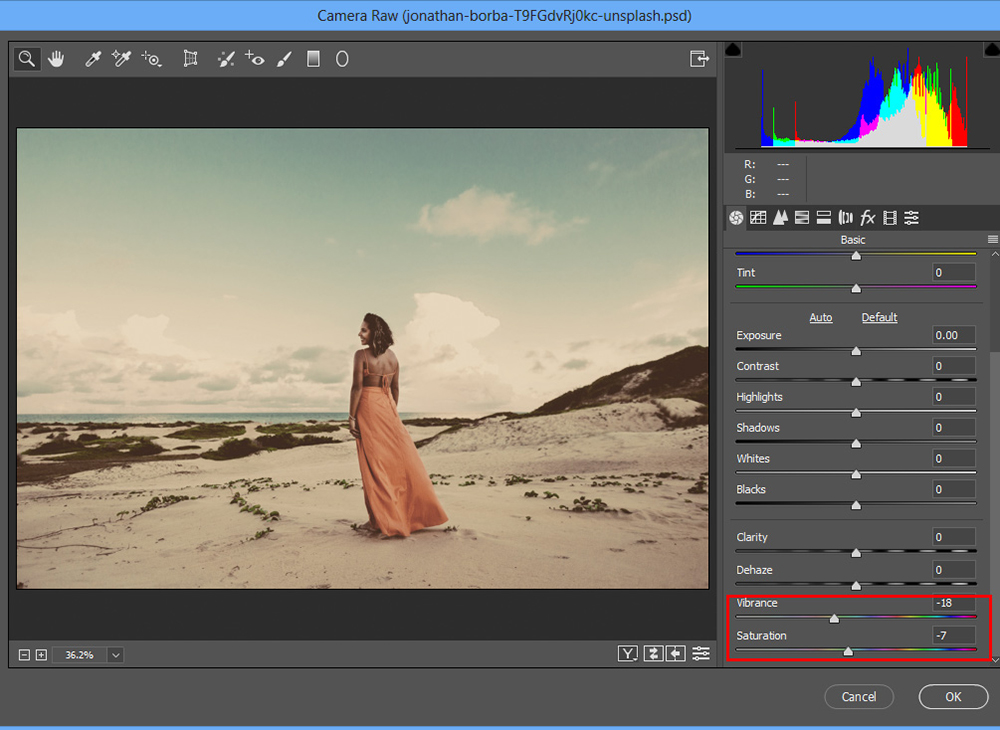
Since Adobe Camera Raw is a filter, right-click on the image and choose Convert To Smart Objects before you apply it.
Go to Filter > Adobe Camera Raw to bring up the Camera Raw Filter window. From there, I desaturated the image by reducing the Saturation & Vibrance. You can see the settings below:
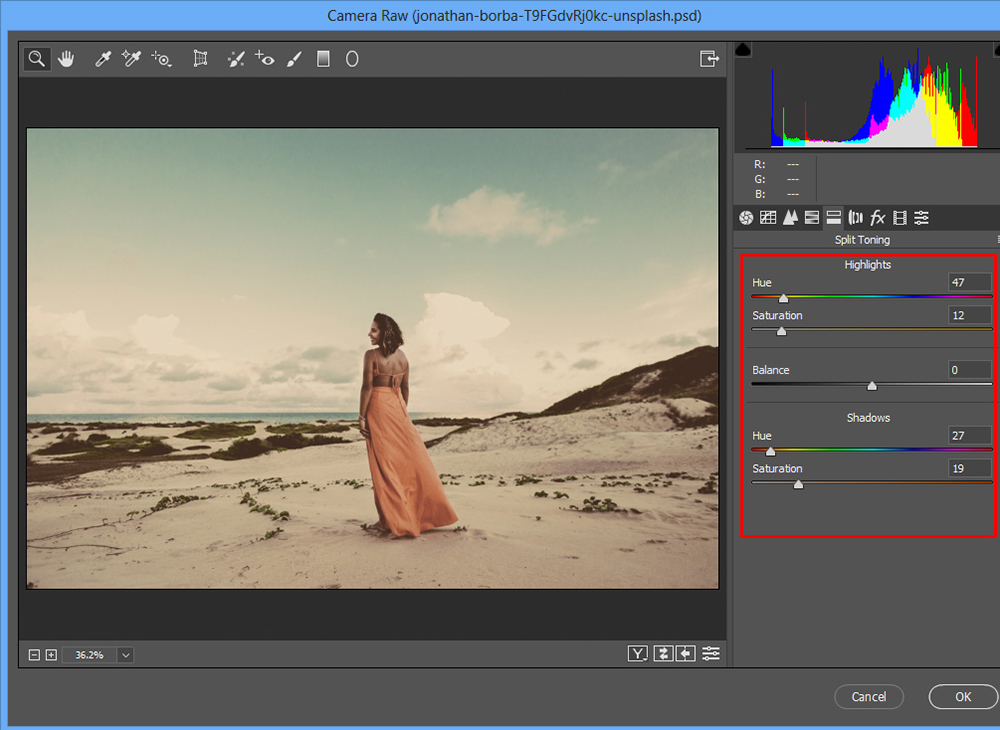
Next, I went to the Split Toning panel and added a bright yellow & dark orange to the image’s shadows. You can see the settings below:
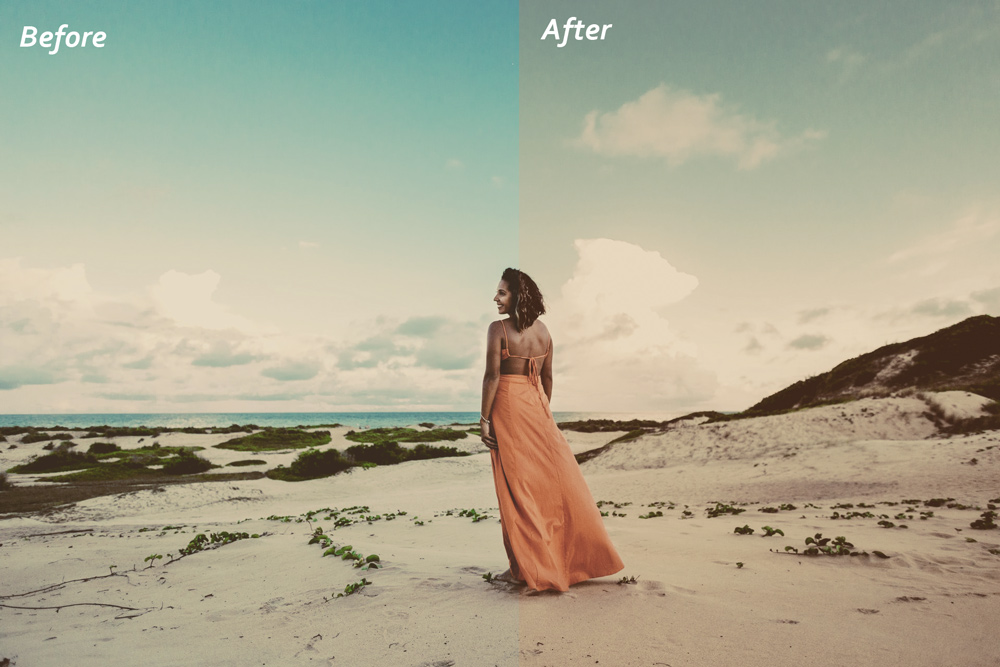
Here you can see a before & after using the ACR Filter:
Step 7
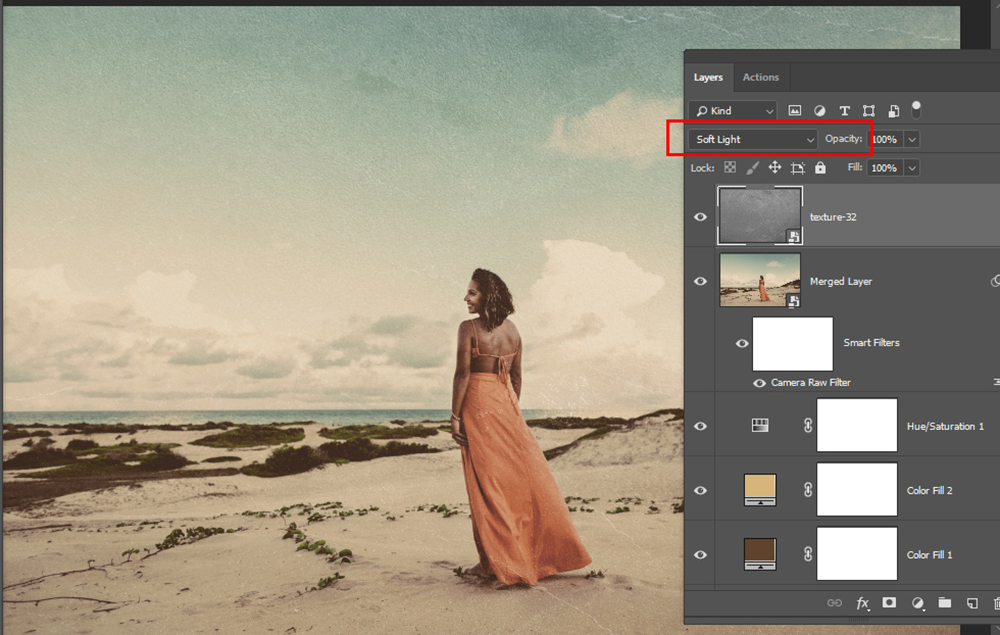
To add natural-looking grain, I used some grunge textures. You can download the exact texture I used from the resources section at the top of the tutorial. I used texture-32.
You can, of course, add noise or grain to the image, but I prefer to use textures such as grunge, dust, or film textures to make the grain look more natural. Also, using a texture often works better than adding noise, especially when you want to add a worn-out effect to your image (think old Polaroids). Here you can see I added the texture:
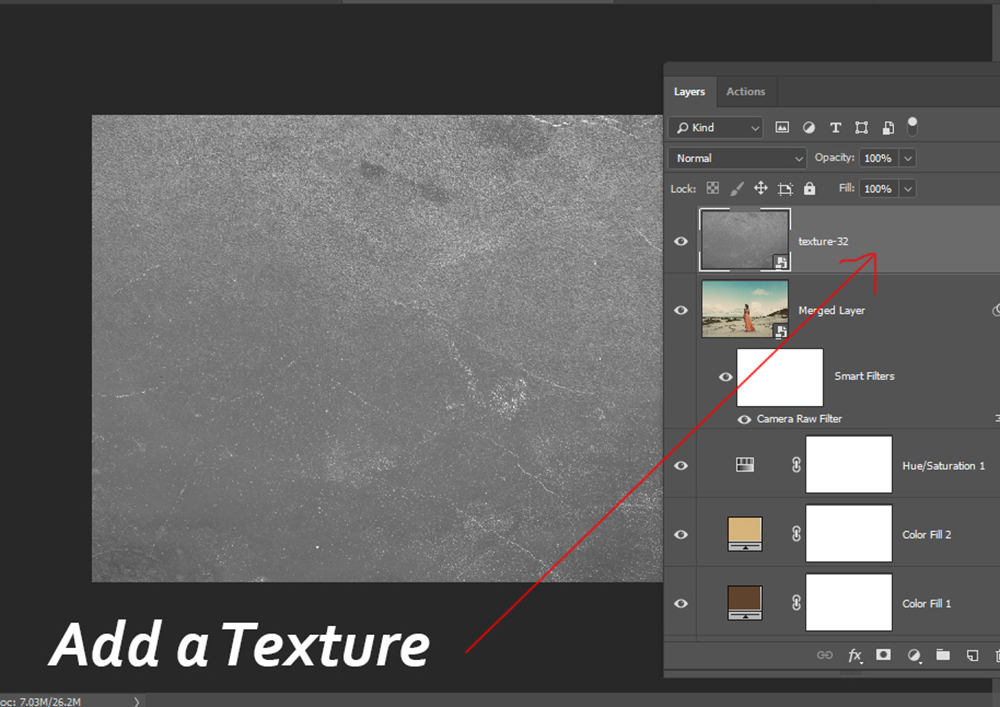
I used the Soft Light blend mode to blend the texture quickly, but you can play around with Blending Modes to see which one works for your image.
Step 8
I then masked parts of the texture, so it’s not visible throughout the whole image. Mostly on the subject and the sky.
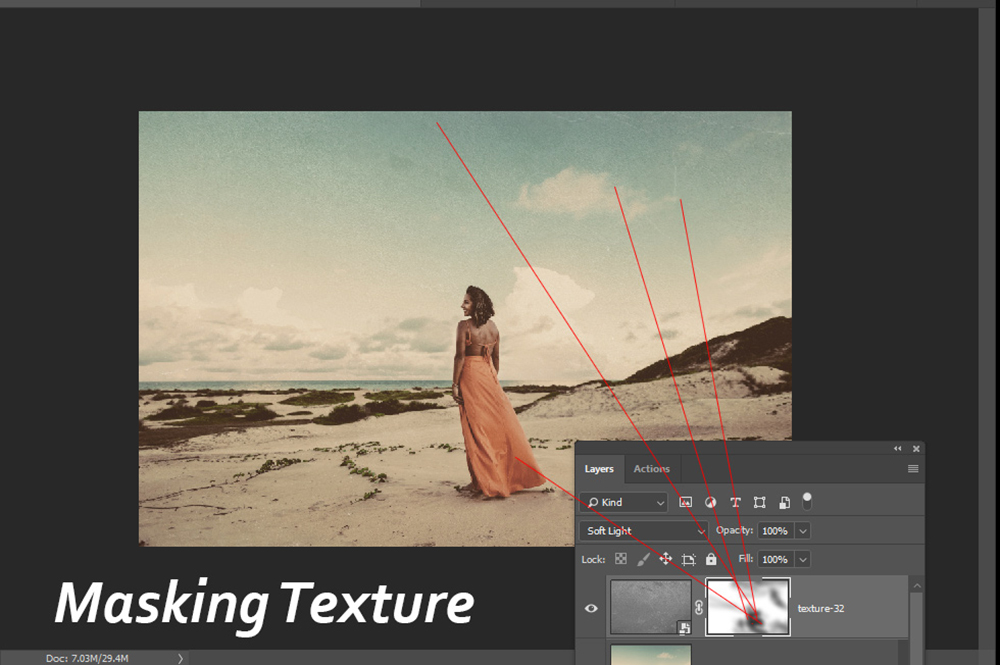
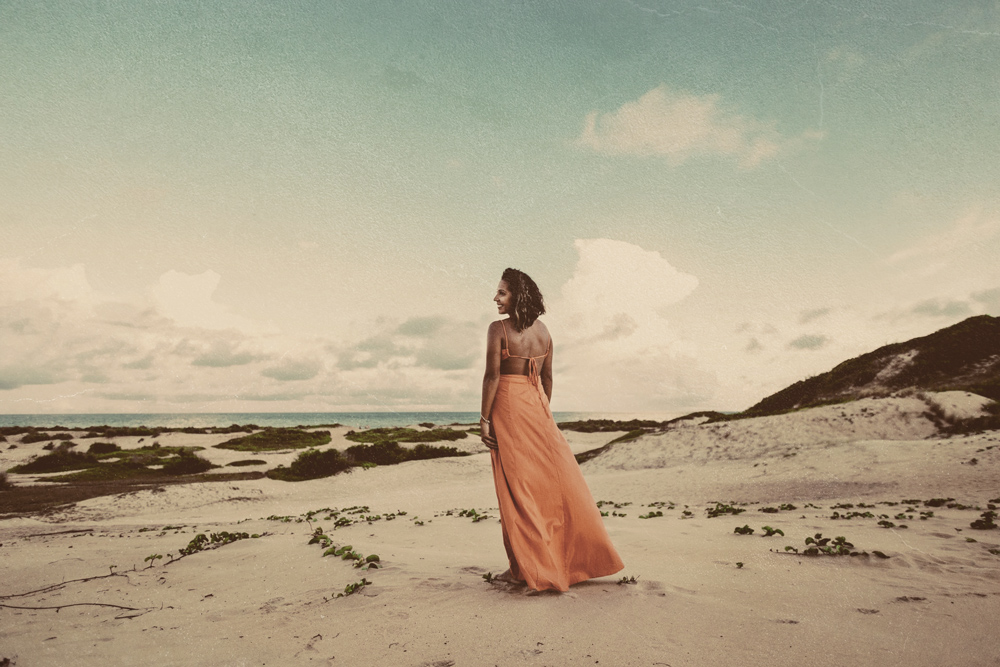
You can mask any part of an image using a layer mask, but you have to add it first. To add a layer mask, you can go to Layer > Layer Mask > Reveal All. Now use a soft round brush with black color and start brushing over the parts you want to hide. Here are my final results:
I hope you enjoyed the Photoshop tutorial. I’d love to get your feedback; please share your thoughts with us on Facebook [3] or Twitter [4].