A good photographer is always eager to experiment in order to improve his craft. As such, since the learning process is never ending, photography is often seen as an evolving art form.
Whether the focus is on new techniques or on not-so-new aspects of photography, a true blue professional photographer is always open to learning.
This is why today’s spotlight is on backlight photography. Backlighting is a common term, and many photographers have either heard about it or employ it in their practice. There are, however, a few who still want to understand what it is and exactly what it contributes to the art of photography.
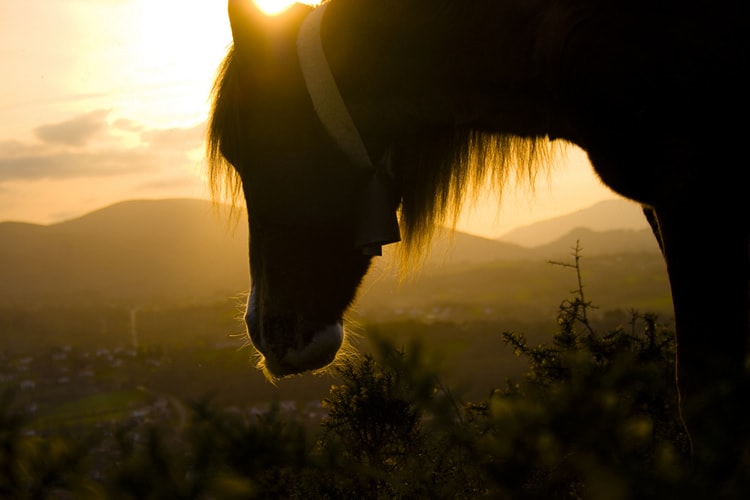
photo by Alejo [1]
What Is Backlighting or Backlight Photography?
Backlighting, defined in the simplest of ways, refers to the main source of light behind the photography subject. In other words, the main light (or one of the main lights) is positioned in such a way that it faces the camera. The subject is then placed in the middle of the light and the camera. This creates a certain glow effect at the edges or at the back of the subject. Backlighting [2] is normally created with the help of artificial lights, although there are also techniques for achieving effective backlighting [3] by taking advantage of the natural light available.
It is different from background lighting, which refers to the light that a photographer uses to illuminate a backdrop or background.
Most photographers use backlighting to add depth into an image or a scene. Others use it to achieve a more dramatic effect. When not used properly, however, backlighting can result to over exposure and will, in some cases, produce unwanted shadows.
This is why it is important to learn how to control backlighting. It is important to know when to use and when not to use backlighting. Additionally, applying common tips and tricks will also help.
When to Use & Not to Use Backlighting
Using backlight is not effective in all situations. Additionally, not all subjects and scenes can be backlit. Therefore, it is important to have a basic background about different lighting situations and which of these are applicable to which subject. One of the things that you need to remember is that a strong light source will give off a greater backlight.
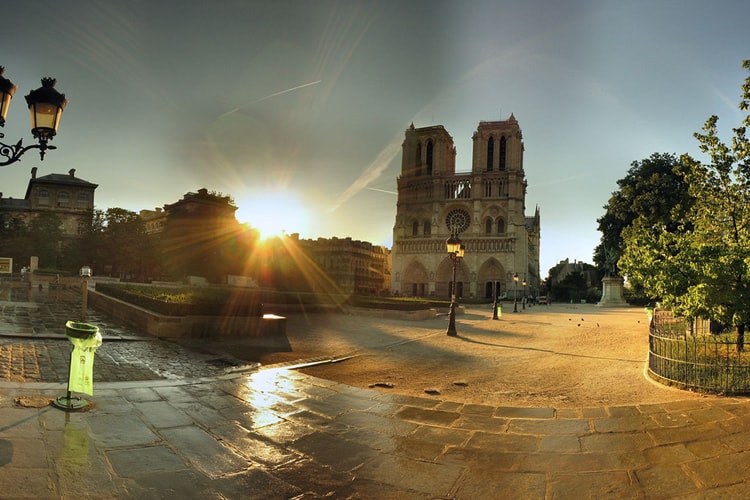
photo by Panoramas [4]
If you are shooting in natural light [5] in the middle of the day, when the sun is up high, you will be able to create a backlight effect, but since the light source is up high, the backlight will also be on the top portion of the subject. Only very little amount of light will be at the back of the subject.
For complete backlighting, it is best to use the natural light that comes out early in the morning or late in the afternoon. Since the sun is positioned at a lower angle in the sky, the backlight is greater and will therefore, cover the entire subject. This is what you need to consider if you want to create a dramatic backlit image.
A lot of photographers also combine natural with artificial lighting in creating backlights. This is especially true in situations where the sun is glaring and strong. A fill light or fill-in light is used to bring out the subject and add some brightness to the shadowy or darker areas. In other words, this artificial light is used to bring the shadowed subject to the foreground. The same thing should be done if the light source beams straight into the lens of the camera [6].
Backlighting Tips & Tricks
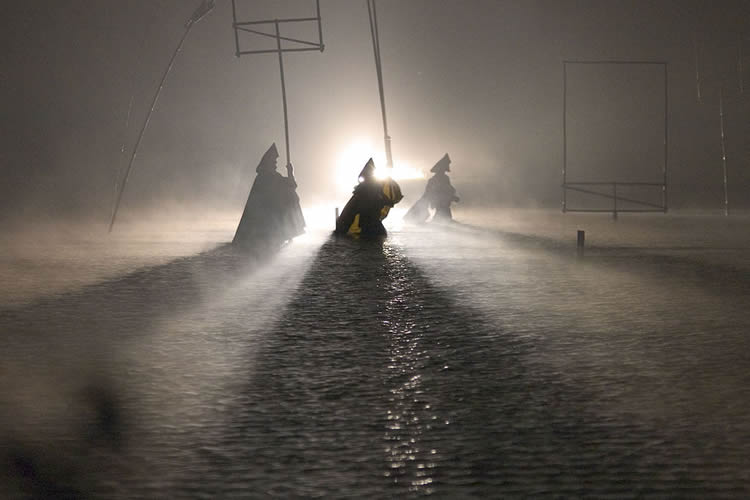
photo by mindfulness
Here are some tips and tricks that you can use to elevate your backlighting style.
- Make sure that you (as photographer) are facing the sun, and your subject is positioned with his or her back to the sun. He or she should be facing you. Any other angle will not give you a great backlight at all. This is the most basic of the tips and tricks. If you do not follow this, then you better not aim for backlighting.
- For first time backlight takers, look for a place or location where the light source is hidden – partially or fully – once you look into your camera. Be sure, however, that your subject is 100% in the frame. This will help you tone down the light that’s expected to come into the scene. Use a tree, a cloud, or a building, or any similar object, to block the light source or the sun. You’ll love the sun rays this technique will create.
- It is important to familiarize the spot meter before shooting backlit subjects. Proper spot metering will help make sure that your subject is properly exposed. The spot meter is normally used to make dark areas achieve the right exposure (for example: the darkest part of the face).
- Shoot and position your subject against a dark colored background. This will make your subject stand out. Additionally, the glow or rim lighting created by the backlight will be more emphasized.
- To prevent wrong exposure, use the manual mode in your camera. This way, you will be able to properly control exposure.
- You need some light on your subject’s face, so before you position yourself and your camera, make sure that there is nothing behind you that blocks whatever light that comes from that area. There shouldn’t be any trees, buildings, or any other structure behind you.
- In cases where the sun is not “available”, you can still shoot with backlighting. However, you will need to use your flash [7], though, and create your own backlight. What you can do is have someone stand behind your subject, slightly to the side, and then ask this person to use the flash and point it to the back of your subject.
- Last but not the least; do not be afraid to try out your lenses’ focal lengths. Experiment and be as creative as you can be.
Using backlighting for your photos will add more meaning to the images you’ll create. It will help you better communicate with your audiences and viewers. It will add more value to your creations. As in everything else, learn to practice until you believe you’ve reached your ideal level of perfection.