One of the hardest difficulties in photography has always been to pick the best spot for picture taking, especially if you needed to take portraits. Finding the right location to ensure that you get the best results for portrait photography can be pretty challenging.
Some photographers seem to think that just having the subject offer a great facial expression is all that matters in a portrait. It’s not that simple. If the background of your subject leaves something to be desired, then he can smile broadly all he wants to—the background is going to have an overall, negative effect on the quality of your portrait. That’s just the way it is.
Picking the right spot for your portrait can make or break your snapshot. Here’s what to look for when scouting the perfect location [1].
The Meaningfulness of a Location

photo by Susanne Nilsson [2]
To determine if the location is meaningful or not, just ask yourself if it really adds to the story that you’re trying to tell with your photograph. Let’s look at an example of a family portrait to illustrate this point.
In a family portrait, the photographer can suggest a location, but sometimes, the family will have a specific spot in mind…because it holds high significance for the family. For instance, a popular spot for family portraits might be the garden at the back of their house. The family has spent many a day tending to and cultivating the plants and flowers there. That’s afforded them a bonding experience. Hence, it’s a meaningful area.
Remember: As a photographer, you want to pick a spot that helps tell the story of your subjects or adds greater emotional impact for the people you’re shooting.
Areas That Feature Open Shade

photo by Modestas Jonauskas [3]
The benefit of open shade when shooting portraits [4] is that it does not have severe light that’s covering your subject. At the same time, since the shade is “open,” it still provides adequate light [5] to give your subject’s eyes that sparkle that looks great in a picture. Both window light and a tree are good examples of open shade. Open shade basically means that your subject enjoys some shade, yet isn’t fully closed off. Using the aforementioned examples, being in the center of a room and being in the middle of the forest would be complete shade.
Open shade shows up wonderfully well in pictures. Because it’s not very harsh, it provides you with soft directional lighting that produces sufficient shadow on the faces of your subjects, which creates a handy sense of depth.
Geometric Figures and Shapes

photo by Erik Söderström [6]
The brains of people are always on the never-ending hunt for a sense of order. Due to your viewers’ biologically programmed need to see order, they generally want to see the elements in your photograph fit together like a fine-tuned puzzle. In a portrait, it’s helpful to the eye if you have various shapes—circles, triangles, squares, etc.—in there. Then, as you compose the photograph, do so in a way that promotes their harmony and unison.
When you commit yourself to searching for shapes, eventually, you’ll have no trouble spotting them everywhere. It’ll also help make it more natural for you to seamlessly include them in your portraits.
Using Trees to Your Advantage
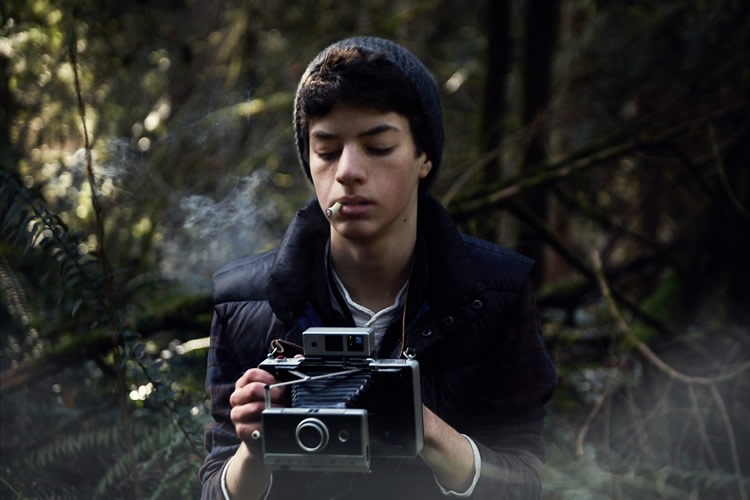
photo by Steven Leonti [7]
Try taking a picture of your subjects standing in front of a line of trees. Just do it, and you’ll see a bunch of effects that satisfies virtually all of the best practices of portrait photography. Be sure to use a long lens for something like this.
The leaves on the trees offer the open shade that we referenced earlier, and the path that your subjects are walking on provides the leading line that offers your snapshot some great depth. Of course, the long lens that you’ll use also provides an advantageous effect: It creates a nifty, tunnel-vision effect that not only draws you in, but also frames the photograph, right along with the trees.
Using Leading Lines

photo by Anthony Cain
What are leading lines? In a photograph, leading lines [8] are there to cut an efficient path for the eyes of the viewers to follow through the various elements of a photograph. Therefore, they’re a great feature to include in portraits. Typically, they make an appearance at the bottom of a picture and then lead the viewers’ eyes both upwards and in, all the way from the foreground of the shot to the background. Leading lines also usually lead right toward the main subject.
The good thing about leading lines is that they’re able to give pictures a nice sense of depth. In addition, they also give your shot a 3D feel, which creates yet another interesting effect to study in the frame.
As a general rule, you can use anything and everything as leading lines, so long as they draw the eyes of your viewers toward your subject. For instance, a row of trees, the lines of a cornfield, paths and fences work very nicely.
Leaves That Twinkle

photo by Andrew Yanovskiy [9]
Twinkling leaves help bring that extra pizzazz to your portraits. Have your subjects stand in front of back-lit leaves, which will result in the appearance of an attractive mosaic of green twinkling, right behind them, when you utilize a low f-number for the shot. Something like f/4 should do the trick!
To increase your chances of pulling this off, use the stop metering mode on your camera to properly expose for the faces of your subjects and prevent silhouettes from showing up. This is just a precaution since you’re working with backlit subjects. By all means—don’t be afraid to utilize a reflector to bounce some extra light into the faces of your subjects.
Locations Help to Make Portraits
Just to recap: The facial expressions of your subjects aren’t the only elements that matter in a portrait. Choosing the right location is equally important since the background heavily influences the overall look and feel of your photographs. That’s why it pays to think carefully instead of just having your subjects pose in front of anything.
By scouting locations to find ones that add meaning to a shot, feature geometric figures and include open shade opportunities, you’re taking your portrait photography to the next level. As a result, your clients will be happier, you’ll look better as a photographer, and both parties come away with an awesome experience.