In the world of photography, silhouettes are considered an artistic element. Many photographers use silhouettes to add an element of drama and mystery to an image, or to help to convey a certain mood.
One of the great things about silhouettes is that because of their simplicity, they tell a story while still leaving much to the imagination. When done correctly, a silhouette can create an inspiring photograph with more impact and emotion than almost any other style. Plus, silhouette photography can be a lot of fun!
Learning to take silhouette photographs isn’t hard –all you need is the right camera settings, the right subject, and the right lighting.
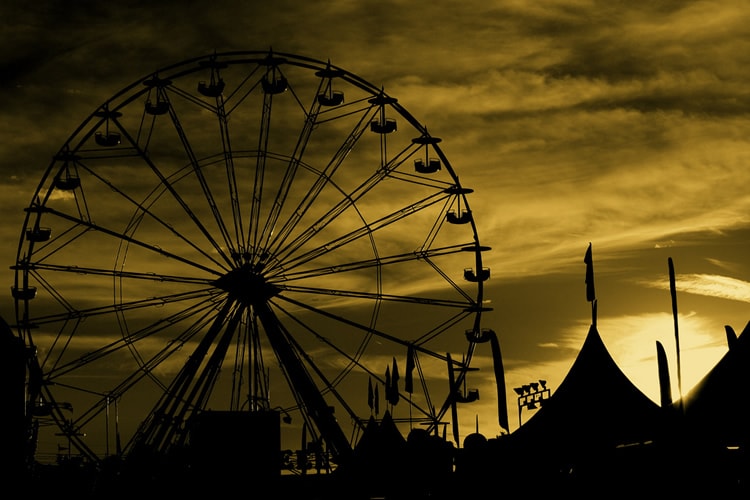
image by Kevin Dooley [1]
Ready to get started? Read on to see how simple, and fun, silhouette photography can be.
A Strong Subject
Choose a strong subject that has a clearly recognizable shape. Since silhouettes do not show colors and tones, it’s important that you choose a shape that’s easily identifiable in two-dimensional form.
People are by far the most popular subject for silhouettes, but there’s no reason why you can’t experiment with trees, interesting plants, flowers, bicycles, bridges, instruments, animals – anything that looks interesting and stands out against the backlight.
The Right Lighting
The right lighting is crucial to silhouette photography, and a clear day is best. The ideal time for outdoor silhouette photography is near sunset or sunrise, since this is when the sun is lowest in the sky and is obscured by the atmosphere. Often, this angle of the sun also creates a colorful backlight.
Make sure your subject is lit from the back, so place your subject in front of the sunset and shoot facing the sun. Unfortunately, the window of opportunity for shooting silhouettes during sunsets and sunrises is quite small, so make sure you get to your location early to adjust your settings.
No Flash
Turn your flash off when doing silhouette photography -you want as little light in front of the subject as possible in order to get the silhouette effect, so don’t forget to turn it off.
Interesting Angles
Experiment with different angles. Getting down low puts your subject up higher, and adds a unique perspective. Or experiment with different silhouette shapes by having your subject try different poses. You could also try experimenting with fun “forced perspective” silhouettes, and make your subjects appear as though they are holding or touching the sun!
An Identifiable Outline
With a silhouette, you will only see the outline of your subject –no tonal or color details, so it’s important to make sure your subject is distinct and uncluttered. Position your subjects so they aren’t overlapping, and watch out for distracting details that could cause your subjects to become unrecognizable.
Extra Details
While it’s important to ensure your silhouetted subjects are distinct and uncluttered, carefully chosen details can help to add to the photograph. Interesting clouds, blades of grass, or ocean waves in the background can help set the scene, and frame your subject.
Adjust Your Camera Settings: Silhouette Mode
Now that we’ve looked at the composition basics, let’s take a look at your camera settings. The camera settings that you use will vary greatly depending on the location, time of day, your subject, and of course, the desired effect.
-
Shooting in Auto
You can take silhouettes in auto, but you’ll have to trick your camera into underexposing your subject to get the silhouette effect. To capture a silhouette in auto, focus on the brightest part of your picture and then press the shutter halfway down, move your camera back to frame your shot, and finish pressing the shutter. Your camera will think that the bright part of the image is actually mid tone, and will expose anything darker as a dark shadow.
-
Shooting in Manual
Shooting in manual allows you to experiment with the settings and get the exposure exactly right. To get started with manual, take a photo in auto and look at the shutter speed and aperture. This will give you a starting point to work from. If your subject is too light in auto, put your camera on manual, increase the shutter speed, and see what happens. Speeding up your shutter speed will allow less light to enter your camera, and will result in shorter, darker exposure. If your subject is too dark, slow down the shutter speed for a brighter image.
Bracketing your shots is a helpful technique that can help you to find the right exposure. Bracketing will give you three images, an original, one that’s lighter, and one that’s darker. This can be a helpful starting point, and will give you a series of shots at different exposures which will give you slightly different results and colors.
-
Focus
When it comes to focusing, you want the silhouette itself to be clearly in focus. If you’re shooting in auto, this can be difficult as pushing the shutter halfway down will mean that your camera will focus on the background. To combat this, you may want to try using manual focusing, which will allow you to focus your shot before you meter it.
Another way to adjust the focus is by adjusting the aperture. A smaller aperture (larger number) will increase the depth of field, and give you a sharper foreground and background.
With silhouette photography, there is a lot of trial and error that goes into getting that perfect shot. So don’t be discouraged if it takes a few tries to get the settings just right. Thankfully, digital cameras make it easy to practice with different settings until you get the right shot.
Silhouette Examples
Learning by example is a great way to find out what works. Let’s look at some of these examples of silhouettes, to find out which camera settings were used.
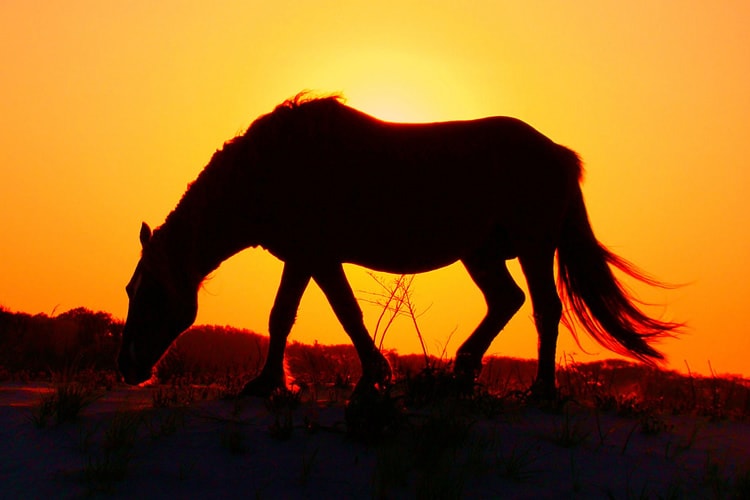
Image: Eric Lynch [2] · Aperture: ƒ/8 · Shutter Speed: 1/320 · ISO: 100
In the example above, the photographer was using a point and shoot, but still ended up with excellent results. The small f/8 aperture kept the image foreground and background in focus. The shutter speed was a fast 1/320th of a second which let in less light, creating a darker image.
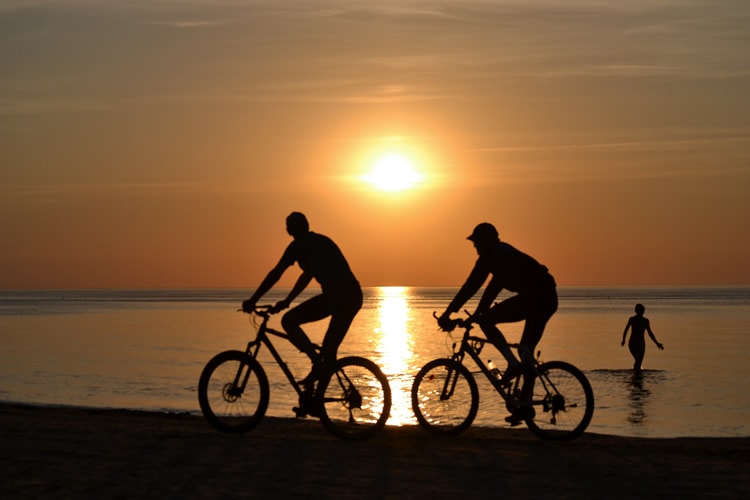
Image: Pablo Andrés Rivero [3] · Aperture: ƒ/6.3 · Shutter Speed: 1/2500 · ISO: 100
In the above photo the photographer was shooting in shutter speed priority mode, which allowed him to set the shutter speed himself for the best results. He used a fast shutter speed to create a darker image. The aperture of f/6.3 was small enough to allow most of the foreground and background details to still be in focus.

Image: João Lavinha [4] · Aperture: ƒ/1.8 · Shutter Speed: 1/4000 · ISO: 400
In our final example above, a wide aperture of f/1.8 was used; note how this caused the foreground and background to be out of focus. An extremely fast shutter speed of 1/4000 was used with this shot, which froze the action and made for a clear, dark image.
Silhouettes are a great way to turn an ordinary moment into something that will stand out. The next time you’re on the beach at sunset, or outside when evening sets in, try practicing silhouette photography –and turn those ordinary moments into something memorable.