How To Capture Stunning Twilight Sky Scenes

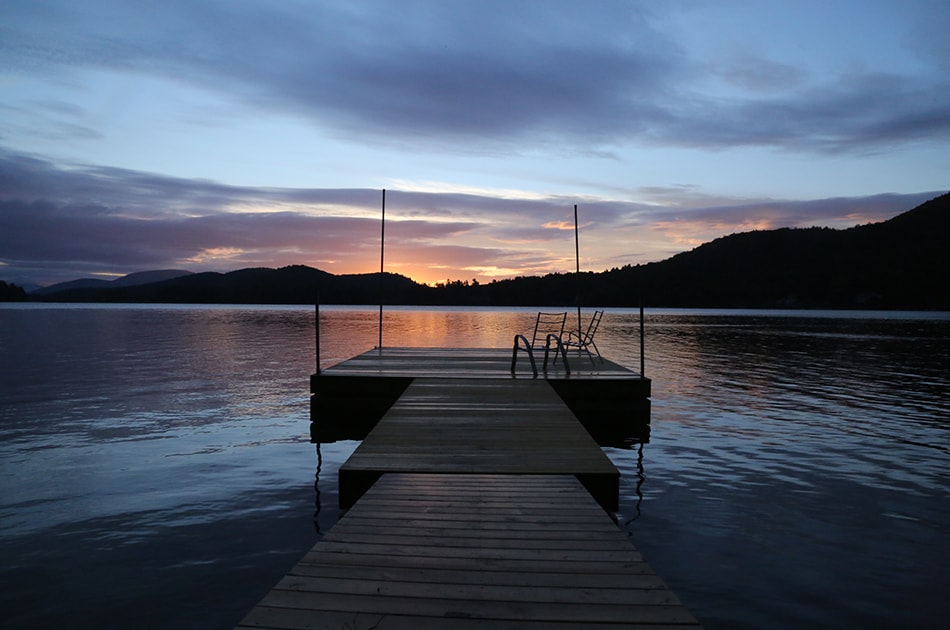
One of the prettiest times of day is undoubtedly twilight, that moment when the day’s sunlight begins to fade to black. Before it does, of course, all sorts of gorgeous hues and colors emerge, making it a wondrous opportunity for some real photography.
Taking shots of twilight sky scenes can be at times tricky, mainly because there are rapid changes in the light occurring all the time until nightfall actually hits. With this in mind, it’s best to have a structure to follow when doing photography at this time of day.
Here’s what it should look like.
It All Starts With Preparation
Before you do anything, you’ll want to determine exactly when twilight falls in your area. Check the sunset or sunrise times, but also check how long twilight lasts, as twilight is longer or shorter depending on the time of year. These days, you can accomplish this easily by consulting a website like Suncalc.
From there, we move on to knowing what to expect with the weather, the other huge factor along with the actual onset of twilight. It goes without saying that a clear sky is the best condition you can hope for, but that’s not always realistic.
Second-best would be a light cloud cover since it can give your shot a cooler and subtler look. Thus, you’ll want to get an accurate weather forecast prior to going on your twilight adventure.
Your Camera Settings
Now that you’ve hopefully got a good read on the best conditions for your photography, you need to ensure you have your camera settings right. If your aim is to achieve a cool and blue result, use a Tungsten or Daylight preset. On the other hand, to get a warmer appearance, go with a Shade or Cloudy preset.
Tackling the filter comes next. Utilizing a strong ND grad filter is recommended when you’re photographing against the rising or setting sun’s glow. An example of one is a 3-stop or ND8. However, let’s say you’re shooting in the opposite direction of sunrise or sunset; this will produce less contrast. In such a scenario, you’ll only have to use a 1- or 2-stop!
So you want to use auto at this time? Sorry, but manual’s the better choice. Reason is that you’re working in low-light conditions during twilight. As such, your camera’s going to have an almost impossible time accurately focusing and then calculating the exposure. So when using manual mode, go with an aperture of f/16 and set the ISO to 100.
Finally, it’s time to deal with your exposure. Your shutter requires an appropriate exposure. You need to continually check the histogram as you’re reviewing an image to ensure that the exposure is still fine. This is due to the fact that your scene will either get darker or brighter, based on darkening after sunset and brightening after sunrise.
As you change the exposure, use the shutter speed to do so, for best results. You may be tempted to rely on the aperture instead, but resist. You want your shots’ depth of field to remain consistent, after all.
The Technique
Nailing twilight photography comes down to your technique. First off, do the no-brainer basics right, like having a small battery or headlamp with you on location so you’re not fumbling around in the dark, and bringing along extra warm clothing for temperature drops after the light disappears.
Alright, with that out of the way, let’s talk arrival time. It’s advisable that you get to your location 10 to 15 minutes prior to the sun going down. This will let you determine what you want to shoot and glance around at your environment.
Now, you should do some test shots and then bust out your tripod. In this setup, produce the final framing that you think will look best. Since this is a long exposure shot, also bust out that shutter release cable. With your camera in manual, lock your focus onto the part of the frame that’s most interesting to you.
This should have taken you several minutes to do. Here’s where you’re just waiting for the sun to fully set, so that you can start doing some test shots. After 10 minutes after sundown, start taking some test shots to see if everything’s checking out okay. As a general baseline, if you’re using an aperture of f/8 10 minutes after sundown, your exposure time will be one to three seconds.
The key here is to consistently keep taking pictures as the length of time the sun’s been down gets longer. So take pictures every 10, 15, 20 minutes, etc., to see increasingly more aesthetic results.
You’ll want to experiment with your white balance, too, as this is vital to great twilight photos. Utilize your camera’s LCD screen to gauge contrast and color. It’s recommended that you decrease your white balance at this point to approximately 2800 degrees K to intensify the color blue’s saturation.
When you hit the 20-minute or so mark, keep relentlessly clicking away since you’re fast approaching that so-called sweet spot (which is only open for a really short time) where you just have the right light and conditions to really achieve amazing-looking twilight shots. As a general rule of thumb, this far deep into twilight with exposure times of 15 to 30 seconds and aperture of f/8 should do the trick!
We can’t stress enough how, throughout all of this clicking away, you have to keep adjusting your exposure times since you’re going for a precious moment that’s very fleeting.
After all this, you either have great twilight shots or you don’t.
It Takes Patience and Practice
Outcomes will be different for all photographers since the variables are so wild. There’s your equipment, the conditions, the time of year, your skill as a photographer… you can see why you shouldn’t expect to get the greatest twilight shots in the world, especially on your first try!
Of course, practice makes perfect, so your next twilight adventure will produce superior results compared to your first attempt. Hey, after all, if you don’t succeed, try, try again!
That’s the philosophy you need to eventually reach the point where you’re snapping awesome twilight images that everyone will want to see.
About the Author: Marc Schenker
 Marc is a copywriter and content marketer who covered photography. These days, he runs The Glorious Company, a content marketing agency.