Tips & Tricks On Using A Polarizing Filter

As photographers, we’re always on the lookout for ways to improve our photography. One fast and easy ways to enhance your images is with the addition of a polarizing filter.
Polarizing filters are relatively inexpensive, and learning how to use one will help you to capture dramatic images for years to come. This is one filter that you’ll want to invest in, and is a great way to take your photos up a notch. Additionally, many of the effects of these filters can’t be recreated in post processing, making it an especially valuable filter to have.
A polarizing filter works by blocking some of the light from reaching the camera’s sensor. Much like wearing a pair of polarized sunglasses, the polarizing filter eliminates some of the glare and improves color saturation – especially in the sky. These filters are especially useful for landscape photography where you will often be left with some unsightly haze in the distance. They’re also great for portraiture or situations where you want to cut through reflections and glare – something you’d have a hard time doing in post processing.
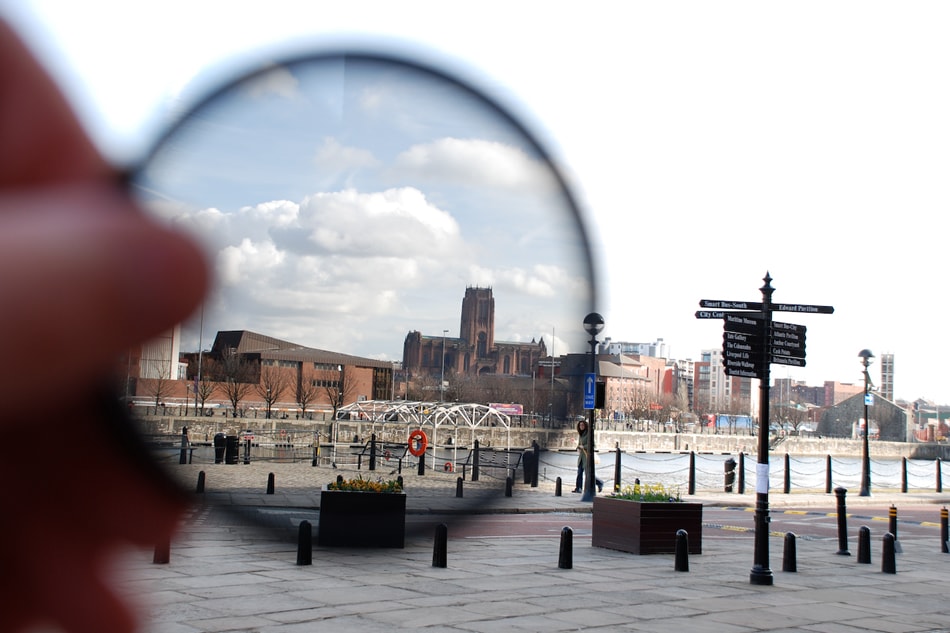
Photo by Dave Kirkham
However, there’s more to using a polarizer than just putting it on and shooting. The secret to getting the best results with your polarizer involves knowing how to use it effectively. If you’d like to get the most out of your polarizing filter, here are some tips that will get you off to a great start.
Using the Filter
To get started, just screw the filter onto the lens, and adjust it by turning the ring. The great thing about a polarizer is that you can look through the viewfinder, and make adjustments until the picture looks exactly how you want it to. Just remember to turn the ring counterclockwise since clockwise could cause it to fall off.
Things You Can Do With a Polarizer
There’s a lot of things you can do with a polarizing filter. Here are some great examples.
-
Capture Amazingly Blue Skies

Photo by Franck MichelPolarizers are great tools for reducing the amount of haze in the air, resulting in deeper, bluer skies. But your polarizing filter won’t be very useful if the angle of the light is wrong. This is because polarizers work best when the light is oriented on a 90-degree axis to the filter. In other words if the light is directly behind you, or in front as it is when shooting into a sunset, the effects will be minimal. The best angle for the light is to your side, or directly overhead.
A good way to find a 90-degree angle to the sun is by making an ‘L’ shape with your thumb and forefinger, and pointing your finger at the sun. Still pointing at the sun, rotate your hand both clockwise and counterclockwise. The area that your thumb points in any direction is where the maximum effect of polarization will be.
-
Reduce Reflections and Glare
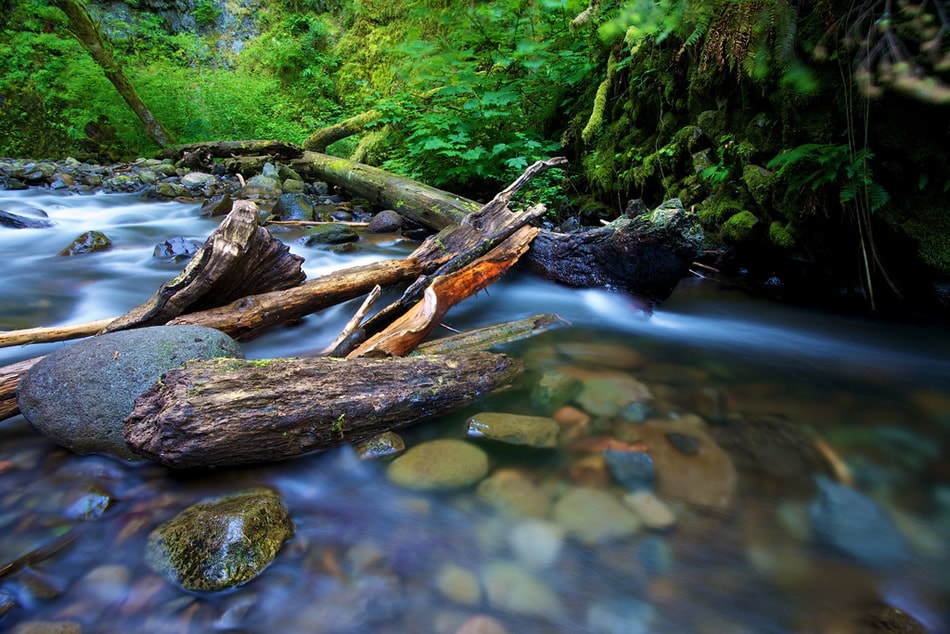
Photo by Jonathan MuellerWhile reflections aren’t always a bad thing – there are some situations where you may wish to eliminate or reduce them in your images. Polarizers are ideal for times where you’d like to see through the surface of the water to photograph the shallows. Just pay attention to the angle that you’re shooting at. If you’re photographing directly above, the water will be more transparent, but shooting lower, from a side angle, it will be less so. Polarizers are also ideal for eliminating glare. Especially if you’re photographing through glass, for example, or capturing landscapes after the rain, since they can help to remove the shiny surface glare found on wet rocks or other surfaces.
-
Capture Amazing Rainbows

Photo by Zoltán VörösA little-known fact about polarizing filters is that they are excellent for shooting rainbows. However, it’s important to know how to use them properly, since, in some cases, polarizers can make a rainbow disappear completely. When shooting rainbows with a polarizer, you’ll want to twist the filter to just the right point to darken the background clouds and create a bright and bold image of the rainbow.
-
Photograph Soft, Misty Water
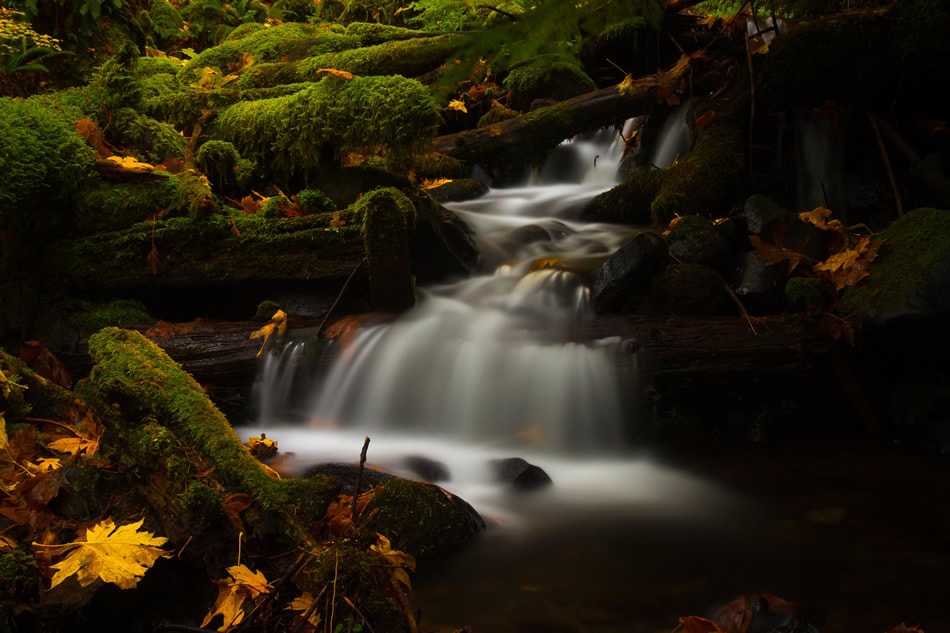
Photo by Luke DetwilerWant to capture soft, silky waterfalls? With polarizers, you can! Since the filter will block out some of the light, you’ll be able to use a longer exposure to blur the movement of the water, allowing you to capture silky, soft waterfalls or gently blurred ocean waves. Of course it won’t replace a good ND filter, but it can help.
-
Watch Out for Unnatural Skies

Photo by SachinChitaleWhile a polarizing filter is great for darkening the skies, take care that the image doesn’t come out too dark or unnatural. In some cases, a polarizer will make the sky an unrealistic shade of blue. You can combat this by adjust the outer ring to reduce the polarizing effects, or by taking a shot without the filter just in case it’s better. Another issue with polarizers is that when used with a wide angle lens, usually wider than 24mm on a full-frame camera, there’s a risk of creating a gradient effect of different shades of blue in the sky. Shooting just to the side of the sun will accentuate this effect, so if you notice that your sky isn’t even; try pointing your camera farther away from the sun for a more even effect.
-
Prevent Blur
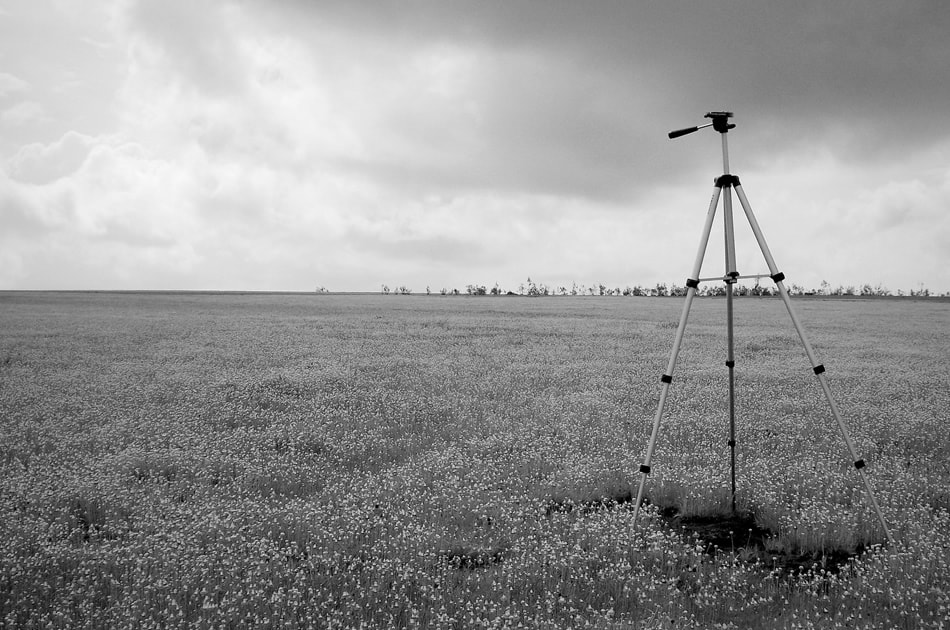
Photo by nilesh1foruBecause a polarizer can block two to three stops of light from your camera, depending on the degree of polarization it’s set at, you’ll have to use slower shutter speeds to compensate. When using longer exposures, remember to use a tripod to reduce camera shake that can disrupt your images.
As you can see, polarizing filters are a great addition to your photography kit, and an easy way to capture images with deeper, more saturated colors. Since they’re small, they’re no trouble to throw in your bag and take out with you when you’re capturing landscape images – especially if you’re going to include the sky in your shots. Just remember to buy the right size polarizer for your lens filter holder, and if possible, choose a quality piece of glass – like B+W Kaesemann, or even Tiffen or Hoya for the best results.
Do you use a polarizer for your landscapes?
About the Author: Christina Harman
 Christina is a part time blogger and full time photography enthusiast living in Southeast Alaska. She enjoys travel photography and has taken pictures in countries such as Mexico, England, France, and China. She likes sunny days, new lenses and drinking good coffee. You can visit her at Tangled Thoughts.