How to Master Long Exposure Photography
 by
Jo Plumridge
by
Jo Plumridge

Long exposure photography opens up countless photographic opportunities, allowing us to capture images that would otherwise be impossible.
If you’ve ever looked at your shutter speed range, you’ll see that speeds go down to full seconds, before eventually going to the Bulb setting (which is sometimes a separate mode on your mode dial marked by ‘B’). It’s these longer shutter speeds that allow us to achieve long exposures. But what is long exposure photography and when would you use it? We’ll look into all this and more in this guide.
Here’s what we’ll cover:
- What is long exposure?
- Why would you use a long exposure?
- What equipment do you need for long exposures?
- How to shoot long exposures
- Ideas for long exposure photography
What is long exposure?
A long exposure is one that begins when the shutter speed is too slow to capture a sharp handheld image. So, a long exposure is the same thing as a slow shutter speed. The exact shutter speed at which using a tripod becomes necessary for sharp images varies according to the focal length of the lens you’re using, and how steady your hands are. For example, most standard and wide-angle lenses will need a shutter speed of 1/60th to be handheld. But when you start using telephoto lenses, you should always use a shutter speed equivalent or faster than the focal length of the lens (e.g. use 1/250th for a 200mm lens).
Your shutter speed refers to the amount of time the camera’s shutter is open for. It’s measured in fractions of a second down to full seconds. This means that 1/1000th is a quicker shutter speed than 1/60th as this refers to the fraction of a second. Full seconds are generally shown on a camera like so – 5”, 10”, 20” etc.
Essentially a long exposure allows you to capture a single image over a longer period of time from seconds to even hours.
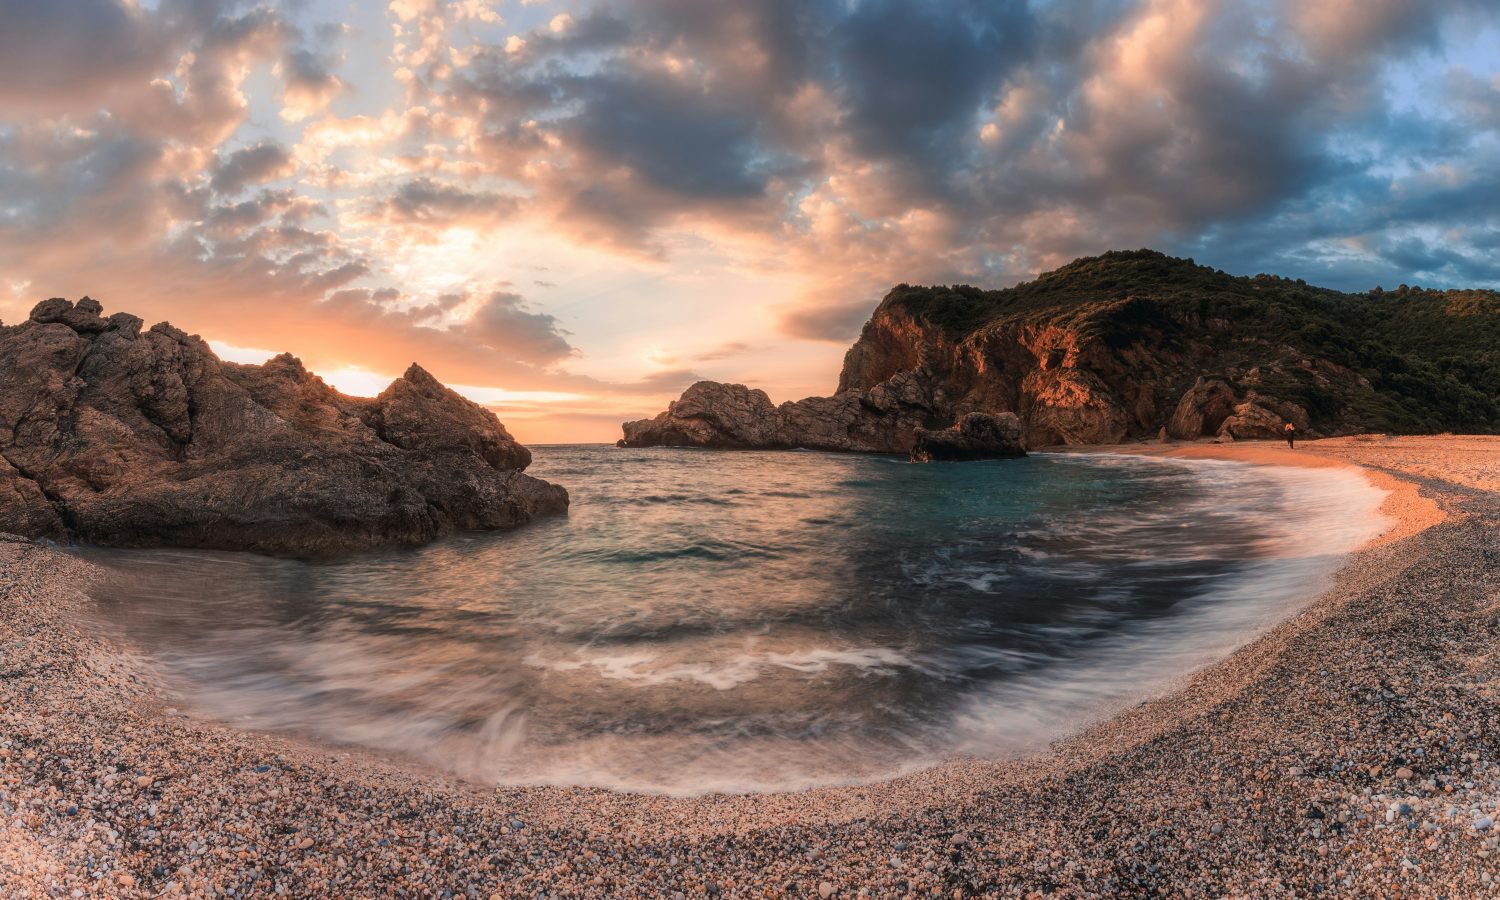 Photo by Nick Panagou
Why would you use a long exposure?
There are multiple reasons to use long exposures. They’re most commonly used by landscape photographers, and you’ll probably have seen many examples where the water looks silky, clouds are blurred, or there are a multitude of tones and a depth of colour in the shot. Long exposures are often used when a photographer wants to deliberately introduce blur into an image to give the shot an artistic and often ethereal feel by keep stationary images sharp and blurring water and sky.
But this isn’t the only use of long exposures. Landscape photographers also often use long exposures to get a large depth of field and low ISO on days when there isn’t enough natural light for a faster shutter speed. They’re also essential for shooting at night or in cities to blur out unwanted people in architectural and street images. Lastly, they’re also used for stunning astrophotography images.
What equipment do you need for long exposures?
There is some specific equipment that you’ll need for long exposure work. First up is your camera. Yes, you can achieve some great images with modern smartphones but for control and flexibility, you really need an interchangeable lens camera. You need to be able to adjust your settings manually – in particular the exposure triangle of shutter speed, aperture and ISO. And, of course, your camera needs to have a Bulb (B) setting. Little note – the Bulb setting is also sometimes called the Time mode.
You’ll also want a wide-angle lens to give you a broad perspective over a scene and help you to capture depth in your image. Most long exposure shots are taken with a wide-angle lens as it allows you to capture a greater range of the scene and gives more of a three-dimensional feel to a shot.
Next up is a tripod. You can’t shoot long exposures if you can’t prevent camera shake. Although there are plenty of cheap tripods on the market, I’d recommend investing in something that’s sturdy enough to withstand uneven ground and windy conditions – you don’t want your tripod falling over and breaking your camera. If you’re going to be shooting out on location frequently, I would suggest saving up for a carbon fibre tripod as they’re much lighter. Alongside a tripod, a remote shutter release will help to prevent any small camera vibrations that may come from you depressing the shutter manually. It’s also essential for Bulb mode.
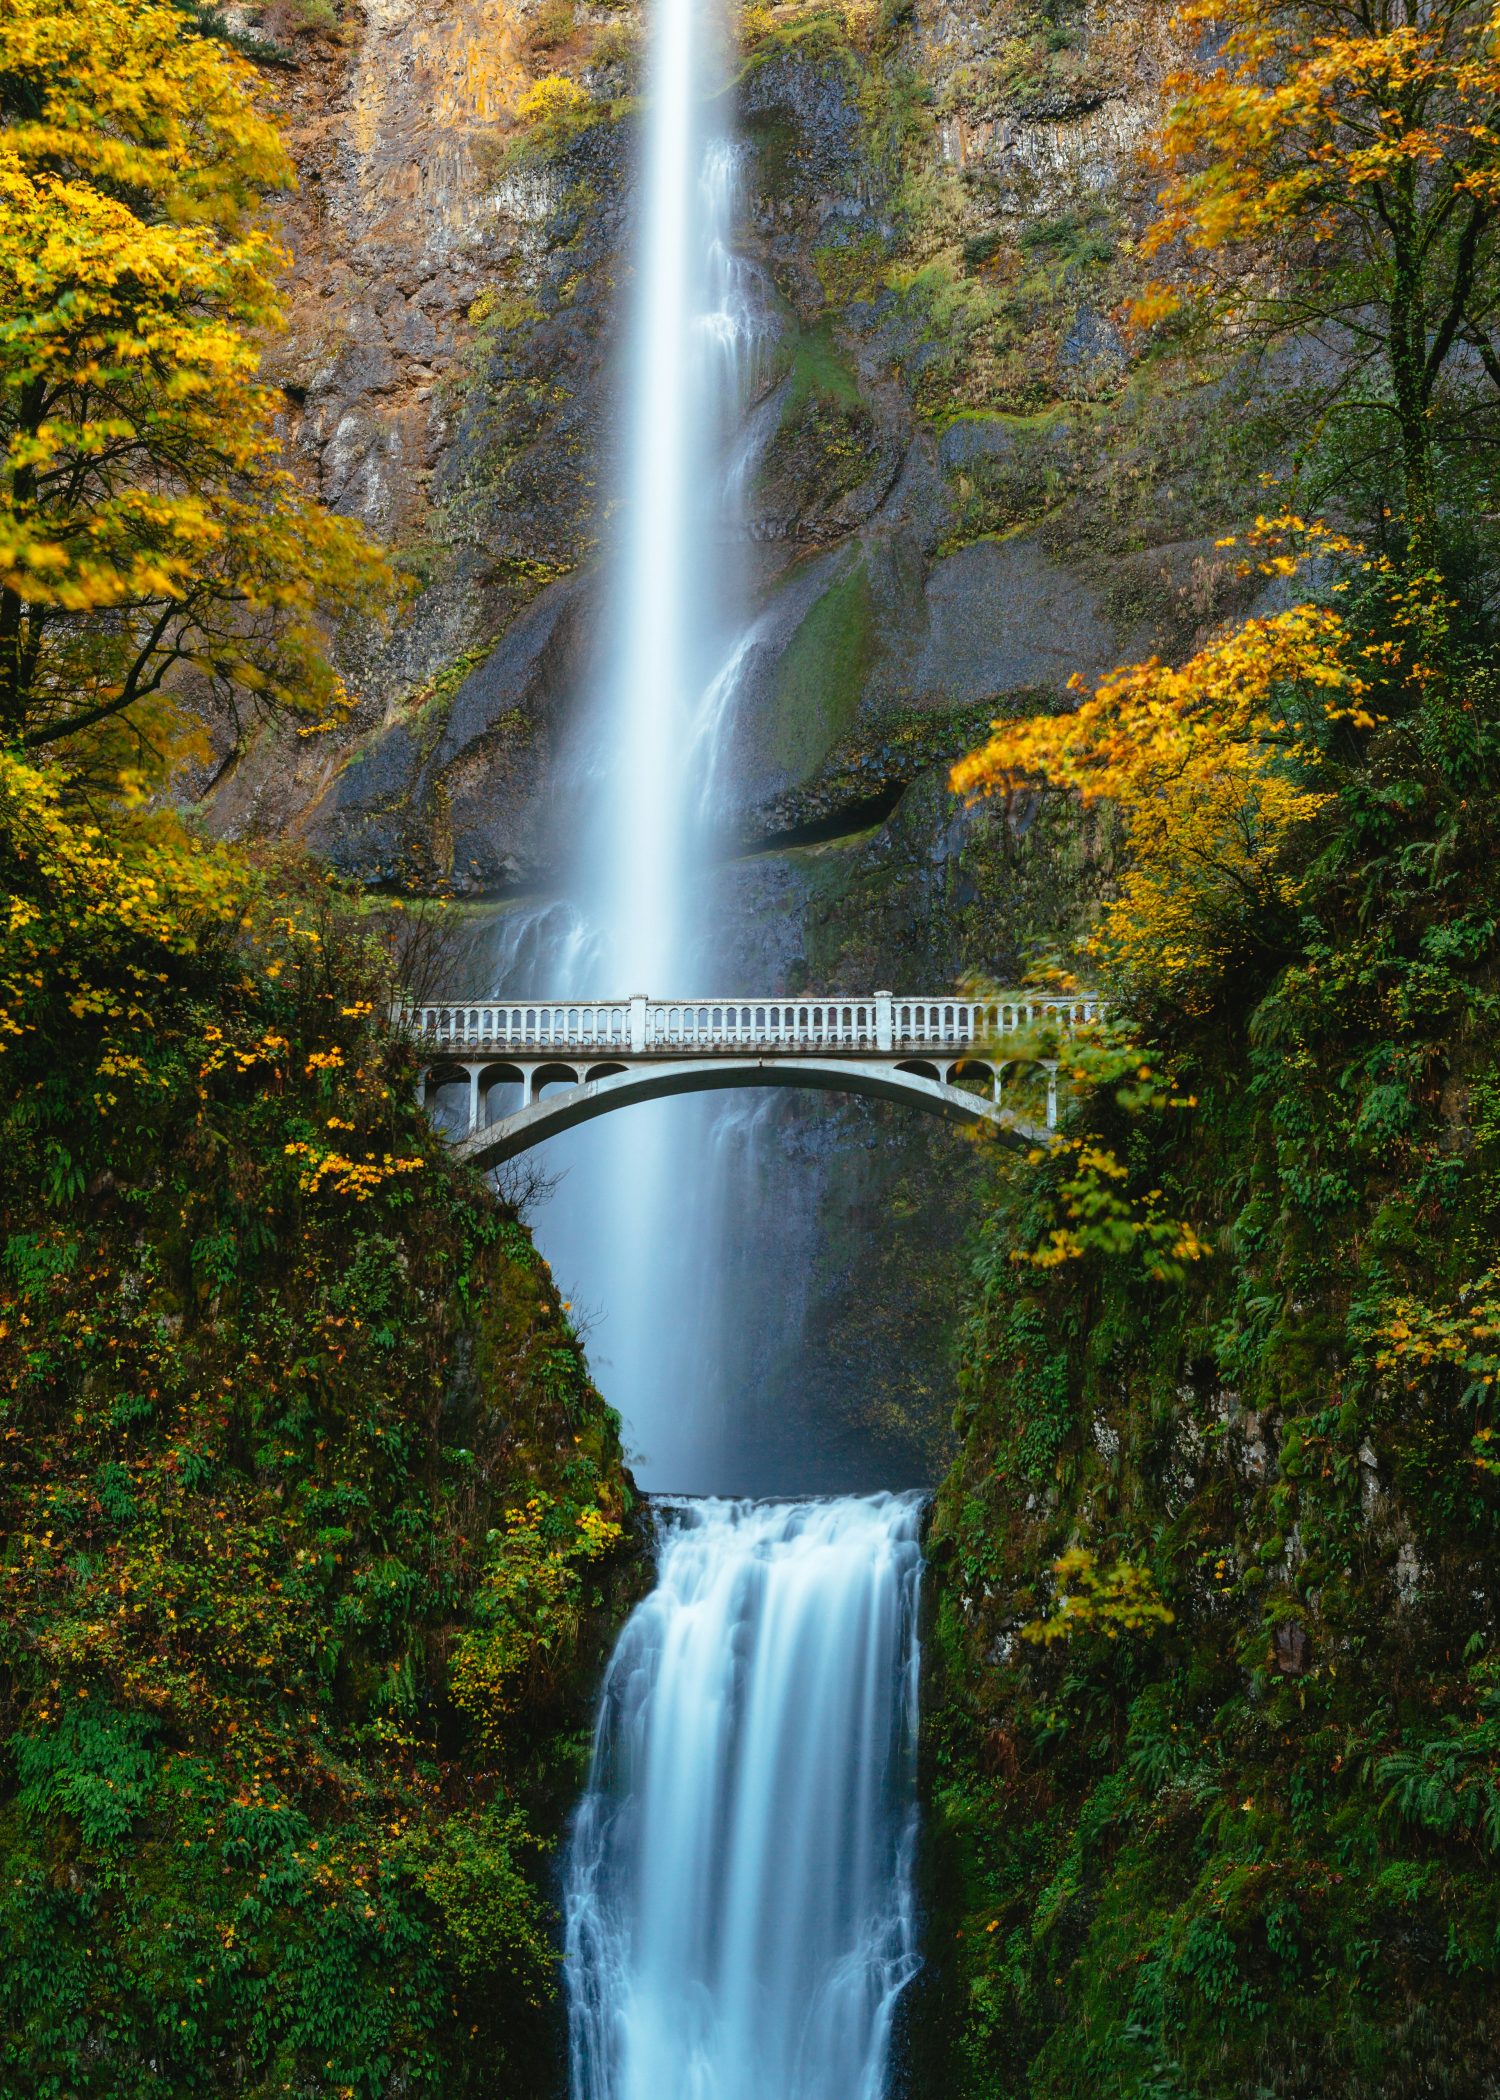 Photo by Dave Hoefler
The last essential for long exposure shots are neutral density (ND) filters. These darkened filters attach to the lens to reduce the amount of light reaching the shutter. If you’re shooting long exposures in the daytime and want to produce effects such as silky water, you’re going to need a fairly long exposure. But, unless it’s incredibly gloomy you’re likely to overexpose your image. A ND filter allows you to use longer exposures without that risk.
ND filters come in different stop ratings (most commonly 2, 6 and 10). A 10-stop filter, for example, will be darker than a 2 stop and would require you to use a shutter speed that is 10 stops slower. I also recommend carrying some graduated neutral density (GND) filters, which are dark at one end merging through to clear at the other. These are great for balancing out exposures when you have a very bright sky and darker foreground.
Don’t forget to bring spare batteries and memory cards – you don’t want to miss a shot because your camera’s out of juice or memory space.
How to shoot long exposures
Not sure how to get started with long exposure shots? Here’s a handy step-by-step guide to help you demystify the process and start getting some great results:
1. Check the weather
As photographers, we’re often used to waiting for sunny and bright conditions, but when it comes to long exposures you actually need drama in the sky to create magical shots. Ideally, you’ll want mood, even overcast skies, although you can get away with partly cloudy skies at a push. The texture in these clouds will add the drama and intensity you need to the skies in a long exposure shot.
2. Scout your location
If possible, try and scout your location ahead of time and before you start shooting. This will give you an idea of the way the sun will move through a frame (you ideally want it out of shot to avoid a bright streak of light), as well as ascertaining any distractions or people/animals that might be about and need to be worked with or around.
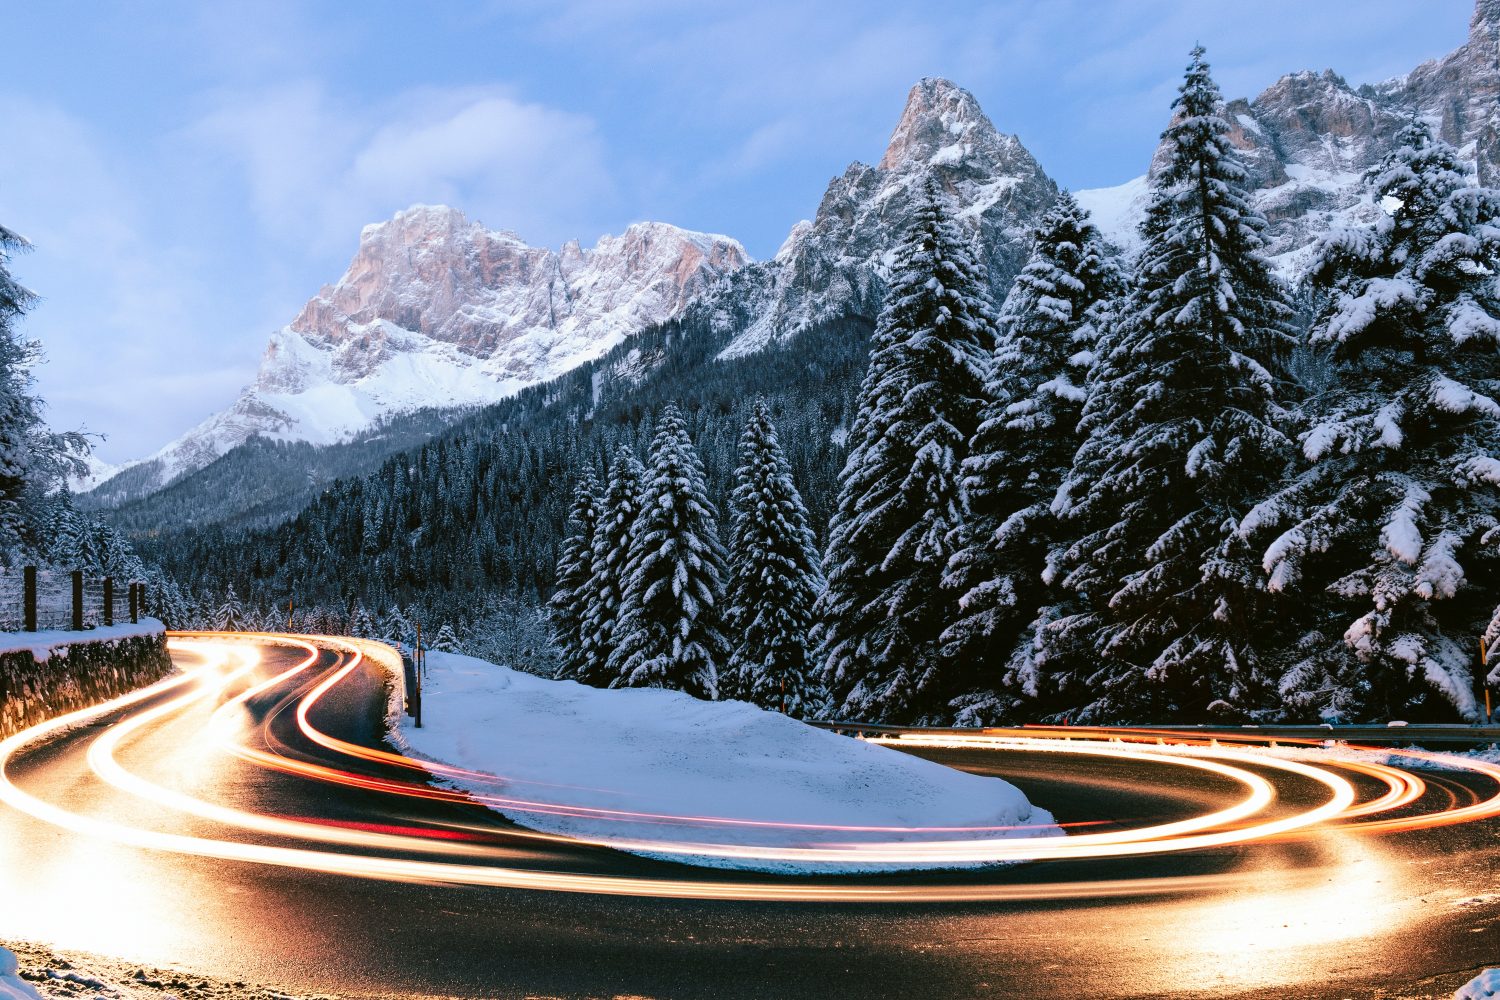 Photo by Federico Beccari
3. Set up your camera
Put your camera on the tripod and frame your shot as you want it. Keep your ISO on the lowest setting on your camera (usually 100) and set your aperture to allow for a large enough depth of field to keep your image sharp. Landscapes work well, in my opinion, around f8 to f16. Now make a note of the shutter speed you’ll need to get your image correctly exposed as is. Bulb mode will give you the most control at this point and allow you shoot at over 30 seconds. Take a test shot using your camera’s autofocus to get the image sharp.
4. Lock focus
Once you attach your ND filter to your camera, the autofocus isn’t going to work. Focus at the hyperfocal distance (about a third into your shot) to get your whole image sharp and then position your active autofocus point over the main subject before half pressing your shutter to engage the focus. Now lock in the focus with the AF lock button. You can also use manual focus or back button focus if you prefer.
5. Calculate your new shutter speed
Now attach your ND filter firmly to your lens. At this point you need to calculate your new shutter speed allowing for the stops of your filter. The joy of the modern era is there are lots of apps that can do this for you – just search for a ‘Long Exposure Calculator’. You can, of course, also work out the exposure manually. These are some common options:
- ND0.3 / 1 stop = 2x shutter speed
- ND0.6 / 2 stops = 4x shutter speed
- ND0.9 / 3 stops = 8x shutter speed
- ND1.8 / 6 stops = 64x shutter speed
- ND3.0 / 10 stops = 1000x shutter speed
If we take a 10-stop filter as an example, we can see that it lets through 1000 times less light, meaning that the exposure time needs to be lengthened by 1000 times to let in the same amount of light you’d get without it. If you were using an original shutter speed of 1/125th you’d now be shooting at 8 seconds for example. Or, as another example 1/30th would become 32 seconds.
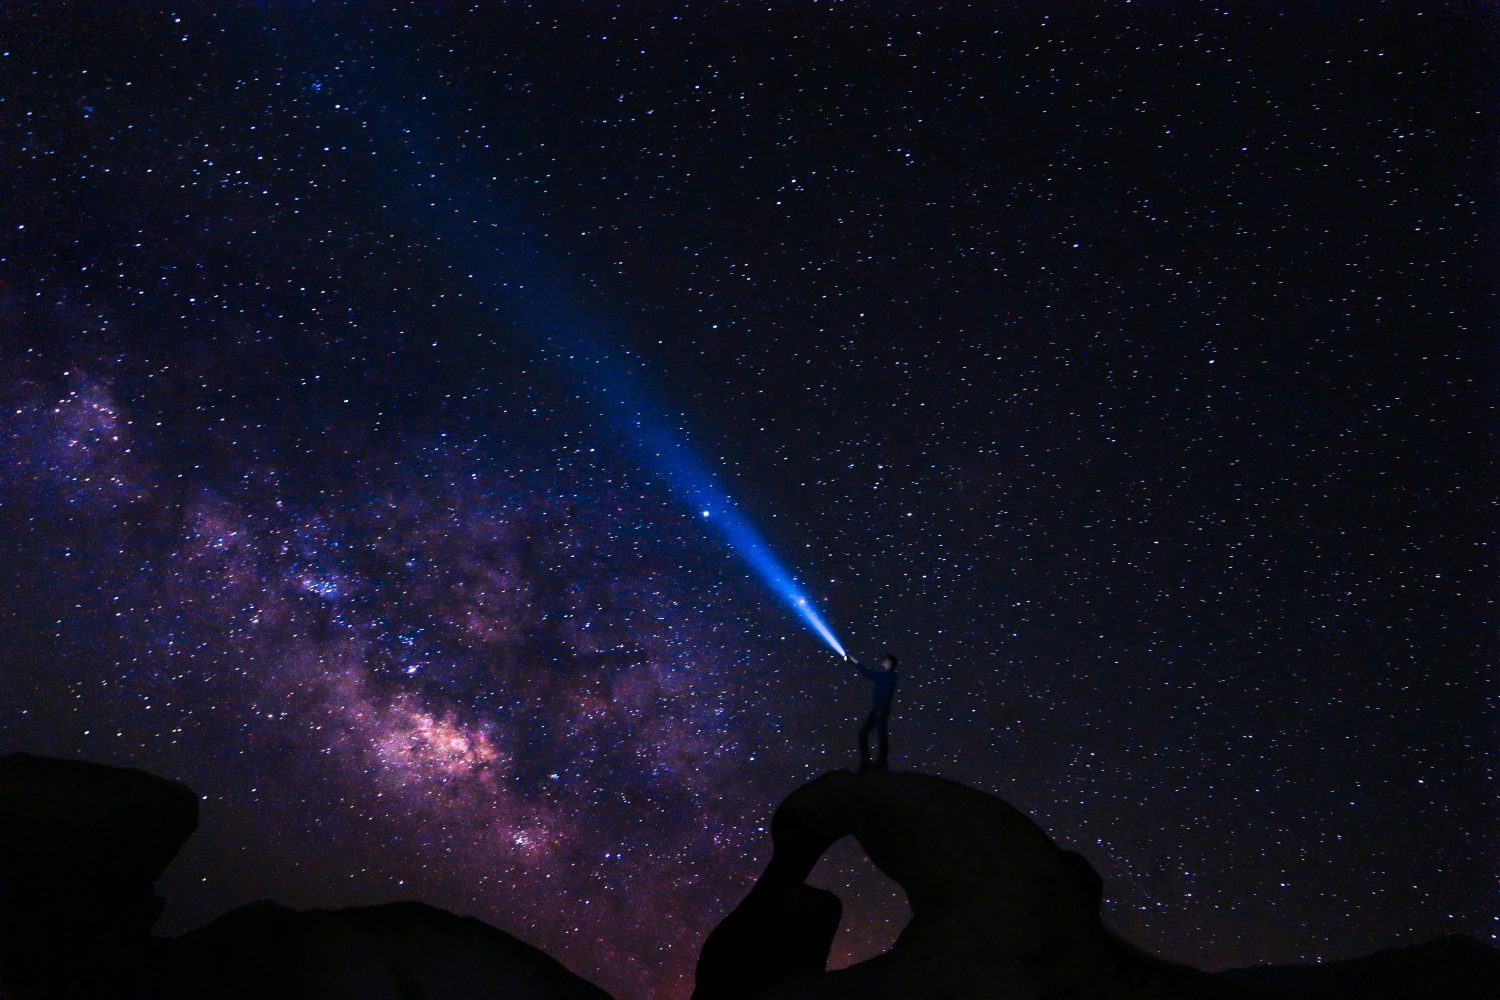 Photo by Clarisse Meyer
6. Apply the new shutter speed and bracket your shots
You can now apply your new shutter speed to your camera and start shooting with your remote shutter release. Check the histogram as you go along to see how your images are doing. I’d also recommend bracketing each shot – shooting at the recommended settings plus one stop under and one over.
Ideas for long exposure photography
There are numerous ideas you can try out with long exposure photography. Here are a few to get you started with:
- Shoot at the Golden Hour – The Golden Hour is always kind to photographers, with soft gold and pink tones in the sky. It’s also a forgiving time of day to start experimenting with long exposures.
- Shoot water – Waterfalls, rivers, the sea – all of these will start to look ethereal and misty with long exposures, giving you romantic and beautiful shots.
- Shoot in dull conditions – If the weather isn’t being kind to you, but you still want to photograph outside, long exposures will allow you to get enough light into your shots without having to resort to high ISOs and lots of noise in an image.
- Shoot cityscapes – Shoot at the Blue Hour just before any stars appear to capture the lights of the city and soft, dark night skies.
- Shoot the night sky – Long exposures allow photographers to capture the magic of the night sky, while really long exposures are used for star trails to show the rotation of the earth.
- Shoot the streets without people – Use a long exposure to blur people out of a shot, allowing the focus to remain on the streets and buildings.
In conclusion
Long exposure photography creates some of the most memorable imagery around and should be something that all photographers experiment with. You’ll be delighted with the results you can achieve with a little simple know-how.
About the Author: Jo Plumridge
Jo Plumridge is a UK based photographer, writer and lecturer. She specializes in portrait, corporate and travel photography, and writes photography, travel and comedy pieces for magazines, websites and books. You can see some of her work at her website, or follow her on Twitter.