Lightroom Classic can be so incredibly useful for photographers. It has a ton of valuable features for editing, organizing, and sharing photographs.
Unfortunately, some things in Lightroom Classic can be a little tricky to figure out. After all, it’s loaded with powerful features!
One thing that can be difficult to master is the export feature. Luckily, with a little bit of know-how, mastering Lightroom Classic [1] is completely possible.
We’ve put together the ultimate guide to ensure that your images are exported properly and with the highest quality possible.
Is Learning How to Export Important?
The short answer? Yes!
Exporting is the only way to really “save” photos. In Lightroom Classic and similar photo editing platforms, images are not saved by simply pressing a Save button.
Instead, you’ll need to decide on the export quality and file type for your photos before you export them once the editing process is finished. With Lightroom Classic, you can export pictures as JPEGs to share on social media or as TIFF files for physical printing. You can also export to folders, attached drives, CDs, DVDs, and networked drives. Your edits in Adobe Lightroom do not replace the original images, so the export feature is very helpful if you want to edit the original image differently later.
Lightroom Classic offers functionalities that go beyond other photo editing tools, and not knowing how to export shouldn’t keep you from using it!
Why is the Exporting Process So Complicated?
Lightroom Classic’s exporting process is a bit complex compared to other Adobe products. The confusion often stems from the way Lightroom handles your image files. In essence, when you make adjustments to an image in Lightroom Classic, you’re not overwriting the original image (i.e., this is non-destructive editing, your original files are not altered.)
Catalog information is used to specify how the images will be used and how to export. This, unfortunately, makes it a little more challenging. Collectively, file copying and cataloging provide a very comprehensive exporting experience. It just takes some skills to master. In the long run, the export feature is worth the mild headache.
Let’s look at the different ways you can export your images from Lightroom Classic.
The Lightroom Classic Export Process
At first, the export process in Lightroom Classic will seem deceptively simple. It looks like you just need to choose the export destination after selecting your images to export.
However, a lot more goes into this than what meets the eye. You can select your own export setting, but you’ll need to have a thorough and in-depth understanding of all the settings to master exporting your images.
The very first step is to choose the photos that you want to export.

Keep in mind that all of the photos that you select will have the same export settings. So if you have multiple images that require different settings, you’ll have to repeat this process.
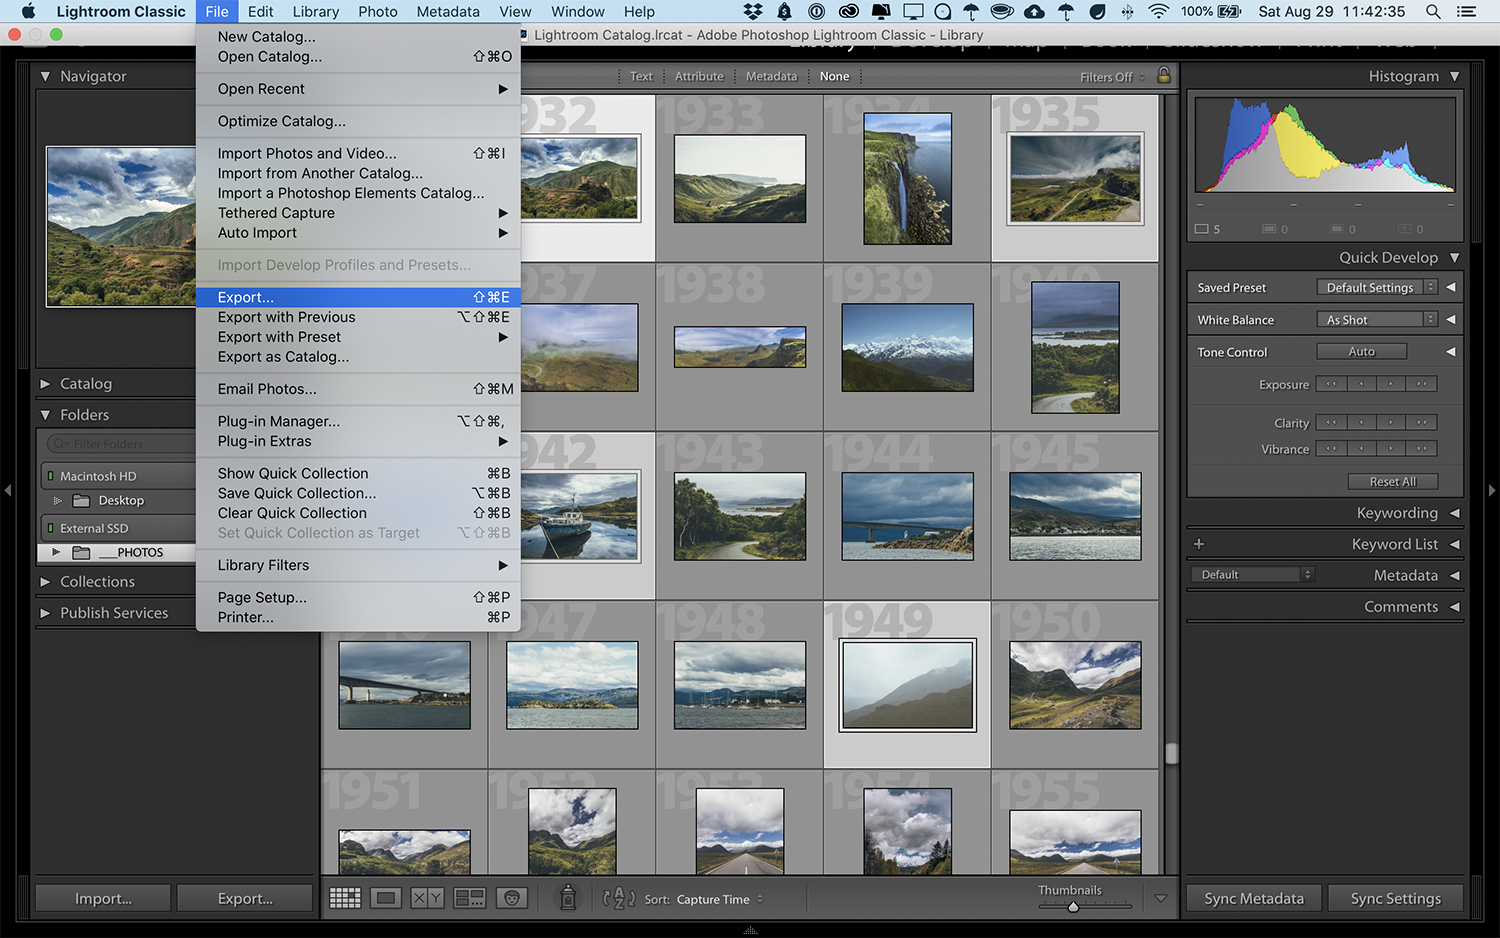
Selecting your images can be done via the Library module. You can also click on your first image, and then press and hold the CMD key and click on more images to select them. You can also select images to export via the Filmstrip at the bottom of the screen.
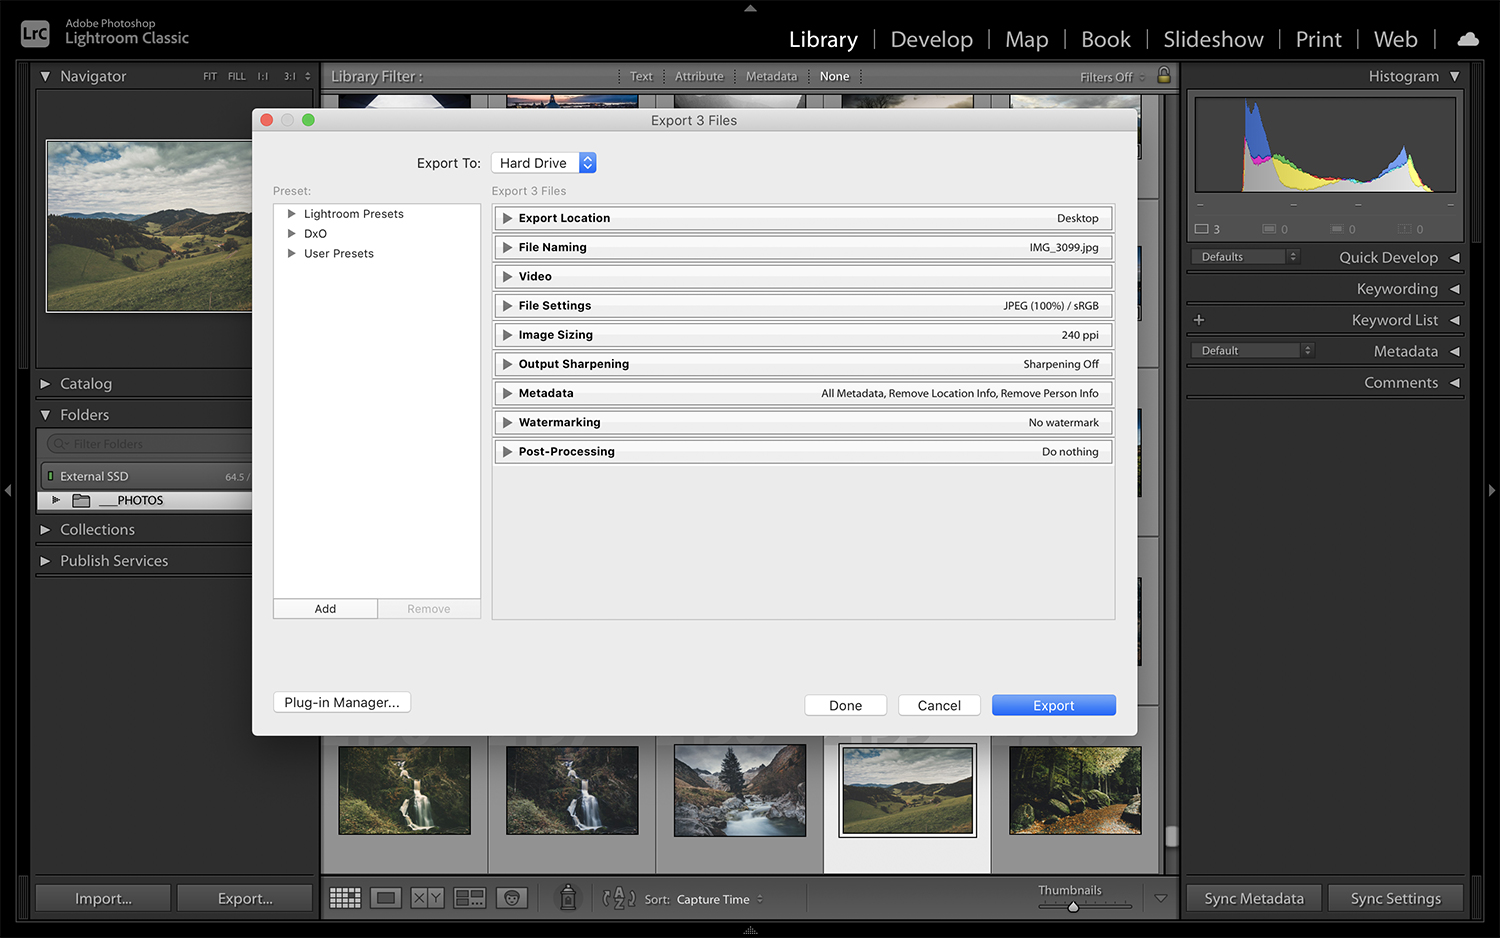
Once you’ve made a selection, go to the top menu and select File > Export. This will open up the Export window. You can also access the Export window by clicking the Export button in the Library module’s bottom left.
At the top, you’ll see a dropdown menu labeled “Export To.” Most of the time, you’ll select Hard Drive.
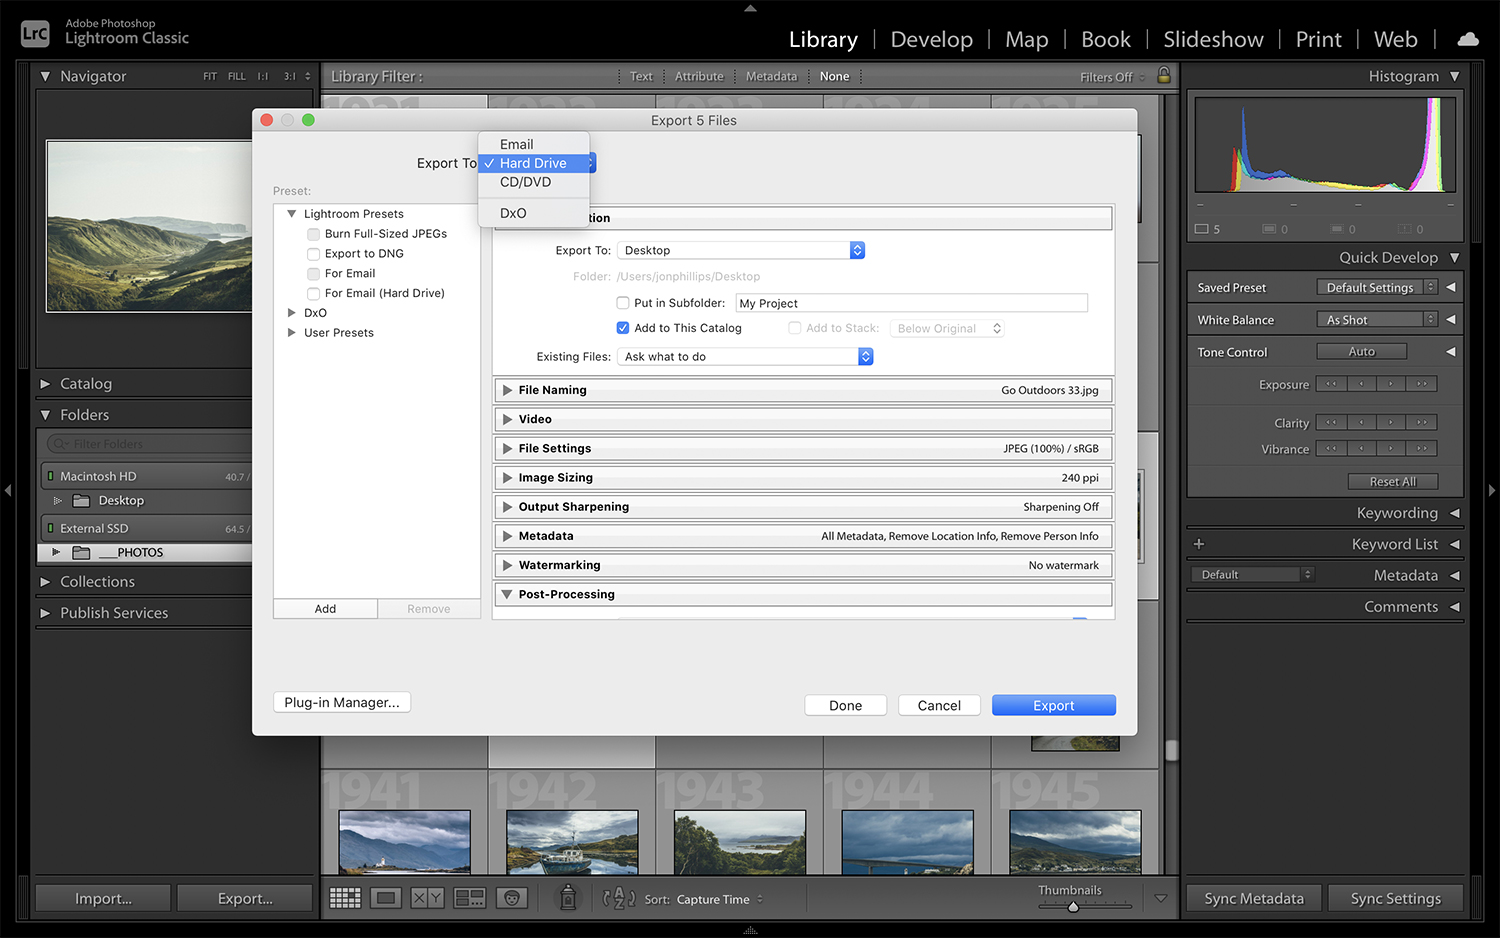
Choose the Export Destination Via the Export Dialog
Once you’re in the Export window, you’ll notice there are a lot of settings!
At this point, you’ll need to select an export preset (if you have some, it’s ok if you don’t) or the individual export settings that you desire for your photos.
Using Lightroom’s Export Presets
Now we get to use one of the most useful features of Adobe Lightroom Classic! If you’re at all familiar with Develop Presets, this should be easy.
Here, we’ll essentially be “exporting/saving” the export settings. You can store all of the export settings for any batch of photos to use again in the future. If you want to add more images to apply the same export settings, all you need to do is use the stored template of your export settings.
Presets can be saved once you’ve had a chance to play around with export settings.
Lightroom already has a few presets out of the box, all of which are pretty useful in their own right. These options include:
- Export to DNG
- Burn full-sized JPEGs
- For emails (Hard Drive as well)
While those presets can make exporting easier, they might not fit your workflow or your export requirements. We’ll get into how to specify your own export settings in the next section.
To create your own export preset, you’ll need to adjust your export settings and then save them into a preset. To do that, load up the Export window, select your desired export settings and click the Add button.
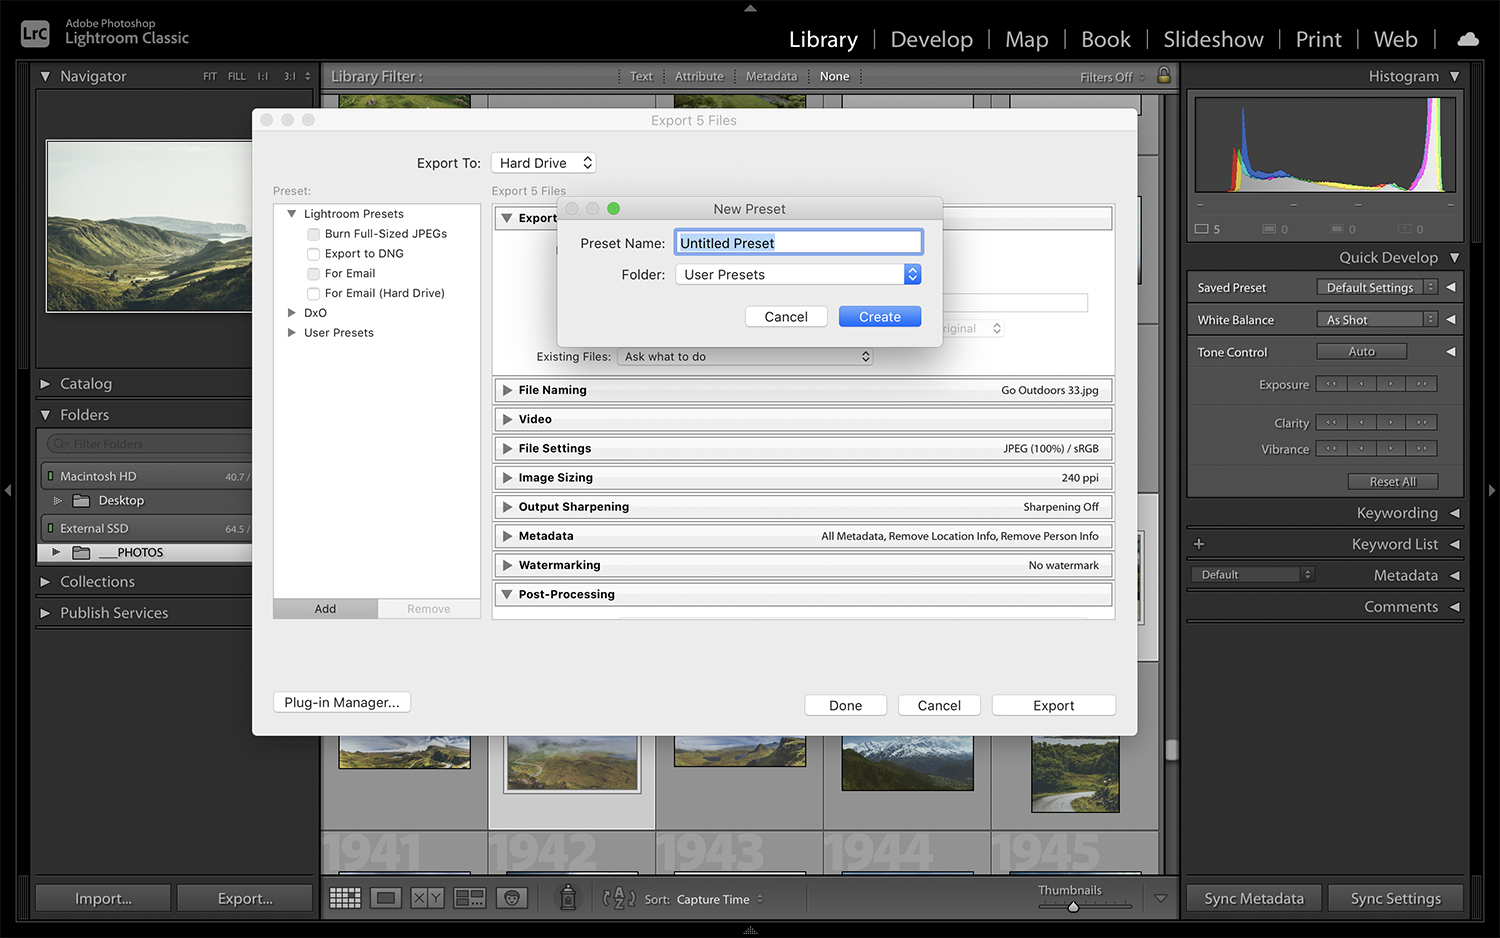
Give your preset a name and select where you’d like to save it (the User Presets folder is usually fine.) Once this is complete, your custom export preset will be available whenever you need it to make future projects much quicker to export.
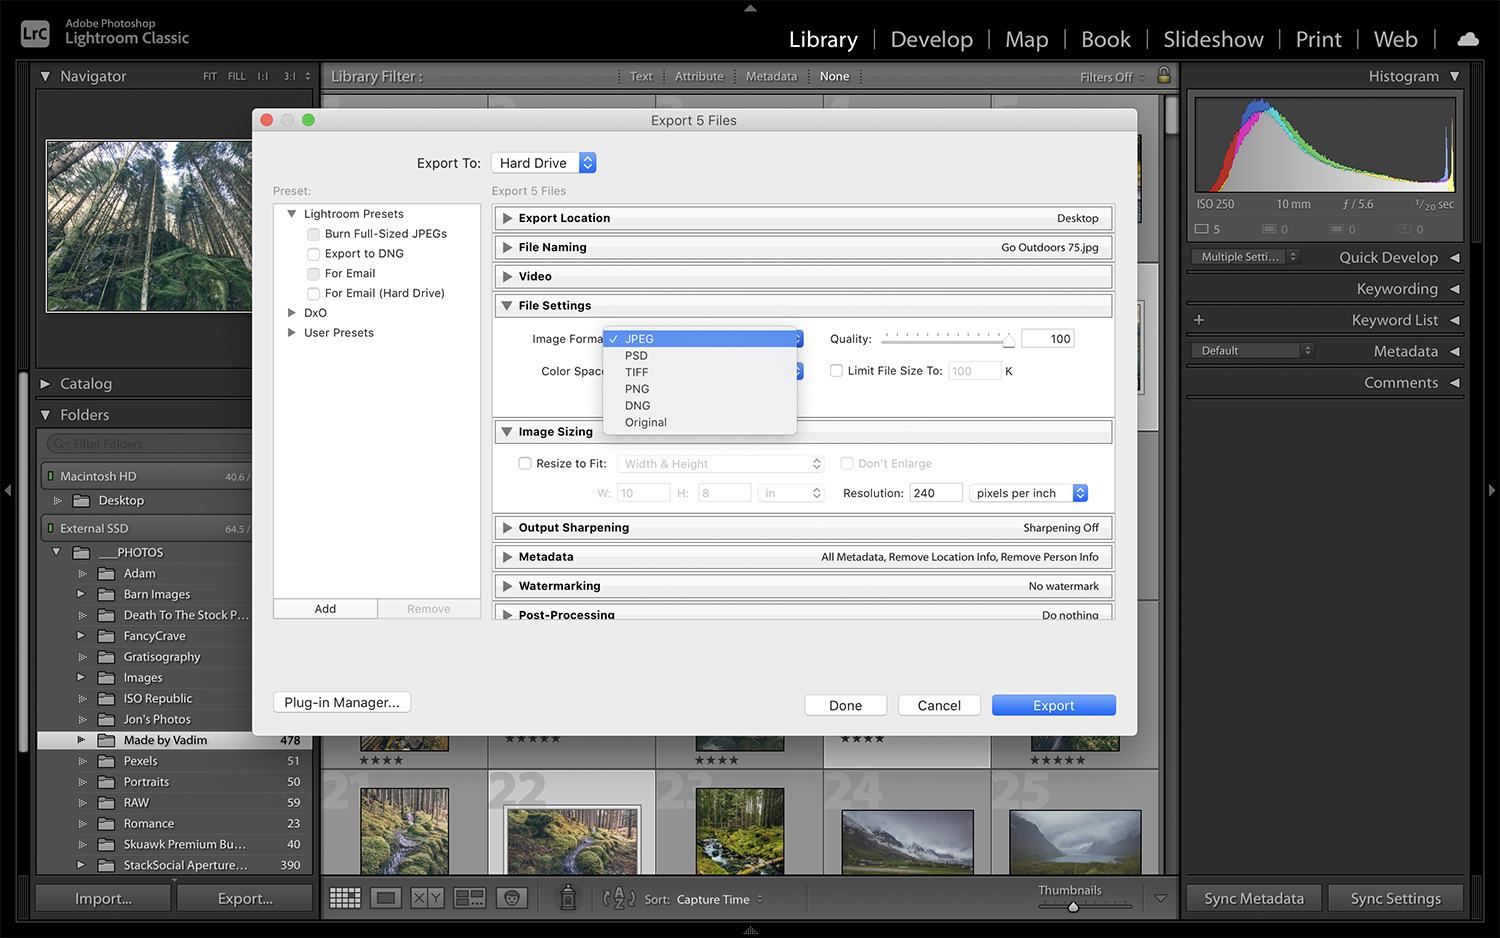
Specify Your Own Custom Export Settings
By specifying each export option individually, it is possible to control small details that the default export presets don’t offer. When you define your export options, you can use the desired settings that you feel are right for every project, every set, and every photo.
The same Lightroom Export Dialog box we’ve been working with also provides the ability to choose storage and photo related settings for exported files. You can apply these settings to your photos, including color space, quality, compatibility, compression, etc. You can even rename your images and choose to resize your images based on width, height, dimensions, or even a custom resolution.
You’ll probably have to make different export settings for different use cases or photography style. For example, if a client requests that you deliver their images at 3000×2000 resolution, you can save this as a preset. But, that might not work for your other client who needs their images to be 4000×3000. Those settings can be stored in your presets.
Catalog
There is an option in the Export Dialog Box to export and then add to your Catalog. This feature essentially re-imports your exported images into your Lightroom Classic Catalog (for further processing, organizing, etc..)
Web
Suppose your goal is to display your photos online on your portfolio, a blog, or any social media. In that case, you should opt for smaller file sizes while maintaining the best possible resolution quality.
The best format for this purpose is JPEG, specifically within an 80-100 value on the quality slider. You should also resize the photos according to the image size that you plan on posting online.
This can be set in the File Settings and Image Sizing sections of the Export window.
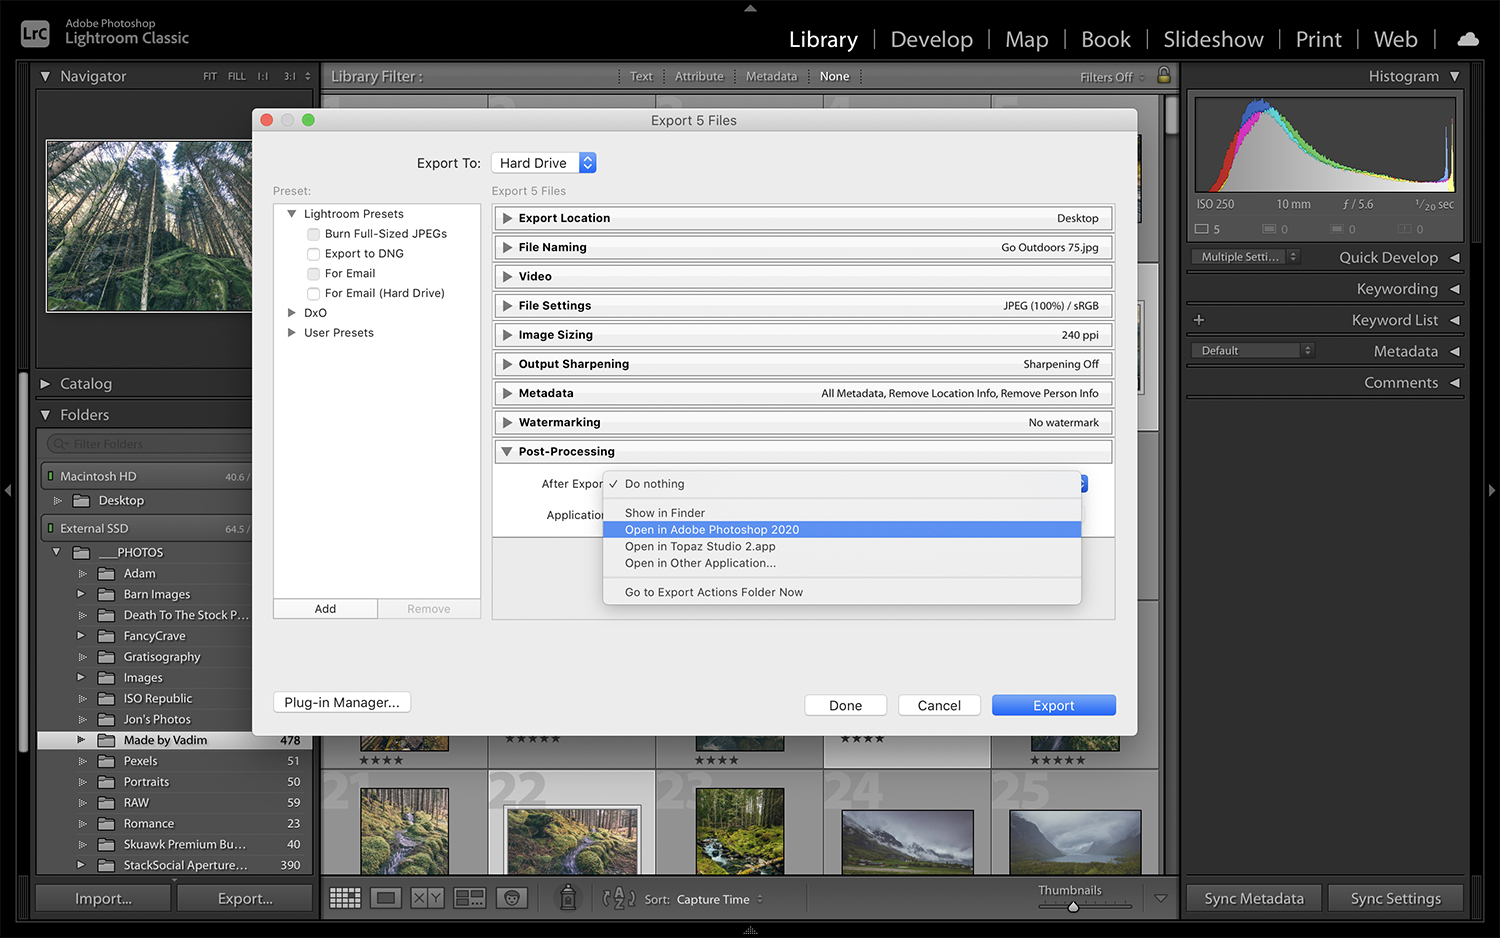
Post-Export Options and Post-Processing Tips
Once you’ve hit that glorious Export button and finally finished, you still have some great options available to you. You can use other programs to open your exported items, such as Adobe Photoshop. Using multiple platforms for editing, you’ll benefit from additional functionalities and adjustments that aren’t available in Lightroom.
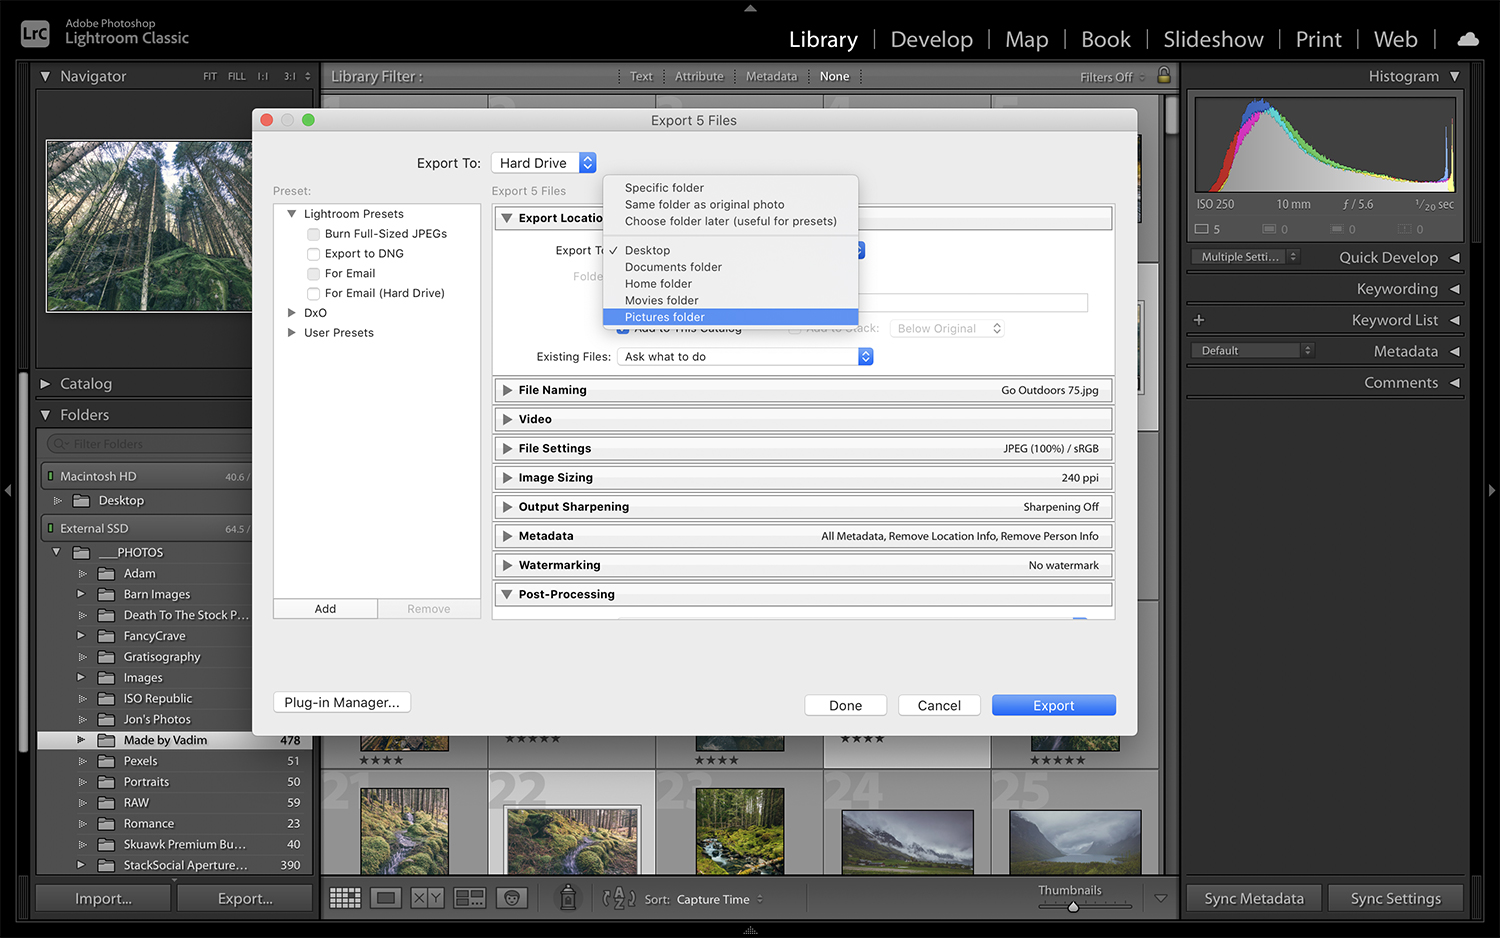
Location, Location, Location
After all of the post-processing work you’ve just completed, you should keep in mind the exact destination you’d like your photos to go into. Nobody likes hunting for their photosets because they just went with whatever obscure folder Lightroom defaulted to. You can always find your most-used destination within the Export Dialog Box, so you won’t have to worry about losing your images.
Ready to jump into Lightroom and export your photos with confidence? We hope that this guide will help you avoid any hiccups when the time comes to export your images!