If you’re someone who spends quite a lot of time editing photos on their computer, or even someone just learning to edit [1], then you’re probably aware of Adobe’s Lightroom Classic.
Although modern advancements in technology have gotten us used to lightning-fast speeds, Lightroom Classic can sometimes slow down for various reasons.
In case you’re dealing with a slow Lightroom, it can interfere with your work, which can be bothersome. Let’s look at some ways you can speed up the performance of Lightroom Classic.
1. The Obvious: Update Your Software
Keeping your software updated doesn’t just help with Lightroom Classic, but with the overall performance of your computer as well. These updates help in solving the issues you’re having with Lightroom and improves its speed.
It often does happen that updating the software doesn’t fix issues right away, which leads to users complaining about the application running slow. Still, the updates definitely help with improving stability and compatibility.

If your system is 64-bit, the Adobe installer should use the 64-bit version of Lightroom Classic by default. This action takes place when you install Lightroom Classic. If you’re using an older version of Lightroom, it might be 32-bit, but since Adobe released Lightroom 6, all versions are 64-bit.
When using Lightroom, another thing to keep in mind is to close the other programs, since Lightroom is pretty resource-intensive in itself. Defragmenting your hard disk and using the Disk Cleanup [2] on Windows, or CleanMyMac [3] on Apple computers are good options, too, because these clean up your computer and help in getting rid of the junk.
2. Check Your Hardware
Using Lightroom Classic means you have to have a relatively powerful system. Working with big, complex files entails having hardware that can take the load of Lightroom Classic. 12GB of RAM is recommended by Adobe [4] when using Lightroom Classic – of course, using just 4GB or 8GB of RAM will work, but if you’re on the market for a new computer, consider upgrading the RAM – it’s a worthy investment.
This is because the higher the RAM, the faster will be the import and export of files, and the quicker you can work with high definition images or even panoramas.
To store your files efficiently, getting a SATA hard drive will suffice. A solid-state drive (SSD) [5] is even more helpful in this regard. For those of you who want to opt for an external hard drive [6], see to it that you go for a USB-3 connection or Thunderbolt to achieve the best speed.
Remember to free up your hard drive as well. In case there’s not much free space, Lightroom Classic can tend to perform slowly. This is why keeping about 25% of it free is advisable to use Lightroom Classic and store the related files.
While possessing an integrated graphics card [7] will work just fine, but getting one just for Lightroom Classic will improve the app’s performance even more.
3. Manage Your Previews
The preview images provided by Lightroom Classic can often be the cause of it slowing down. One way to fix this is by making use of the File Handling panel.
This is located on the right of the import window, and through this, you can opt to render on the import option.
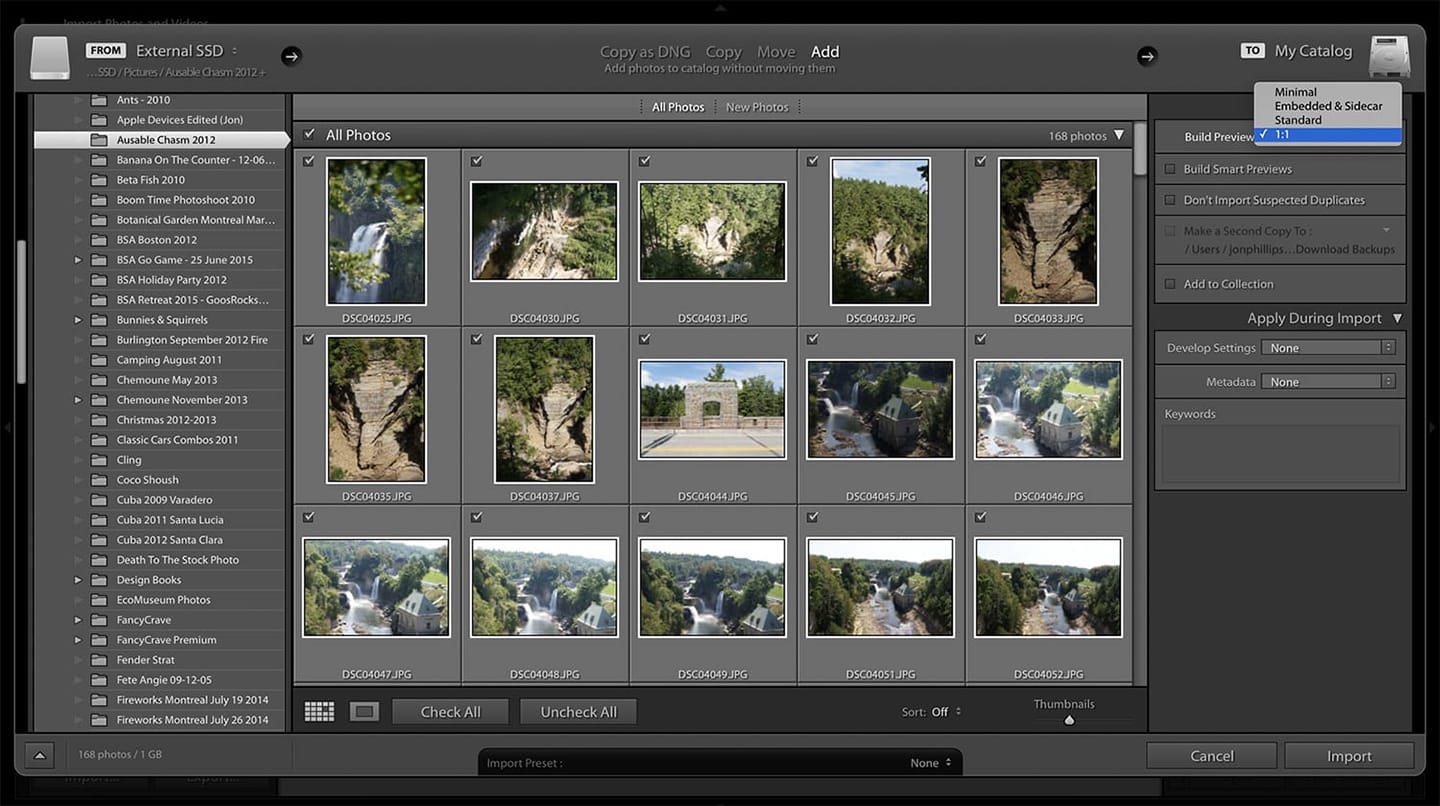
All you have to do is select the 1:1 option as the Render Preview. As you do this, the import process might slow down, but the overall performance of Lightroom Classic will surely improve.
An alternative option to this is choosing standard or minimal previews during the importation process. The 1:1 render part can be applied to the files once they’re ready to be used. This comes in especially handy when there are a lot of images you need to get imported to start working on them immediately.
Another thing you can look into is enabling Smart Previews [8] – which is a compressed DNG copy of your image and it is stored in a .lrdata file in your Lightroom Classic catalog.
4. Increase the Camera RAW Cache
When you increase the Camera RAW Cache, Lightroom Classic’s slow performance is taken care of up to an extent as well. A high-quality preview is presented to you by Lightroom whenever you’re editing or viewing an image. However, this process becomes much faster if the actual image is in the Camera RAW Cache.
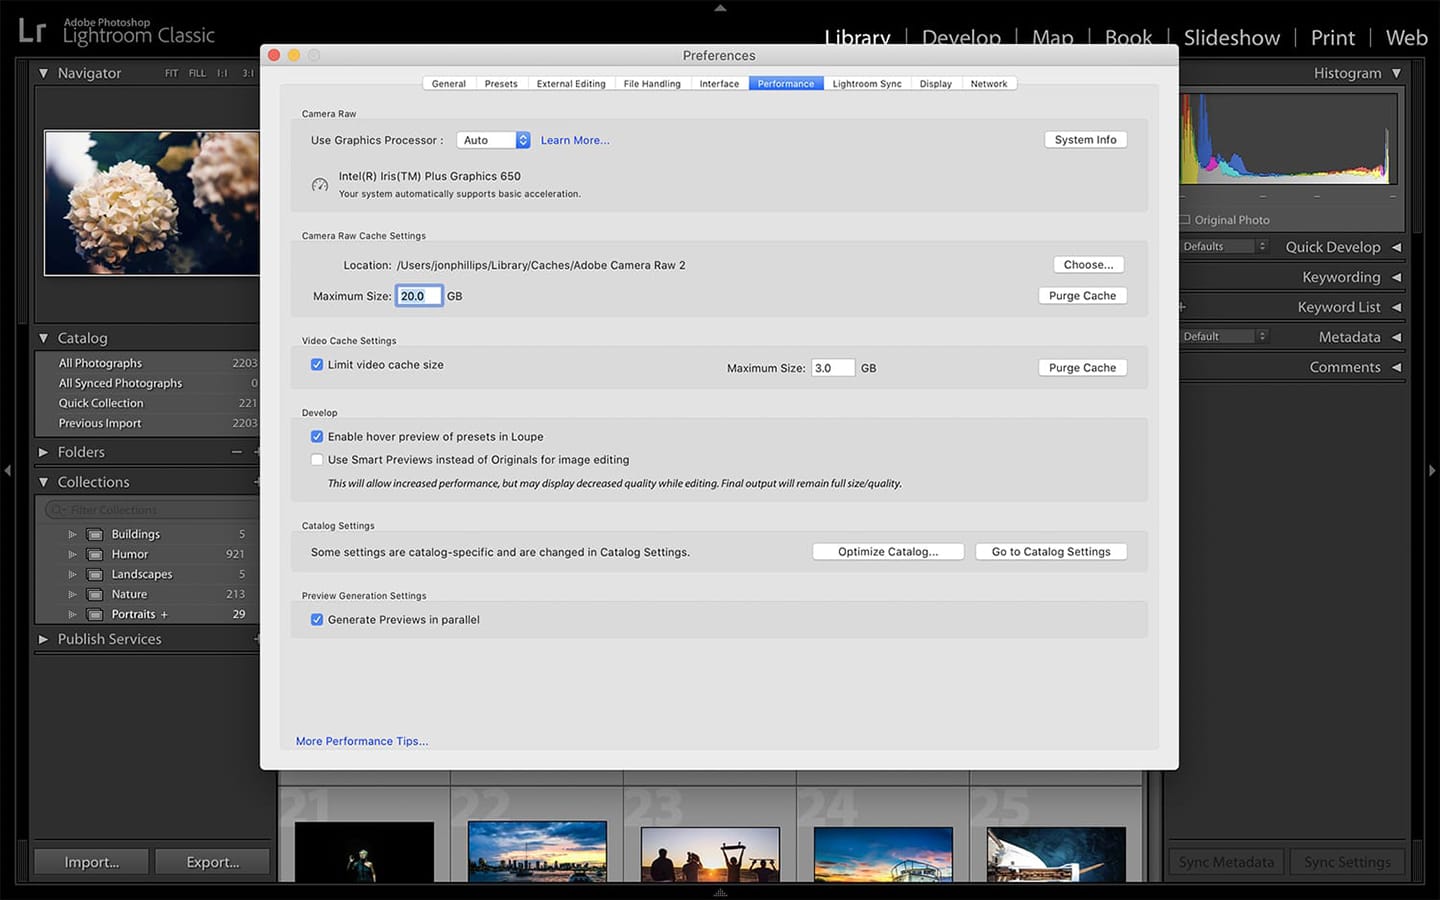
The bigger the cache is, the more storage space you have for images. Your default setting should be either 1 or 5 GB. Although, if you’re taking a bunch of images in one go, that size can be increased to 20 GB or more. Under the Performance tab in Lightroom’s settings, you can find the Camera Raw Cache Settings, and use it to change and adjust the cache size.
The location of the cache matters, too, as far as boosting the performance of Lightroom Classic is concerned. For example, whatever drive your operating system is on, try to keep your cache separate from it, such as on an internal hard drive or an external SSD drive.
5. Stay Away from the Graphics Processor
If you think that employing the Graphics Processor acceleration can speed things up for Lightroom Classic, that’s actually a common misconception.
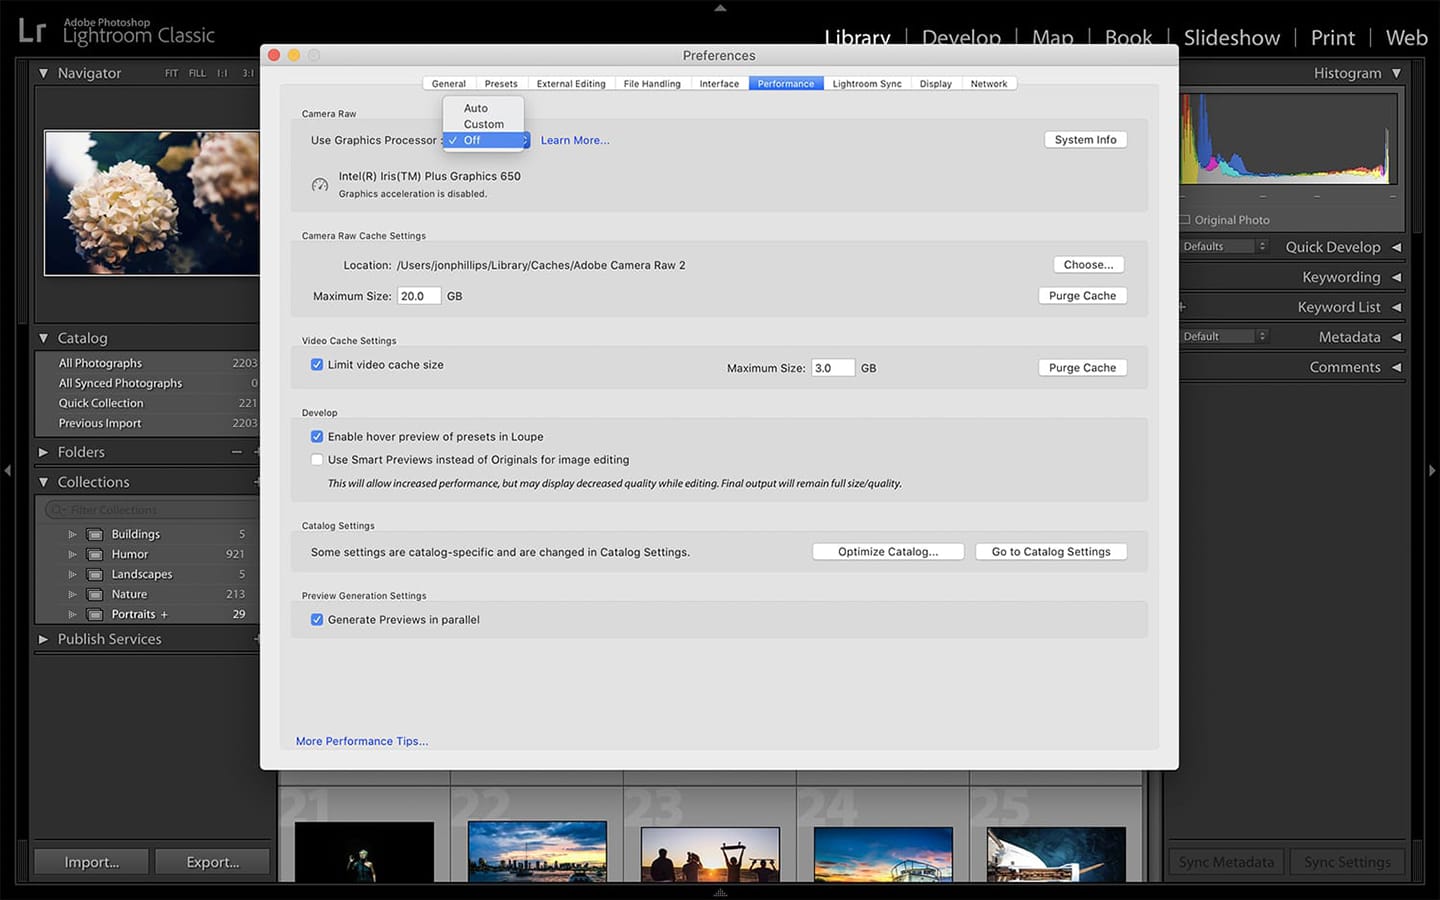
Under the Performance section of the Preferences panel, simply uncheck the Use Graphic Processor, which will help prevent a lot of glitches.
I hope you found those tips useful and that they help you get better performance when using Lightroom Classic! For even more tips and solid training material, make sure you check the next page: