The art of panning is not something that’s easy to get right. It takes practice and skill, but can produce fantastic results when done correctly. So, what is panning?
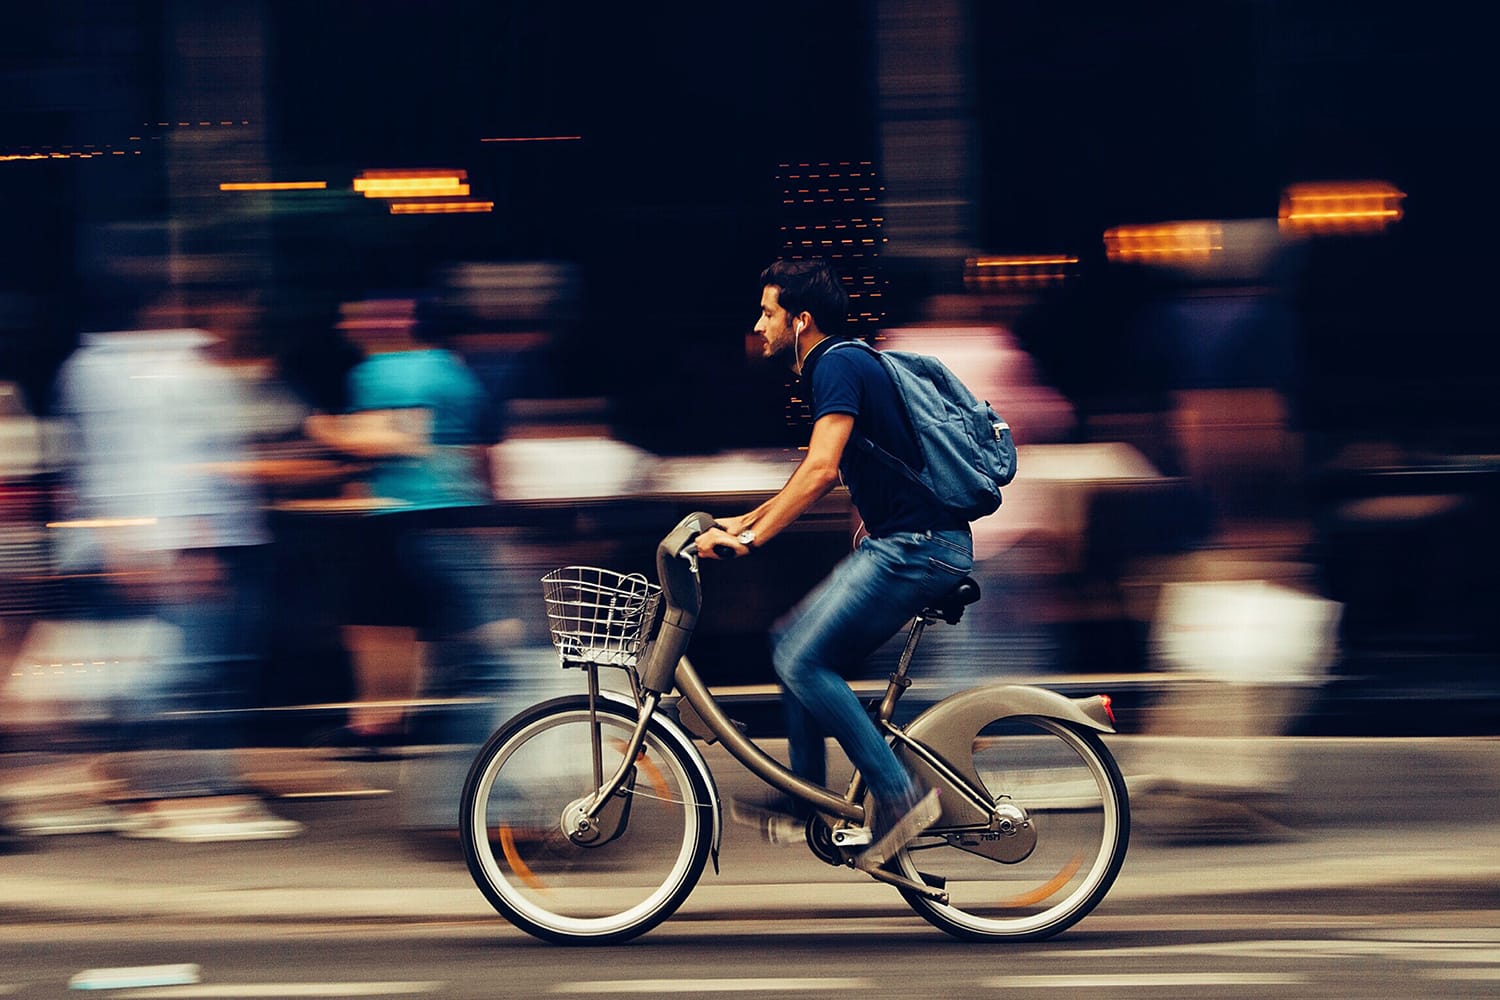
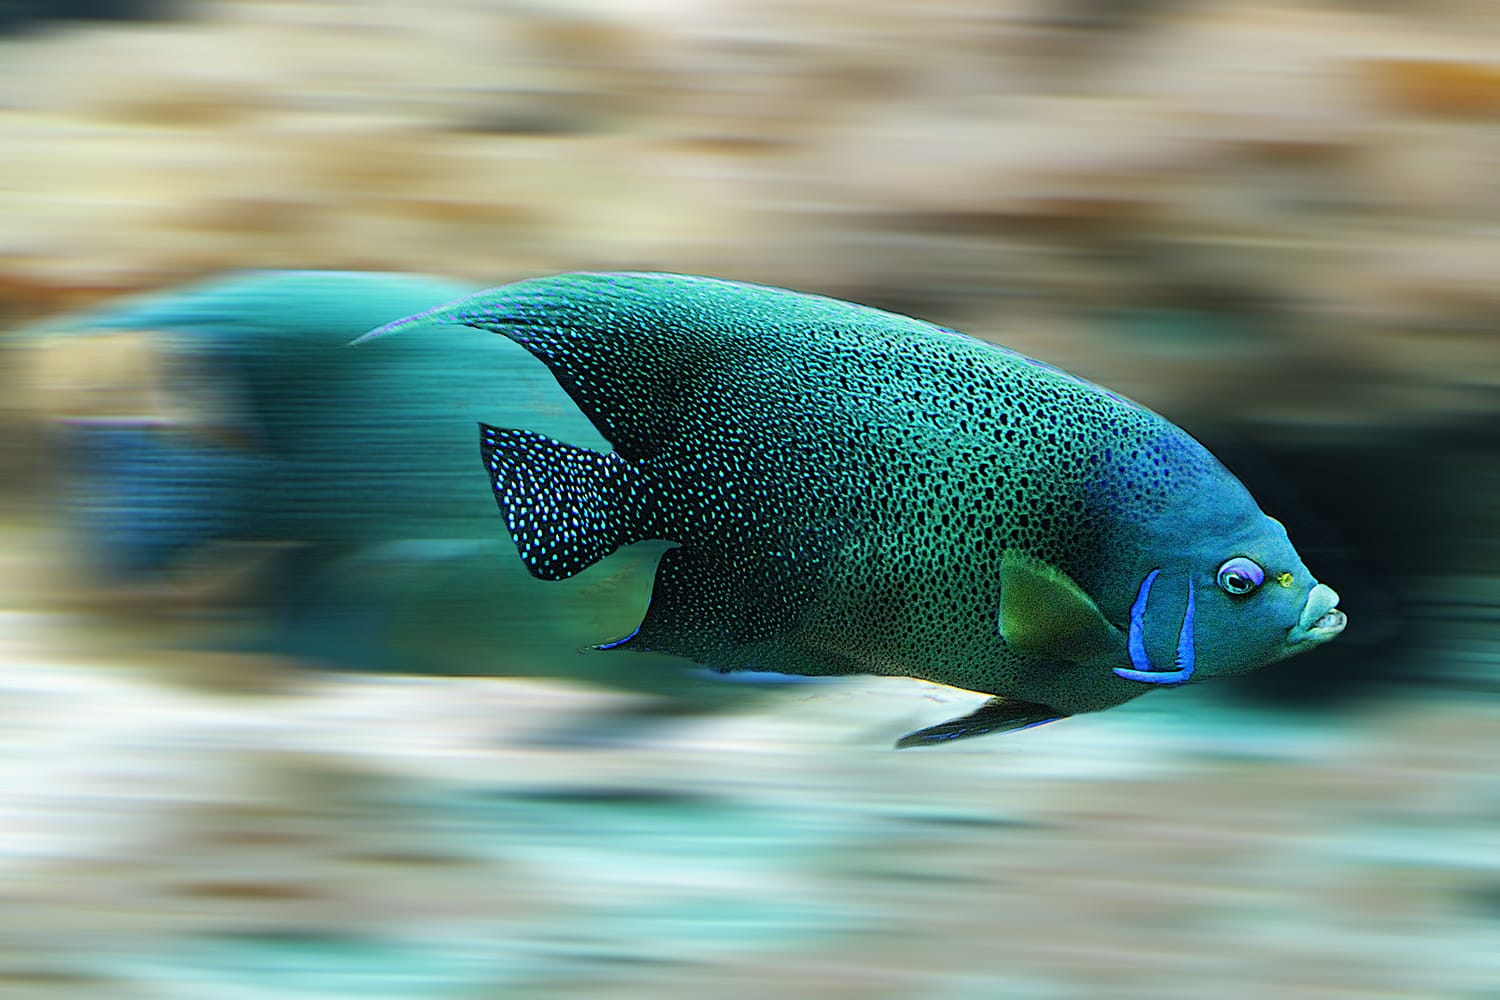
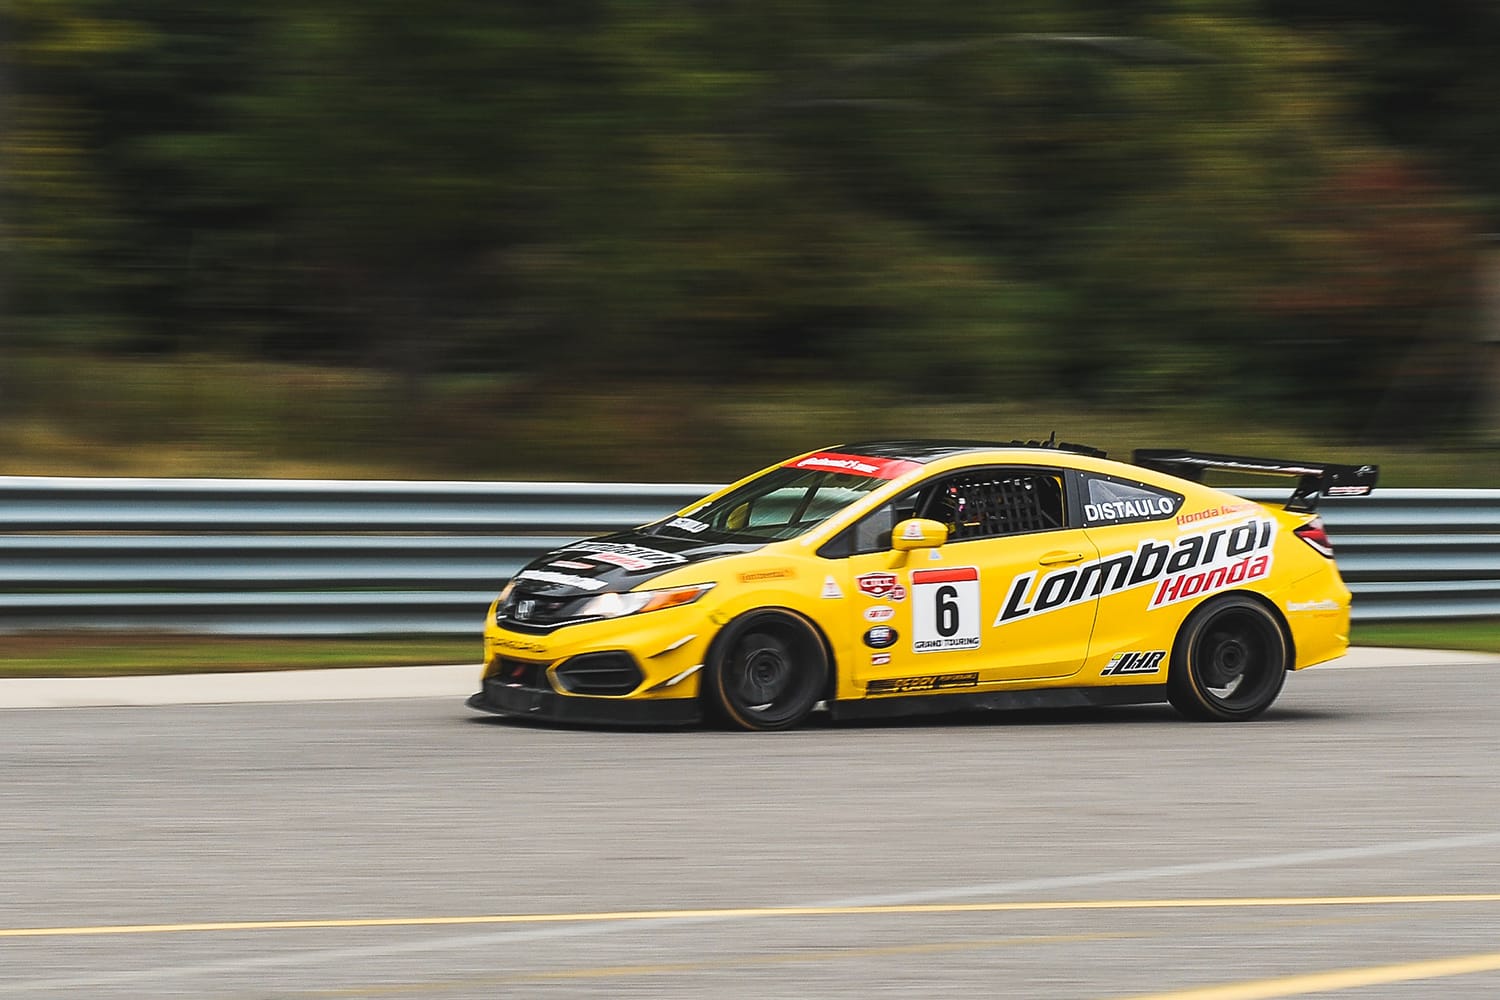
Well, essentially the basic idea is that you move your camera along in time with a moving subject (i.e. ‘pan‘ the camera). This results in a sharp subject with a blurred background. It’s a great technique for conveying movement and speed and is commonly used for photographing subjects such as racing cars and animals.
So, how do you do panning successfully? Well, for starters you need to set aside a fair amount of time to practice! Then follow these instructions:
- You need to give yourself a clear and unobstructed view of your subject. Large open spaces obviously work well, but don’t forget to take into account the background of your shot. Plainer or single coloured backgrounds work well as they won’t distract from your subject matter.
- When starting out with panning, set yourself up so that you are parallel to the path of your subject. This makes it easier to focus.
- As your subject starts to approach track it smoothly with your camera by panning it round to follow the movement. This is a tricky thing to get right and it definitely takes practice to hold your camera steady and move in a smooth line. If you are using a longer lens or find it hard to hold your hands steady, a tripod with a swivelling head will make things far easier.
- Once you’ve released the shutter keep panning with the subject until after the shot has been taken. This is to ensure that you have consistent and smooth motion blur from start to finish.
A Note on Focusing
Most modern DSLRs have a ‘tracking‘ autofocus mode, whereby you focus the camera on a subject and, as you move with the subject, the camera will keep refocusing automatically. If your camera’s autofocus is fast enough, this is a really helpful way to achieve great panning results. Alternatively, if your camera can’t keep up with the subject, you’ll need to pre-focus your camera upon a designated spot and wait for your subject to enter the frame.
Whichever method you use, it’s essential to get into the habit of manually choosing your focus point. DSLR cameras [1] can have anything from 3 AF-points on really old models, up to 39 or 51-points (or more!) on modern equivalents. But however many focal points your camera has, it’s important to choose your own so that you can ensure the camera is concentrating on your moving subject and not a distracting background object by mistake.
Choosing a Suitable Shutter Speed
Panning requires forethought when it comes to picking a suitable shutter speed. There are a number of variations on a theme that can produce interesting results However! My favourite types of panning shots are ones that choose a fast enough shutter speed to freeze your subject, whilst still being slow enough to produce motion blur in the background.
I would recommend starting out by using 1/60 to 1/250 sec for fast moving subjects (for example racing cars) and 1/30 to 1/60 sec for slightly slower subjects such as animals and bikes. Do bear in mind though that if you use a shutter speed slower than 1/60 sec you run the risk of slight blur in your subjects.
Tips for Improving Your Panning Shots
- Take your shot when your subject is directly in front of you. If you shoot when your subject is angled toward or away from you, the perspective will change slightly during the exposure, thus producing an unsharp image.
- Try using a monopod [2]. If you can’t run towards a tripod with a swivelling head (these can be very pricey), you could use a monopod instead. This will stop the camera from shaking up and down.
- Use a flash on rear-curtain sync [3] to help freeze the subject. This will also help if you are using a slower shutter speed, as the flash will help to freeze the subject. Using the flash on rear-curtain sync also means that the flash won’t detract from the existing ambient light.
- Use your focus point to track your image. The focus points are handy reference points when you’re panning. Position the one you are using over a fixed point on your subject and ensure it stays in the same place as you pan.
- Try shooting at an angle. Tilting the camera slightly can make your panning shots look more dramatic. Remember though to pan with your subject, rather than with the orientation of your camera.
- Focus small! Focus on a small party of your subject (such as an animal’s eye) and keep your focus on this point as you pan. By focusing specifically, you’ll get far more shots that you want to keep.
- Lastly, don’t rely on the LCD screen. The quality of the screens means that you can’t see the effects of panning on it. So shots will often look sharp on the screen when, in reality, you will have captured an effective panning shot.
In conclusion
Panning can be a frustrating business! It takes practice to perfect and even us pros can’t guarantee that every shot we take will be perfect! Remember that the technique means that you are likely to have a little bit of motion blur in your subject and this isn’t a bad thing – it merely helps to convey a sense of movement.
If you want to practice panning extensively, the easiest place to go is to a busy road, where you’ll have a never-ending supply of cars! Whilst frustrating, when you perfect panning the results will be well worth all the effort you’ve put in.