Most photographers use some photo editing software for post-processing their images. Adobe Photoshop is one of the most popular photo editing tools out there, and it’s the preferred choice for many photographers.
But, let’s not kid ourselves, Adobe Photoshop can be a bit tricky when it comes to creating an efficient post-processing workflow [1], and it can be a little harder to get started with it than Lightroom Classic [2], for example. With that said, let’s look at some practical and actionable tips and tricks that will help you use Photoshop’s features more efficiently and accurately. Let’s dive in!
Learn Keyboard Shortcuts
By far, learning keyboard shortcuts or hotkeys is the fastest way to speed up your photo editing process. You can access most of Photoshop’s tools by pressing a key or a series of keys together without using the mouse.
It eliminates the hassle of having to dig through different tabs and menus to do a task. Putting aside some time to learn and practice all the keyboard shortcuts that Photoshop offers is a fair trade for the efficiency you get in return. Remember that time saved during the editing process often equates to money saved.
Actions
Once you start learning post-processing, you’ll certainly repeat similar tasks multiple times. For instance, duplicating or renaming a layer, activating a blending mode, and applying a certain filer can add up and make your editing session longer than it needs to. After all, the more time spent at the computer, the less you’re spending out there shooting.
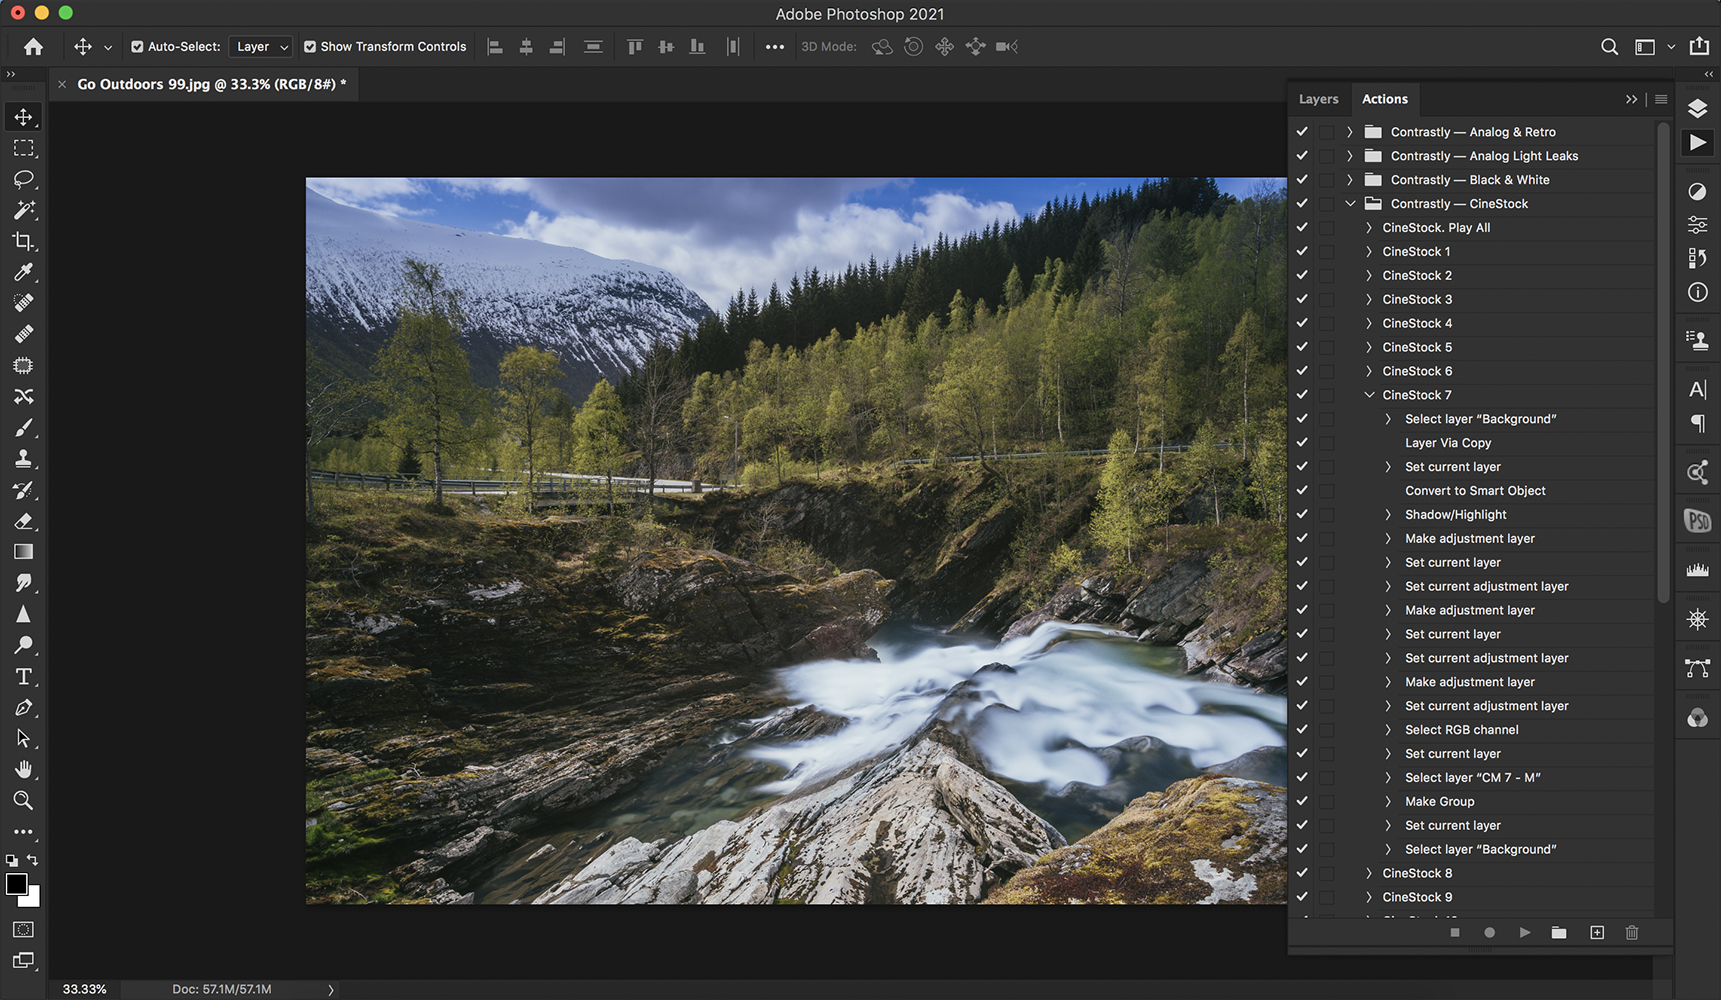
Instead of repeating the same steps all the time, create an action instead. A Photoshop action is essentially a file with a series of pre-recorded steps that you can recall at the press of a button.
If there is one thing that can really speed up your editing workflow, it’s Photoshop actions [3]. They’re a no brainer.
Batch Resize Photos
Resizing photos is one of the most common things that almost all photographers do.
If you are not familiar with batch resizing, you’re doing it wrong. Resizing individual photos can add hours and hours of work that you could save by applying a simple action to a large batch of images.
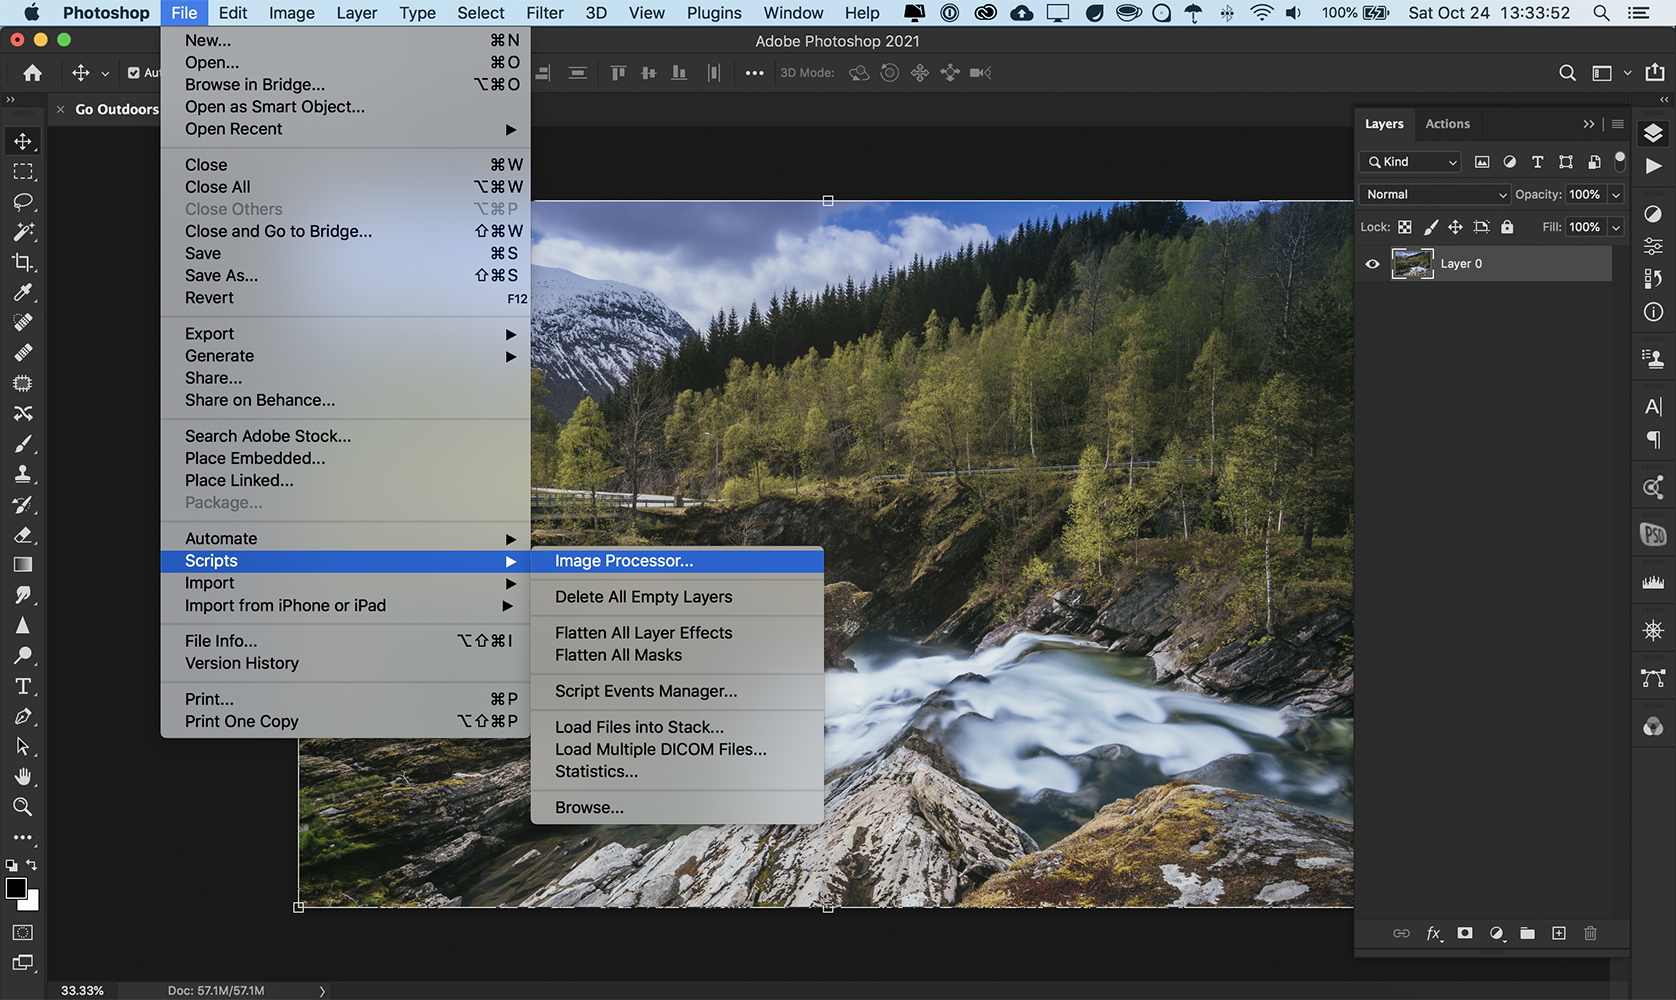
You’ll need to use a script – but don’t worry, it’s not as difficult as it might sound.
First, navigate to the “File” menu, then look for the “Script” menu. You’ll then find the “Image Processor,” which will further have a few options.
You can easily run the script on all of the photos you have currently opened, or you can apply the script to any of the folders. Photoshop also allows you to select the exact folder location you want to save the resized photos.
Photoshop Layers Organization
If your photoshop layers are organized, it will save you time in the long run, although keeping all of them organized can take some time, so it’s a bit of a trade off.
I personally prefer to always name my layers properly because it allows me to navigate the exact layer I want to work on without having to look up each layer separately. You can easily rename any layer by going to the Layers panel and double-clicking the layer’s text. The Layers panel can get out of hand very quickly. But, if you always name your layers right away, the whole process will soon become second nature, and you’ll thank yourself later on.
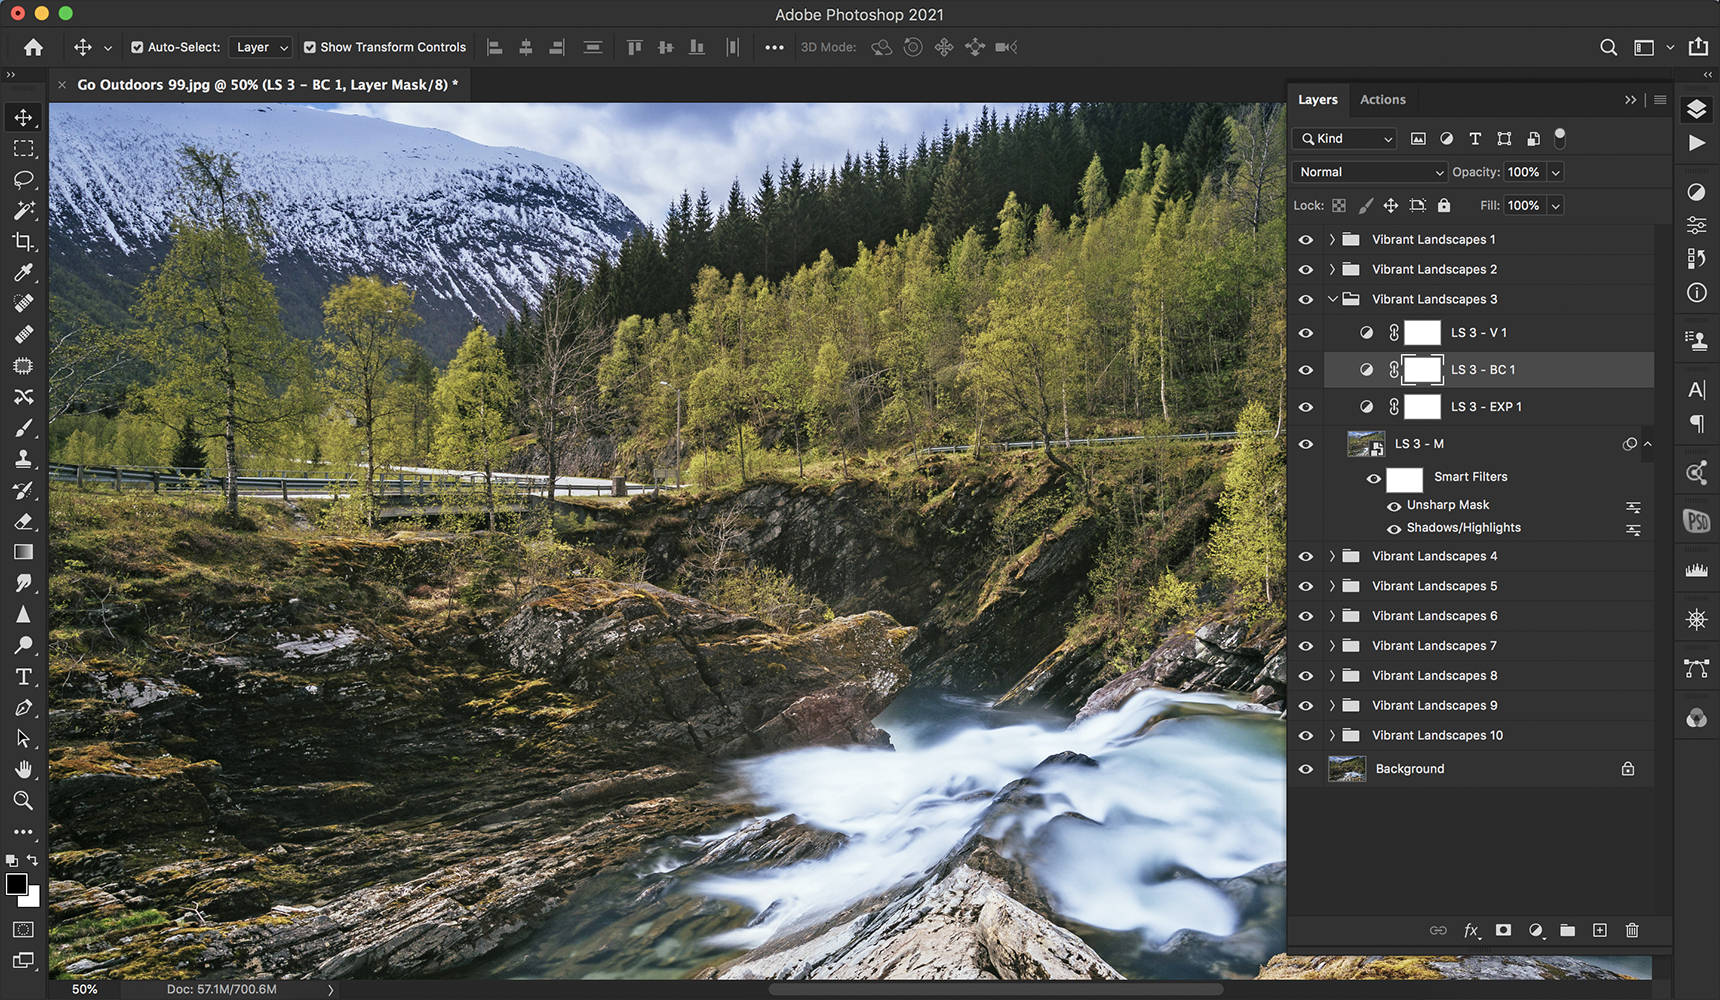
Photoshop also allows you to create separate groups of a set of different layers. All you need to do is select the layers you want in a certain group, right-click them and click on “Group from Layers.” If you got a good handle on keyboard shortcuts (which you should; see the first point in this article), navigating between layers and groups should be a breeze.
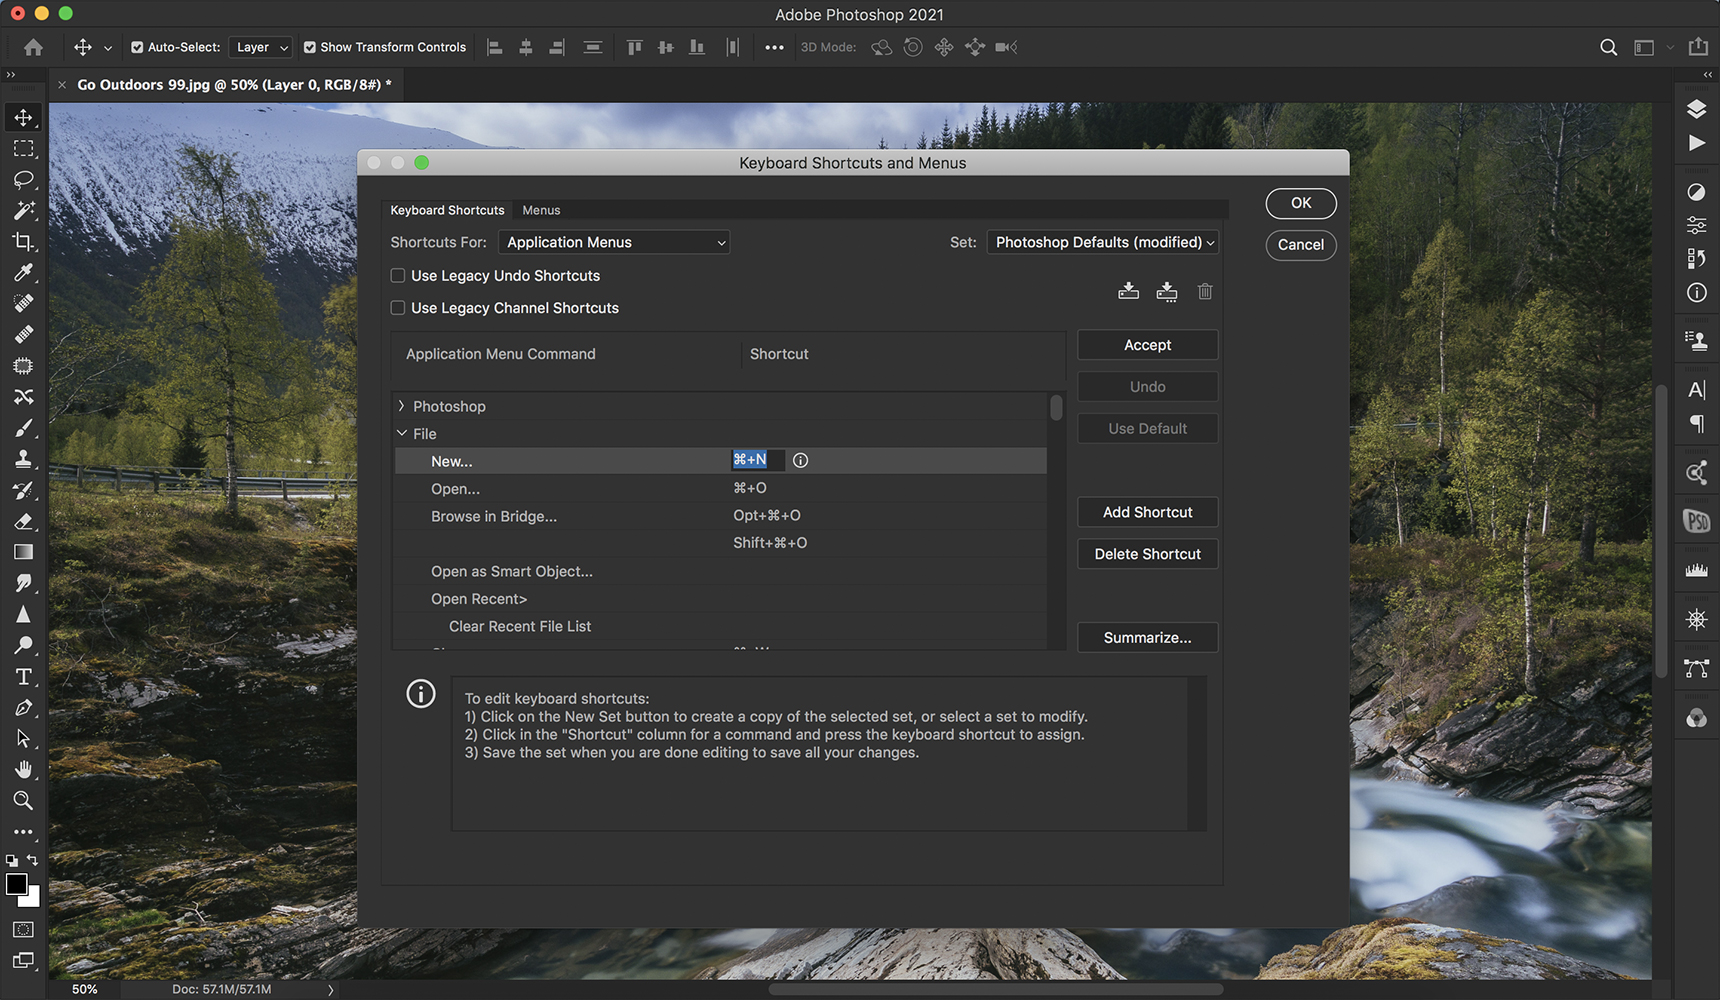
Menu Customization
Customizing menus is one of my favorite functionalities that Photoshop offers. Not only does it allow you to get to a specific menu very quickly, but you can also rearrange the panels. Photoshop [4] also allows you to hide specific items that you don’t use, and you can also color code the ones you use the most.

It might not save you quite as much time as the shortcuts or actions can, but you still won’t have to go through all the menus to find the one tool you need.
All you have to do is to go to the “Window” tab, then “Workspace” to find the “Keyboard shortcuts and Menus” option. It allows you to alter any menu that you want and add custom keyboard shortcuts to be more accessible to you while you work.
Bear in mind that if you change the default keyboard shortcuts, you’re on your own. The default shortcuts that come with Photoshop have become a standard. So, I advise you to learn the built-in ones rather than changing them.
Conclusion
Once you start learning the basics of Photoshop, your efficiency will improve. I hope these tips and tricks will allow you to choose the functionalities that work the best to speed up your workflow.