For sky watchers, or those who would like to witness an incredible and potentially once-in-a-lifetime event, a total solar eclipse is especially spectacular. A solar eclipse, for many, is life-changing, and could easily prove to be one of the most amazing sights that many will ever see in their lifetime.
On August 21, 2017, one such solar eclipse will be taking place in the U.S. This eclipse – that many have dubbed the “Great American Solar Eclipse” – will allow sky watchers across the U.S. to see the sun disappear behind the moon, resulting in near-dark conditions for those who are in the direct path of the shadow, or in the path of totality.
Elsewhere, just outside of the path of totality, a partial eclipse will still be able to be seen.
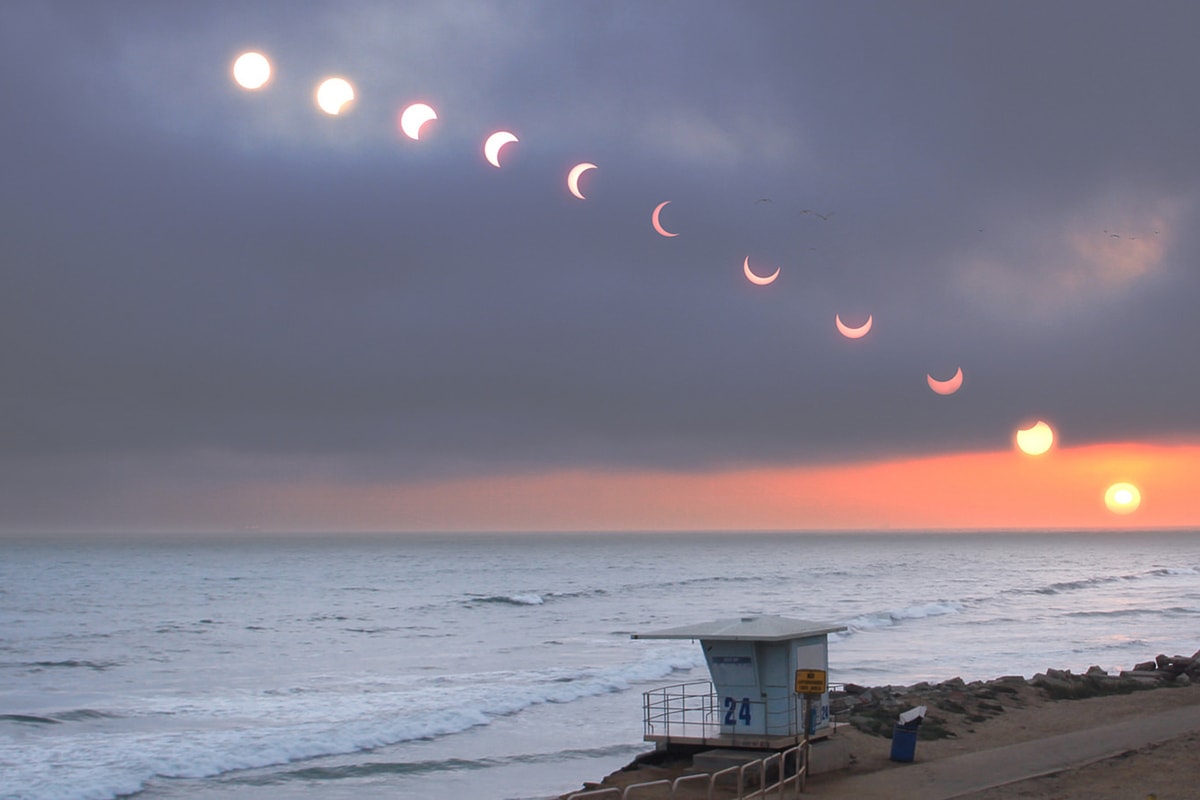
photo by jimnista [1]
While two to five solar eclipses, on average, occur each year, total eclipses are rarer, happening just once about every 18 months. Oftentimes, though, these eclipses take place in faraway or remote areas, so having an eclipse that’s visible across the U.S., and one that will be able to be seen by so many, is what makes this one so special.
If you’re hoping to see this great total eclipse, or, even if you’re planning to watch the partial eclipse, there’s a good chance that you’ll want to be there, camera ready, to capture this spectacular event. Of course, as rare as this opportunity is, you’ll want to make sure you’re prepared! If you’re looking for some tips on capturing this amazing event.
Here are a few things that you should know about photographing solar eclipses.
Where Will It Be?
First of all, you’ll want to know where, exactly this eclipse can be seen. Keep in mind that this total eclipse will only be visible along a relatively narrow path, about 70 miles wide, stretching from Oregon to South Carolina. It will pass through Oregon first and then Idaho, Wyoming, Nebraska, Kansas, Missouri, Illinois, Kentucky, Tennessee, Georgia, North Carolina, and, finally South Carolina.
Have a look at this helpful state-by-state guide [2] to see which cities and areas will fall within the path of totality. If you’re looking for an ideal location for capturing this eclipse, it’s worth bearing in mind that Grand Teton National Park is expected to be one of the best places in the entire country to for viewing this event [3]. The park will experience 2 minutes 20 seconds of totality at about 11:35 am. Of course, this is weather permitting. It’s also worth noting that your camera will be pointed at the sky, which means that your surroundings are relatively irrelevant from a photographic perspective, unless you’re planning to incorporate some of your environment into the shot.
If you’re planning to be in position to capture this event, be sure to book early. People will be coming from far and wide to view the eclipse, with many making arrangements months, or even years, in advance. You’ll also want to ensure that you’re in the right area and ready for action, as eclipses are fleeting, and you will have a brief few minutes to capture it.
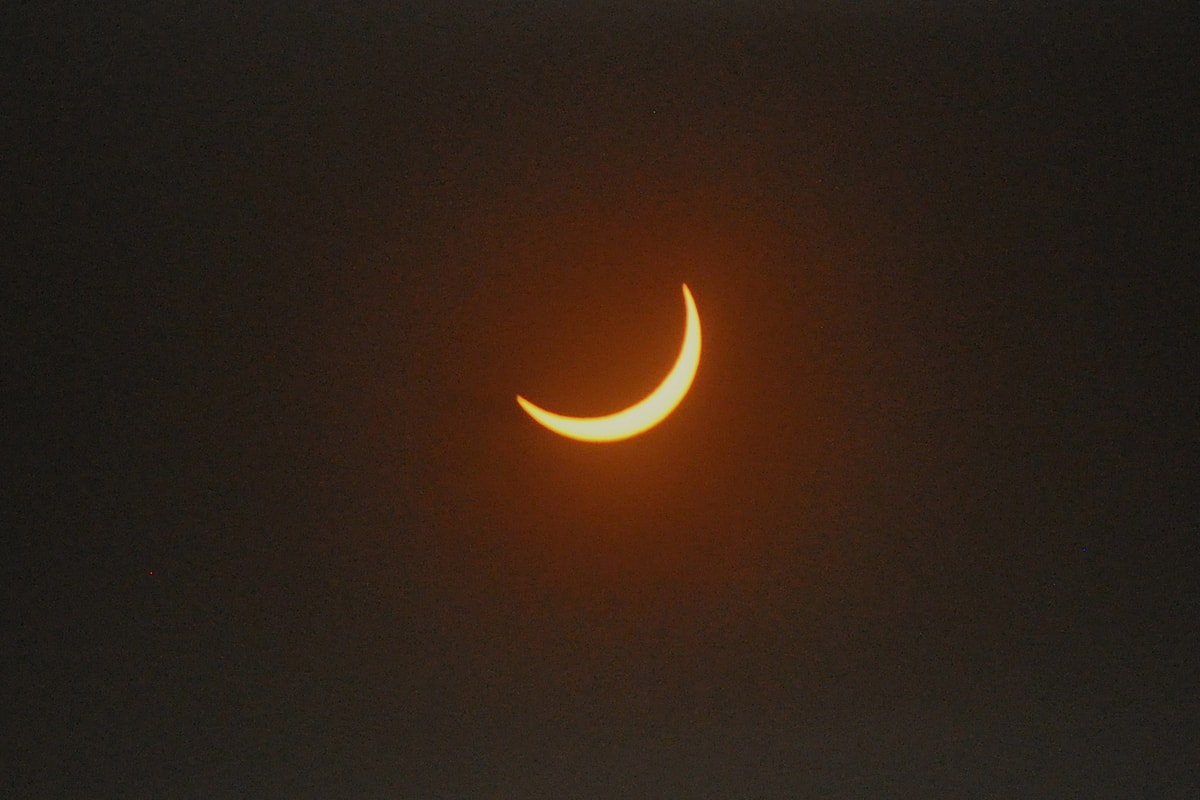
photo by NASA Goddard Space Flight Center [4]
Safety First
Before you get started, it is important to remember that photographing an eclipse can be dangerous if not done correctly. Looking directly at the sun can be harmful to your eyes as well as to your camera, even if the sun is partially obscured, so it is important that you have eye protection, as well as the right filters for protection from the sun’s powerful rays.
- Never look directly at the sun: Sunglasses are not adequate! You’ll need a pair of solar viewing glasses [5]; protective shades that will allow you to look directly at the sun. The only safe time to view the sun is during the totality phase.
- Never point a camera at the sun: Unless you are using a certified solar filter [6]. Without a solar filter, your lens will magnify the intensity of the sun, causing potentially serious damage to your camera.
- Never look through the viewfinder of a camera that’s pointed at the sun: Always wear solar viewing glasses, or to be extra safe, use the LCD screen. The optical viewfinder will not protect your eyes from damage.
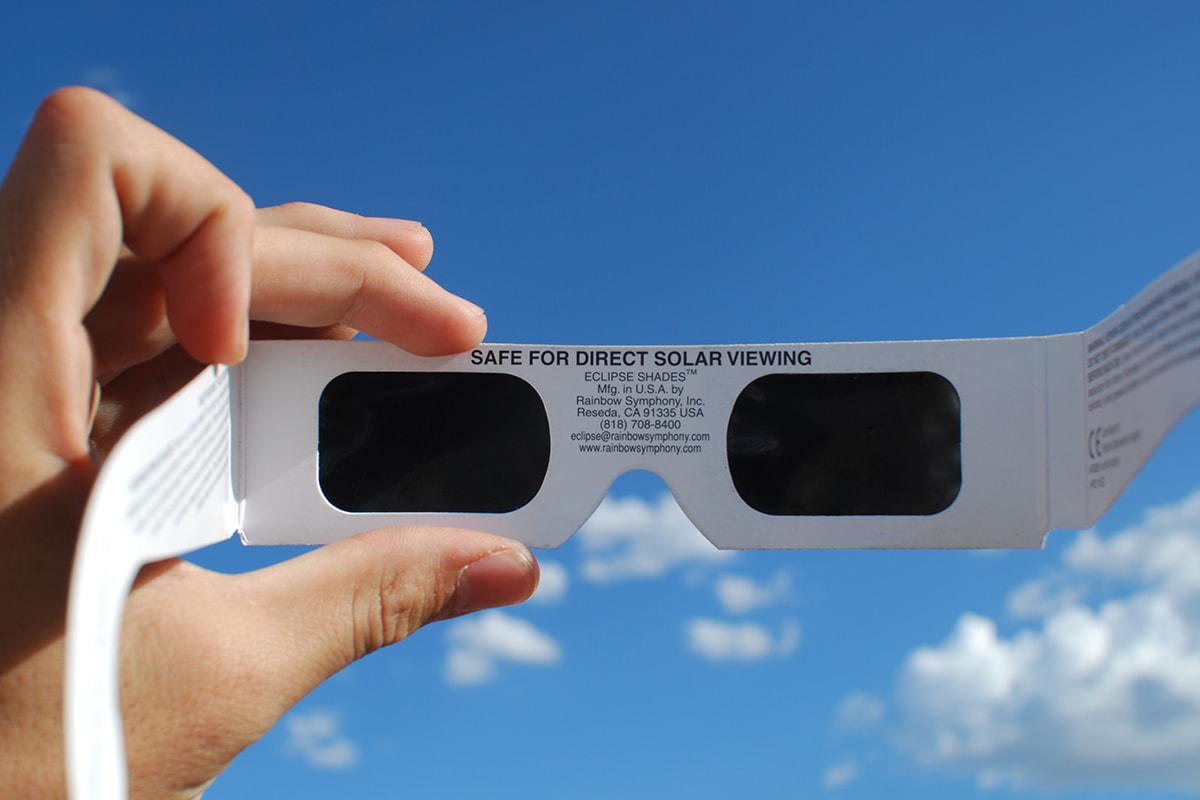
photo by Kevin Hale
Bring the Right Camera Gear
When it comes to photographing an eclipse, your camera gear matters. You may wait your entire life to witness an eclipse, but you will only have a short window of time to capture it. Make the most of your opportunity be having the right gear to capture the shot.
- Tripod [7]: You’ll be shooting in varied lighting conditions, from bright sun to complete darkness. Your shutter speeds could vary, and you’ll want a solid surface for your camera to reduce blur.
- Shutter Release: A remote shutter release [8] will be helpful. You’ll also want to turn off any image stabilization features on your camera, and use mirror lock-up to minimize vibrations.
- Lens: Ideally, you’ll want to use a decent sized telephoto [9] to capture images of the eclipse. A lens with a focal length of at least 300mm is ideal, but keep in mind that longer the focal length, the larger the images of the sun you’ll be able to take. If you don’t have a telephoto, consider renting one.
- A Solar Filter: Since you are taking pictures of the sun, a solar filter [10] is going to be an important part of your setup. Make sure you choose a properly designated solar filter. These filters are specially constructed to sufficiently dim the sunlight and can help to protect your equipment from non-visible IR and UV radiation.
- Memory Cards: Make sure you bring enough memory cards [11] and have plenty of room for RAW images.
- Camera Settings: Your camera settings are important – yet quite simple. Keep in mind that photographing the partial phase is quite different from the totality phase, where the sun will be largely obscured by the moon, and will require a slightly different approach.
Photographing the Partial Phase
The best way to determine your ideal exposure for the partial phase of the eclipse is by doing a test run on the sun before the eclipse.
Using a solar filter and solar viewing glasses, start by setting your camera on a tripod then manually focusing the camera to infinity. Set your ISO to 100, or the lowest setting. You’ll want to shoot the sun at an aperture between f/8 and f/16, and try different shutter speeds between 1/4000 second to 1/30 second. Check your exposures, and then see which combination of shutter speed and aperture is ideal. You can then use those settings to photograph the partial phases of the solar eclipse.
You can also bracket your exposures during the eclipse, to ensure that you capture some images with an ideal exposure. If the actual eclipse occurs on a hazy day, and your test run was performed during full sun, it’s a good idea to consider increasing the bracket of exposures by an additional f/stop.
Finally, make sure you shoot in RAW [12] to ensure that you’ll be able to savage your photos later on if the exposure’s a bit off.
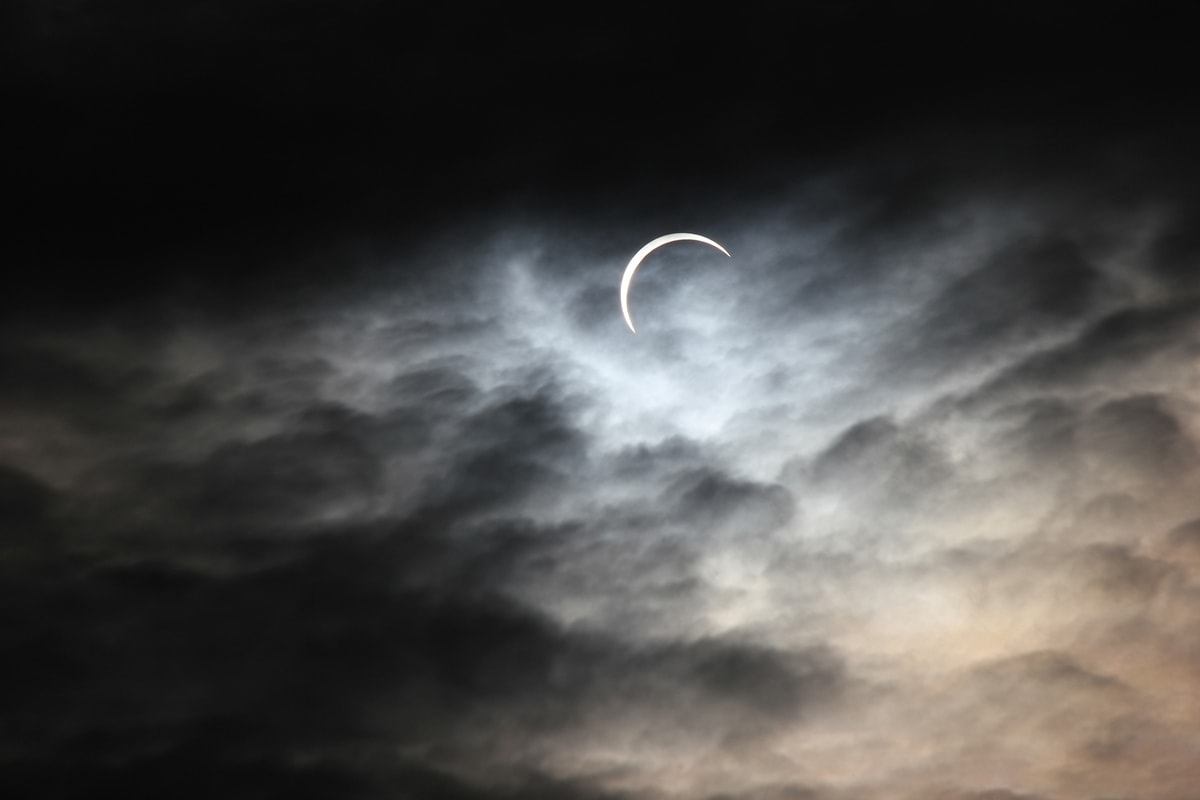
photo by Owen Fuller [13]
Photographing the Totality Phase
When photographing the totality phase, where the sun is almost completely blocked by the moon, the challenge is capturing this fleeting phenomenon. This is the most exciting part of the eclipse, since, for a brief moment, the sun’s white corona, or, band of light is visible.
All solar filters must be removed at this stage, the sun’s corona has a fainter surface brightness, and filters will completely block the view. You can also remove your eye protection at this time, since you can safely view a totally eclipsed sun.
Since you’ll be unable to capture the full dynamic range of the eclipsed sun with one exposure, your best option is to choose an aperture, and then bracket over a range of shutter speeds from about 1/1000 second to 1 second. Make sure you practice adjusting your exposures ahead of time, so you’re able to work quickly when capturing the eclipse itself.
Determine What You Will Photograph
You’ll want to decide whether you’re going to capture the entire eclipse, or just the period of totality, where the moon will block out most of the sun resulting in a “ring of fire.” You may want to consider documenting the entire eclipse, since you’ll have images of all of the stages, from partial to totality. This will give you the option to combine the images later on if you choose to do so, to create a sequence.

image by Nicholas Jones [14]
Composition
While in most situations, composition matters, an eclipse is an exception. Unless you’re going to include some foreground, you’ll want to focus solely on the sun and sky. Instead, pay attention to your settings and exposure, and capturing the eclipse effectively. You can always crop your images later on.
Practice, Practice, Practice
Make sure you practice ahead of time, when the sky is clear, with the sun. This will give you invaluable practice that will prove to be helpful when you’re capturing the real event.
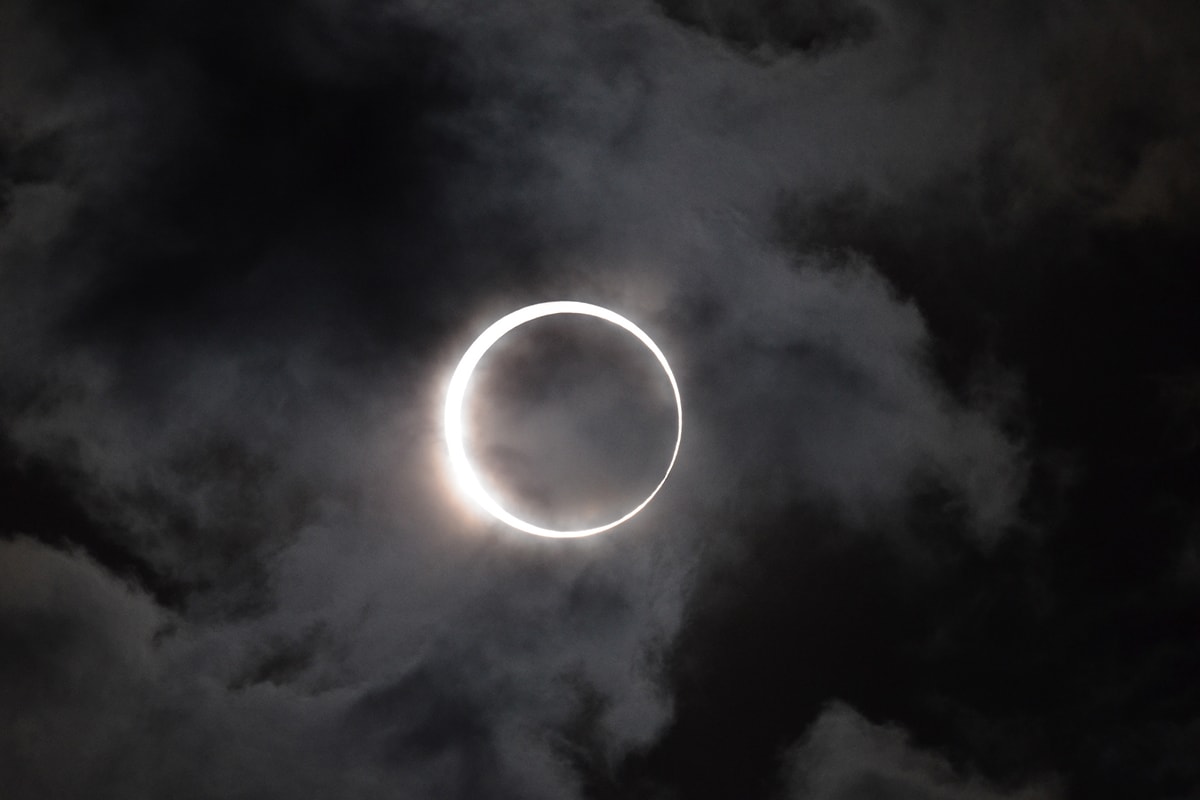
photo by Takeshi Kubok [4]
Finally, while a solar eclipse is an exciting event and an amazing opportunity to photograph, keep in mind that experiencing the eclipse is important too. The last thing you’d want is to have to spend all of your time messing around with camera settings, and seeing the eclipse through the viewfinder, without being able to see or appreciate it fully, so make sure you take a few seconds to step back, and watch the eclipse. It’s often been said that experiencing the eclipse firsthand is far more amazing that looking at images of it, so make sure you’re fully present and able to witness this spectacular event for yourself!
Are you planning to see the August 21, 2017 eclipse? Where are you going to view it from? Let us know on Twitter [15] or Facebook [16]!