Some Useful Ingredients of Mouthwatering Food Photography

Making food photography is definitely an engaging process. But in many cases it turns to be a rather challenging task requiring a lot of creativity, finesse and concentration, since its main idea is to create really vivid, impressive and mouthwatering images that can make anyone zealous to try the food presented on them.
With my solid experience in shooting food and drinks, I’d like to share some tips that hopefully will come useful, whether you are going to make appetizing photos for food magazines, recipe-books, restaurant booklets, etc. or just for your personal Instagram account.
Lighting is Everything
Choosing the right lighting is the key part of success in any photography project. Before setting a light, color and shadow balance, think out thoroughly the composition you are going to create as well as the mood you wish to convey around any particular food.
- As an ardent adherer of everything natural, I suggest to use organic, mild window light, avoiding direct sunlight though. Such light will help you create pleasant and comforting look and feel of food, emphasizing its natural freshness and appeal.
- If the sunlight is too bright, you can easily soften it by fixing tracing paper, vellum paper or a translucent paper to the window.
Try not to use the camera flash. However, when it is essential, avoid pointing your on-camera flash directly on the object, so that only the light edge reaches the target. Alternatively, you can point the flash to lighten the background only. - With the help of small mirrors you can easily reflect the main light back to the front of your object and enhance the appearance of depth.
- I would also suggest to take advantage of collapsible reflections that come with black, gold, silver and diffuser panels. While being rather compact and requiring reasonable costs, these tools are really fantastic and do great job of managing light directions.
- Don’t be afraid of experiments – try to combine large and small light sources on the same shot. This is especially useful, when working large objects like steaks, fish, large fruit, vegetables, etc. The graduation of tone across the object will surely add more interest and enticement to it.
- Some other nice techniques that can do magic to your shots include: reflection on a plate created from the large backlight, extra small light source to enhance the texture of a white dish, combine the lights and darks to add depth to images.
Choosing Lenses
Just as with portrait photography, shooting meals and drinks implies working at a rather close range, where there is the necessity to capture sharp details, flatter various features and, quite often, work very quickly (when shooting hot or iced meals).
Therefore, my professional advice here is to use razor-sharp, fast standard (60-105mm) and telephoto (150-200mm) lenses. Such lenses will certainly help you get the job done perfectly resulting in striking and elegant images with polished details and refined appeal.
I personally love working with medium lenses like the Nikon 60mm f/2.8 D AF Micro-Nikkor, Canon EF 100mm f/2.8 USM Macro (AF) and Tamron SP 90mm f/2.8 Di; and telephoto lenses like the Nikon 200mm f/4 ED-IF AF Micro Telephoto Nikkor and Tamron SP 180mm f/3.5 Di Macro LD-IF.
Some Other Useful Tricks
- Highlight sauces and gravies by using a broad light reflector.
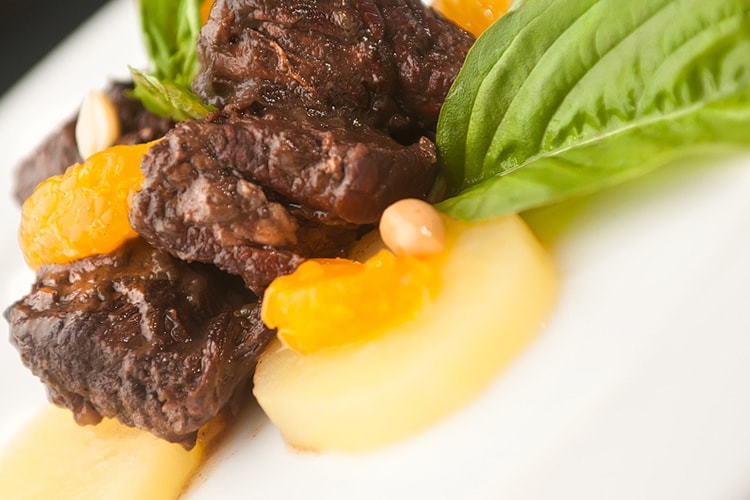
- When working on the image style of a completed meal, add some of essential ingredients and tools to its composition by placing them around the object. This will certainly help you arouse more interest both in the dish itself and its visual composition.
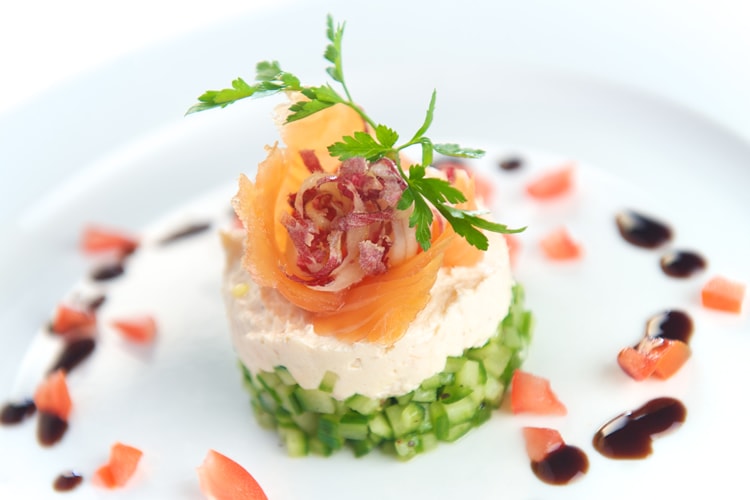
- Using garnish, like green herbs, a bit of salad, edible flower, toasted bread, etc. is a great way to add texture, color and appeal to a meal. This method comes especially helpful when shooting monochromatic dishes, like cereals, cream soups and hummus.
- The first bite looks as best as it tastes. Create the image of the first bite with a spoonful of a delicious meal, nibbled cake or, for example, some crumbs scattered around or near cookies. Show viewers how the first bite looks like and they will surely feel itchy to grab the spoon or fork right from your photo.
What is your personal food photography experience? Perhaps you have some other tricks on mind? Feel free to share your ideas and suggestions via Twitter or Facebook.
About the Author: Winston Mathews
 Winston Mathews is a photographer and fan of the Ralph Smith food and drink photography studio, located in Houston, Texas. Take a look at the Ralph Smith's beverage photography portfolio or read the latest news in the photography blog.