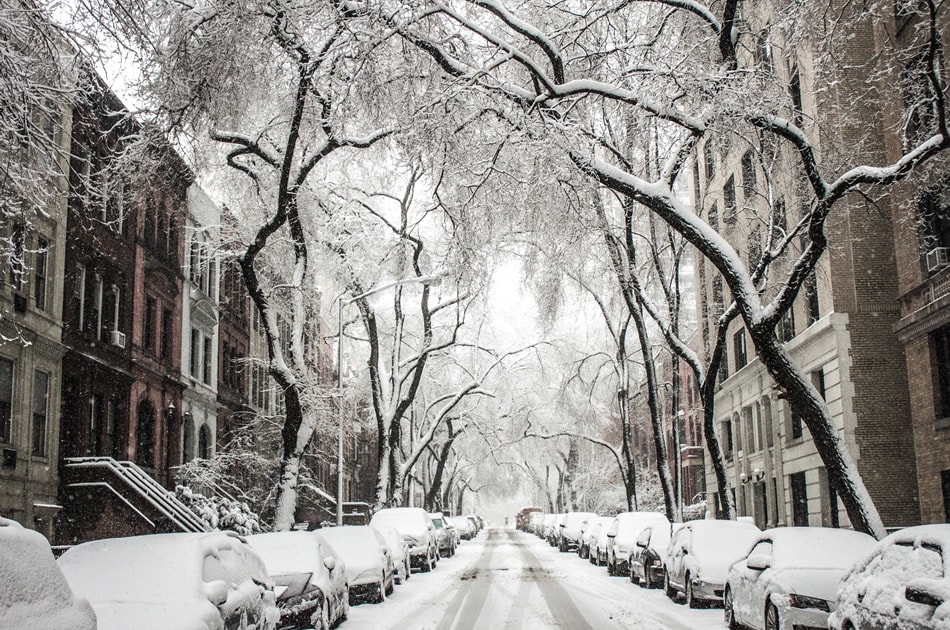
Unless you happen to live in a warm part of the world, then there’s a good chance that each winter you find yourself staring out the window at a blanket of white, wistfully wondering how to spin the snowy scene at hand into an amazing photograph.
Snow has the ability to transform even the most mundane setting into a wonderland of white, and the freshly fallen snow can make for some spectacular landscape photo opportunities. Falling snowflakes can present their own opportunity for exciting images [1], while portraits also look spectacular in the new-fallen snow.
While snow photography can be a bit of a challenge, the results are well worth it. If you’re ready to head out and capture some amazing snowy-day images, here are some tips that will get you off to a great start.
1. Protect Your Camera
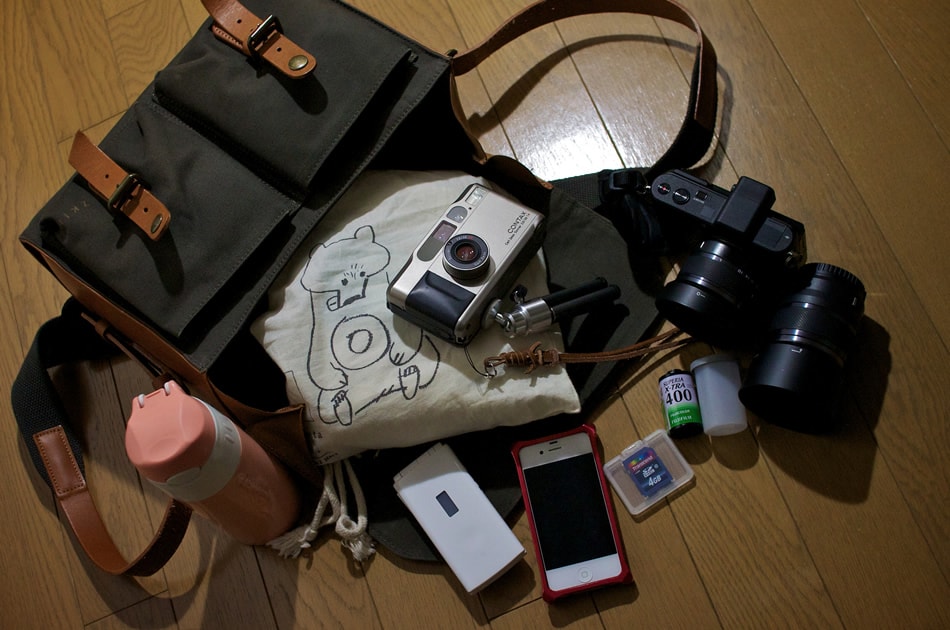
Photo by MIKI Yoshihito [2]
Make sure you use your camera bag [3] to protect your camera from the elements. Hiding your camera under your coat could cause condensation to get into places that it doesn’t belong. It’s also important to take care when coming inside from the cold.
Try leaving your camera in a cold room for about 15 minutes first to allow it to acclimate to warmer temperatures and prevent the mirrors and lenses from fogging up.
2. Dress the Part
It may sound obvious, but make sure you dress warm enough for the weather. This means remembering gloves, a hat, and warm socks. As a side note: make sure you’re not too warm – dress warmly but make sure you’ll be able to peel off layers easily as you start to heat up.
3. Bring Spare Batteries and Cards

Photo by Tolbxela [4]
The cold weather tends to drain batteries [5] – so you’ll want to bring along a spare in your pocket. You should also try to bring some extra memory cards – especially if you plan on shooting in RAW [6] – something that’s always a good idea as it will give you the most freedom and flexibility when post-processing.
4. Consider a Filter
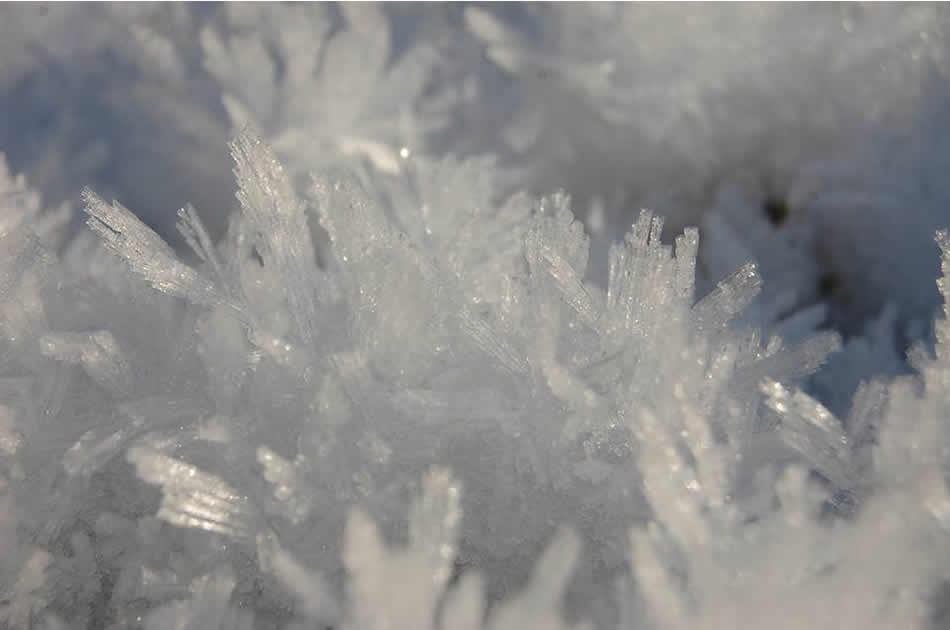
Photo by Christina Harman [7]
For snowy situations where there’s a significant amount of glare, using a polarizing filter [8] can help to cut down on the reflections off of the snow. If you’re planning to do any long exposure photography during the day, you may also want to bring along an ND filter [9] – especially on bright, clear days. This will allow you to keep the shutter open for longer without flooding the sensor with light.
5. Adjust Your Exposure
A fresh, white blanket of snow looks beautiful, but it can cause problems when your camera is trying to expose for it, and will often end up looking gray. To help the snow appear fresh and white – you may need to adjust your exposure, +1 or +2 will usually do the trick. Alternately, you could try using a cloudy or shade setting – or even the snow setting if your camera has one. Don’t worry too much if the snow is slightly overexposed – it’s usually easier to darken an image in post processing than it is to lighten one.
6. Adjust Your White Balance
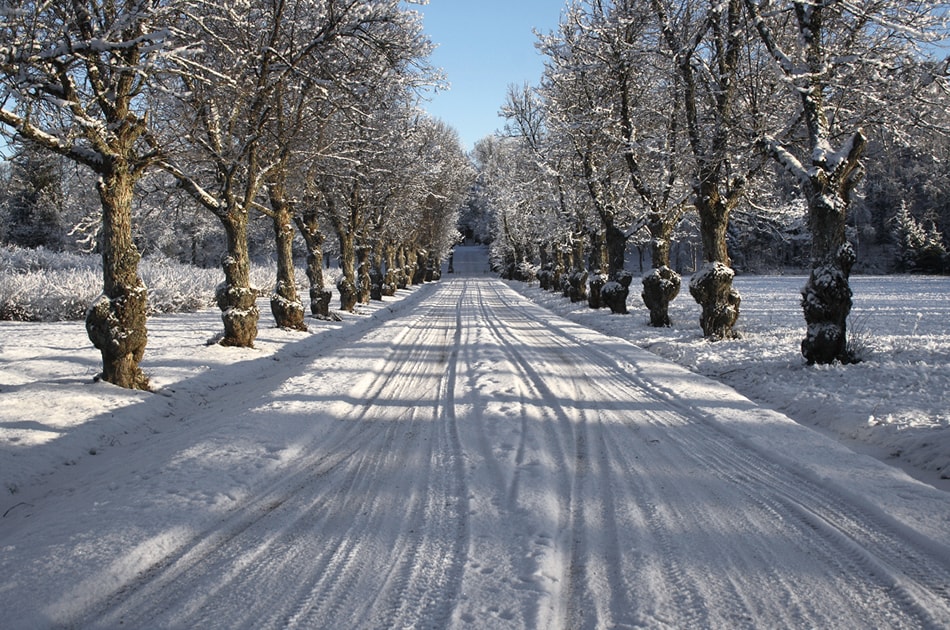
Photo by Miguel Virkkunen Carvalho [10]
The white snow will also confuse your camera’s auto white balance (AWB) – which will often result in the snow taking on a blue tint. If your images are too blue, the snow setting on your camera may help out – or, you can adjust your white balance manually. The lower the number, the more blue a scene will look, and the higher the number, the warmer it will be.
7. Check Your Histogram
It can be difficult to tell whether snow is overexposed just by looking at an LED screen, so you may want to check your image’s exposure with your camera’s histogram [11]. As a side note: images often look different on a smaller screen than they do on the computer, so try to wait until you get home to delete any photos.
8. Shoot Something Other Than Snow
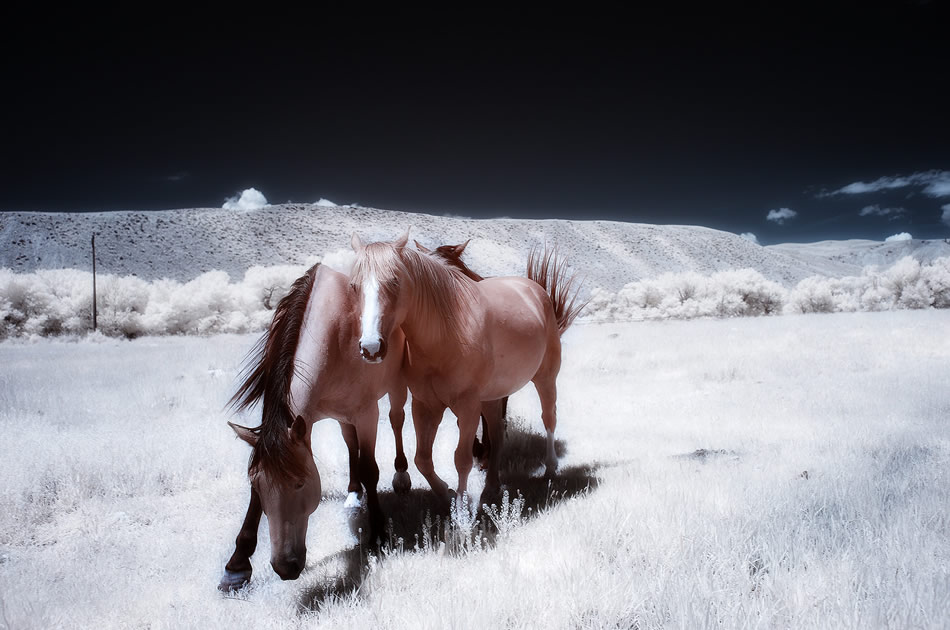
Photo by greg westfall [12]
While it may be tempting to photograph the endless expanse of pure white snow, consider adding some details or points of interest into your images to help break up your compositions and make them more engaging. Look for animals, fences, fallen logs, or anything of interest to serve as a focal point in your images.
9. Add Some Color

Photo by Rachel Kramer [13]
The snow makes a perfect backdrop – especially if you introduce a splash of color. If you are shooting portraits, your subjects can really shine if they wear bright colors such as red.
If you’re capturing scenic shots, wildlife images [14], or macros, look for color that contrasts against the snow – red berries, birds, a rusty mailbox, or a barn can all make great, vibrant subjects that will stand out against the pure white backdrop.
10. Include Some Foreground
When it comes to snowscapes – or any other type of landscape photography [15] – including some foreground is a great way to create some striking compositions. Foreground adds a sense of depth and dimension to a photo and can help the image to come alive. If you have a wide angle lens, be sure to use it to help accentuate the foreground in your images – and try to include foreground interest whenever possible.
11. Try Your Hand at Macro
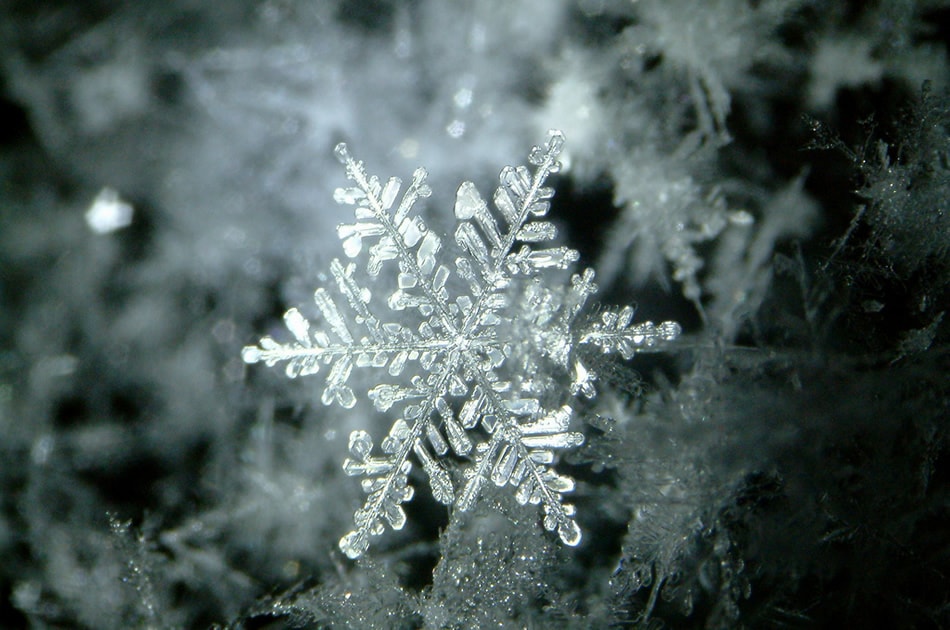
Photo by yellowcloud [16]
Winter is the perfect time to get started with macros, in particular – snowflake macros. These images are nothing short of spectacular, and can be fascinating works of art. For snowflake macros [17], you’ll need a lens that’s able to get closer than what a typical macro lens is able to offer. One way to accomplish this level of magnification is by adding some extension tubes [18] to your macro lens [19]. Then get in close and start shooting.
12. Capture Falling Snow By Adjusting Your Shutter Speed
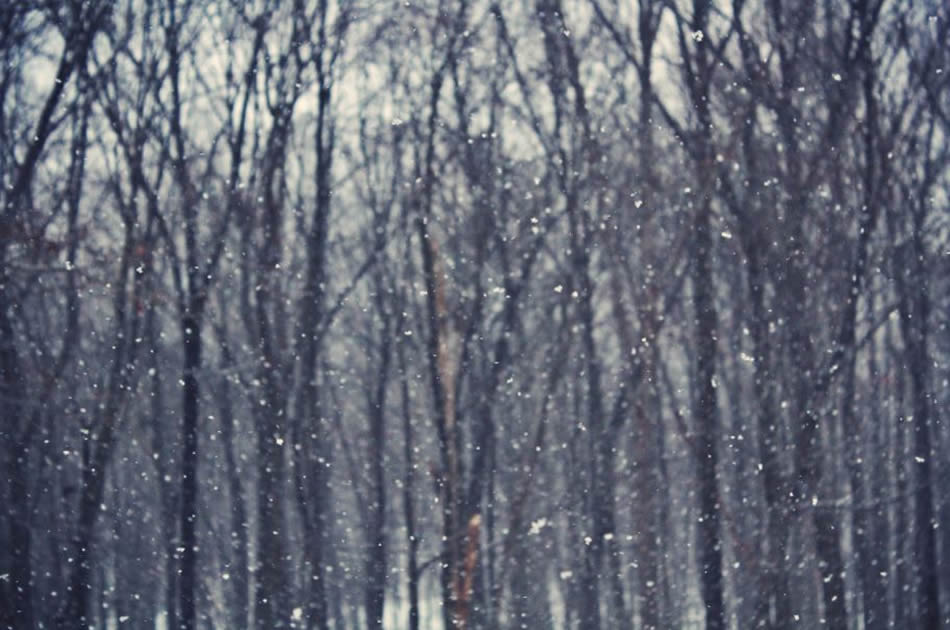
Photo by martinak15
Let it snow! While falling snowflakes can be frustrating if you don’t want them in your images, these delicate flakes can make great features in your photos. To capture snowflakes, you’ll want a tripod [20] to steady the camera. For streaky, gently blurred snowflakes, slow your shutter speed down, or speed the shutter speed up to “freeze” the falling flakes.
13. Don’t Forget About Post-Processing
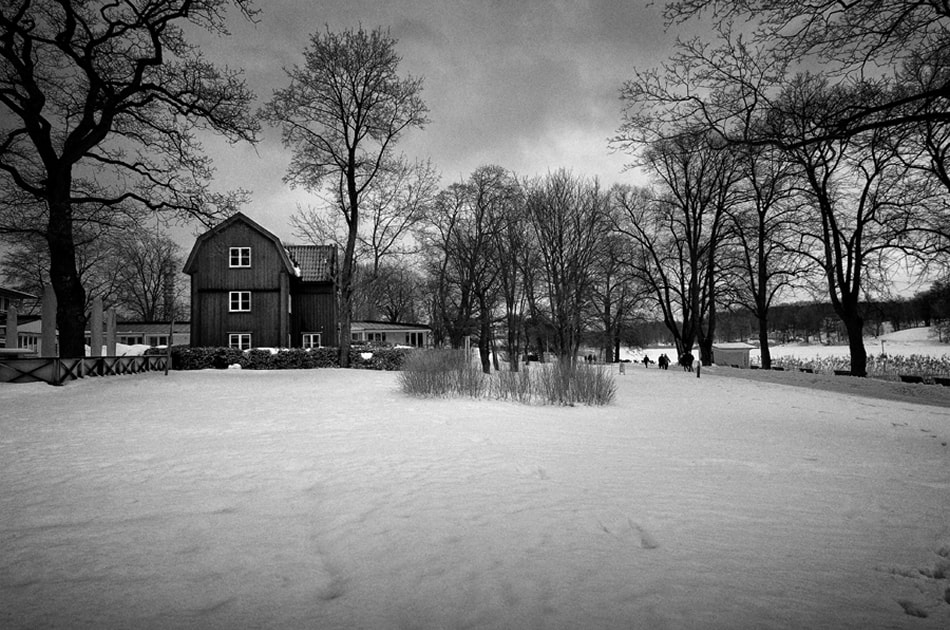
Photo by Daniel Zedda
While some photos don’t require much, or any post-processing, snow photography is something that often will require a touch of work once you get home. For instance, the lighting may often need to be adjusted. And snow photos often end up with a haze, something that can easily be remedied by increasing the black intensity in the image or using the “dehaze” slider in Lightroom. Also, consider adding a white vignette to your images, white edging around a predominantly white image can help your snow photos to look even better. Snowy scenes can also make great black and white images, and you may want to consider using Lightroom presets like Contrastly’s Noir & Blanc Lightroom presets [21] to create amazing black and white photos of snow.
As you can see there are plenty of ways for you to create some winter-wonderful photos. So what are you waiting for? Get outside and start capturing your own winter masterpieces!
Do you have any snow photography tips? We’d love to hear them. Feel free to share your tips – and images via Facebook [22] or Twitter [23]!