The visual power of a crisp, in-focus image can draw us into a photograph and make us feel like we’re a part of it. It’s no wonder that we often agonize over making sure that our photos are as focused as possible!
Unfortunately, achieving this kind of stunning focus throughout an entire image can prove immensely tricky with only in-camera focusing techniques, particularly when shooting landscape or macro photos.
When nailing focus with a camera alone seems impossible, many photographers turn to one of their favorite techniques – focus stacking.
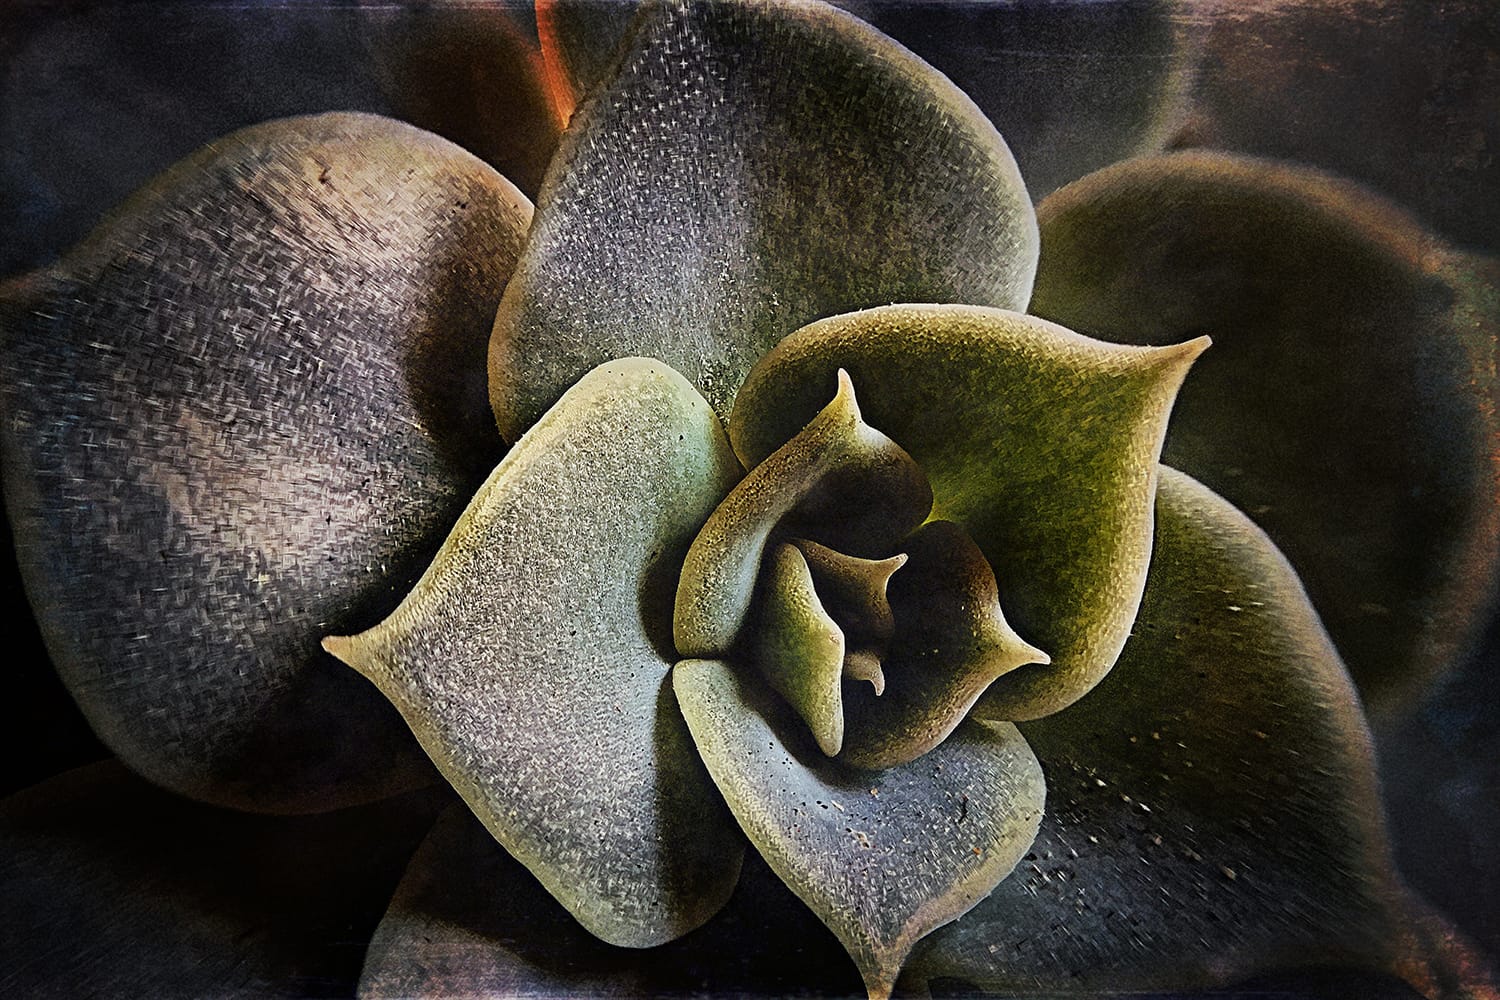
Image by Rafael Vianna Croffi [1]
What Is Focus Stacking?
Focus stacking is a photo editing technique that allows us to achieve impressively sharp focus [2] throughout an image when doing so in-camera is impossible.
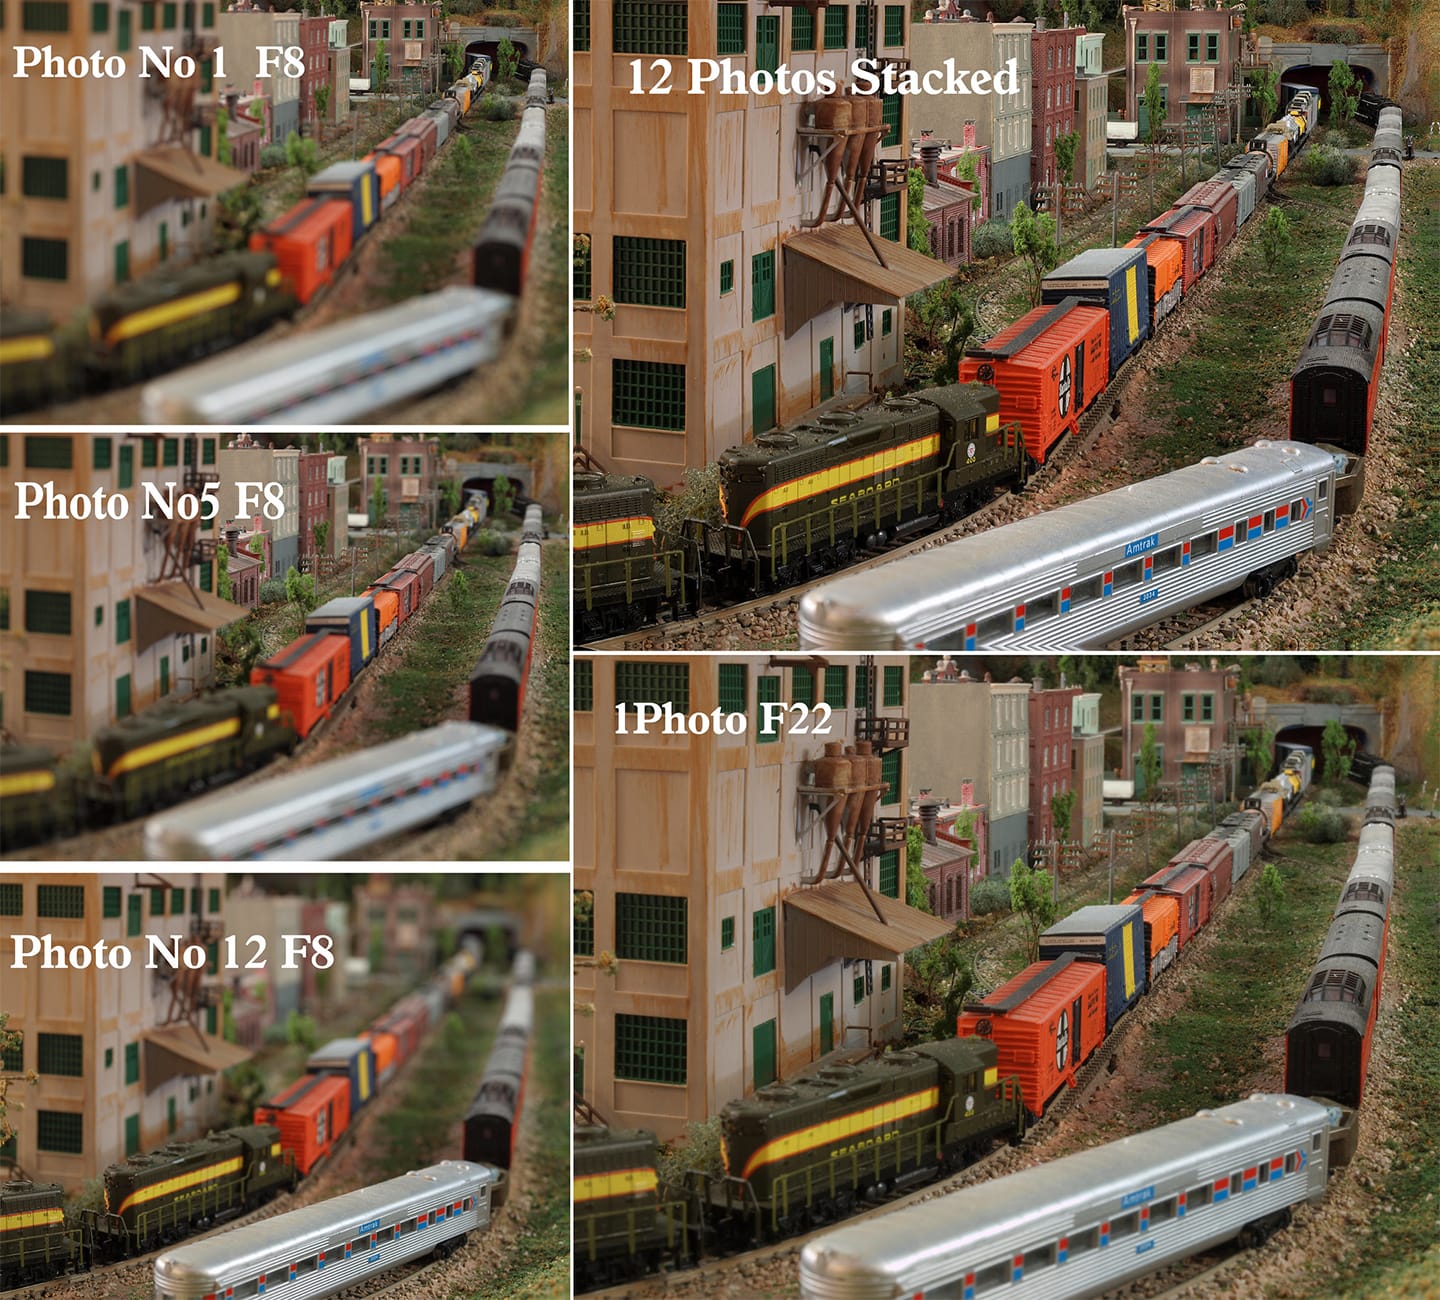
Focus stacking is the practice of taking multiple shots of the same subject, adjusting only the focus each time, then merging these shots in post.
At its simplest, focus stacking is taking two images – one of which is perfectly focused in the foreground with the other having perfect focus in the background – and combining them into a single image so that focus is ideal throughout.
Of course, focus stacking often involves many more than two pictures!

Focus stack of 76 images, by Gilles San Martin [3]
How Does Focus Stacking Work?
In their search for images that are focused throughout the scene, many photographers may increase the aperture to increase the depth of field. However, increasing the aperture too much will lead to image diffraction, which counters the added sharpness achieved by the greater depth of field. This puts many photographers in a bind.
Focus stacking to the rescue!
Focus stacking utilizes technology that we may not even know we had—it’s right at our fingertips, housed within our favorite photo editing software.
When we load similar images, programs like Adobe Photoshop [4] and Lightroom Classic [5] can merge them into a single picture that includes the sharpest, most in-focus parts of each photograph. This yields a single image that is focused throughout.
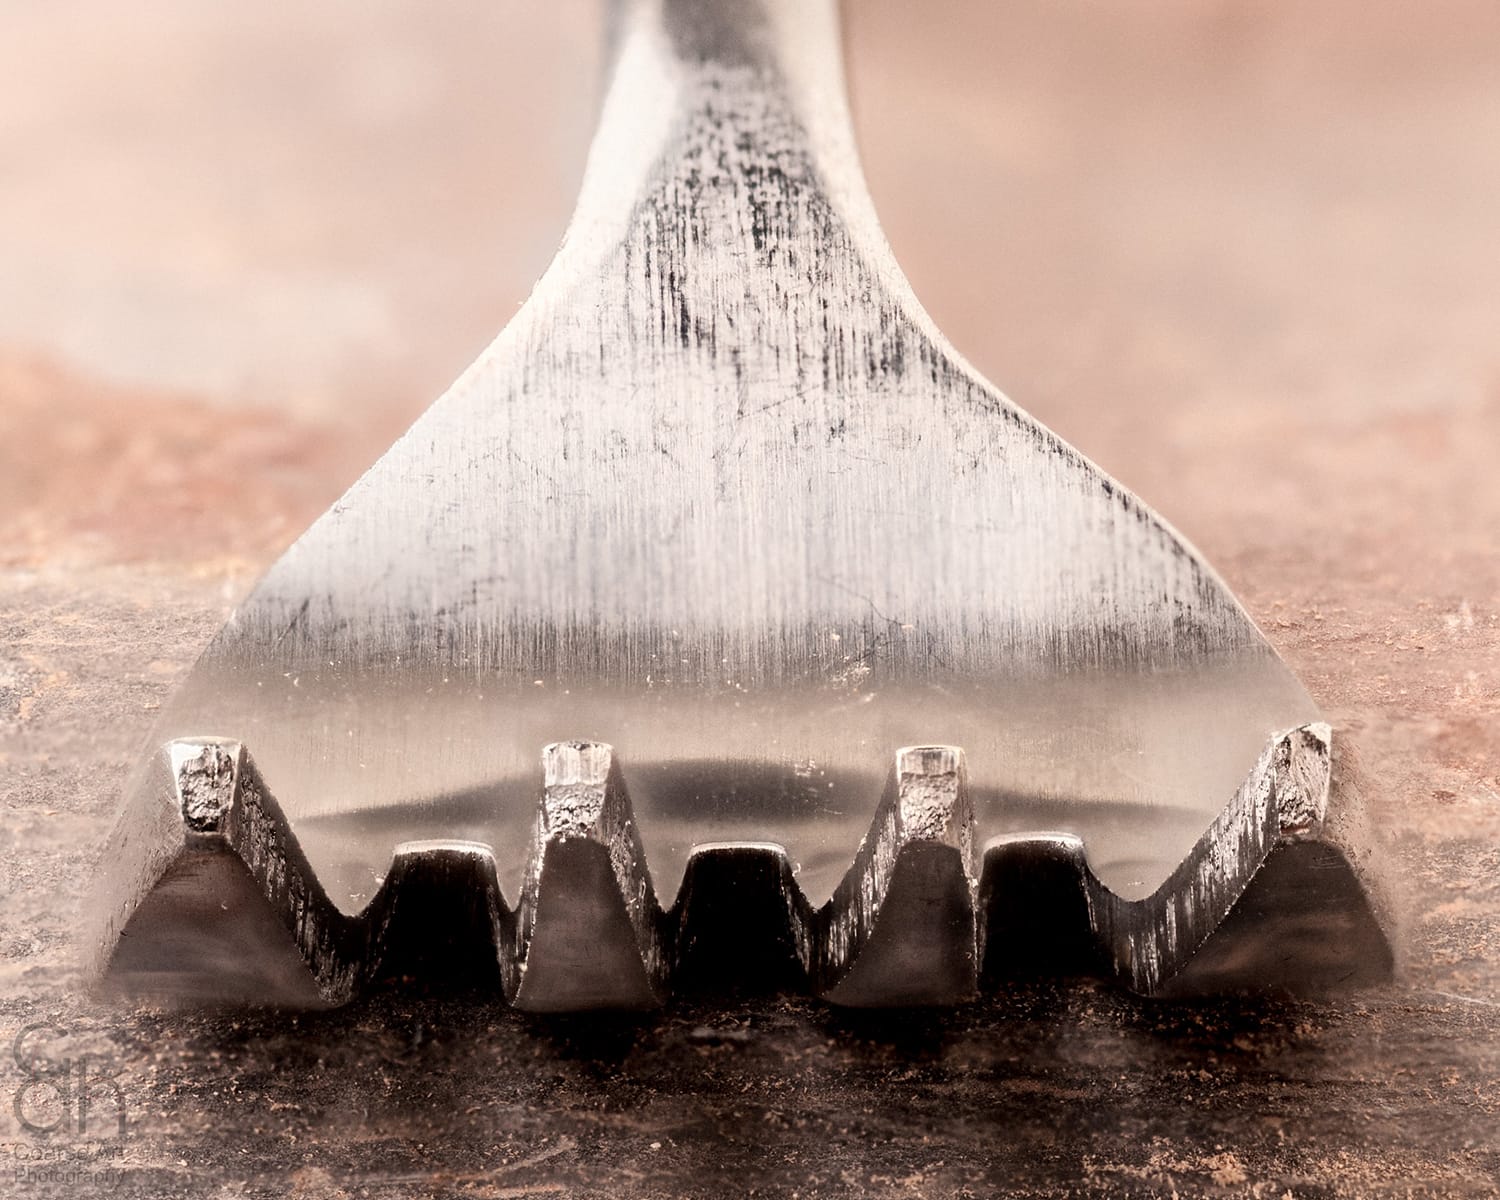
Image by Chris Heald [6]
When to Use Focus Stacking
Focus stacking is widely applicable throughout several photography genres. Because of its crisp, clean, and focused results, photographers from all niches can find a way to use this technique to bolster their photographs.
However, focus stacking is particularly prevalent in landscape photography [7]. Due to the vast distance between the foreground and background in many landscape shots, achieving a shot that’s free from pesky blurring can be quite the challenge (if not impossible). For this reason, landscape photographers often utilize focus stacking to ensure that the clarity of their shot is spot-on from foreground to background and everything in between.
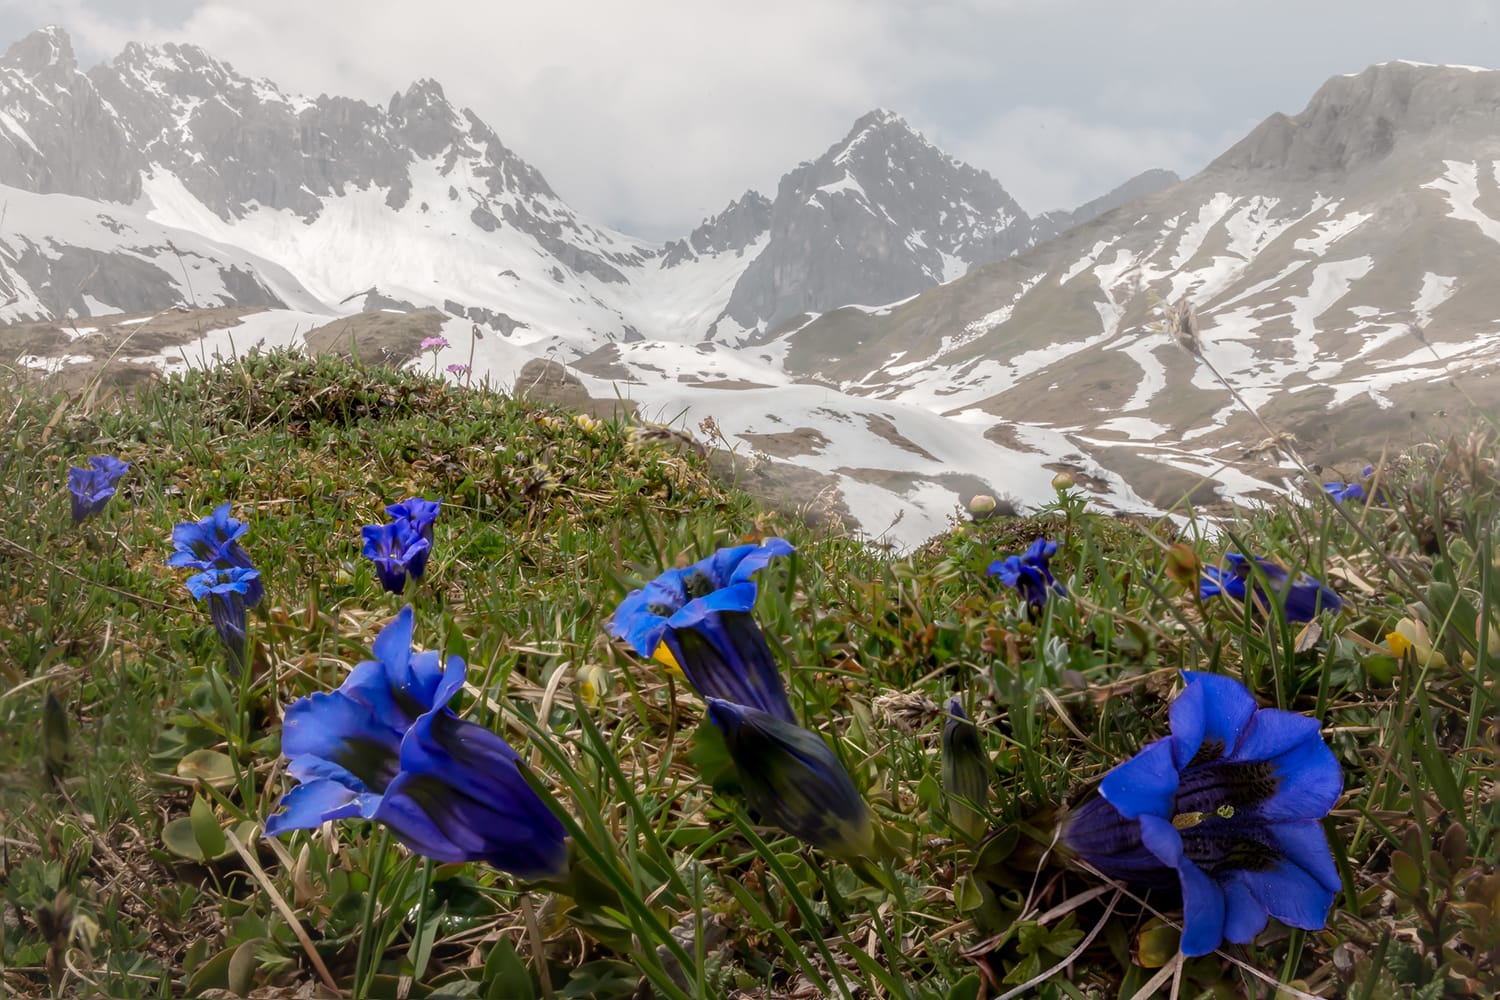
Image by Bernd Thaller [8]
Similarly, macro photographers love focus stacking, because the small depth of field afforded to most macro lenses [9] makes it difficult to achieve proper focus across the entirety of photos.
Focus stacking allows these photographers to artificially expand the area that appears in-focus without increasing their depth of field.
Trying It Out for Yourself
We like to say that the best way to understand a technique thoroughly is to try it out for yourself, so of course, we weren’t going to leave you without a tutorial about how you can use focus stacking in your photography!
In the Field
While merging photos—the final step of focus stacking that allows you to achieve perfect focus throughout your scene—is completed during post-processing, the act of focus stacking begins in the field.
Without proper field technique, you likely won’t be successful in merging your photos at a later time.
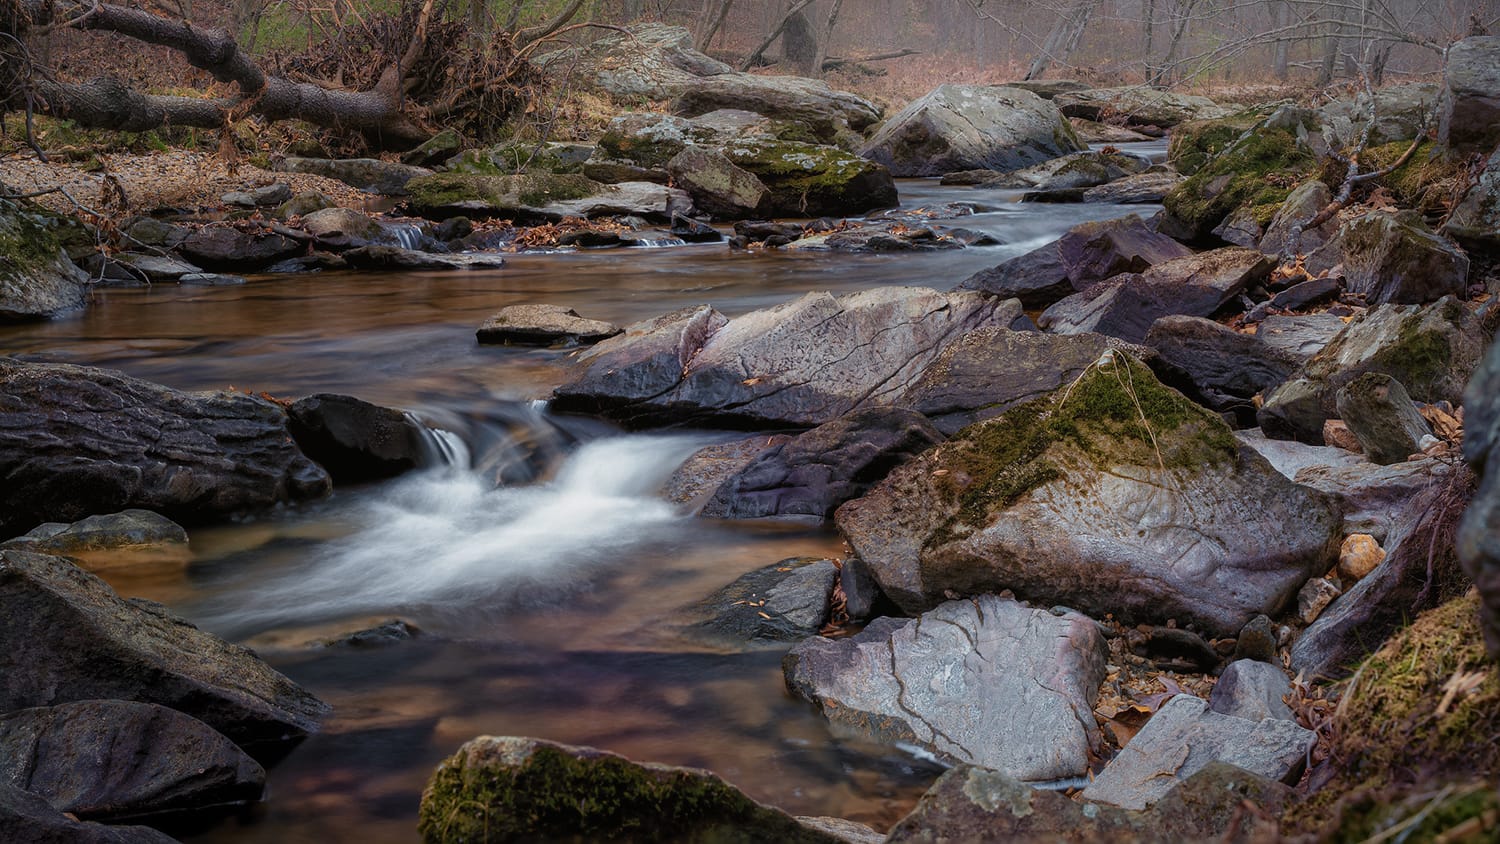
Photo by John Brighenti [10]
To prepare the images you’ll need for focus stacking:
1. Set up your shot with a tripod [11] and a remote shutter release
Keeping your camera steady on a tripod will ensure that your images remain as similar as possible, aside from the manual changes you will make to focus.
The remote shutter release minimizes the effects of vibration that might make their way into your photos. Mainly when shooting macro images (a common reason to pursue focus stacking), movement from the touch of your hand on the camera body can be magnified in the shot, disrupting the clarity you’re looking for.
2. Get your settings just right
Now, take some time to adjust settings like ISO, aperture, and shutter speed [12]. Do this whichever way works for you, but don’t worry about the focus just yet. Once you’re content with your settings, carry on.
3. Begin working with the focus
Once you’re happy with the composition of your shot, the last thing left to do is find your focus. For your first shot of the series, adjust your focus so that your shot’s very forefront is sharp. Take the shot. Then, adjust the focus so that it is a little farther away before taking another shot.
Repeat this process until you have taken enough pictures so that each point between the foreground and background is sharply in focus within one of the photos.
Images by Jim Bauer [13]
During Post-Processing
Merging images for focus stacking can be achieved in numerous photo editing programs. Here, we’ll discuss the process of merging photos in Adobe Photoshop.
Once you’ve nailed the images you’ll use for focus stacking, transfer them to your computer, open up Photoshop, and follow the steps below.
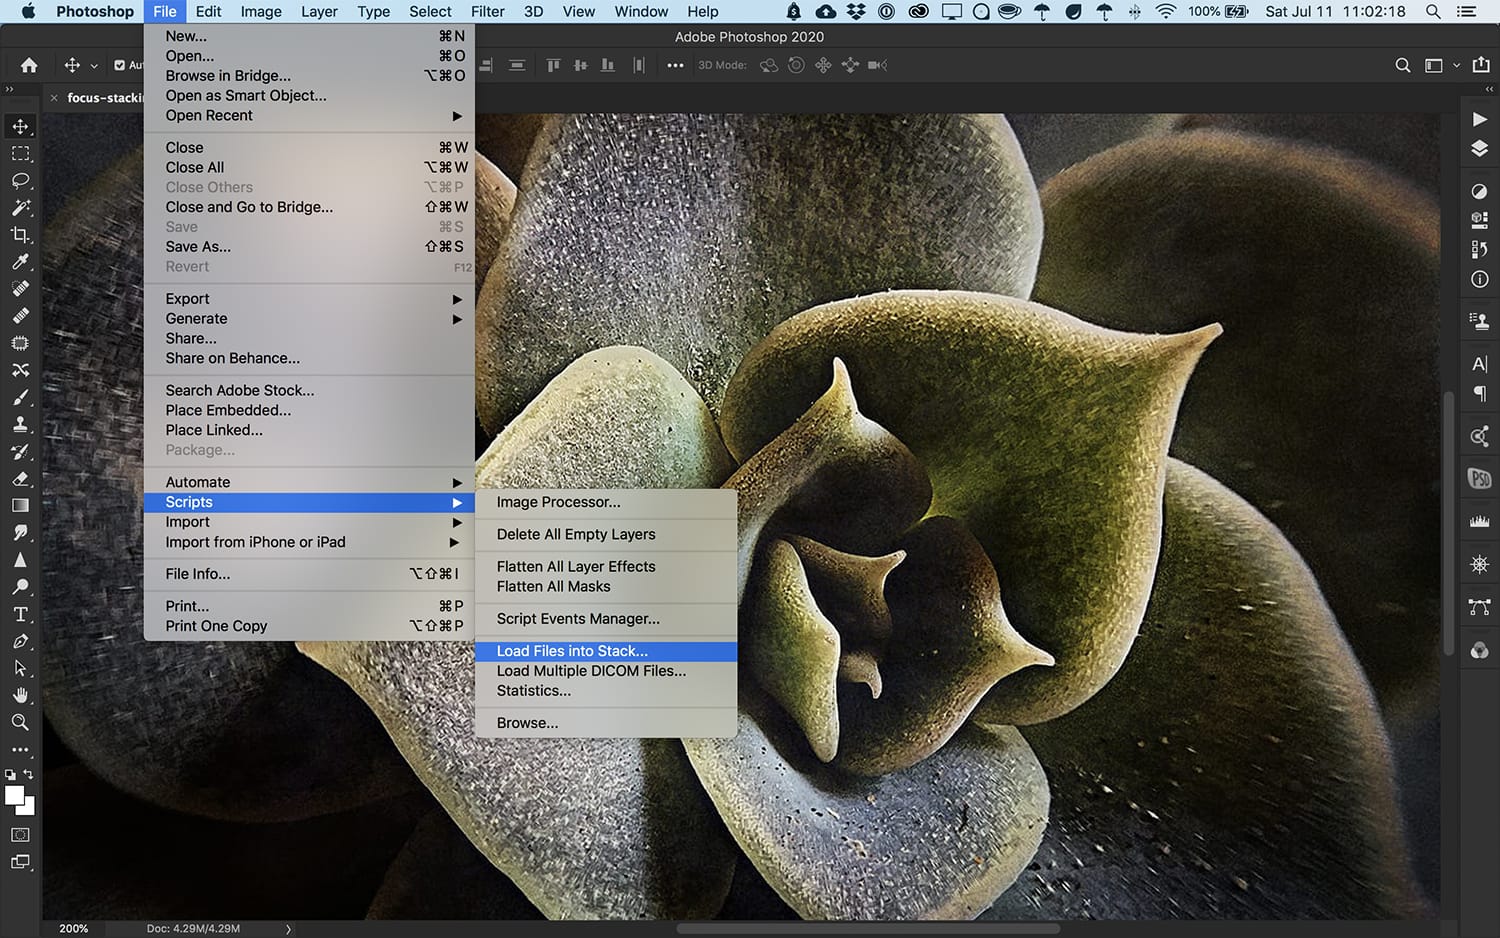
1. Load your images into Photoshop and align them
You can do this by navigating to File > Scripts > Load Files Into Stack. Here, you’ll be able to browse the photos on your computer and choose each one that you want to include in your focus stack.
Be sure to check the box titled “Attempt to Automatically Align Source Images” to keep your photos in line with one another and account for the slight variations which might occur even when using a tripod. We’re going for as close to exact as possible here!
Once you’ve confirmed your selections, Photoshop will automatically insert each image into a separate layer of its own.
Afterward, you can make sure that your images line up by selecting each layer (all simultaneously, which you can do clicking on the first layer, holding the shift key, then selecting the last layer), and then navigating to Edit > Auto-Align Layers. This would line up your images if you forgot to select that checkbox when uploading the photos in your stack.
2. Merge or “stack” the layers
Select all of the layers in your stack using the shift key, then choose Edit > Auto-Blend Layers. Choose “Stack Images” and make sure that both “Seamless Tones and Colors” and “Content-Aware Fill Transparent Areas” are checked.
Once you give Photoshop the go-ahead, it will merge your images into a single photo that should be focused throughout! Finally, select all layers once more, right-click, and use “Flatten Image.”
Focus stacking is a process that will become more familiar and intuitive once you’ve given it a try yourself. Use this tutorial to get practicing, and never again worry about frustrating, out-of-focus pockets within your photographs.