LUTs are tools beloved by photo editors who are looking for that extra boost to take their photographs to the next level.
Unfortunately, LUTs also have a reputation as being something difficult to understand, making some people fearful of the dry and technical language which might accompany some information about LUTs.
However, LUTs may have a technical side to them, but you don’t have to understand all the ins and outs of LUTs in order to use them successfully in your post-processing workflow. Without further ado, let’s dive right in.
The Basics of LUTs
Let’s start at the beginning. What is an LUT?
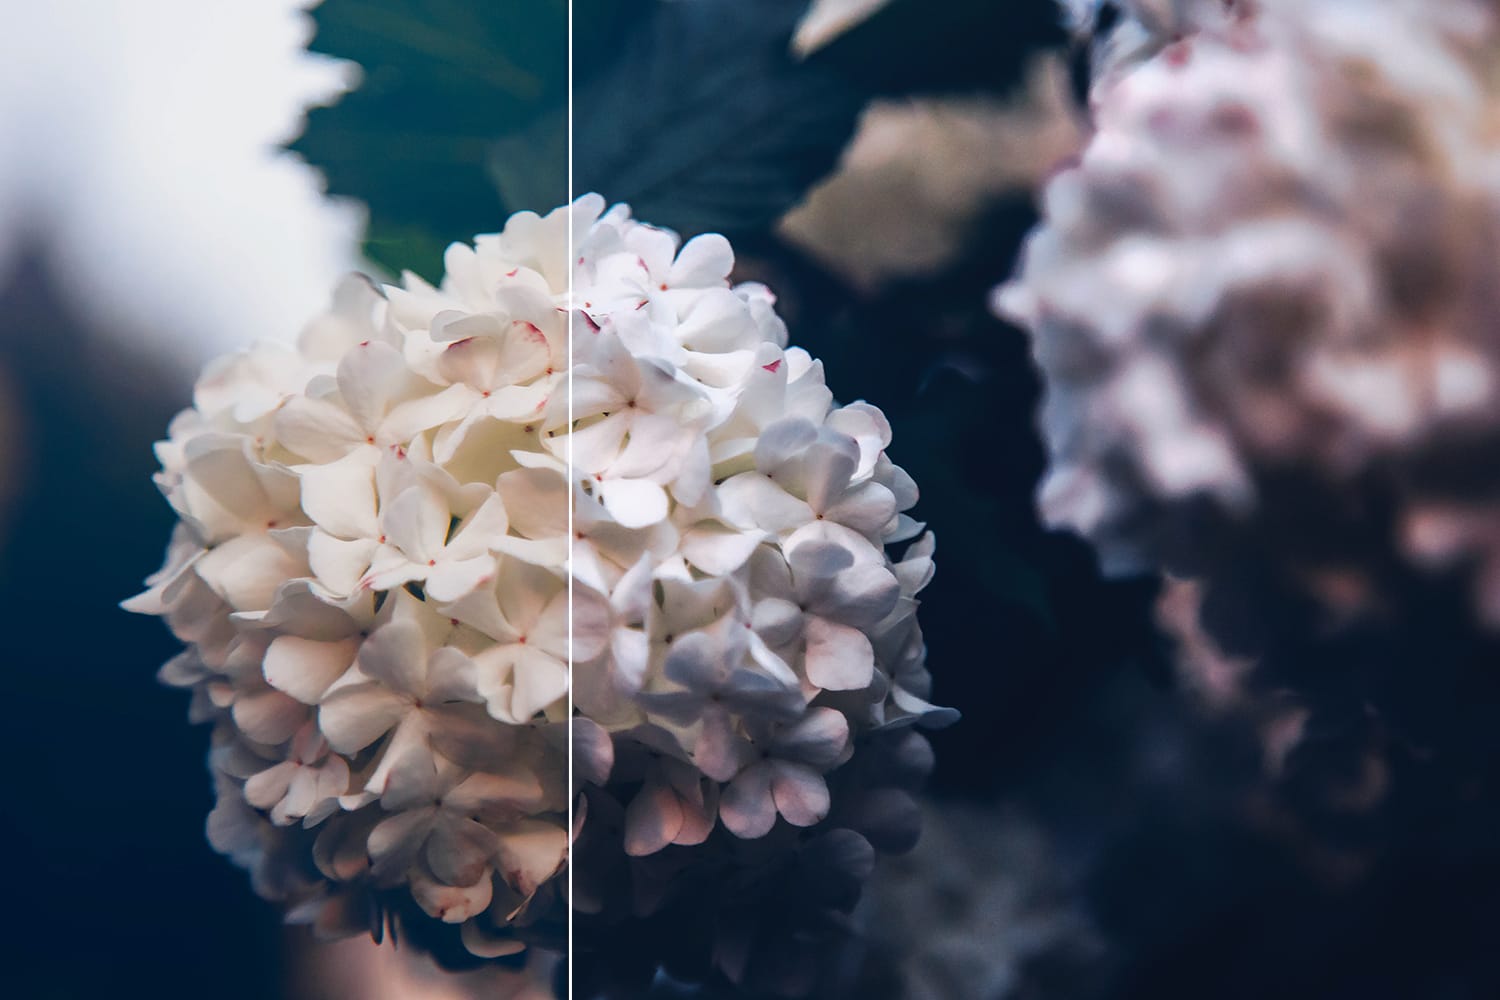
LUT is an abbreviation for “Look Up Table.” Each look up table [1] is, at its simplest, a collection of numbers utilized as a color grading tool within a photo editing software. These numerical values are modifiers that alter the RGB values of a photo, enabling photographers to massively change and improve the appearance of an image by applying only a single filter. Each RGB value is assigned an entirely new value, and the application of an LUT implements all of these changes at once.
LUTs are incredibly helpful for photographers who want to save time without sacrificing the high quality and artistic results that come with hours of minor, manual slider adjustments. One click to apply an LUT can give photographs the professional finish you need.
Plus, using the same LUT or small selection of LUTs across the board can help you achieve uniformity throughout a single photoset or even an entire portfolio.
When LUTs Come in Handy
To keep things simple, you might say that an LUT is like adding a filter to your image. In fact, this is quite literally the case, as LUTs are often applied via a filter layer in Photoshop, for instance.
There are many reasons why a photographer might choose to use a LUT for photo enhancement, but we’ve outlined a few specific scenarios to help you get the gist.
- Color enhancement
- Implementing darker tones for mood adjustment
- Emphasizing shadows and highlights
- Boosting mid-tones
- Enhancing color within a specific tonal range
- Creating monochrome images
- And the list goes on!
How to Use LUTs
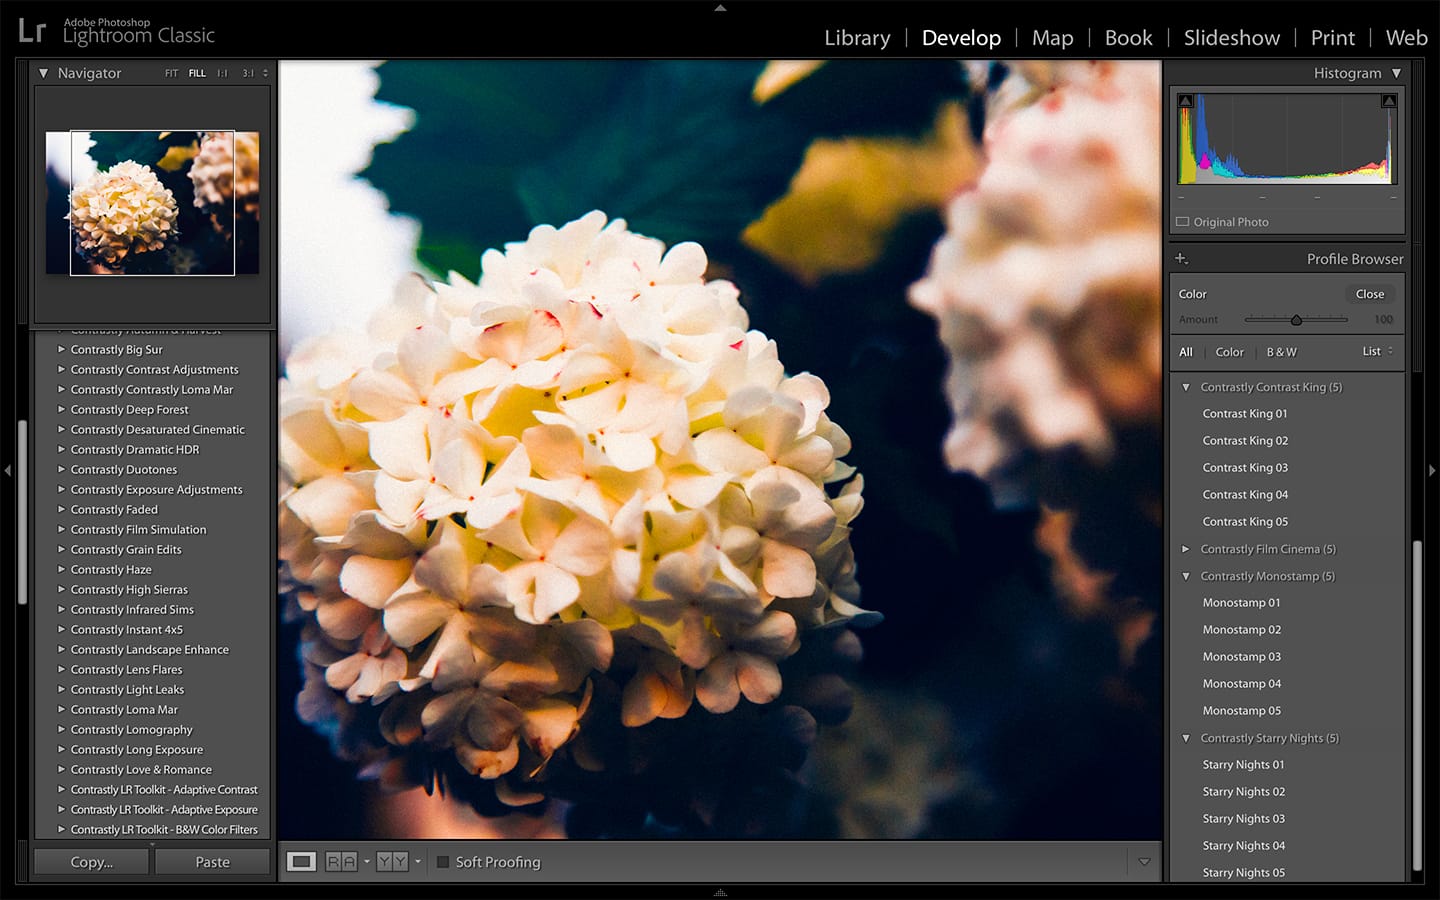
LUTs are compatible with the most popular photo editing programs including Adobe Photoshop [2], Adobe Lightroom [3] (CC and Classic), Affinity Photo [4], Skylum Luminar [5], ON1 Photo Raw [6], and many others…
File Extensions Galore
When applying LUTs within these programs, you’ll notice that your downloaded LUTs may have some file extensions [7] you’ve not seen before. That’s okay! The file type you’ll choose for importing into your preferred software will depend on which program you’re using.
If you’re aiming to install LUTs for Lightroom or Adobe Camera Raw, for example, keep an eye out for .xmp files. Downloaded LUTs will also include files with a .CUBE extension. This file type is the most broadly used, as it can be applied to multiple programs including Photoshop, Adobe Premiere, Adobe After Effects, and many others.
Some programs use their own file extension. LUT files prepared for ON1 Photo Raw, for example, will uniquely end in .ONpreset [6].
Implementing a LUT
As we mentioned earlier, LUTs are typically applied as a filter or a layer within photo editing programs. Once they are downloaded, you can install the LUT with the appropriate file extension and apply it within your program of choice.
Then, you’ll be able to adjust the LUT’s strength or intensity until you’ve achieved the perfect effect.
Organizing Your Workflow
As with any other aspect of post-processing, it’s important to know exactly when to apply an LUT and then perform these steps a similar way every time rather than approaching the editing process without order and structure.
Once you begin using LUTs on a regular basis, you’ll begin to understand how their application will best fit into your personal workflow.
Here’s one idea of when you might use LUTs while editing:
- Tackle basic adjustments and color correction first.
- Apply the LUT.
- Refine with smaller adjustments.
Limitations of LUTs
We like the idea of applying some basic corrections to a photograph before applying the LUT because, unfortunately, LUTs have some limitations. After all, LUTs are only technology, not magic, and they’re only as good as the photographer using them!
Most importantly, LUTs are calibrated to work with properly exposed images. Of course, anyone can apply an LUT to photos that are underexposed or overexposed, but the effect won’t be as intended. Similarly, LUTs are also calibrated to work optimally on images with a proper white balance.
In other words, LUTs can help you with color grading, but not necessarily with color correction [8].
This is why it’s a good idea to get those basic adjustments out of the way before applying an LUT to your image. We know it’s tempting to apply the LUT and get those beautifully dramatic results right away, but check out your histogram and get the exposure just right first, then check your white balance.
Creating a LUT
Numerous LUTs exist on the internet, ready for download. Many are free, while others are premium options, but regardless of your budget there are bountiful options with which you can experiment.
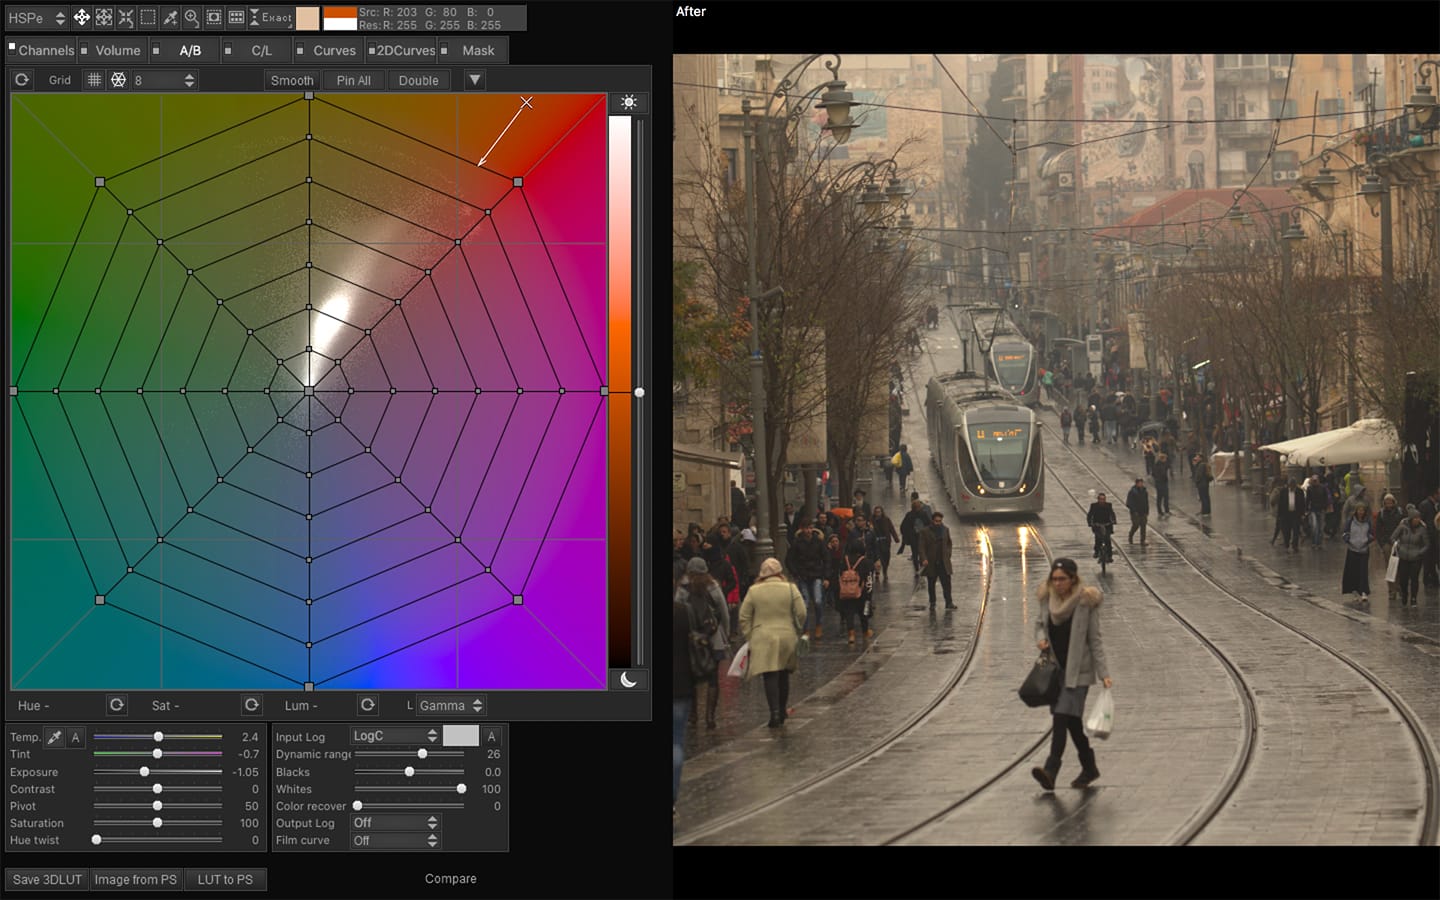
However, not all LUTs out there are good, unfortunately, and sometimes you may have a specific vision that preexisting LUTs can’t achieve. When this is the case, photographers can embrace an extra step and create their own LUTs with programs like 3D LUT Creator [9] or Lutify.me [10], then use these custom LUTs in Lightroom thanks to Adobe’s 2018 addition [11] of creative profiles [12].
Wrapping Up
As with most aspects of photography and photo editing, the use of LUTs is something that requires practice and healthy experimentation. Over time, you’ll begin to develop an instinct for proper color grading and an eye for a good LUT, and you’ll be able to identify with ease which photos might benefit from a particular LUT.
However, you don’t need to be an LUT expert to get started right away and utilize LUTs to greatly enhance your photos. Consider LUTs as another tool in your post-processing arsenal [13] that you can use (starting now) to bring you closer toward achieving your creative vision for every shot.