5 Trick Photography Secrets That Will Have You Doing Double Takes

Simply put, trick photography is a genre that utilizes special effects and tricks to elicit wide-eyed reactions of “What did I just see?!” from a great many people. To a trick photographer, one of the greatest compliments that can be paid is the belief that the photo had to be photoshopped because it just seemed so…out there.
Of course, it wasn’t photoshopped, but, rather, the product of a highly skilled photographer’s creativity.
Trick photography is a feast for the senses because it does two things. It provides your eyes with a workout as you take in the seemingly impossible, and it also offers your brain a mental riddle as you try to figure out how that shot was taken in the first place! See if these 5 trick photography secrets won’t have you doing double takes.
Rear or 2nd Curtain Flash Sync
Using this technique, you’ll be able to demonstrate movement in your photos. As the name implies, two separate flashes are used with this method. It’s called the Rear or 2nd Curtain setting, and it should be available on many dSLR cameras.
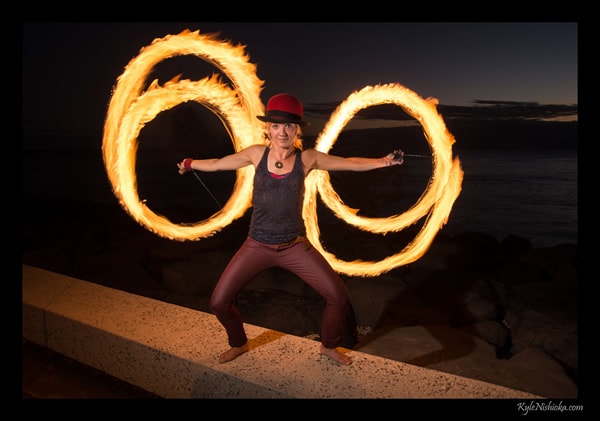
photo by madmarv00
The first flash goes off at the exposure’s start; then, the shutter’s first curtain closes. The second flash goes off just at the end, prior to the second curtain’s close. There’s going to be a brief moment of time between these two flashes. As a result, your subject is frozen in the image, but the background will blur into movement, which creates nifty trails.
Look in the flash control settings of your SLR to find this feature. Note that it can typically be adjusted only if you have a flash attached to the camera. Go with a slow shutter speed for this effect, something like one-fiftieth of a second or even slower. This technique is notably effective when you’re taking flash pictures of people who are already moving (entertainers or dancers, for example).
Infrared Photography
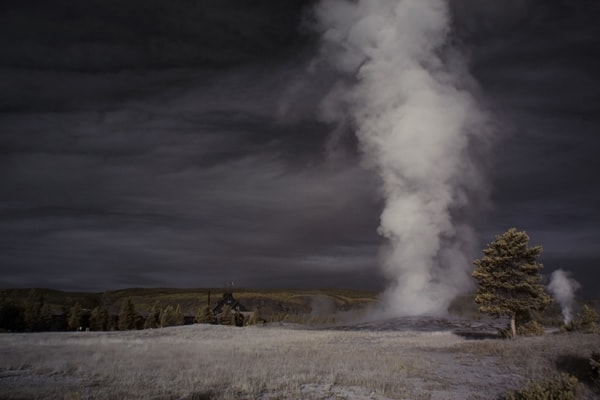
photo by fortherock
Infrared photography was one of the first topics to be covered by Contrastly when it first launched, but it deserves additional coverage here. This style of photography uses special infrared film or a modified digital sensor to take images that look ethereal and surreal, whether in color or black and white. The effects produced include strange and unexpected colors. For instance, green trees become pale white in black-and-white infrared photography, while blue skies morph into pink hues in color infrared photography!
Unfortunately, makers are slowly but surely discontinuing the production of infrared films. This is because it’s costly to produce and has just a tiny, committed audience. The same thing can be said of cameras with actual infrared-sensitive sensors on them. However, you can always purchase a regular digital camera and simply remove the infrared light-blocking filter located on its sensor.
Whatever option you choose, as soon as you have a digital camera that’s capable of shooting in infrared, you most definitely want to make the best of it. Start off by shooting pictures of foliage and trees because these objects do the best in reflecting infrared light.
Tilt-Shift Miniature Effect
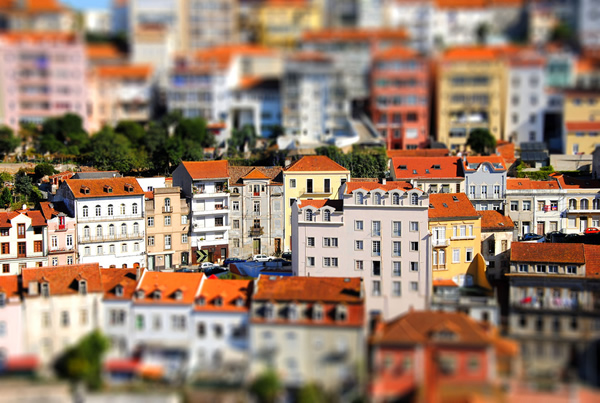
photo by Leandro returns
Ever wanted to take shots of people, vehicles and other objects from above, so that they looked like miniature, toy figurines? Thanks to the tilt-shift miniature effect, you can! This effect can be produced by simply using a tilt-shift lens on your camera. Such a lens empowers you to control perspective in your shots by variously shifting and tilting the lens that’s in front of either the sensor or film, which causes an extremely shallow depth of field. You can even maximize this effect by using wide-aperture lenses.
To achieve this effect, you’ll want to concentrate on the lens’ tilt control, not the shift. You can adjust this tilt simply by turning the knobs that are found on the side of the lens barrel. The glass is going to actually tilt in front of your sensor or film, which permits you to manipulate just where the sharpest point of focus in a picture should be.
If you want to miniaturize people or objects in a shot, just make sure those objects stay in focus. However, be sure to leave stuff in the background—like buildings and the like—blurred. You can even increase this miniature effect if you shoot down on your scene, as when you’re on a hill or on top of a building.
HDR Imaging
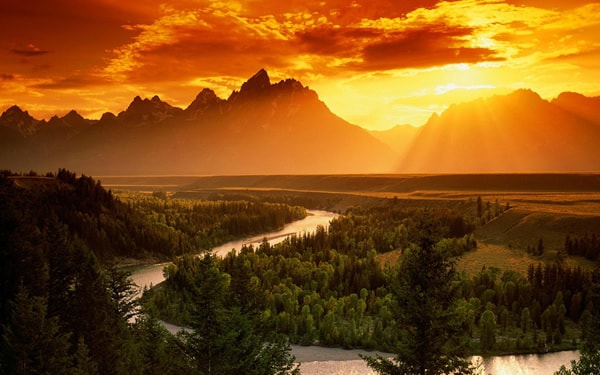
photo by Jeriff Cheng
HDR (high dynamic range) is a method in which several pictures are combined into just one image to increase its dynamic range. This range is defined as the amount of exposure between an image’s dark and light sections. Ergo, images with a low dynamic range feature bright highlights and dark shadows, but those with a high dynamic range feature even luminance that sports fine details. Still, if this method is overused, it can give pictures a cheap and even gimmicky appearance.
Mainly a software-based approach, HDR imaging can be done through Photoshop, but cheaper alternatives like HDR Expose 3 and Photomatix Pro 4 (HDRsoft) are perfectly fine, too. To use these programs, you’ve first got to take at least three pictures of the same scene with various exposure settings.
When you’ve got your pictures, load them into your HDR-processing software to combine them into one picture. You’ll control how slight or blatant the HDR effect will be. Simply use tone mapping to manipulate the picture’s color saturation, luminance and additional visual factors.
Long Exposure Photography
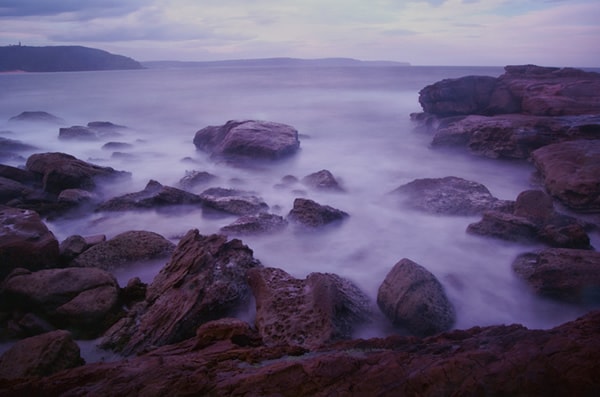
photo by nigelhowe
Long exposure photography involves increasing the amount of time that the image sensor of a camera is exposed to light. This technique is mainly employed at night in order to heighten a scene’s brightness. Artistic and eye-catching effects can be added through long exposure photography. If you shoot, for example, fireworks, vehicles on a highway and moving carnival rides, you’ll get dizzying light trails in your images!
The first step to successful photography of this nature is the use of a tripod. This will lessen blur from your hand shaking as you operate the camera. Pick a good candidate for the subject of your shot: Fog, rushing water and lights at night are excellent examples. You decide on the exposure’s length, and it’s recommended that your shutter speed is just a few seconds.
From here, the camera does the rest of the work for you, as it automatically clicks the shutter for you. Always utilize a remote for the shutter during long exposure photography since manually pressing down on the shutter will add unwanted shaking to your picture.
An Acquired Taste, for Sure!
The long and short of it is that trick photography’s not for everyone. Some of these techniques are not for beginners, and, as such, they take a bit of time and practice to perfect. However, if you’re creatively inclined, then, by all means, give trick photography a shot…or two. It will expand your photography knowhow and expose you to methods that will amaze you with their ingeniousness.
Interested in trick photography? Have you ever tried any of the above photography techniques…with varying success, perhaps? In any case, feel free to let us know via Twitter or Facebook! And keep making Contrastly your premier destination for the coolest in photography from all over the globe.
About the Author: Marc Schenker
 Marc is a copywriter and content marketer who covered photography. These days, he runs The Glorious Company, a content marketing agency.