Basic Studio Lighting Setup For Portraits

The principle behind studio lighting is easy to grasp but the application can take a lifetime to master. Getting a good portrait is more than setting up the lights, but without the right lighting you’ll never get a chance to get that once-in-a-lifetime portrait.
When it comes to portrait lighting, there are two ways to go: portable strobes and the kind that plug into the wall. Putting together a portable kit is great because you can set it up anywhere, but to light big areas and shoot fast you’ll be farther ahead with plug-in studio lights. You can’t cheat physics; even the most powerful speedlites are no match for wall power when it comes to cycle times and the ability to light really big rooms.
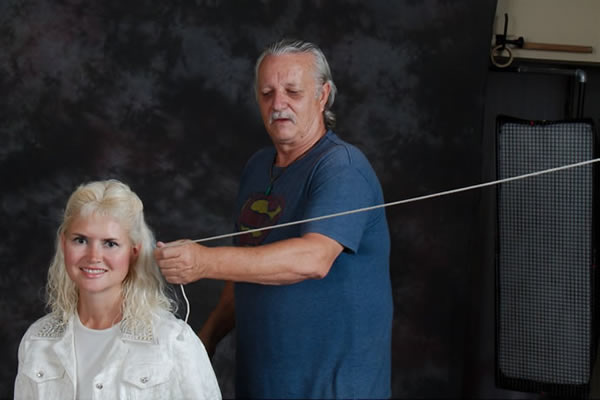
Checking distance to the subject the old fashioned way.
Today let’s go through a basic portrait setup with some help from my buddy Karl Leopold down in Cocoa Beach, FL. Karl’s been shooting weddings and portraits longer than most photographers working today have been alive.
Karl’s studio kit starts with two Alien Bees B800s and an Ultra 1800 on a boom as a hair light. One of the B800s is in a Fomex softbox, which we’ll use as the key, and the other we’re using as the fill is in an Photoflex Octodome. The Ultra 1800 is fitted with a grid screen and partial snoot.
We shot most of the day at either f/11 or f/13, depending on how many lights we had going. All camera settings were manual using 1/125th of a second as our flash sync speed at ISO 100. I was shooting with a Canon 7D with 18-105 zoom set as close to 80mm as I could eyeball it.
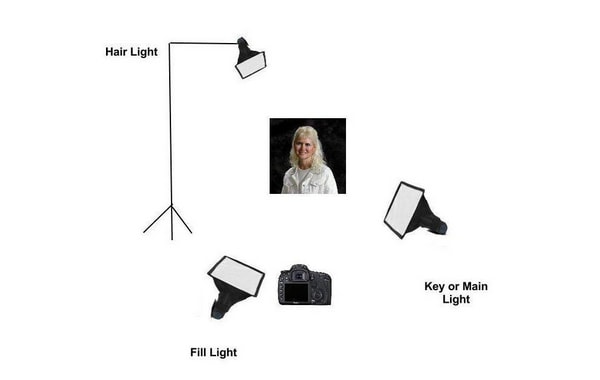
Notice in the graphic of the setup that the key light is closer to the subject than the fill, that is not an accident. If the two lights were equidistant with similar power settings, the light would be flat and lack depth. You want some shadows, just not a lot of them. The relationship between the light from the key and light from the fill is usually expressed in terms of a ratio. A 1:1 ratio the lights would equal, a 2:1 ratio would make the key twice as bright as the fill, or a full stop. We’re using a 3:1 ratio which makes the fill 1.5 stops below the fill. Other common portrait light ratios are 5:1 and 7:1.
To get the proper light ratio you can either cut the power on the fill and keep the lights at the same distance, or you can keep the power the same and move the fill farther back from the subject. We used a light meter to verify our distance was properly set for the fill.

Karl checks the light intensity with an incident light meter.
Now that we had our lighting setup is was time to shoot some test shots. First, we started with just the key.
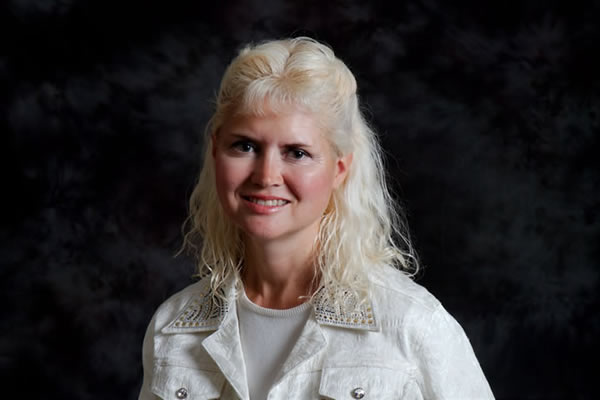
Notice the shadows are sharply defined and the back shoulder of the subject gets lost in the background. Next we’ll add the fill.

This is not a bad portrait here. We have some shadow, but not as harsh as the one light set. But now see what a difference the hair light makes.
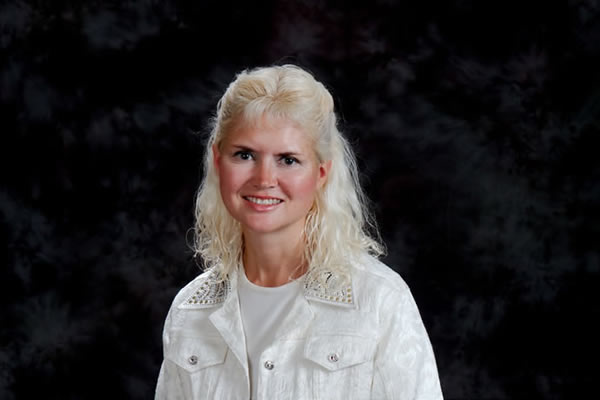
Notice how the hair light makes the hair pop and adds the tiniest bit of halo around the head and back shoulder. We’ve also managed to mute the background a bit and get much better separation on the subject.
This is much improved and with a little cropping and post processing this would be an entirely decent portrait. At f/11 and f/13 we’re shooting right in the middle of the zoom range which will yield good performance from any decent glass.
And that’s all there is to a basic three light portrait setup. While it seems simple, keep in mind we were working in a professional studio with all the lighting positioning marks already on the floor with the assistance of a professional portrait photographer. But what we did with experience and equipment, you can do with practice, practice, practice. Get the lighting setup you can afford and start shooting.
About the Author: Chris Poindexter
 Freelance writer, photographer & videographer, Chris has spent the last four years on the road writing two books on full-time RV living. Besides photography, he writes about personal finance, science, tech, travel & fine dining. Besides a writer, he was a software engineer, CIO of a medical services company & volunteer firefighter. Find him on Google+