Composition Techniques & How to Get the Right Light

Everybody wants to take great pictures, especially today, given the proliferation of so many devices that can take pictures quickly and easily. It used to be that photography, in the general sense was left exclusively to cameras, which could range in size from 35mm to large 5 x 7 formats.
Today, with the never-ending onslaught of new technologies, and the explosive rise of social media as a significant factor in many people’s daily lives, even smart phones or tablets are equipped with reasonably sharp lenses, and are therefore able to quickly take pictures in social settings and share them via e-mail or social media with friends and family.

photo by Jason A. Howie
Are We Getting Dumbed down?
While everybody appreciates convenience and ease-of-use, it appears that modern camera and mobile device manufacturers have decided that the general population really doesn’t want to have to deal with too many complications when taking a picture.
There are certainly situations where being able to go the “point and click” route is the most obvious solution. One may be at a local bar or café with friends, and want to take a quick picture to record the moment.
Obviously, any semblance of spontaneity will be lost if the picture takes over a minute to compose and set up. In these cases, having the camera do most of the thinking and just give us a usable result is probably fine.
Most of the current digital cameras available on the market have been injected with a heavy dose of electronics and processing power, in an effort to make taking a picture as easy as possible. However, for someone who wants to take pictures that are a little more sophisticated than just a “party” shot need to obviously expend a little more effort.
For many, this is actually quite enjoyable. It’s all most like a painting; you get to decide what to place on the canvas and can control all the elements in the composition. On modern digital cameras, this means deselecting the completely automatic mode, giving you a little more control over how the picture will be taken.
The latest digital cameras are even including a feature typically referred to as “face recognition”. This can be quite useful for quick snapshots of people, but also takes control of the composition away from the user.
Taking Control of the End Result
The amount of control you can achieve on your camera really depends on the model and type of camera. Some of the simpler and cheaper digital cameras will give you very few options to control exposure, focus and sometimes even composition. The more expensive and sophisticated ones will give you gradually more and more control over every element of your shot. If you are still using a 35mm camera, you basically have almost total control over the end result.
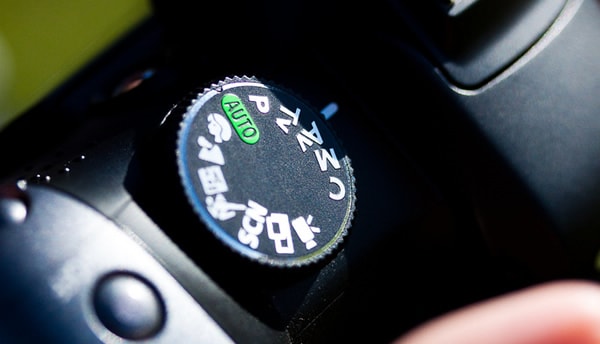
image by Francis Bourgouin
If you’re planning on buying a new digital camera, and know that you will want to take more than just a casual snapshot, it’s worth investing a little more money into a camera that has the ability to relinquish control over the composition and exposure, and let you choose the settings you prefer. This will give you the creative freedom to take the picture as you have imagined it in your mind.
The basic elements to consider in this case are having the ability to control how you frame the shot itself, as well as the ability to decide how to deal with the various factors involving focus, exposure, including adjusting for various lighting conditions.
Elements of Composition and Lighting
Assuming you can rest control of your composition away from your cameras processor, there are several elements to consider which will affect your ultimate result:
Composition is one of the key elements in achieving a satisfactory result. For simplicity sake, this can be divided into two separate categories.
Portraits
There are several schools of thought on the subject, and all of them are valid.
- There are those that prefer to have the subject centered squarely in the middle of the frame, so that they are by default the central image that one sees.
- One could also place the subject to one side of the frame, allowing for some of the background to be more visible, and creating additional visual interest.
Landscapes
As used here, this describes a very general category where no individual person is actually a major element of the picture, if at all.
- Depending on the picture, one may want to have both the foreground and the background in sharp focus. This will require using a small aperture, which will provide a greater depth of focus. Depending on the sensitivity of the film (35mm) or the ISO setting on the digital camera (which can often be manually selected) one can take the same picture with a narrow aperture in a shorter period of time. Without the aid of a tripod, this is crucial to ensure that the picture will not be blurry. The trade off is that the higher the ISO setting, the grainier the result will be.
- The alternative is to ensure the main element of the picture, which is typically in the foreground, is in sharp focus, but leave the background slightly out of focus. This has the advantage of forcing the eye to pay more attention to the foreground, and creates a nice, almost artistic rendition to the background elements. For this, one needs to use a larger aperture, which will also allow for faster shutter speeds, potentially eliminating the need for a tripod altogether, especially in daylight.
Lighting
- Portraits are always best taken with the sun to one’s back, clearly eliminating the subject. However, one could also create an interesting visual effect by taking the picture into the sun, using the built-in flash to help illuminate the subject appropriately.
- Landscapes and other objects should always be taken with the lighting source to one’s back, so that the subject matter is properly illuminated.
Your Turn To Talk
I hope you liked this article, please feel free to share it on Twitter or Facebook.
About the Author: Chris Harlepp
 Chris Harlepp is a US-based lifestyle writer covering some of the latest trends in modern consumer technology. He writes on a freelance basis for many of the major technology blogs and can be followed on Twitter.