Creating a Noir Night Scene in PS and LR
 by
Kent DuFault
by
Kent DuFault

I think you’ll enjoy this blog post if you haven’t played much with post-production other than the fundamental edits.
I will show you how easy it is to create a noir night scene using a few simple masks in Photoshop and Lightroom.
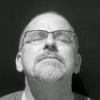
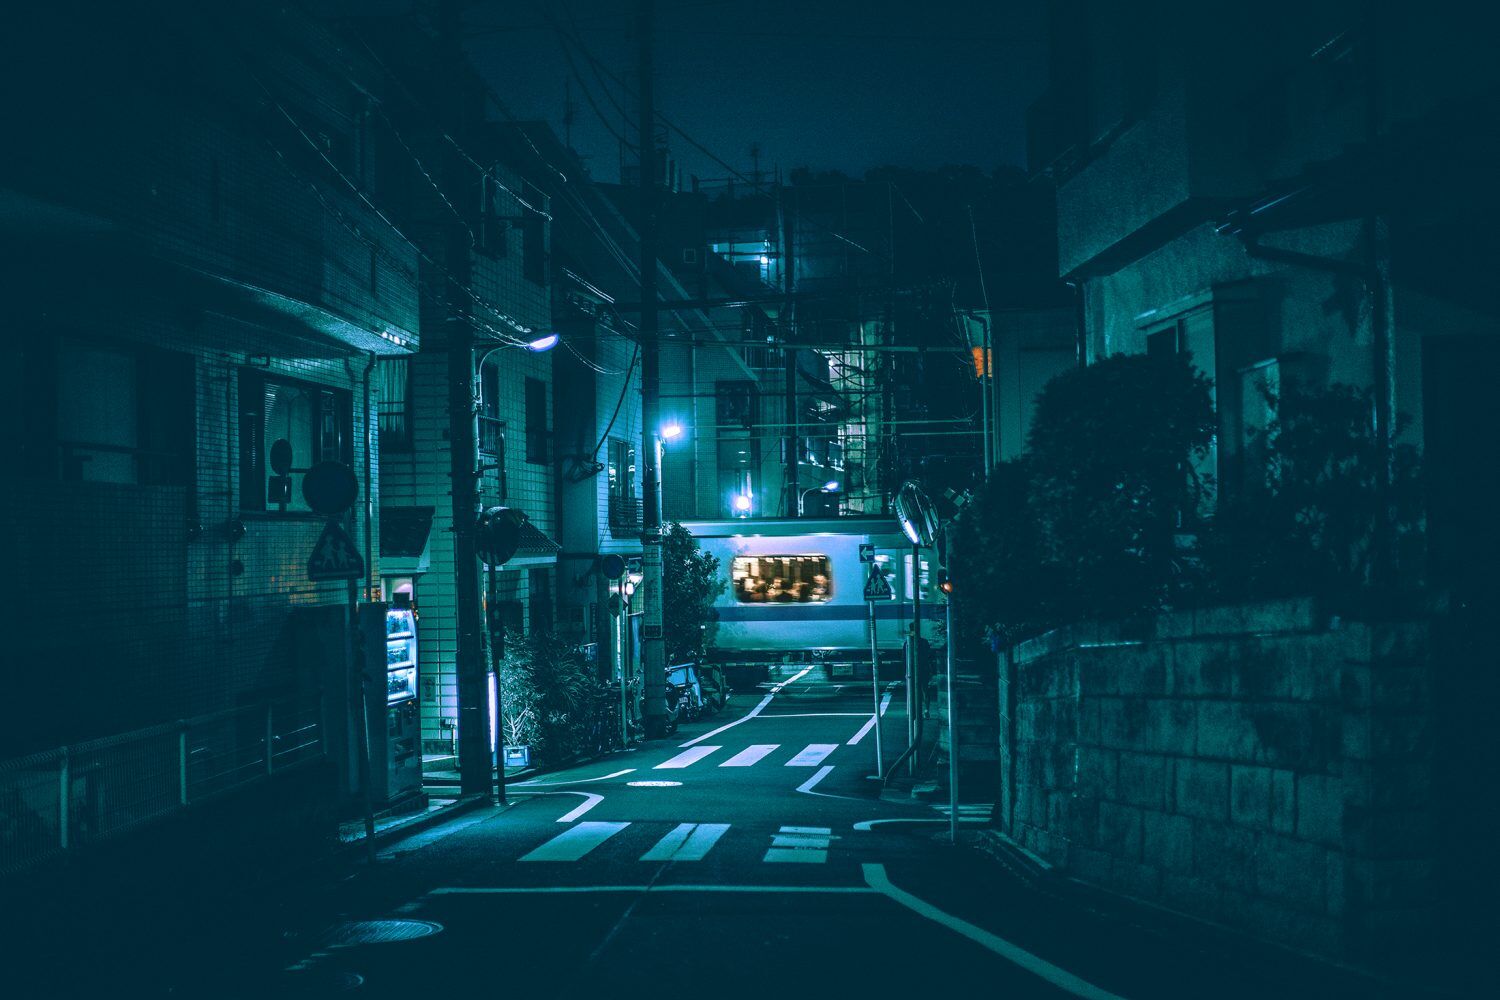
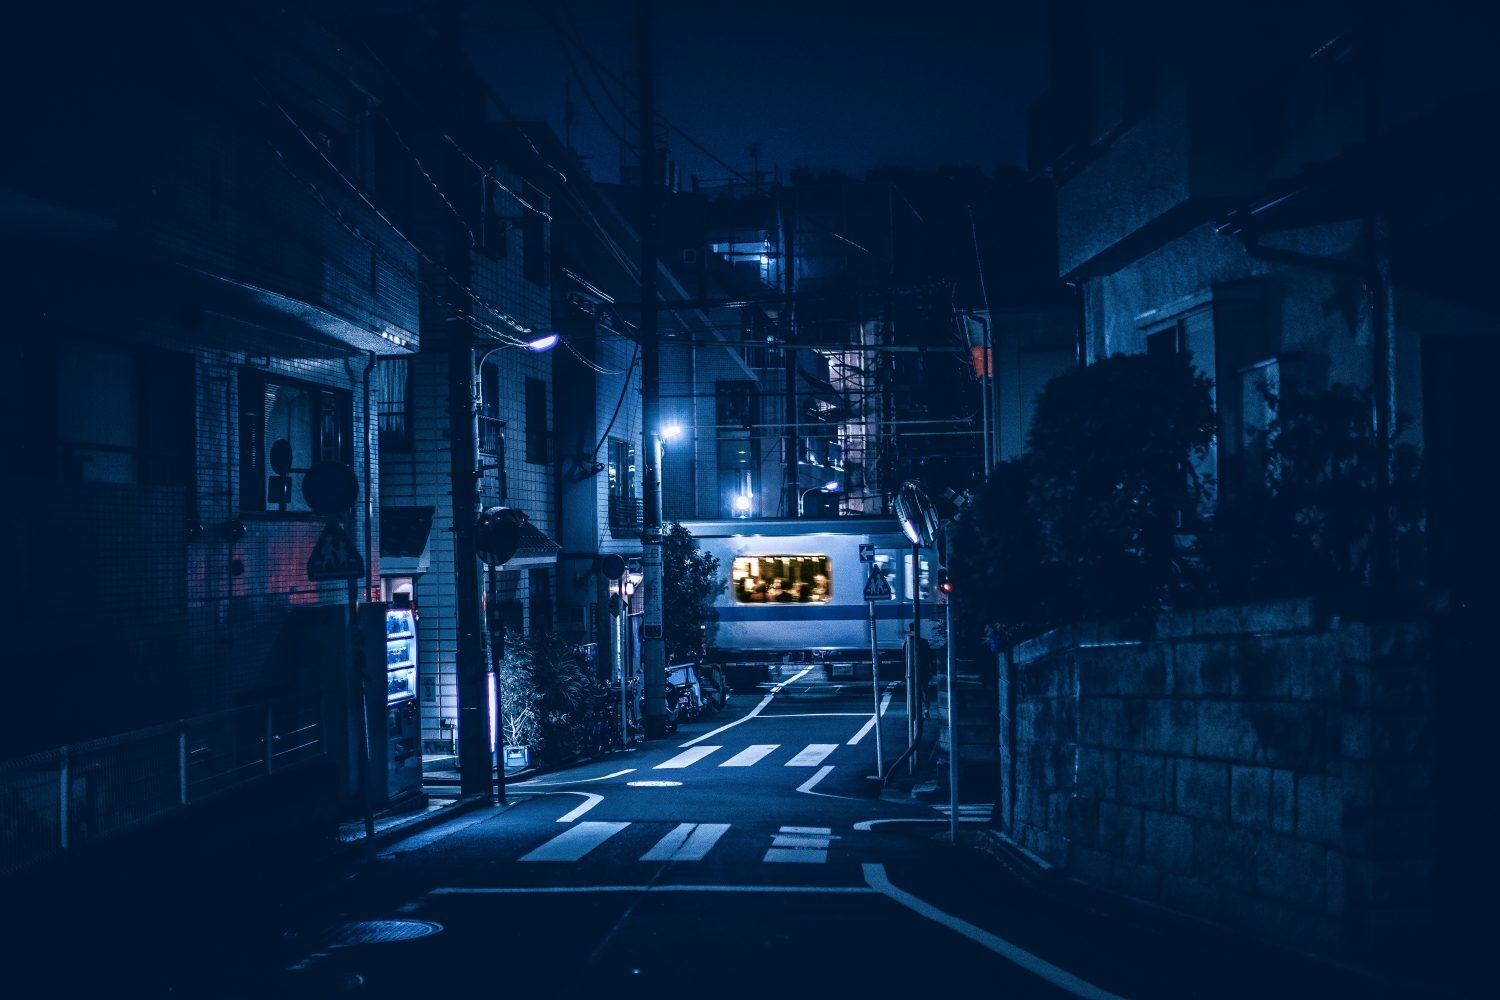
I will use the above photo for this exercise, which is interesting in subject and composition.
000
Yet, it lacks the visual power to really grab viewer attention.
000a
Noir is a cinematic term used primarily to describe stylish Hollywood crime dramas. (Imagine the grizzled detective with a stubby cigar.) The 1940s and 1950s are generally regarded as the American film noir’s “classic period.”
Our practice photo screams ‘noir’ to me. In my imagination, a murder occurred on the train, and the detective (fill in the blank) solves the crime without the train ever stopping.
That’s the story that I want to create with my post-process editing.
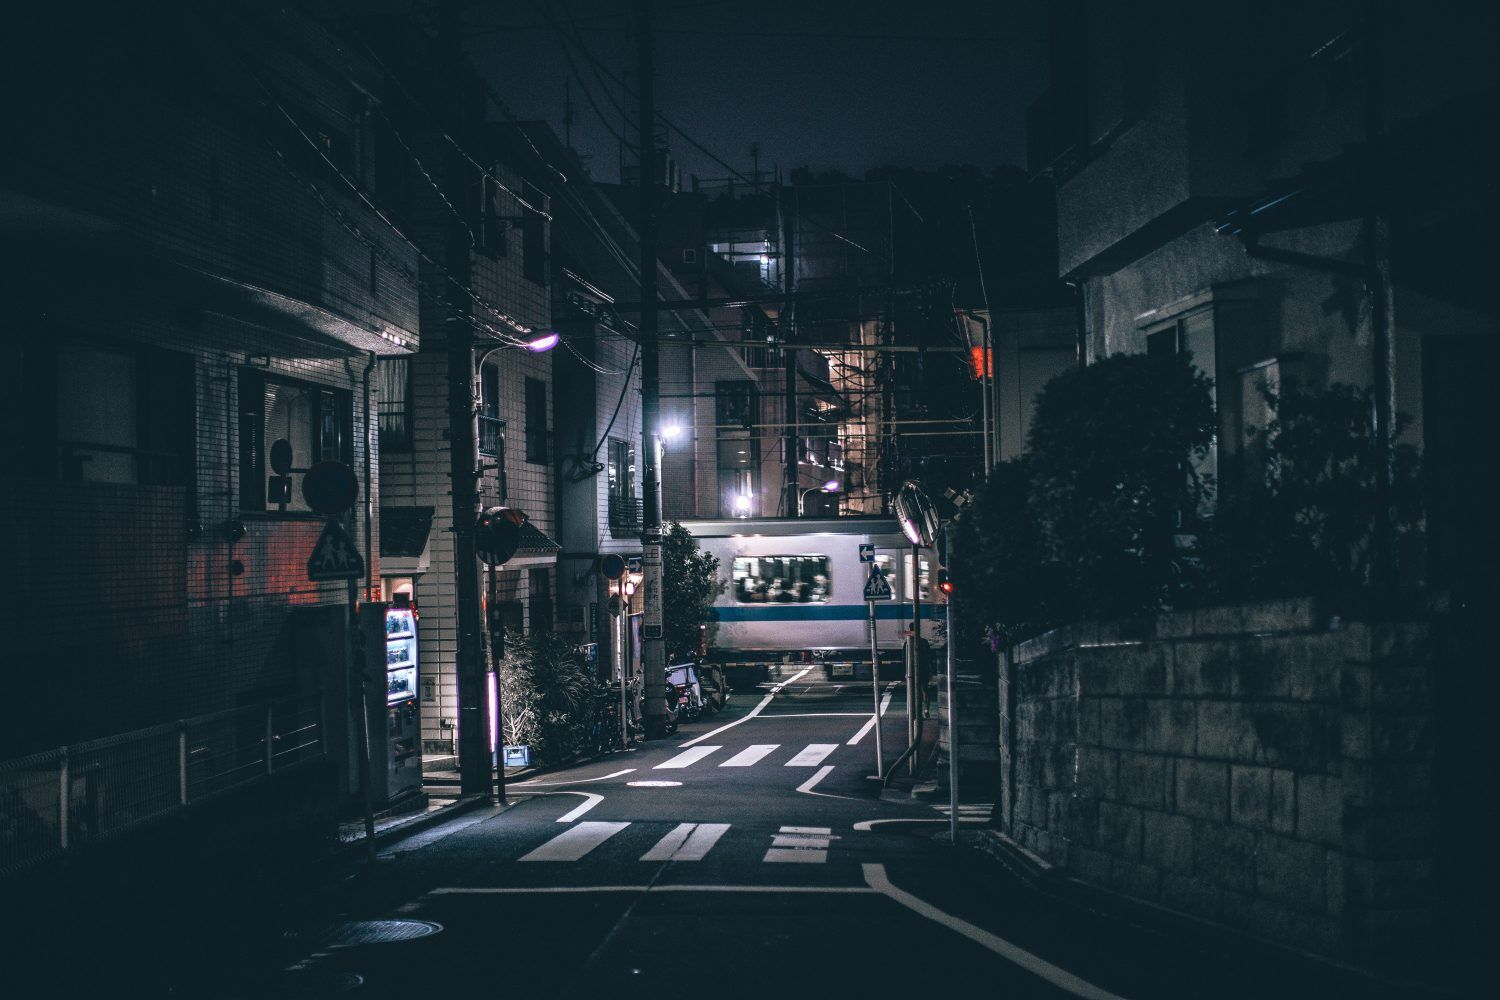
The area in the yellow oval of image 000a will be my subject area. That is where I want viewer attention to be riveted. (It’s here that my detective is questioning the suspects.)
If you review image 000, you can see that the subject area is lost within the frame. We’re going to change that with some post-processing fun.
I’ll show you the steps first in Photoshop and then in Lightroom. The good news is that it is easy to accomplish in either program. That’s the beauty of using masks, and Lightroom is finally catching up to Photoshop in this regard.
001
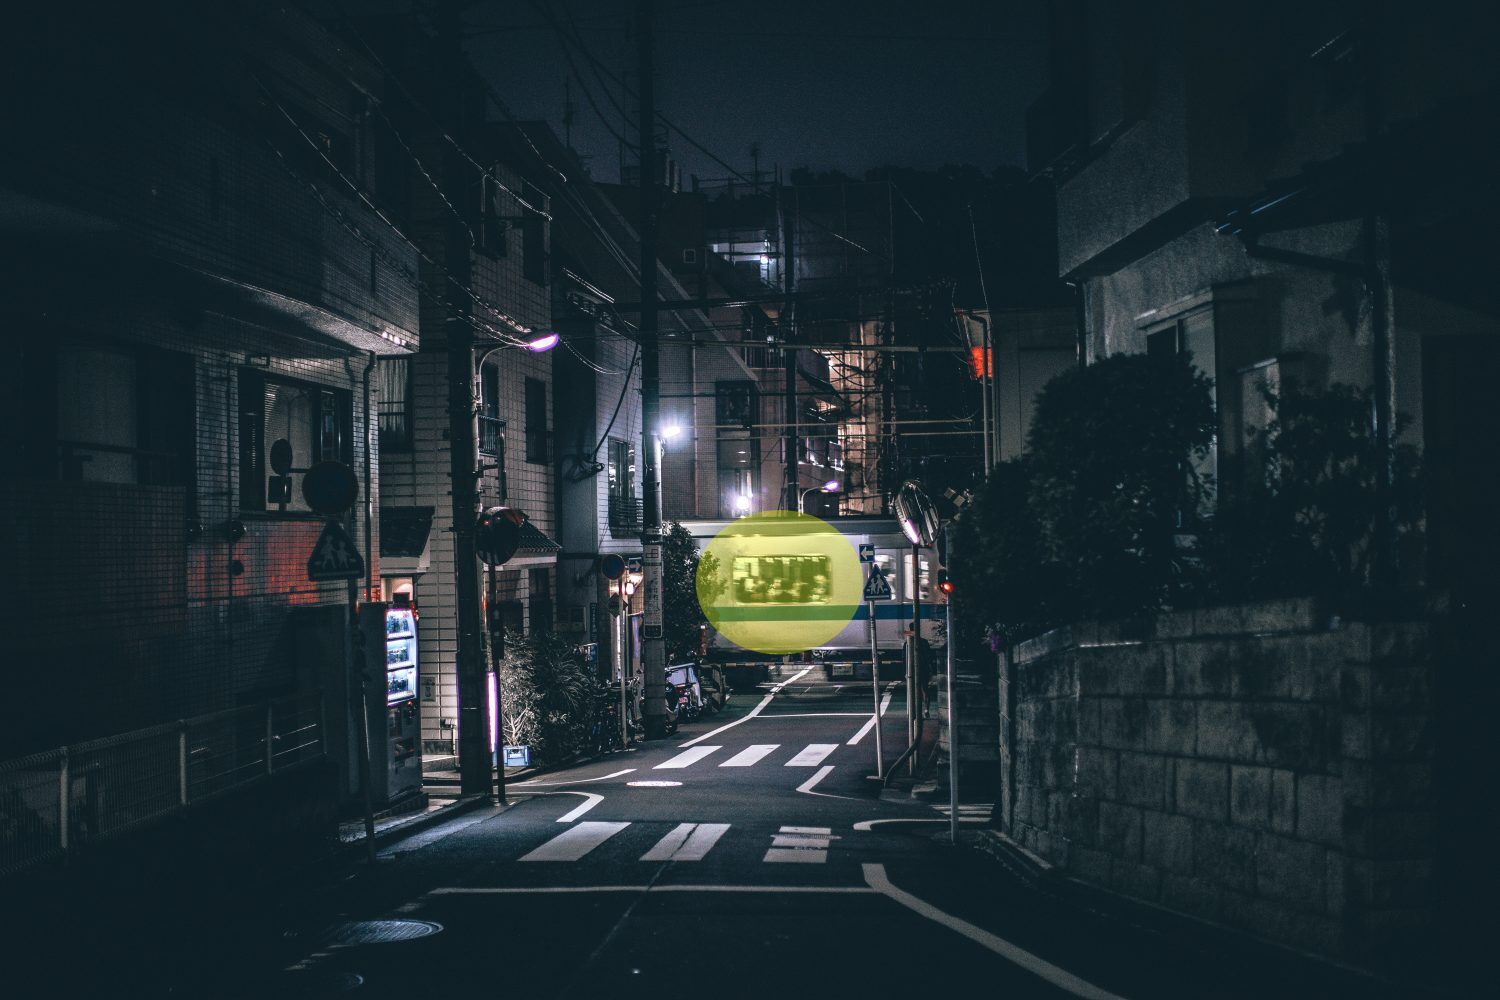
Let’s start in Photoshop by duplicating the background layer.
002
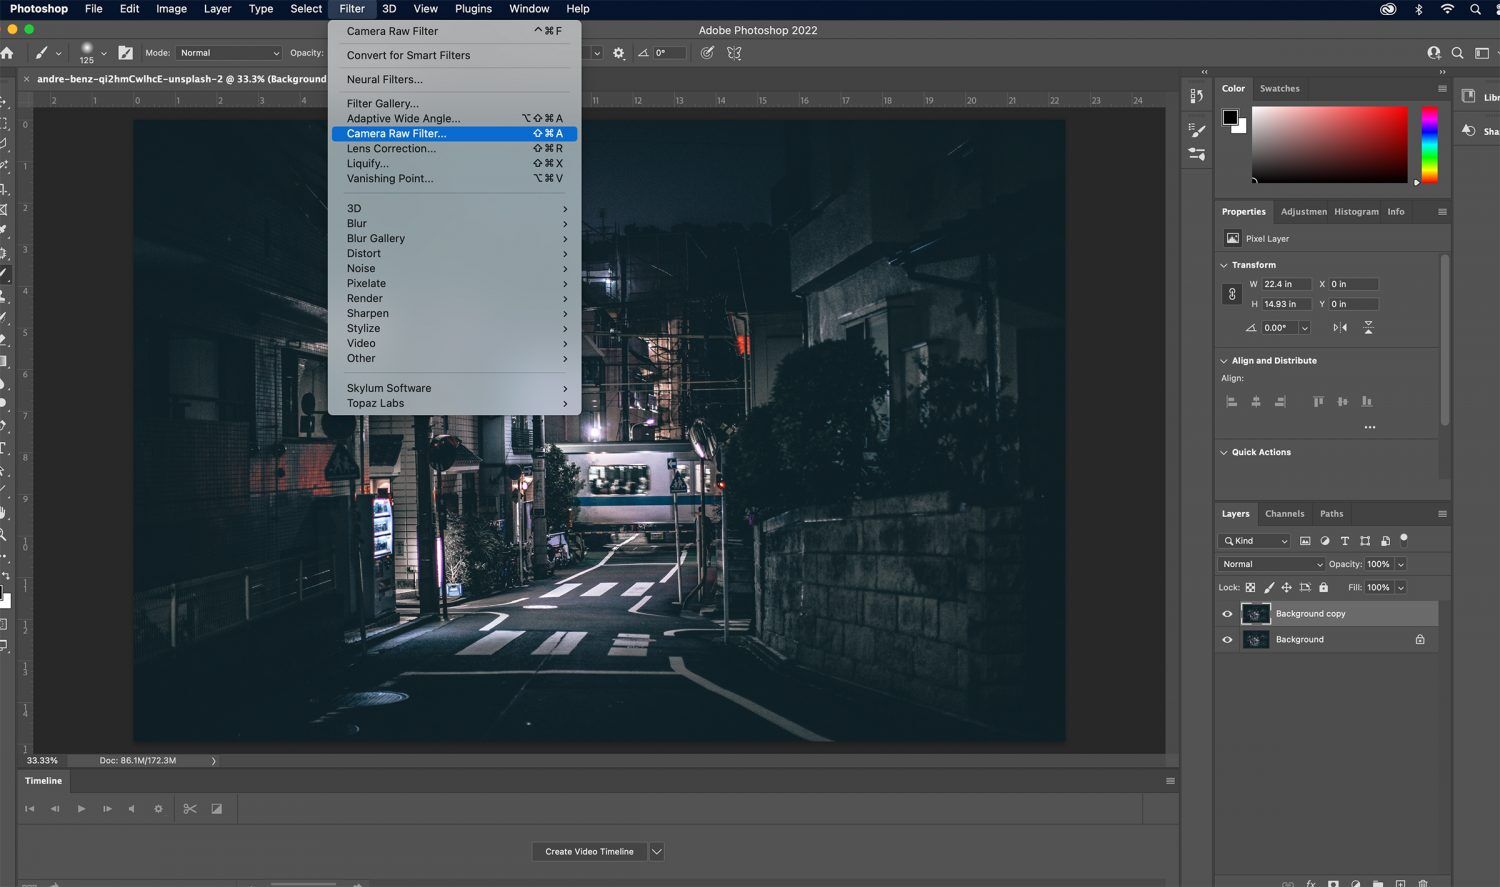
Next, I will open the layer copy in the Camera Raw filter.
003
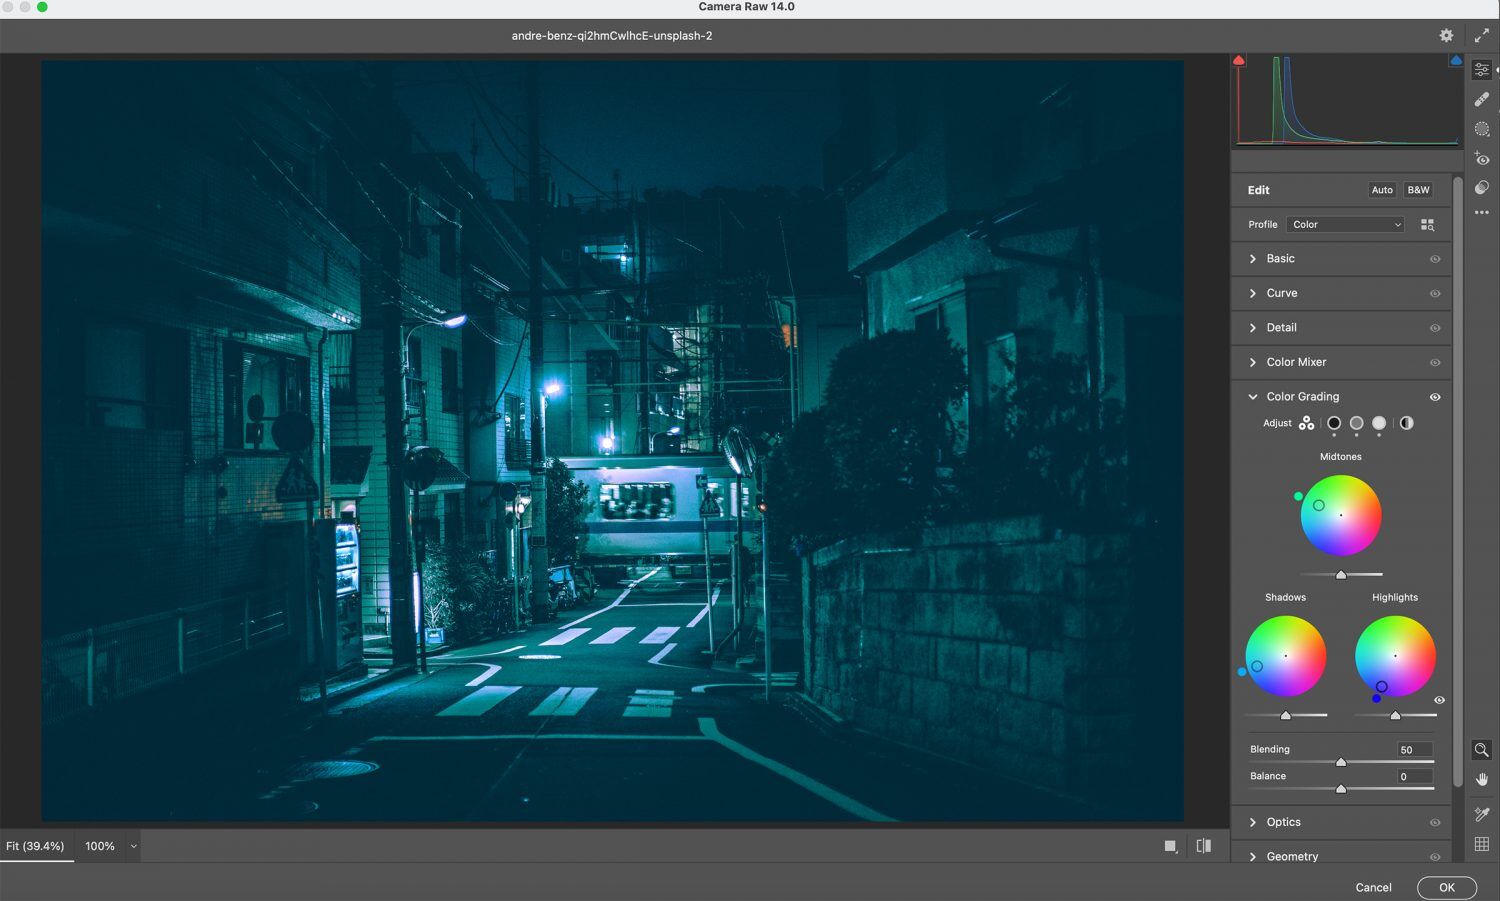
Inside the filter workspace, I will navigate to the Color Grading toolset. I’m going to alter the color with a bias toward blue and green.
That simple color change already gives a nice ‘noir’ effect. However, my subject area is still lost, making my story incomplete.
004
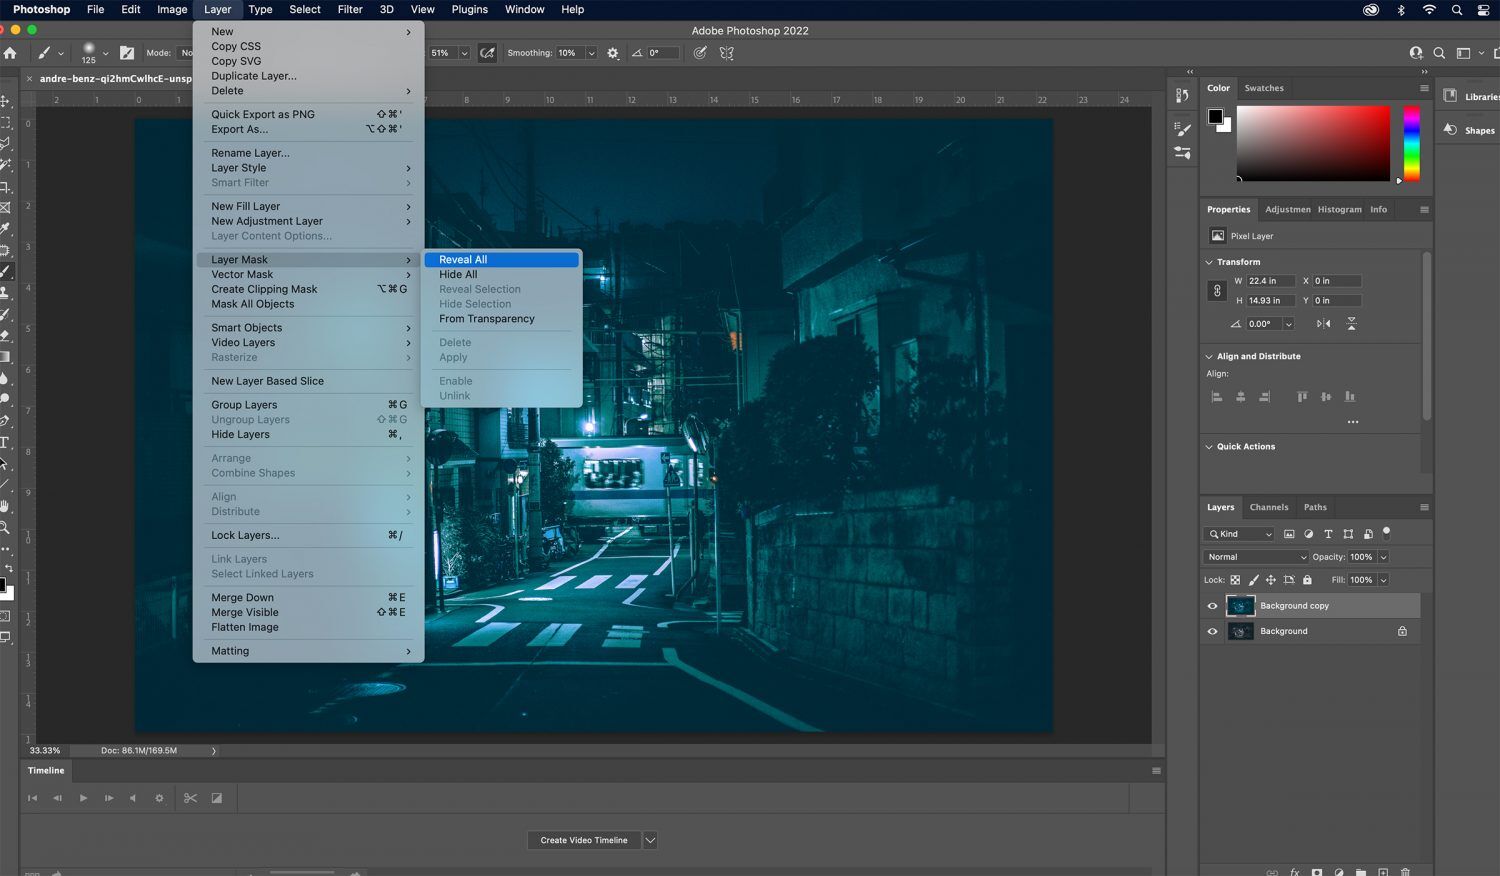
I exit the Camera Raw filter and click on the ‘Layers’ dropdown menu. There, I select Layer Mask and Reveal All.

005
You can see my Layer mask on the Background Copy layer to the right. A Reveal all mask displays as white, and you paint with black on the Preview Image to alter the mask and reveal the base layer.
Make sure the mask icon is selected when doing this step.
I painted over the window of the train to create this mask. This means that only the train window is excluded from the Color Grading tools edit.
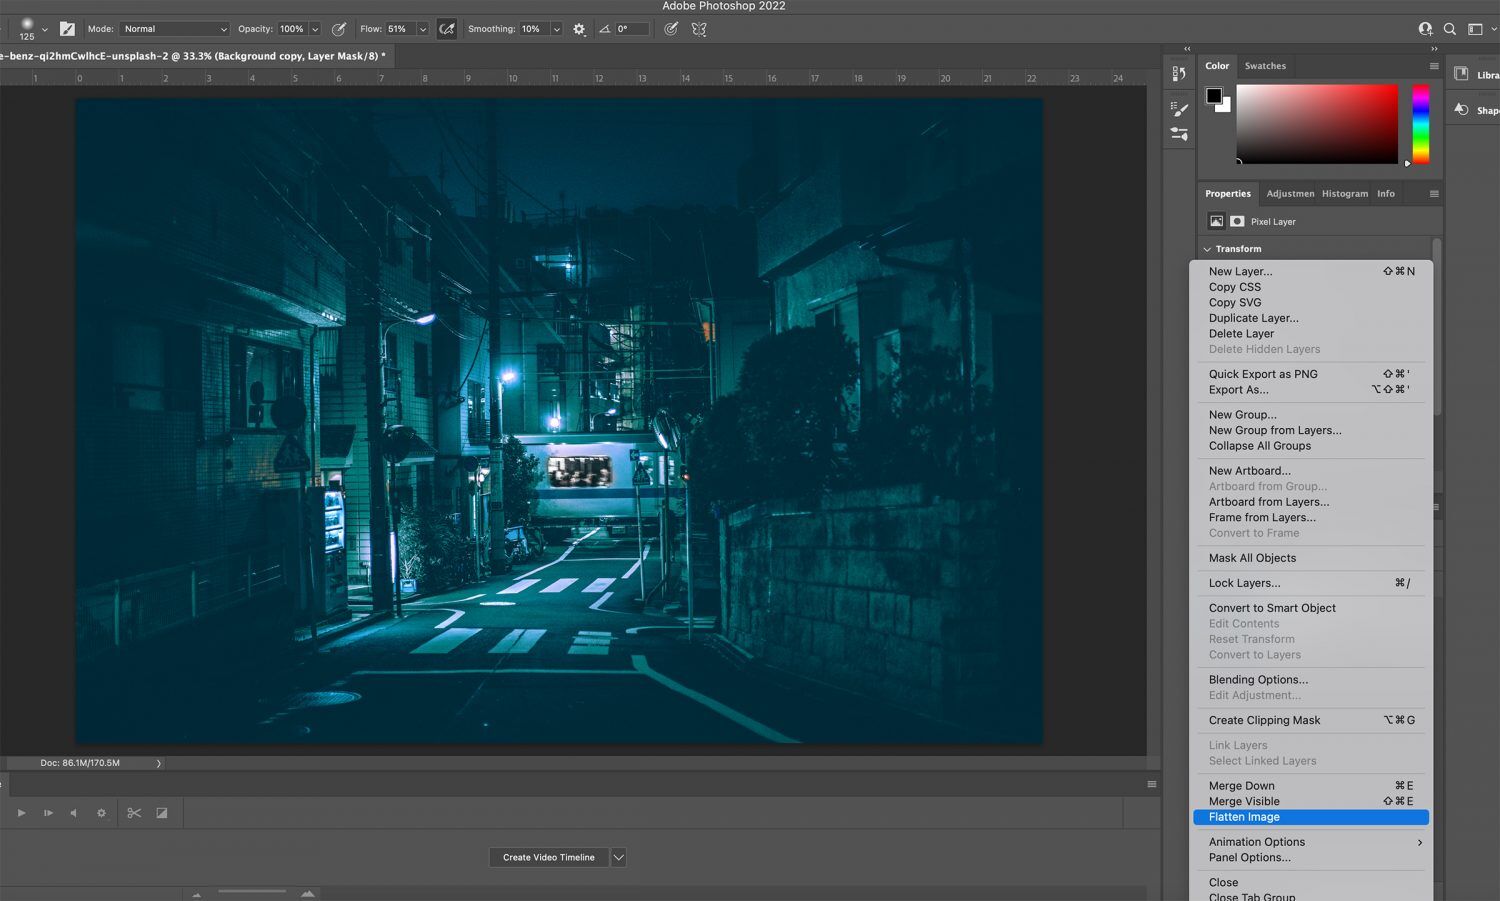
006
I flattened the image, which merged my two layers together.
007
I return to the Camera Raw Filter.
008
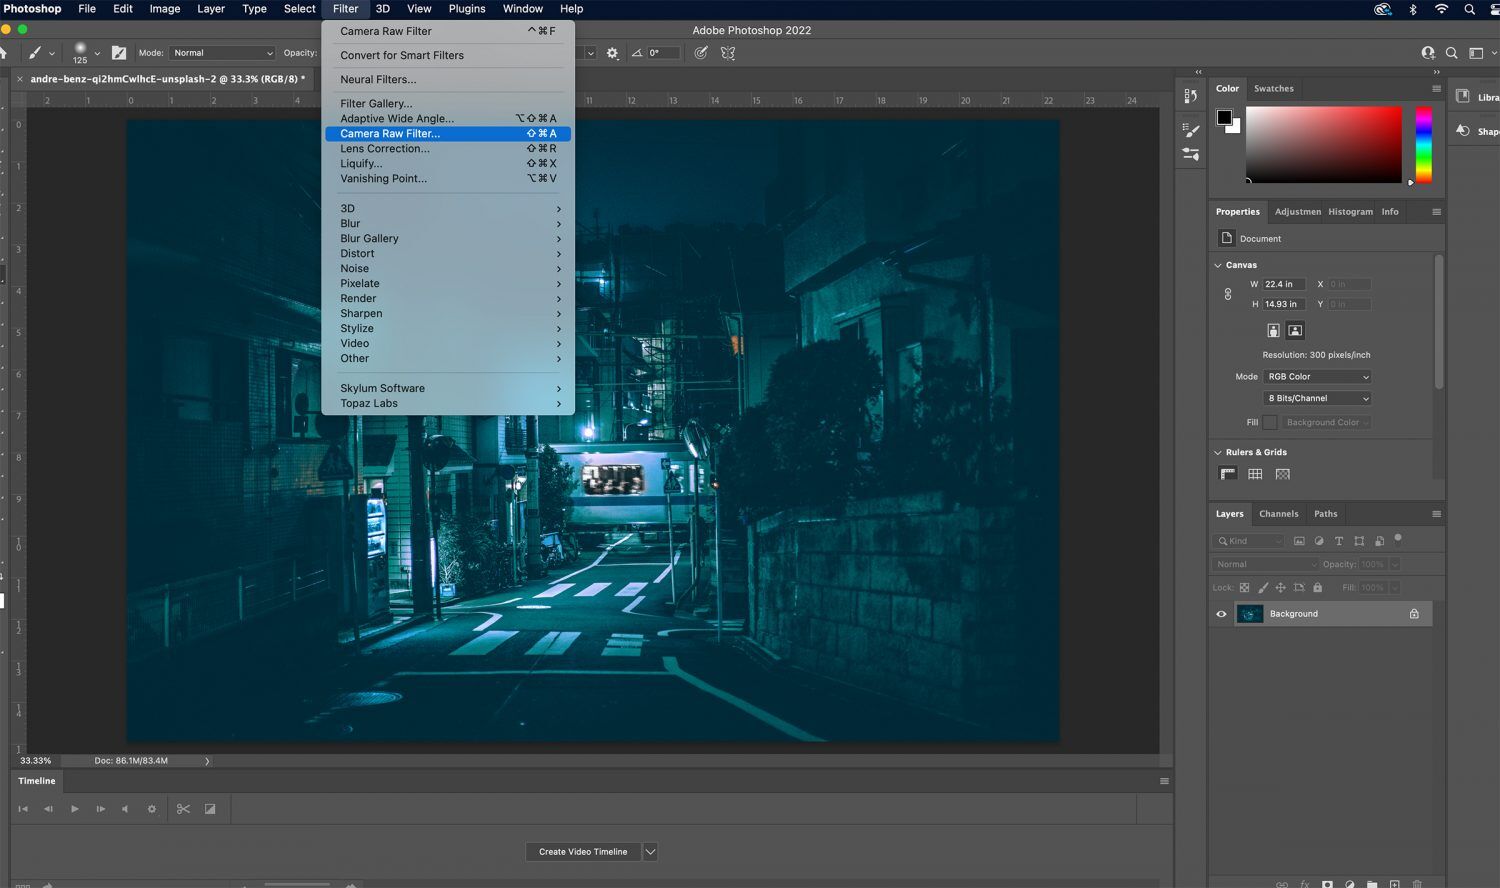
I select the ‘Masking’ tool on the far right. This configuration is relatively new to Photoshop CC. If you’re using an older version of Photoshop- you will use the Adjustment Brush for this step.
I select the ‘Brush’ tool in the Masking toolbox and create a new mask. This mask is painted over just the window of the train. You can clean up the edges of a mask using the Brush and Eraser tools, which are located right next to each other on the right.
009
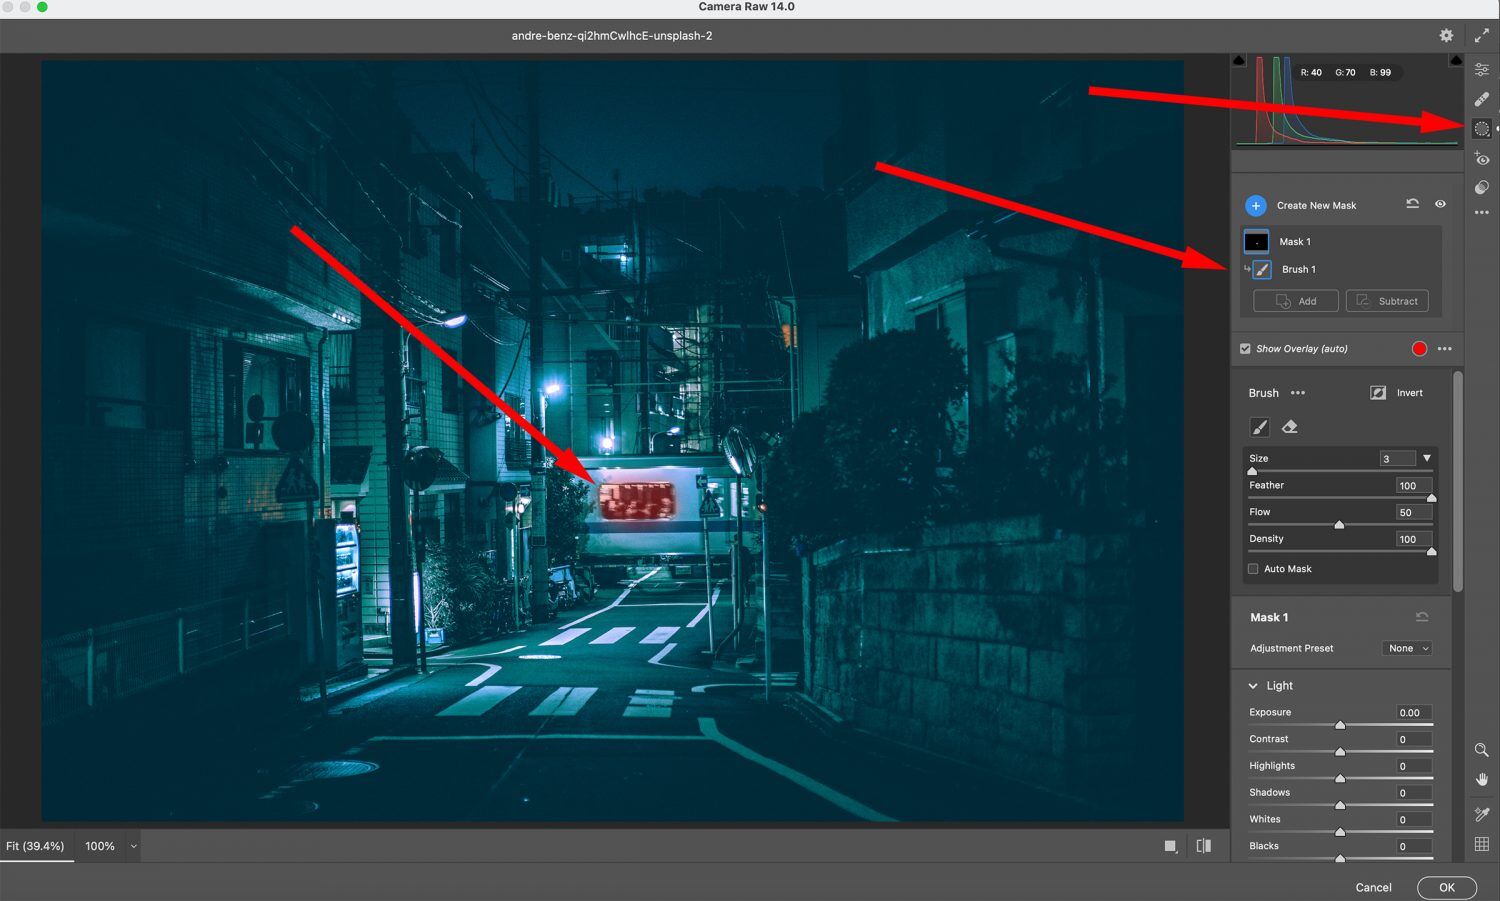
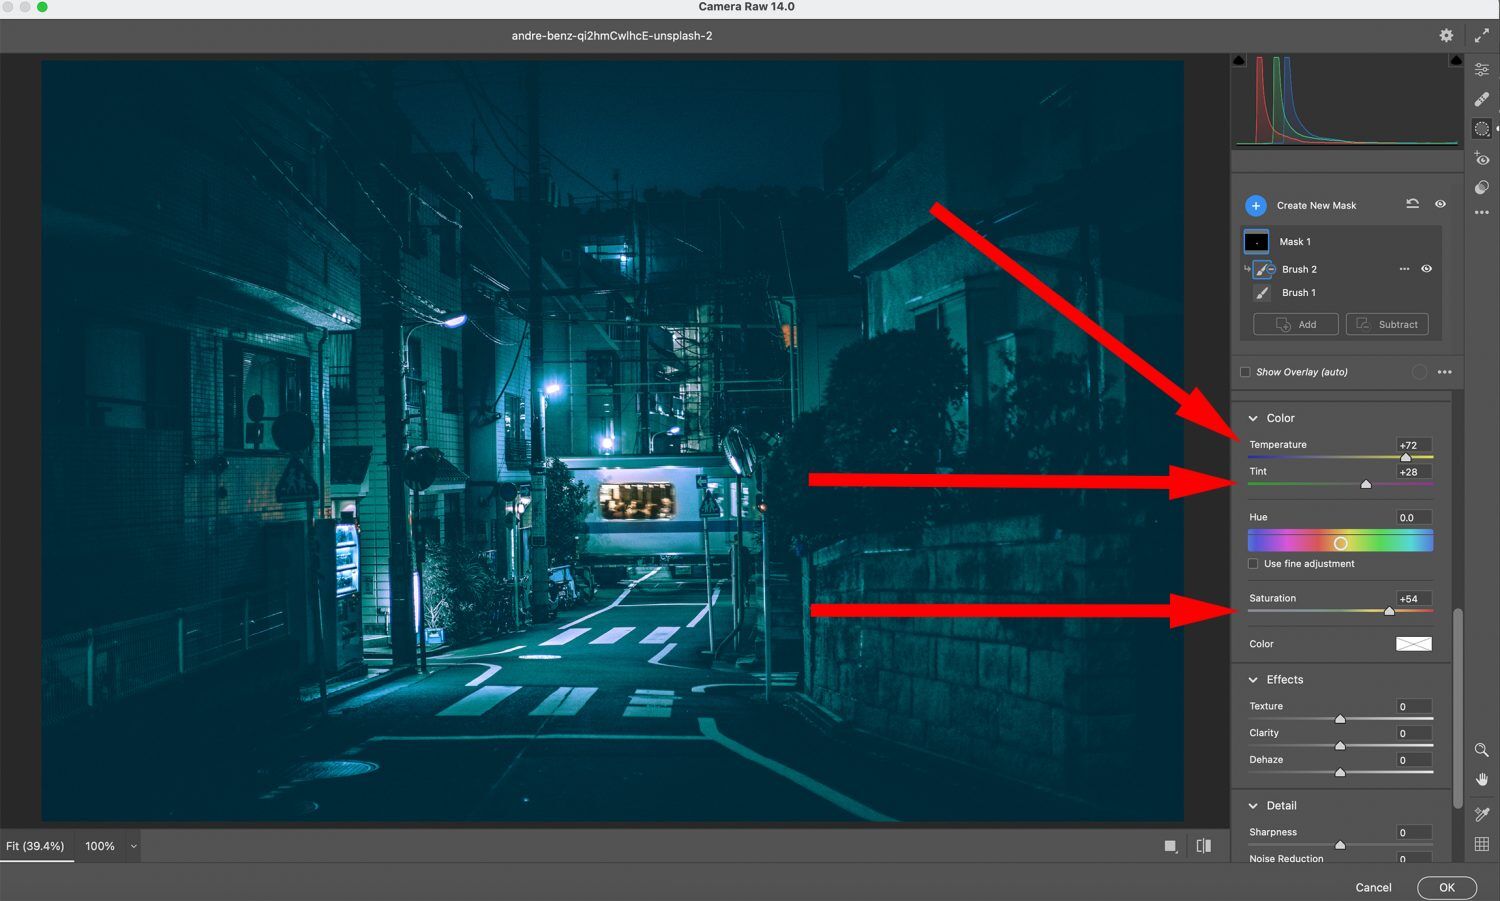
I am changing the color of the train interior by adjusting the Temperature, Tint, and Saturation sliders.
Notice how that window is beginning to visually emerge from its surroundings.
010
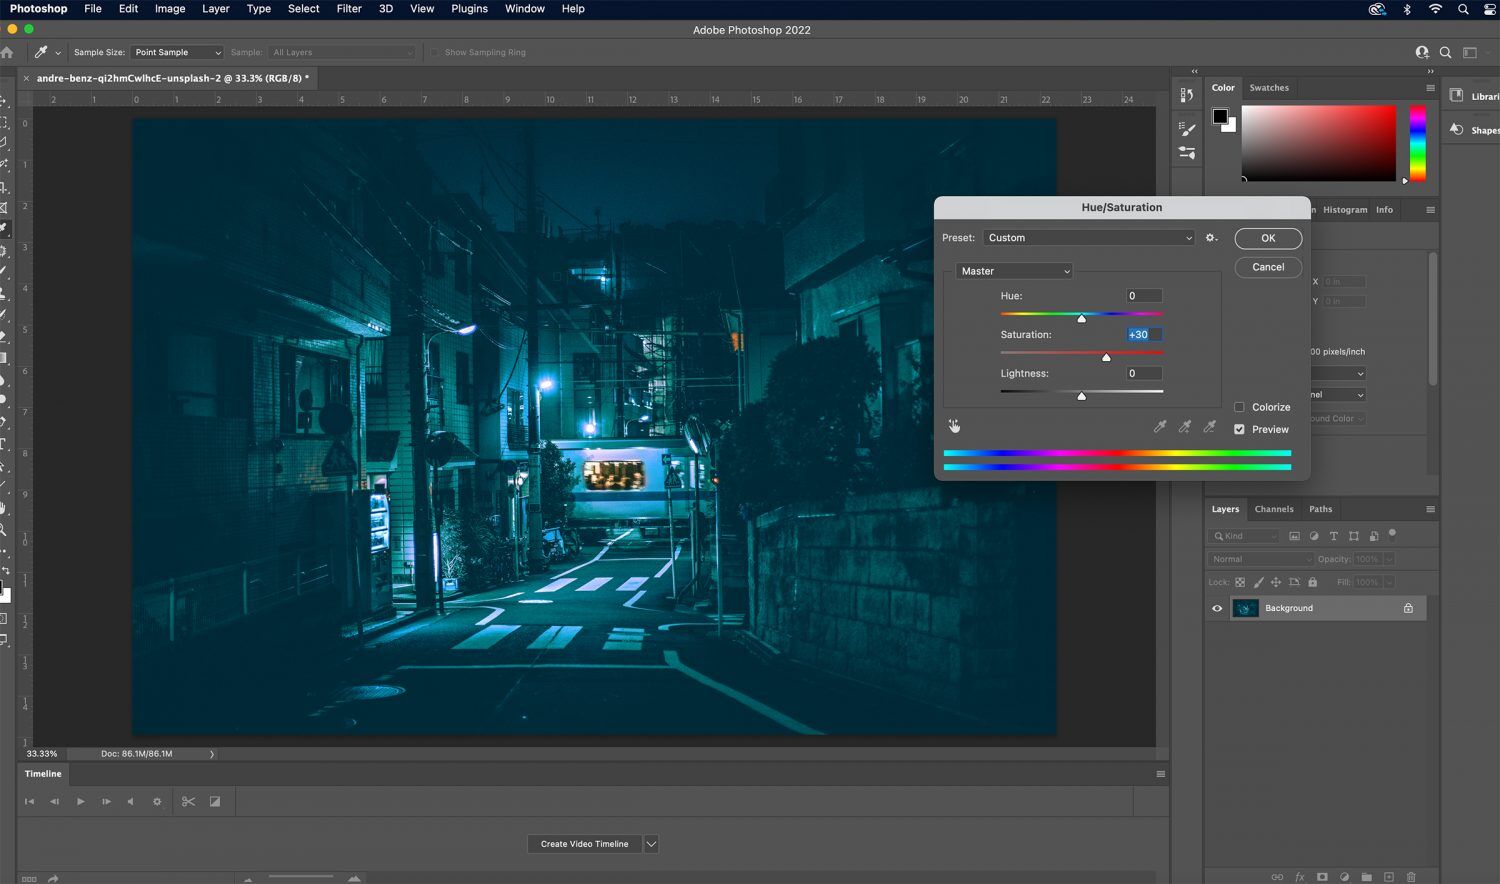
I exit the filter and open the Hue/Saturation Adjustment tool in Photoshop. I gave the entire image (a global change) a boost in color saturation of +30.
011
Here is my final noir night scene using Photoshop.
We will now accomplish this effect in Lightroom, which is actually a bit easier and faster.
012
I have opened the image in Lightroom CC. If you’re using Lightroom Classic, everything operates the same. However, your workspace will appear slightly different.
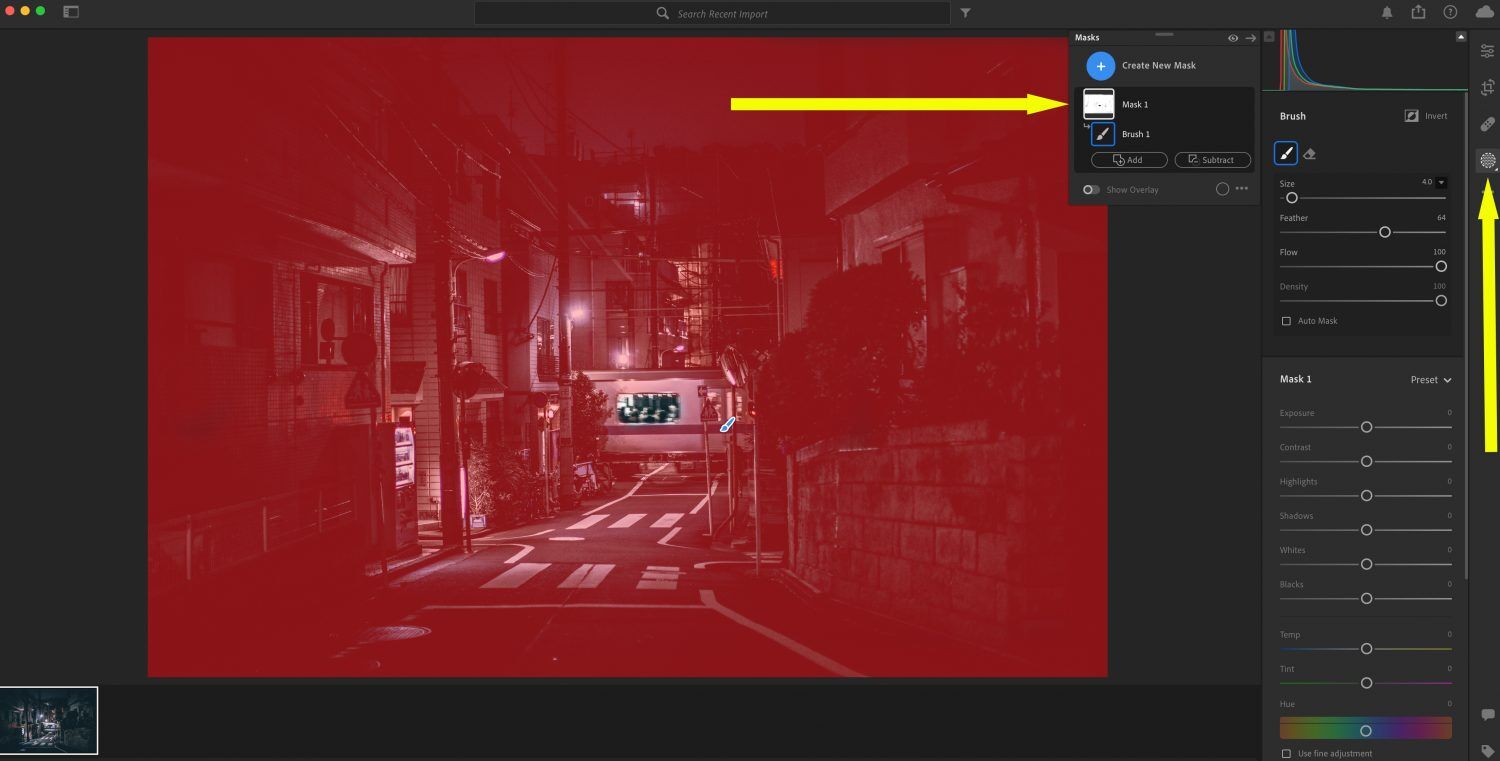
013
I selected the Masking tool and painted a mask over the entire Preview image while excluding the window on the train.
014
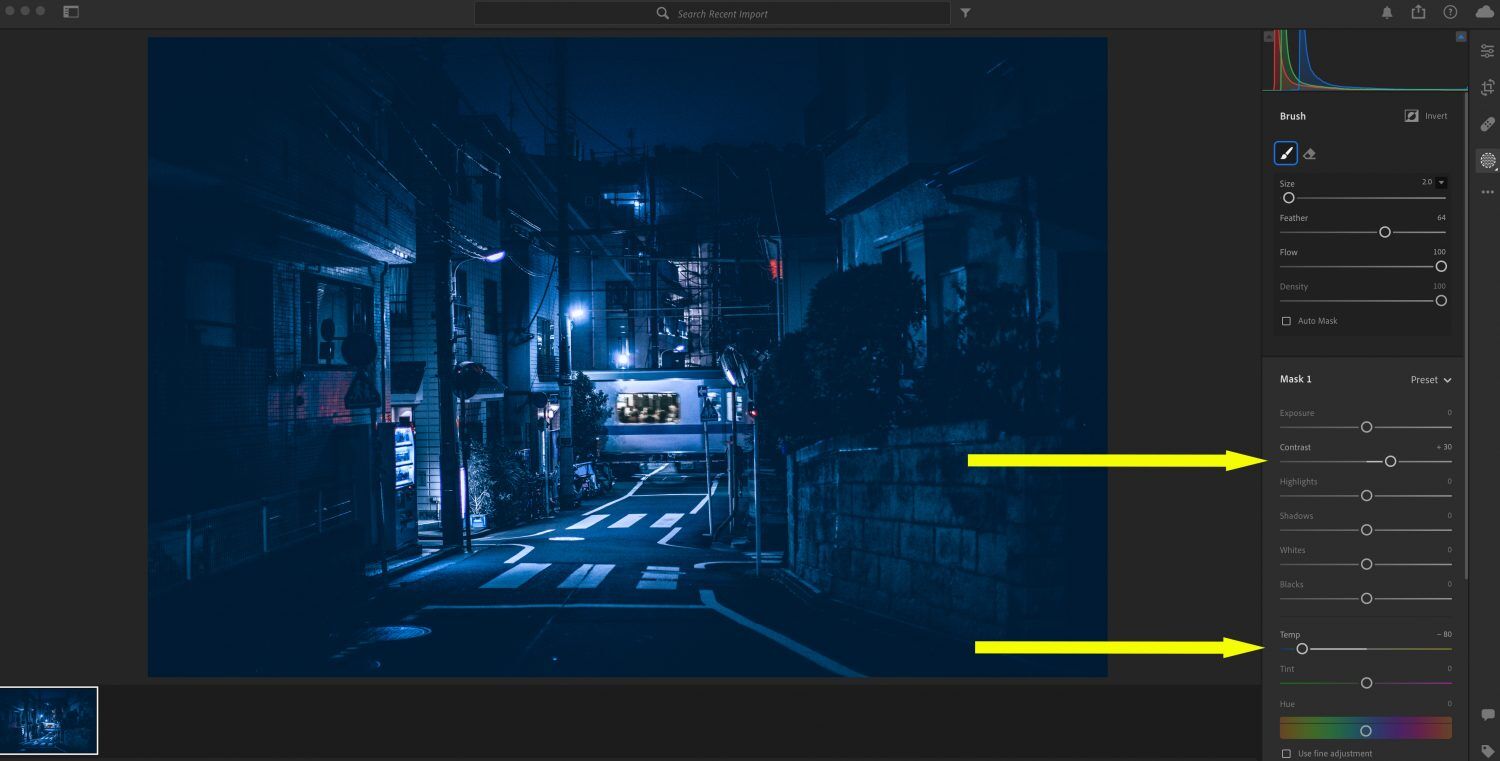
I created my nighttime noir effect using the Contrast and Temperature controls. I could have used the Color Grading just like we did in Photoshop.
However, there are different ways to accomplish things, and they provide their own nuances to an edit. At the end of this post, I want to demonstrate the difference between the two techniques.
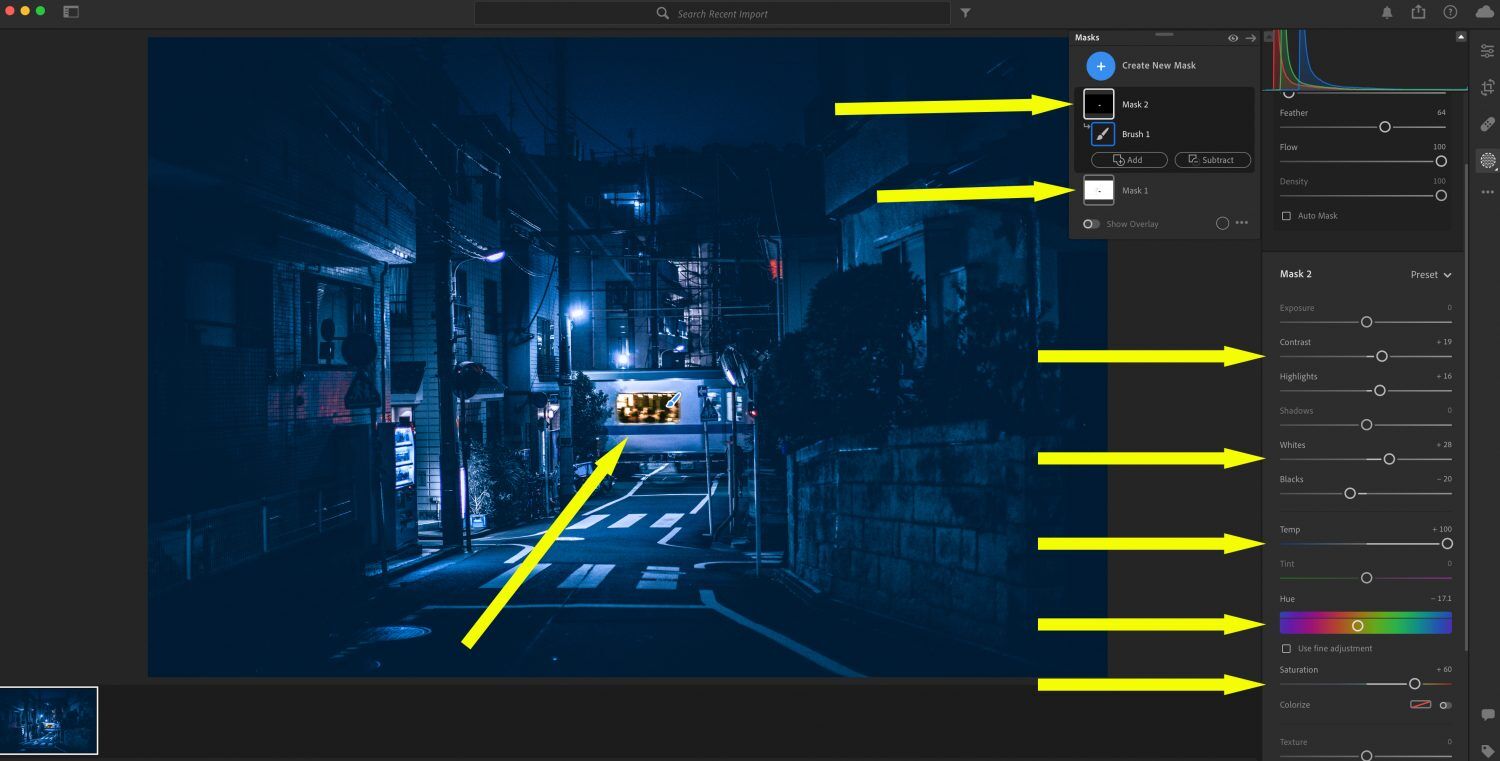
015
I now created a second mask and painted it over just the train window. I am altering the color of the train interior using the Contrast, Whites, Temp, Hue, and Saturation controls.
016
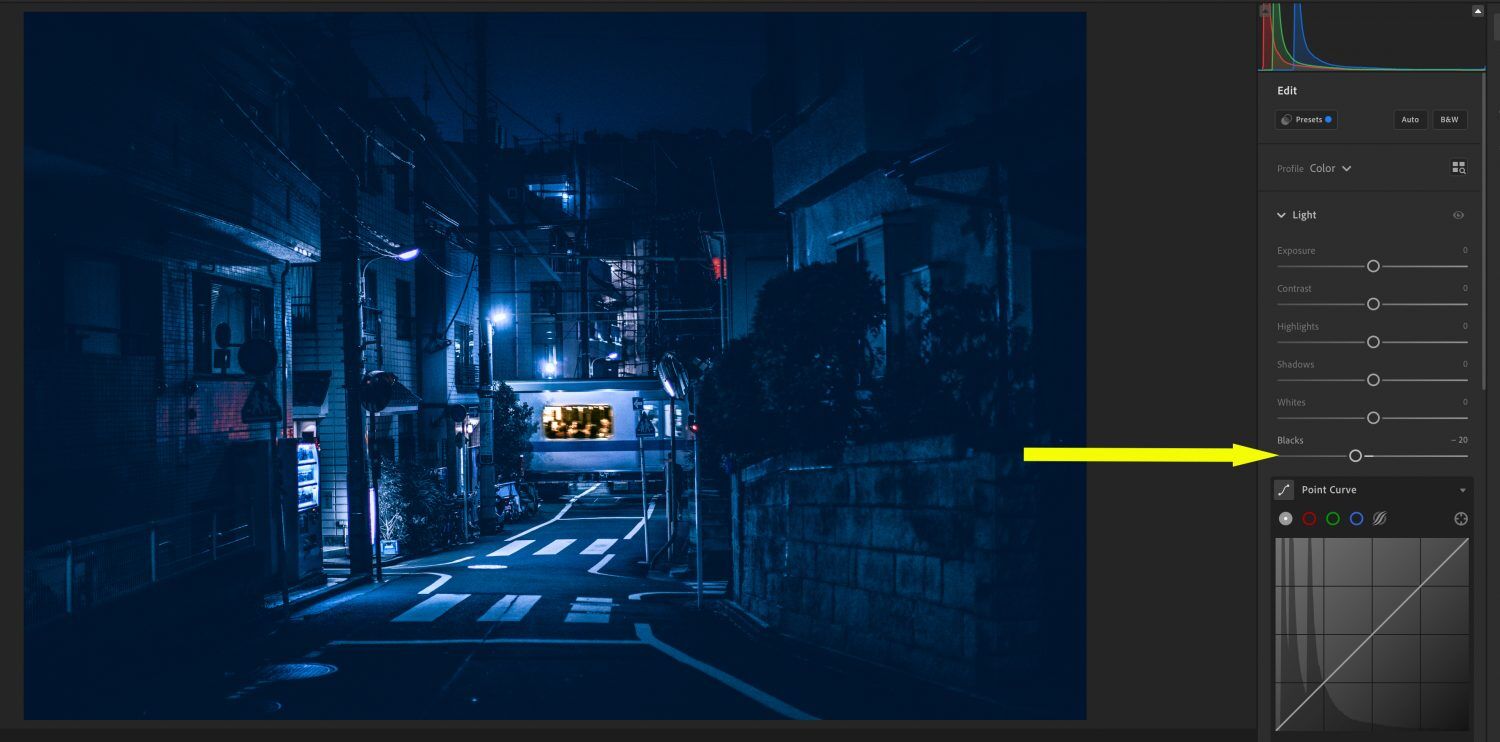
I exited from the Masking tool and went to the Global tools. I pulled the Blacks slider down to -20. This enhanced a previously applied vignette and added further visual weight to the train window.
017
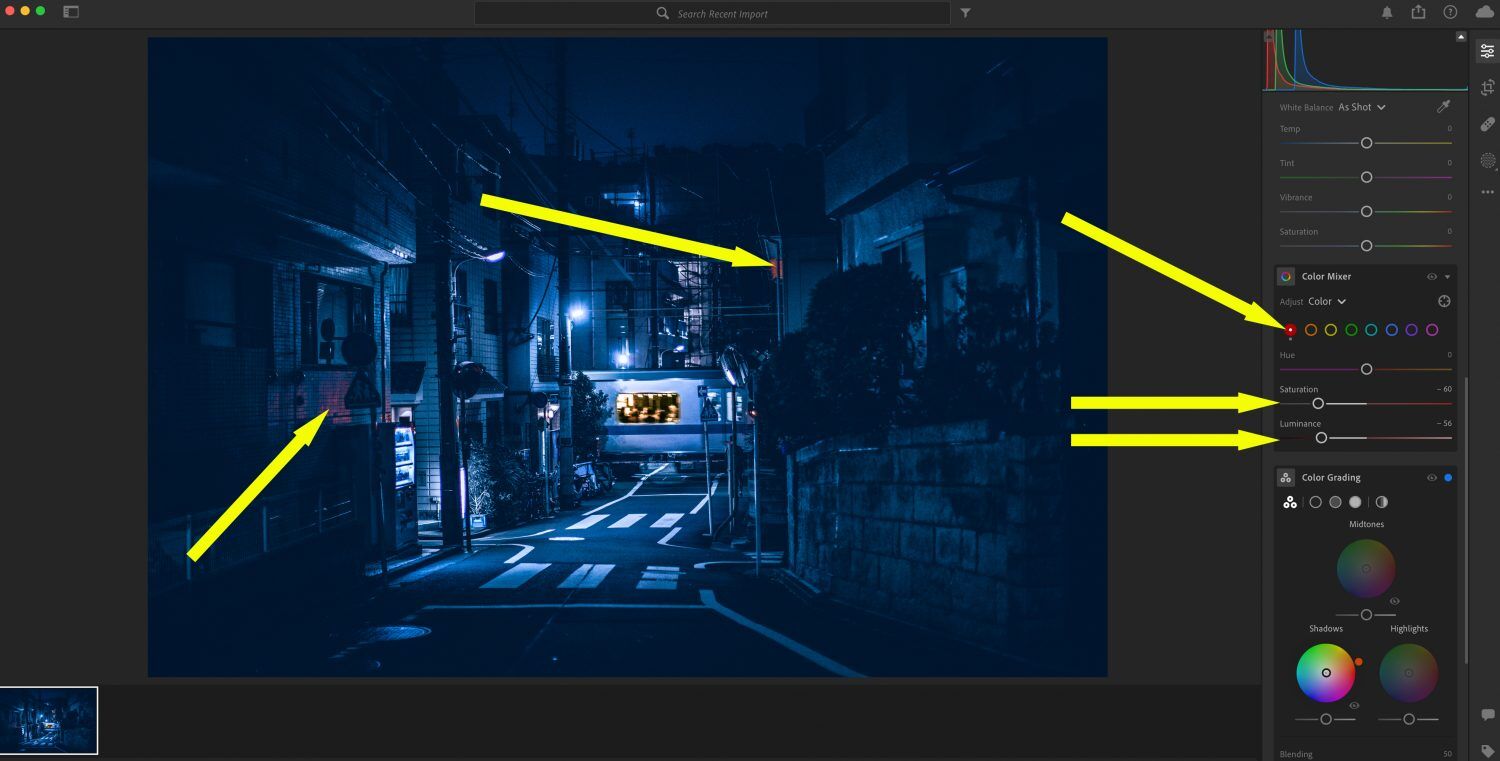
This technique for creating the blue noir effect didn’t subdue the red highlights as much as the Photoshop version. I wanted to knock them down a bit, so they don’t pull the eyes away from the window.
I went to the Color Mixer toolbox and selected the ‘Reds’ hue radio button.
I pulled the Saturation down -60 points and the Luminance down -56 points.
018
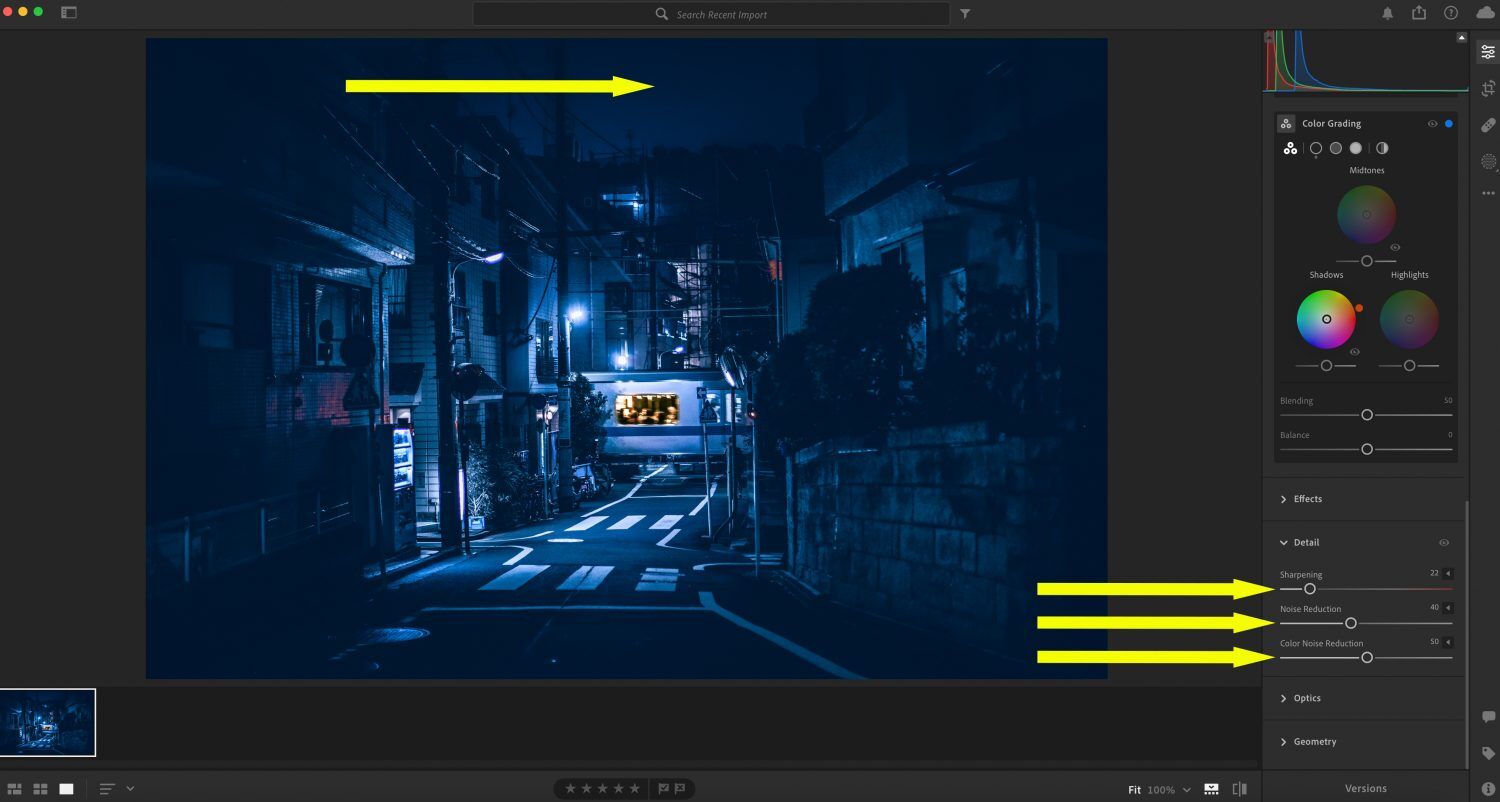
This photo had quite a bit of noise in the original. For the Photoshop version, I left the noise in.
I eliminated most of the noise for this version, especially in the sky.
019
Here is my final Lightroom version.
Let’s compare the two!
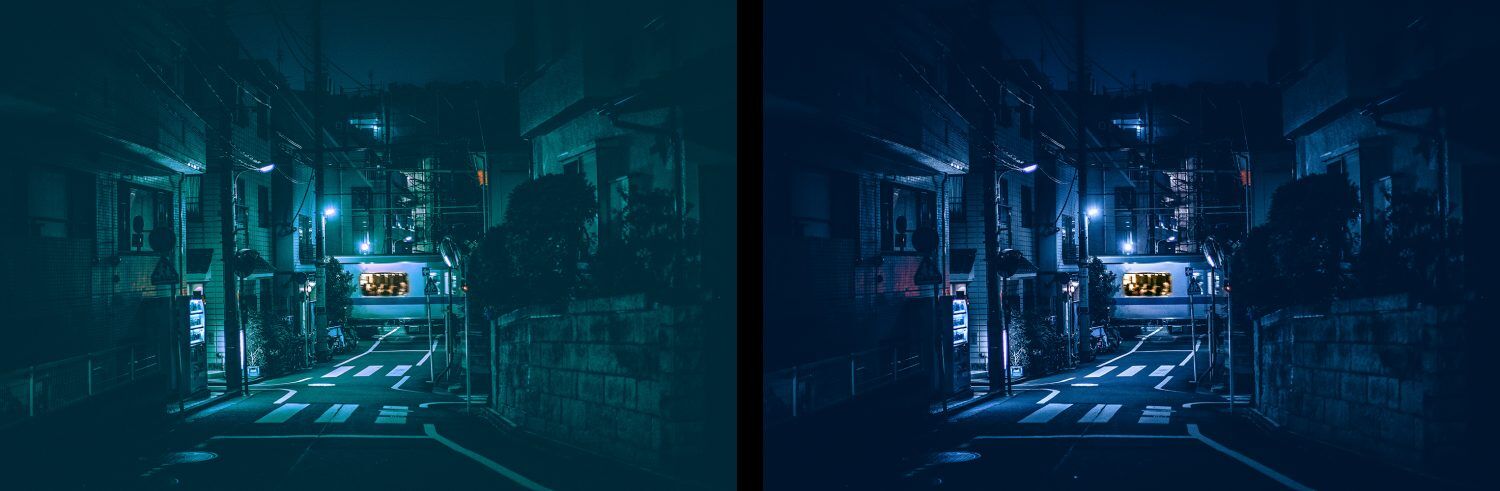
020
As you can see, I have two very different-looking photos. But both support the noir storyline.
I hope you give this tutorial a try.
If you would like to use this same photo before trying it on your own images.
You can find it here. Just download it and give it a whirl.