Essential Filters for Landscape Photography
 by
Jo Plumridge
by
Jo Plumridge

For those of you born into the digital age, filters might seem like a throwback to a bygone era. In the days of film photography there was a filter for everything – from warming and cooling filters, through tungsten filters and even star-shaped filters (a lot of them were a tad gimmicky!).
Most filters are obsolete nowadays, with editing programmes such as Photoshop replicating their effects. But if you’re shooting landscapes, there are still filters that are extremely useful and can make a real difference to your images. So, in this guide, I’m going to look the 3 essential filters that I think you should carry in your kit when shooting landscapes.
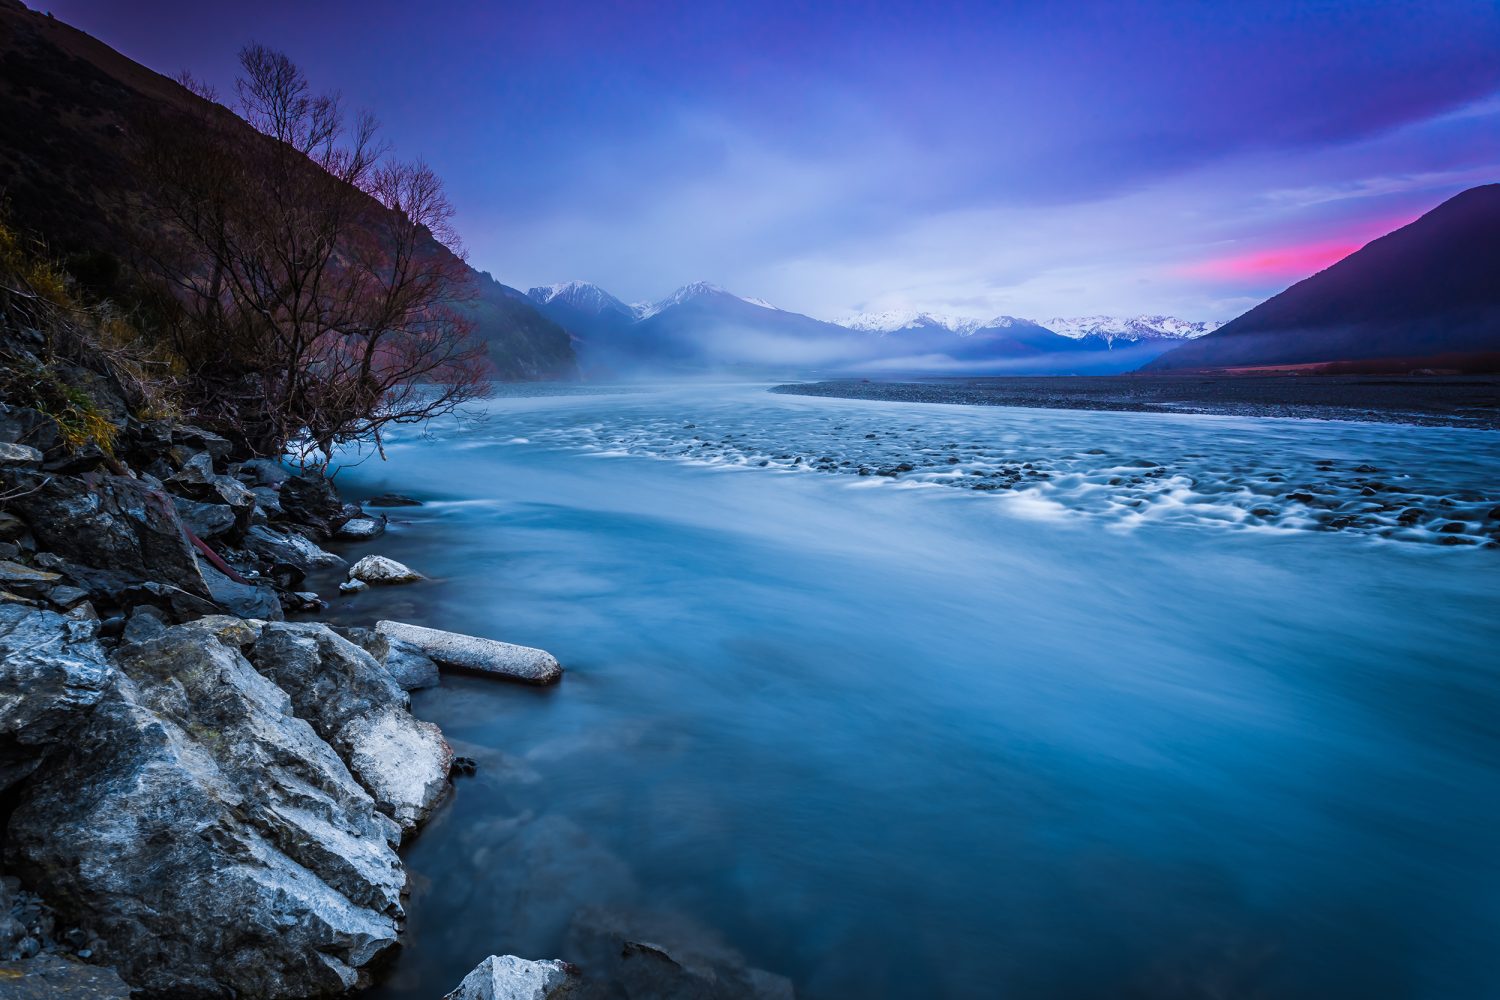
Image 0001 – Photograph by Oliver Wales
Filter sizing and shapes
Just before I start talking about the actual filters, a quick note on sizing and shapes. Most filters are round and indeed the circular polariser that we’ll be talking about in this guide has to be round to work. But you’ll also find rectangular filters that fit onto your camera with a special adapter ring kit, most commonly made by Lee and Cokin.
Whichever style of filter you’re using, you’ll need to buy the right size filter or adapter ring for the lens you plan to use it with. Each different lens has a different filter thread size, which you’ll find written on the back of the lens cap (e.g. 77mm). Make sure you buy the filter that corresponds to this thread size.
Circular polarising (CPL) filter
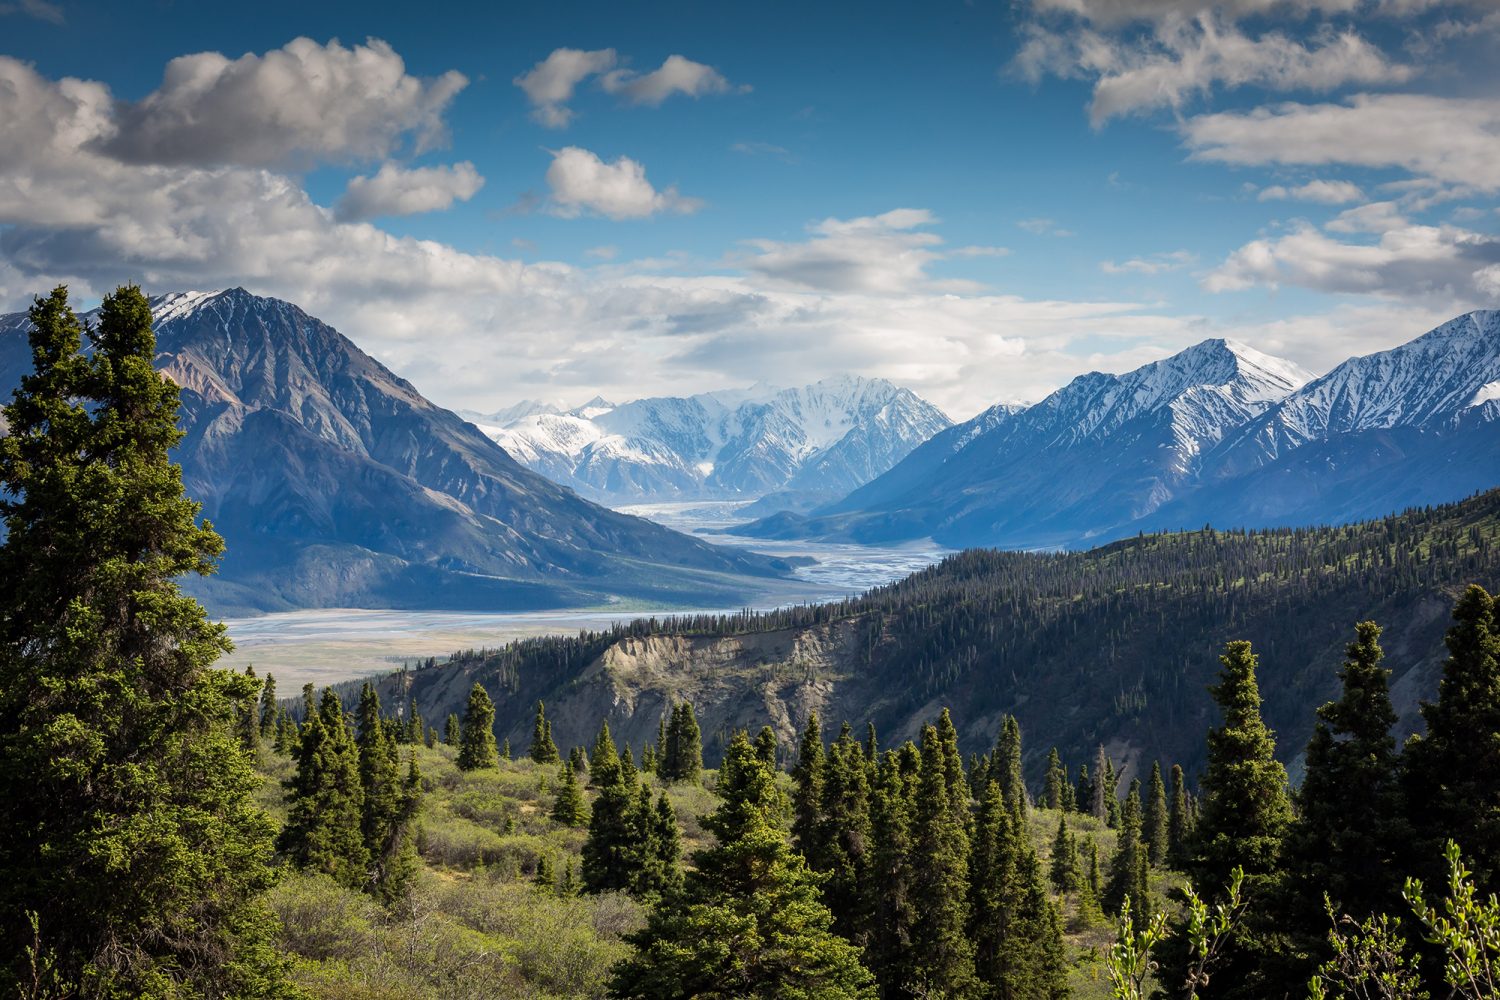
Image 002 – Photograph by Kalen Emsley
Polarising filters change the direction in which light is polarised or, to put it in slightly more scientific terms, they are specially adapted pieces of glass that reduce glare from reflected surfaces when turned at an angle to a light source.
Photographers use circular polarising filters for several different reasons, as they have several functions. One of these is the ability to cut our reflections, which might have more use in cityscapes rather than landscapes but can still be useful after rainfall (for example). You can cut out the glare and reflection from things such as windows or shiny cars, or just manipulate the reflection to reduce its impact on your images.
Most landscape photographers though use a polarising filter to enhance the blue colours of the sky. While a polariser can’t make a grey sky blue, it can enhance and darken a light blue sky to give it more impact and depth. And, of course, you can also use a polarizer to enhance the blue of water.
Polarisers also make colours look more vibrant, particularly after rainfall when droplets are still clinging to the leaves and trees. Using a polariser will add a natural saturation to your images. Finally, a polariser is also very effective at removing haze from photos, which can be very useful if you’re shooting in the early morning.
There are a couple of things you need to watch out for when using a polarising filter. Firstly, you will lose between 1-2 stops when you’re using one, so care needs to be taken to compensate for this (e.g. use a faster shutter speed). Also, if you are using a polarising filter on a lens that’s wider than 24mm (16mm on an APS-C camera) you may find that blue skies will be rendered slightly unevenly. Finally, set your White Balance manually to Daylight, as polarising filters can confuse AWB because of the darkness of the filter.
Neutral Density (ND) filter
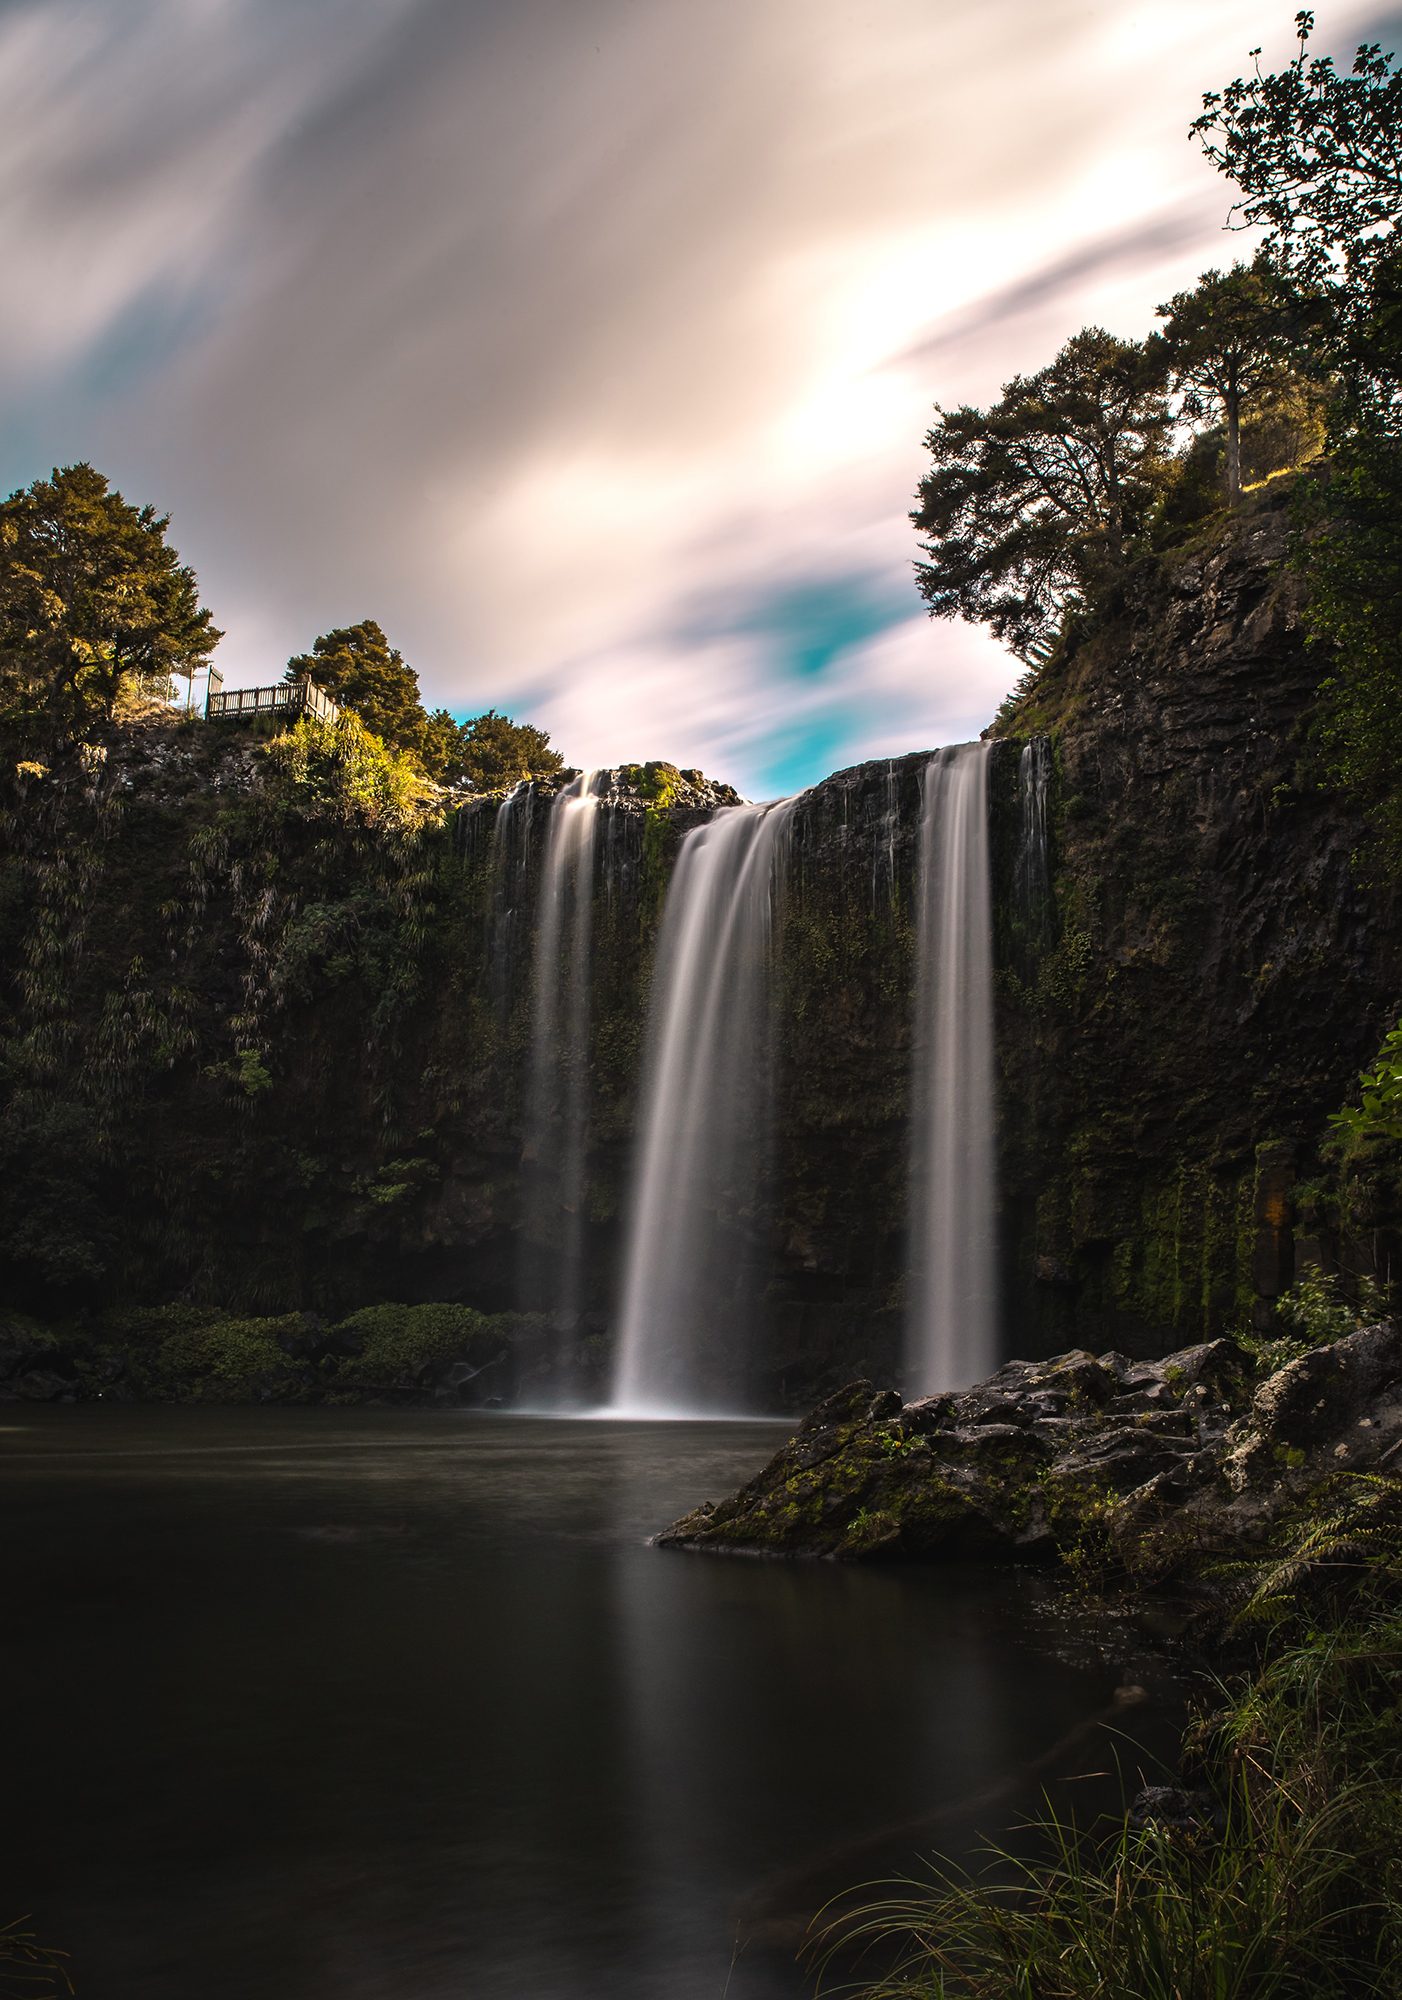
Image 003 – Photograph by Casey Horner
ND filters are solid dark filters that reduce the amount of light reaching your camera’s sensor. What this essentially means in landscape photography terms is that you can use longer exposures without blowing out your shot. They’re also invaluable for blurring water for an ethereal, silky-smooth look, streaking clouds or even eliminating moving people from a shot.
Like CPL filters, ND filters are available in both round and rectangular formats. The advantage of using rectangular ND filters though is that you can stack them to increase their strength. ND filters are classified by the amount of light they block and are usually measured by the reduction in f-stops. Therefore, the more f-stops a ND filter reduces, the less light it will allow to pass through it – i.e. a 2-stop ND filter blocks double the amount of light of a 1-stop ND filter. However, you do need to remember how the number of an ND filter corresponds to the number of f-stops you’re losing. So a ND2 is actually a 1-stop ND filter, meaning that it allows 50% of light to pass. ND4 is a 2-stop, allowing 25% of light to pass and an ND8 is a 3-stop, with 12.5% of light passing through and so on. So, the higher the number on your ND filter, the more light it will block.
The challenge when it comes to using ND filters can be working out your exposure times. It can seem complicated! But it’s actually not too complicated. Let’s presume you’re using a 10-stop ND filter, the strongest single ND filter on the market. Without any filter and shooting in full sunlight, let’s presume you’ll be using a shutter speed of 1/250th of a second. Your shutter speeds would alter as so:
- 1-stop down: 1/125th of a second.
- 2-stops down: 1/60th of a second.
- 3-stops down: 1/30th of a second.
- 4-stops down: 1/15th of a second.
- 5-stops down: 1/8th of a second.
- 6-stops down: 1/4th of a second.
- 7-stops down: ½ second.
- 8-stops down: 1 second.
- 9-stops down: 2 seconds.
- 10-stops down: 4 seconds.
Do remember that these are not exact numbers. You could take a shot at 4 seconds with your 10-stop ND filter and decide the effect isn’t strong enough. If you reach this point, you can look at making your exposure longer by using a small aperture (such as f22), but chances are that you’ll already be shooting with this to get a large depth of field. So at this point you’d want to be looking at ‘stacking’ your ND filters to allow you to get even longer exposures.
Once a ND filter is attached to your camera, you’re not going to be able to see anything through the viewfinder (and perhaps a tiny amount in Live View) so you’ll need to set your exposure and focus before you put the filter on. Use back button focus or focus lock to ensure your camera doesn’t try to refocus.
Graduated Neutral Density (GND) filters
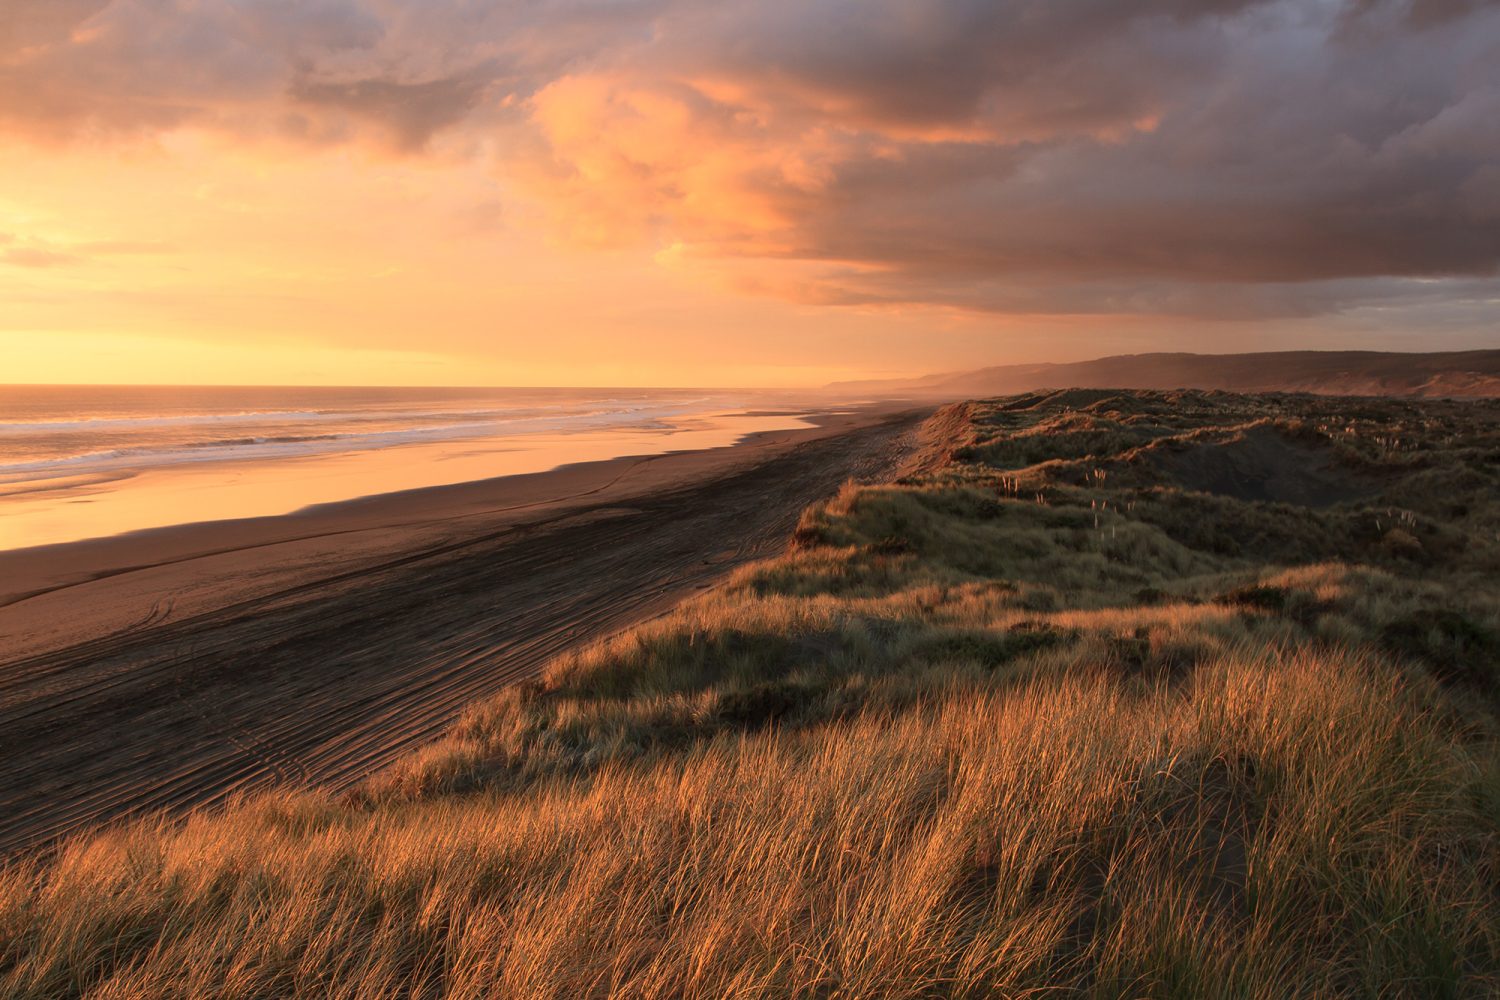
Image 004 – Photograph by Petr Vyšohlíd
GND filters work in the same way as ND filters with regards to f-stops. But a GND filter is clear at one end and gradually builds up to 1/3rd to 3 full f-stops on the other end.
The graduation of these filters makes them particularly useful for shooting at the Golden Hour around sunrise and sunset. This is because you’re going to experience exposures that are radically different for the sky and foreground. Using a GND filter allows you to hold back the part of the scene that’s the brightest (the sky) so that you can expose the foreground correctly.
For GND filters you really need to be working with rectangular filters in order to balance the graduated part of the filter across your scene, as well as being able to rotate the filter to exactly where you need it.
GND filters come with either a hard or soft edge. Hard edge filters have a very definite transition between the dark gradient part of the filter and the clear part and are useful if you have a definite horizon line (e.g. a seascape or landscape scene where the horizon is flat and straight). Soft edge filters gently blend the gradient across the filter, so the line is less obvious, and are useful for scenes where there isn’t a clear horizon (e.g. a forest or street scene).
To use a GND take a meter reading for the foreground and then one for the sky. Work out the difference between them and then use a GND that allows you to get your scene to within one-stop of light difference. Set the exposure for the foreground, focus your camera and slide the GND filter into place, with the dark area at the top.
It should go without saying that all these filters will need you to use a tripod!
Additional Resources
If you want to push your creativity and stretch your skills in landscape photography, check out these Landscape Photography Creativity Prompts from our friends at Photzy! These 5 creativity prompts include over 20 assignments for you to dive into and get out into the field. Read all about these prompts here.
About the Author: Jo Plumridge
Jo Plumridge is a UK based photographer, writer and lecturer. She specializes in portrait, corporate and travel photography, and writes photography, travel and comedy pieces for magazines, websites and books. You can see some of her work at her website, or follow her on Twitter.