ETTR – Overexposing for Better Image Quality
Chances are, if you’ve been in the photography world for a while, you’ve come across the term ETTR, or “Expose to the Right”. Ever wondered what it means? Today, you’ll learn all about this technique, and how it can help you take better photos.

What is ETTR?
First off, let’s take a look at what ETTR is. ETTR is simply a technique – just like bracketing, metering, and other photographic techniques. It’s a way of shooting images to achieve a specific result. ETTR stands for Expose to the Right. This technique involves overexposing the image so that the majority of the data is on the right of the histogram.
Why is it used?
When would you want to use ETTR? Why intentionally overexpose an image? Isn’t that just wasting data?
Actually, ETTR is all about maximizing data. The explanation for this is very complicated, and in doing research for this article, I actually found out that the common explanation for ETTR is wrong. The actual fact is that exposing an image to the right side of the histogram actually produces a higher signal to noise ratio in the image.
Either way, it’s clear that ETTR does offer an advantage in image quality. For this reason, I recommend trying ETTR and seeing how you like it. It’s fairly straightforward: with ETTR, you’re pushing the image to the right of the histogram – as far right as it can go without blowing out any highlights (or more highlights than you want).
Once you capture all that data, you’ll post-process the image and lower the exposure to look the way you want.
So what are some situations that would benefit from this technique? Actually, it’s useful in many different circumstances. I’ve seen it mentioned a lot in astrophotography. You can capture a lot more stars by exposing to the right and then bringing back the exposure in post. This is especially true when you’re trying to capture stars around light pollution – ETTR will give you much better results. When I’m shooting stars near light pollution, ETTR always helps me get more stars than I would with a normal exposure.
Astrophotography isn’t the only use for ETTR. You can use it for any type of photography. Landscapes and other still scenes work best, because often you’ll be using a slow shutter speed. You’ll want to use base ISO for ETTR, so that may limit your options too. But you can use ETTR in a lot of different shooting situations.
How to do it (10 steps)
Okay, you’re probably wondering: That sounds great, but how do I actually do it? Glad you asked. Let’s walk through the steps.
- First, find a scene that you want to shoot. When you’re starting out, try a landscape or something else where you have plenty of time to experiment and not a lot of motion to deal with.
- Break out that tripod. For the first attempt at ETTR, it’s not a bad idea to have, and it’s usually very useful in ETTR because you use slow shutter speeds often.
- I recommend shooting RAW, as this will give you a lot more latitude in post-processing. However, ETTR is possible with JPEG.
- Set any other image settings you need besides exposure, like white balance and image resolution.
- Set your ISO to 100, or whatever your camera’s base ISO is. Always use base ISO for ETTR.
- If your camera has Live View, turn that on. If it has a Live View histogram (most recent ones do), turn that on. Now you’re seeing a live preview of the image and the accompanying histogram. If your image is exposed properly, the histogram data will probably be in the middle. But for ETTR, we want it on the right side.
- With your ISO at base, it’s time to set your aperture. You can put this anywhere you like – set it according to what depth of field you want.
- Now adjust your shutter speed. Shutter speed is what we’ll use to do ETTR. Play around with shutter speeds until you can get the data the farthest right on the histogram as possible, without touching the edge. When you touch the edge, that means you’ll lose some highlight data.
- Now take the photo. It should look way overexposed – that’s what we want. Play around with other settings and shots if you want. Also, if your camera doesn’t have live view and/or doesn’t have a Live View histogram display, you’ll have to rely on the playback histogram. This means that instead of seeing your adjustments as you make them, you’ll have to guess a few times and check the histogram of the image. This will take a little longer, but you can still do it quickly.
- Now bring your images into editing software. All you have to do is decrease the exposure until it looks the way you like. Boom! Now you can apply any other edits you want and save the image.
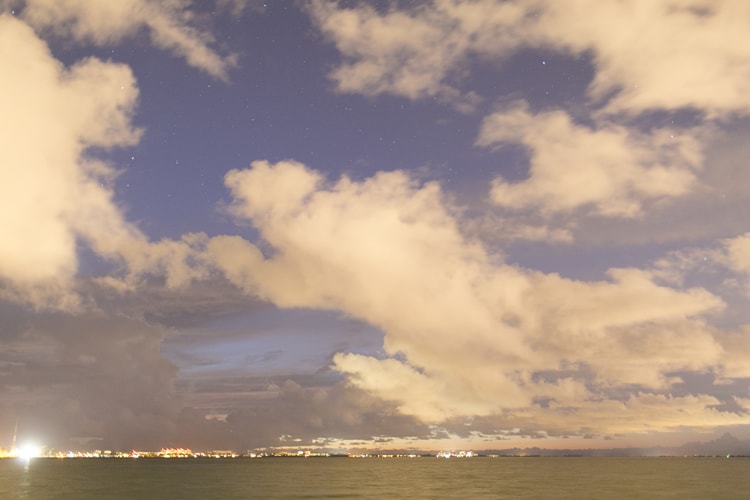
Here’s on of my ETTR shots as an example. Here’s the image as shot:

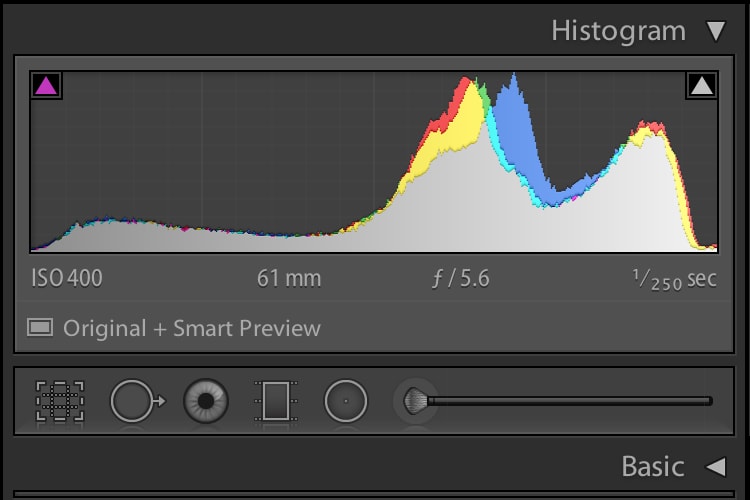
As you can see, it’s overexposed. Here’s what the histogram in Adobe Camera RAW looks like for that shot:

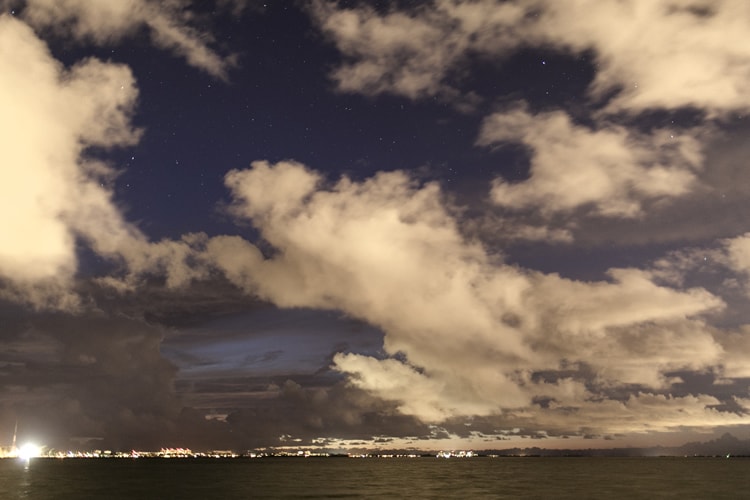
It might even be a little too far. Now if I bring the Exposure slider down a bit, this is what I get:

I added some clarity to the clouds, and other random adjustments. Bringing down the “blacks” slider a lot really brings out the stars. Notice how you can see a decent amount of stars even with light pollution in the frame.
Summary
ETTR is pretty straightforward, right? You don’t have to understand all the technical stuff behind it (I certainly don’t) to benefit from it. Basically, if you push the exposure of the image as far right on the histogram as possible, without touching the right side, you’ll be getting the maximum data quality for your image. You can then darken the image in post to bring it back to a normal exposure.
So next time you’re out shooting, give ETTR a try. It’s not for every situation, but sometimes, it’ll give you better data to work with – and that can go far in creating a better image.
