High Speed Photography 101

How do you capture a drop of water up close or a Formula One car speeding on the racetrack? How do you make sure that the image will come out well? This is what high speed photography is all about.
What is High Speed Photography?
High speed photography is used when you want to take good photos of objects in motion. Fast moving objects are favorite subjects for this kind of photography. It’s like you freeze a particular scene in motion and record it with your camera. High speed photography also means capturing a series of images at a high frame rate.
Sports photographers use a lot of high speed photography when covering events like a horse race, NASCAR and Formula One races and even triathlons.
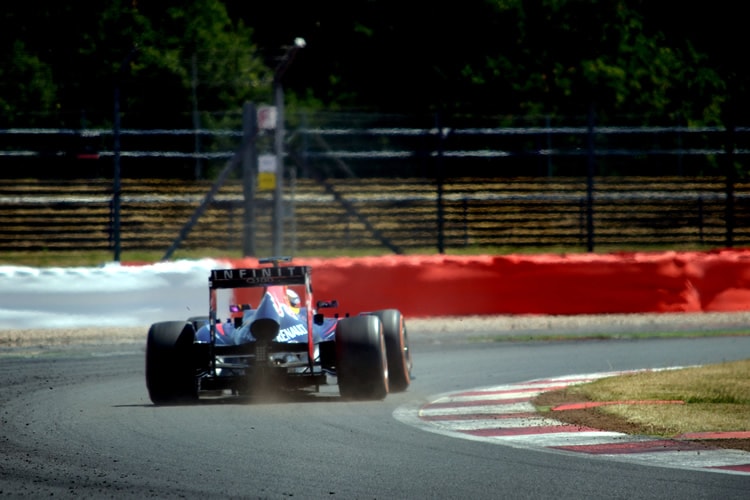
photo by Nic Redhead
There are two major factors that you need to consider if you want to become a good high speed photographer: shutter speed and the camera flash.
Shutter Speed
Your camera’s shutter speed is a major element no matter what kind of photography you want to focus on. In high speed photography, the shutter is used to achieve the “freezing motion” effect. The freezing effect that you will want to achieve is not the one with the blur that some photographers favor. In high speed photography, freezing a subject in motion means it will lock the scene in “suspended in time”. Thus, a slow shutter speed is not viable.
You will need to use fast shutter speeds in order to come out with perfect photos; photos with no blur. It is important, however, to consider your setting or location when adjusting shutter speed. Since you are working with a faster speed, it follows that you’ll capture less light in your images. If you are shooting the scene in bright light, you won’t have problems. But if there’s not a lot of light, you will have to adjust your shutter speed to one that is faster than what you originally need for the shot.
Commonly used shutter speeds are 1/125, 1/1000, 1/2000 up to 1/4000. Use these speed settings when taking photos of a cyclist in motion or of a car cruising at an average speed.
The Camera Flash
Controlling the flash of your camera is one of the secrets of good high speed photography. The usual range used for achieving the perfect freezing motion is 1/800th to 1/2000th of a second. If you know how to use your flash properly, it won’t really matter what shutter speed you use; a flash is capable of freezing objects or “stopping” scenes when its light bursts. Imagine yourself in the middle of the dance floor. The house lights are off, but the strobe lights are on and flashing. Don’t the people around you appear as if they are suspended or frozen in their actions? That’s the kind of effect that a flash has on a scene.
And this is one of the reasons why a lot of photographers prefer to use the “flash method” for capturing high speed photos, as opposed to the “shutter speed method”. In other words, they focus more on the flash than on the shutter speed. What these photographers do is choose a dark location or room for the shoot, open the shutter, activate the flash and then close the shutter. The trigger and flash strobe lag does not affect the photo output. Timing is more consistent, as well as the exposure speed.
6 Steps to Follow
As is the usual, you need to check first if you have the right equipment for your shoot. For high speed photography, you’ll have to prepare your camera, photographic timer (with sensors) and of course, your flash – or, if you like the idea, get a good strobe light (a remote-activated one will be really useful). Your camera should have an adjustable shutter speed.
- Set up your camera. Find a location that’s suitable for your purpose or the effect that you want to create. If you want to go with the “flash method”, find a good dark room for your shoot.
- Set up the scene and your shot. It is always advisable to use a tripod when taking high speed photos. Set up your camera on the tripod and position it. Place your subject in position. If it is your first time to shoot a high speed photo, it will do you good to first practice with a stationary subject.
- If you want the flash method effect but cannot find a dark room, adjust your shutter to a speed that allows the aperture to open long enough for you to take your shot. Use strobe lights to create the flash method effect. Position the strobe lights so that it “connects” to your subject.
- Before you take the picture, turn off the lights to darken the room. Take the shot. When you flash the strobe lights, be mindful of the aperture. It should still be open. Everything should be done in a matter of seconds. Turn on the room lights only when the aperture closes.
- If you’re using a dSLR, check the image to see if you achieved your goal. Then go back and take another shot, this time with a subject that’s in motion. A good example would be a water balloon that would burst. You’ll have to find somebody to help you burst the balloon. Prepare more than one water balloon so you can re-take shots until you get the perfect timing and result. You can also choose to use a spinning object placed on top of a table for your first moving subject.
- Practice makes perfect! Don’t be afraid to correct yourself and try again. Your determination will give you the reward that you long for. High speed photographers take a lot of time testing their shots, so you should do so, too.
High speed photography is not an overnight thing. But if you really want to learn and master it, you will always find a way to. Aside from having the right equipment, the right skills and knowing the right techniques, your attitude will also tell you if you’re cut out for a disciplined art like high speed photography.
About the Author: Michael Gabriel
 Michael Gabriel L. Sumastre is an experienced writer who loves to take pictures of the countryside as well as aerial photographs. He maintains his professional writing portfolio at TheFinestWriter, and you can visit his photography portfolio at Sumastre Photography. Michael was hired by Booking.com to photograph 10 of the most beautiful beaches in Palawan, Philippines.