How To Take Impressive Underwater Photos
 by
Johnny Dunn
by
Johnny Dunn

Underwater photography offers many exhilarating and rarely-seen photo opportunities that no other form or photo-taking situation may present.
Even if you don’t wish to pursue searching for shipwrecks or caves and just feel like taking photos of a fish or two, the experience underwater photography provides can be an extremely exciting process and art in itself, and it’s proving to be just as distinct of a form of photography as portrait and street are from general photography.
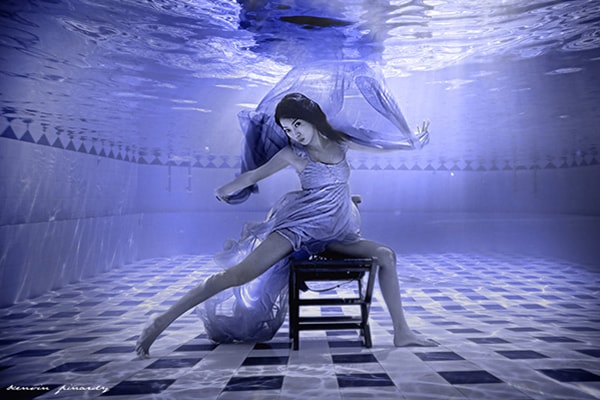
photo by Kenvin Pinardy
Most people, when first undertaking underwater photography as a hobby, think only of going into the sea and taking shots of coral reefs or aquatic life.
But you can take very unique and breathtaking shots just by submerging yourself and your usual subjects underwater in a pool, as depicted above. Though a photo taken in water will lose some of its quality and sharpness, water can offer many opportunities for very different and unique aesthetics and photo effects that no amount of effort in post-production could quite achieve.
Certainly, though, if you’re interested in underwater photography, you probably would like to go into the sea or ocean eventually to photograph marine life and other rare underwater sights. The ocean’s salinity, pressure, and wetness place many physical requirements and components on a camera that unspecialized cameras just won’t have, and of course you can’t take an impressive photograph with a shoddy or improper camera. Most underwater cameras are completely sealed shut against water and dust to a depth of at least to thirty feet. Underwater cameras should also be weather-resistant to a wide range of temperatures, usually 10-100 degrees Fahrenheit, and also shockproof against drops of about five feet or more.
If you’re looking to go into colder waters, you should look for a camera that’s coldproof and / or freezeproof. Also, since visibility is going to be more of an issue while in the water, a larger screen will give you more area to work with and preview your images.
If budget is an issue and you’re looking to take professional photos with a DSLR camera and you already own such a camera, then a special housing case certainly is a working and much cheaper solution than buying a brand-new camera. Many waterproof housing cases fit on a wide range of camera bodies, and aren’t actually too clunky or bad-looking. Casual photographers who don’t wish to splurge on a DSLR camera, though, will find that the technology in underwater cameras can keep up nearly as well as regular digital cameras, and will be able to produce fairly satisfactory quality. For professional photographers though, DSLR quality is of course a must.
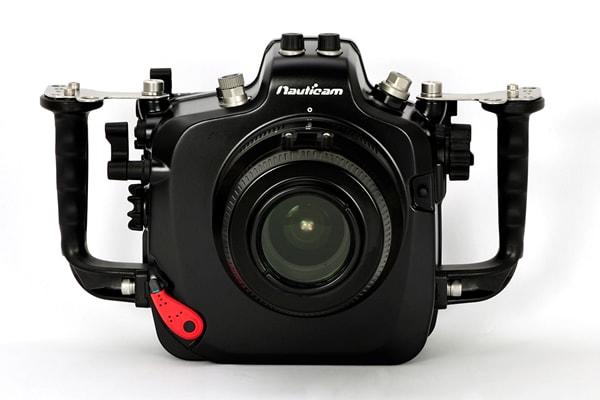
The Nauticam underwater camera housing case like the one above is a great choice!
You have to look for certain specifications in your other photographic equipment as well. A wide-angle / macro lens works best for underwater photography because these lenses, which are usually sized around 18-55mm, allow you to focus more closely on a subject than with a telephoto lenses. This reduces the optimal distance you need to be from your subject to ensure it comes out clear and sharp, and wide-angle lenses just take photos with a greater depth-of-field and area of sharpness.. Even with wide-angle lens, as always, you want to get as close as you can when photographing your subject.
Another one of the most important components of your equipment is your flash unit. When a camera’s submerged in any depth of water, the photos it takes will lose some color and contrast quality. To make up for this loss, underwater photographers can make good use of flash, and so your digital camera should be compatible with a choice of a strobe flash if you want your photos to look as natural as possible. For more casual photographers, the flash unit inside your camera will perform and work just fine, but using an internal flash shines a harsh light directly onto your subject, giving off the very apparent taken-with-flash photo effect. To avoid the undesirable “flash-effect,” you should try not to flash your strobe directly at the subject, but to bounce and reflect the light off a surface onto the object.
Most professional or even hobbyist photographers will already have a wide-angle lens and an effective strobe flash, and most of these people will also own a tripod. It is, however, much more of a burden to maneuver and take photos underwater with a tripod than it already is just carrying around a tripod. Finding a steady surface in which you can place your tripod underwater will be difficult enough, and actually adjusting and being able to use your tripod resourcefully underwater is something that’ll take practice. But, considering that water does reduce the contrast, color range, and sharpness of your pictures, you certainly want the best equipment and setup you can carry around without being terribly inconvenienced.
As far as camera settings go (which you will be constantly changing if you’re working in ‘manual’ mode, which you should if you’re shooting professionally), you might want to be a little more generous with adjustments than you would normally. Almost overcompensating a little bit, even. For example, if you’d use a 1/60 shutter speed for a still, unmoving subject on land, you might want to increase the length to 1/50 or even 1/40, depending on the available sources of light in the water.
In shallower waters, where there’s a decent amount of available or ambient light, you won’t have to worry as much compensating. If you suffer from shaky arms, don’t have a tripod and aren’t getting enough light in your pictures,, you might want to begin with increasing the ISO setting (usually 400 is fine) rather than lowering the shutter speed. Increasing the ISO makes the camera more light-sensitive, allowing it to gather more light just like lowering the shutter speed does (since the longer the shutter stays open, the more light is able to come in), but many people find that they cannot or a camera truly steady longer than a speed of 1/60th of a second.
The aperture, which is essentially the camera’s pupil and is measured in f-stops, controls not only the amount of light, but also depth-of-field. A higher aperture means for a greater depth-of-field, so a larger portion of your image and subject would be sharper than if you took it with a lower aperture. Most people will tell you that for most events and places at a decent time of day, an f-stop of 8.0 is a good number to stay on generally, but in the water, with lowered the lowered visibility, staying at an f-stop at 5.6 would be a more versatile option.
Finally, the white balance setting of the camera does not need as constant or precise adjustment as the other film settings. Be sure not to use an ‘Underwater’ white balance setting if you’re using flash. If you are using any sort of flash, you should change the white balance setting to ‘Auto’ or ‘Sunny.’ If you’re not using flash at all, change the white balance mode to ‘Manual’ or ‘Underwater’ if there is one.
As an example, a very usable camera setting when you’re taking a coral reef in shallow, light-filled waters without using flash (there should be a decent amount of available light even around twenty foot below the surface) would be: ISO 400, 5.6 aperture, 1/60th shutter speed, and manual white balance.
The basic rules of photography and general visual appeal and aesthetics, such as rule-of-thirds, framing, focusing and many others, definitely still apply underwater. Things like getting as close to your subject as possible, making your subject off-center in the image (Essentially following the rule-of-thirds, which is the idea that the central points of an image look better when they meet and divide the image into thirds), and having strong foreground (usually the subject of an image. Make sure it’s sharp!) with a contributing background (you don’t want anything in the background to overpower your focused content) should all be considered in both all aspects of photography, especially underwater. If you can take an impressive-looking photograph on dry land and air, you could achieve comparable quality underwater so long as you have the decent and proper equipment.
There are certain principles and guidelines to keep in mind when underwater, though. Use the widest possible lens so you can capture all of the brilliance of your subjects interacting with their ecosystems, but not before getting as close as you possibly can (reach a distance of twelve or less inches away and you’ll be golden). Approach your subjects directly and very slowly (much, much different from street photography), but don’t get close enough to scare them away or close enough to disturb on intrude your environment. If you find a nice, static background, wait for a strong foreground subject to swim by. Same thing if you find a still foreground subject you like; just wait for a background to pass through. You should also definitely brush up on your diving skills first to ensure maximum efficiency and safety, and be sure to remember to exhale upon ascension.
While the ocean does offers countless unique photo opportunities that no environment on dry land can offer, it is also a more difficult medium to work with. The biggest challenge you’ll face in the water is dealing with pretty low visibility, which reduces the color, contrast, and sharpness of your pictures. Underwater photography really isn’t that big of a jump from conventional digital photography and certainly can be a more exhilarating venture, though it does require more copious amounts of patience and practice.
About the Author: Johnny Dunn
Johnny Dunn is a freelance writer located in NYC, and is also currently working at the advertising and design agency Breakneck Imaging as a residential photographer and copywriter.