Nothing Creates Interest Like a Good Old Fashioned Fog Bank
 by
Kent DuFault
by
Kent DuFault

There are times when our landscape, seascape, or cityscape images could use a little extra oomph to put them in the fantastic category.
One such tool for this is fog.
Unfortunately, sometimes it’s not foggy!
In this blog post, I will walk you through the steps of adding fog to an image using Photoshop. The technique will also work in any other layering program.
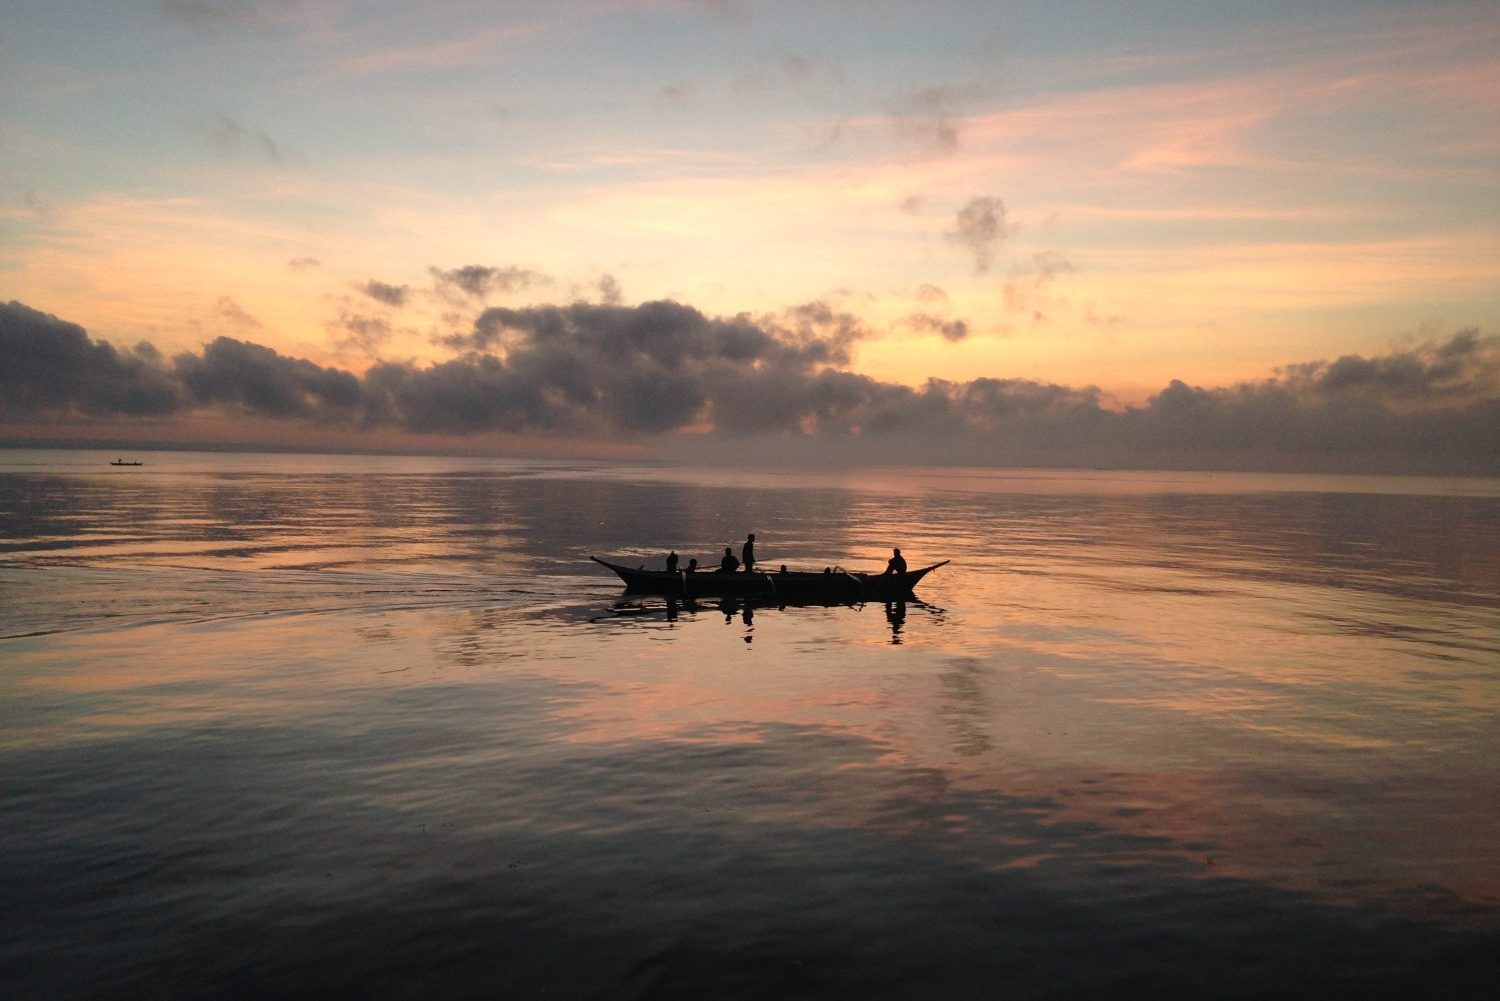
001 – Photograph by Alexander Kluge
This is a nice shot. But, I think an early morning misty fog would ramp up the drama and storytelling.
Let’s do it!
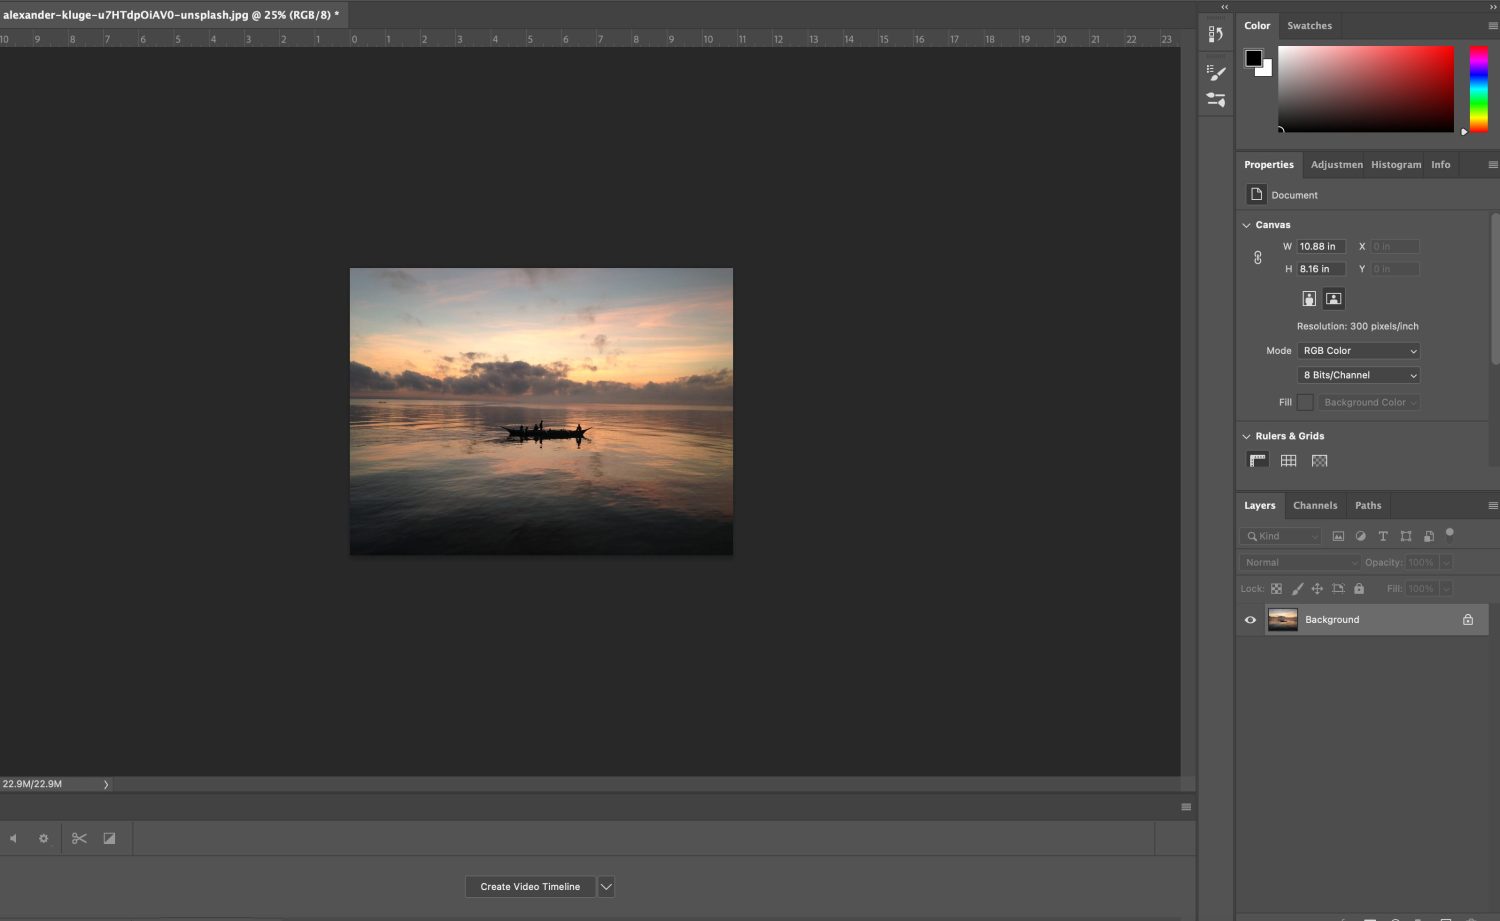
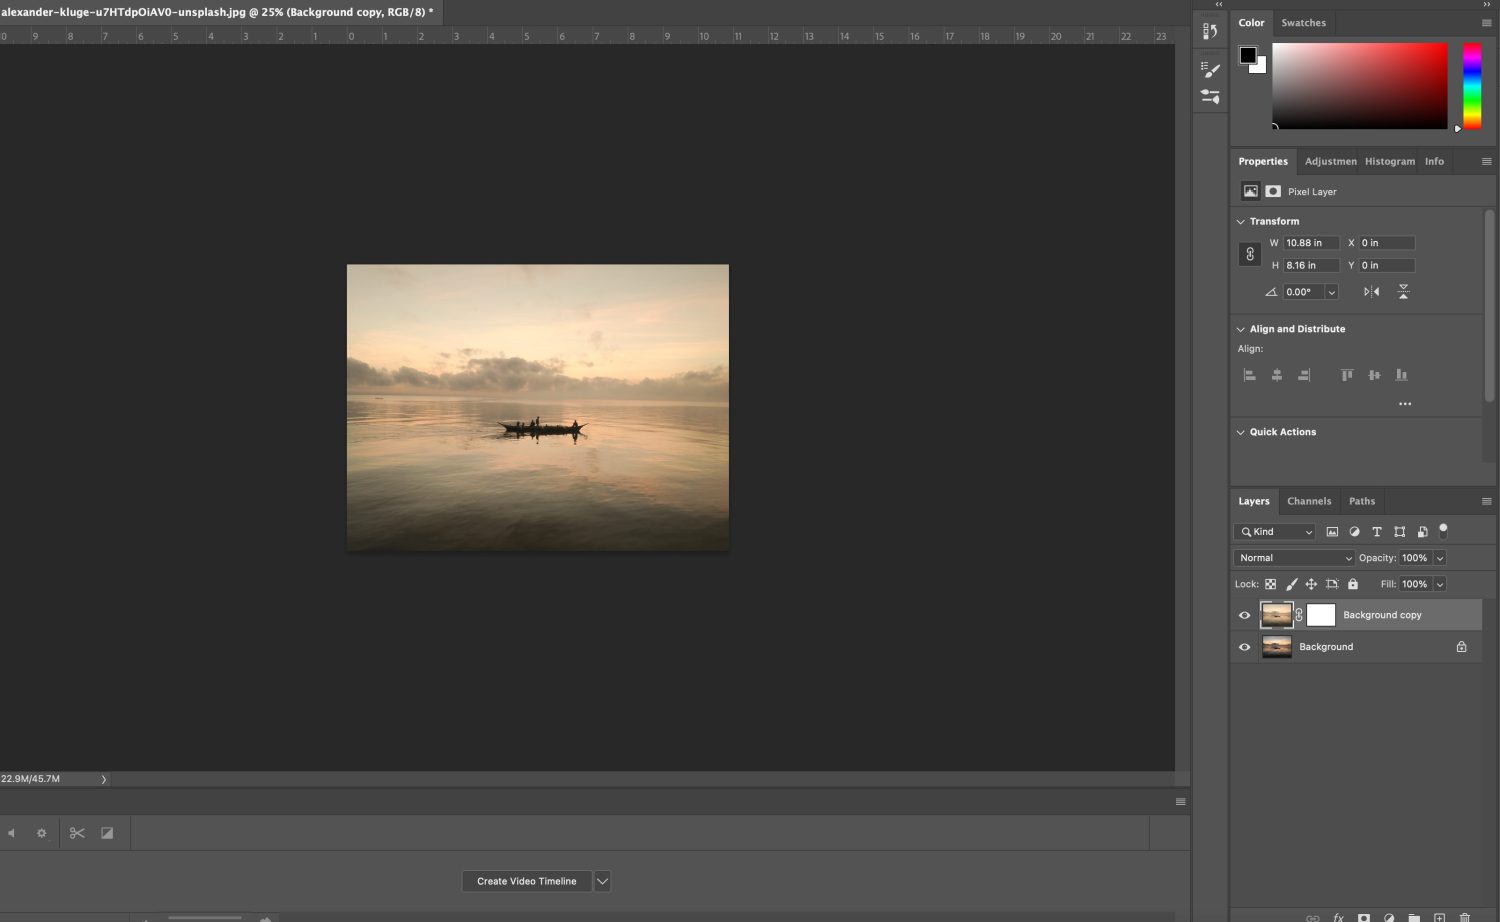
002
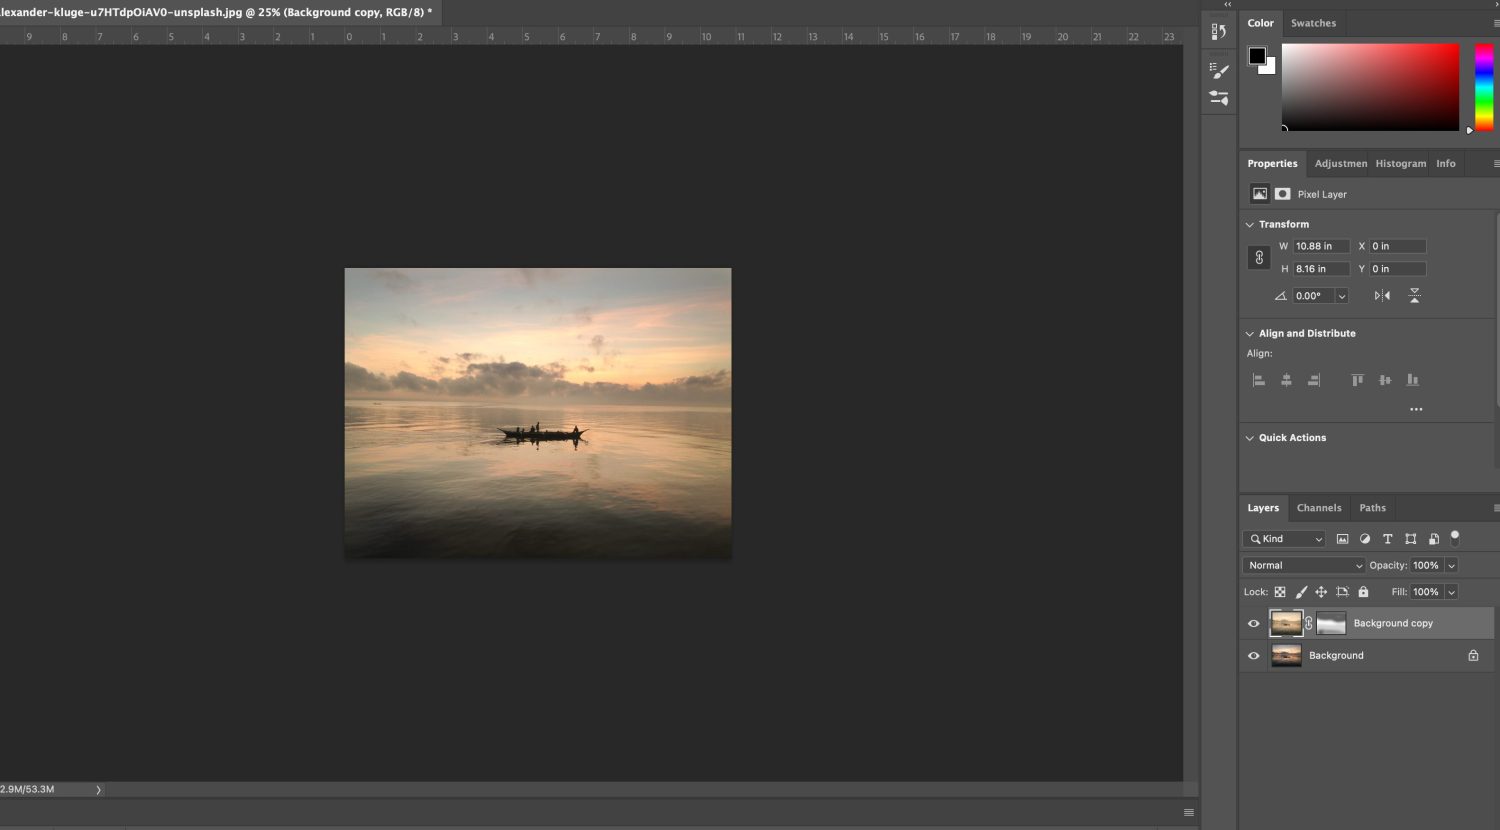
First, we open the image in Photoshop and have the Layers palette visible.
002a
We right-click on the Background layer and duplicate it.
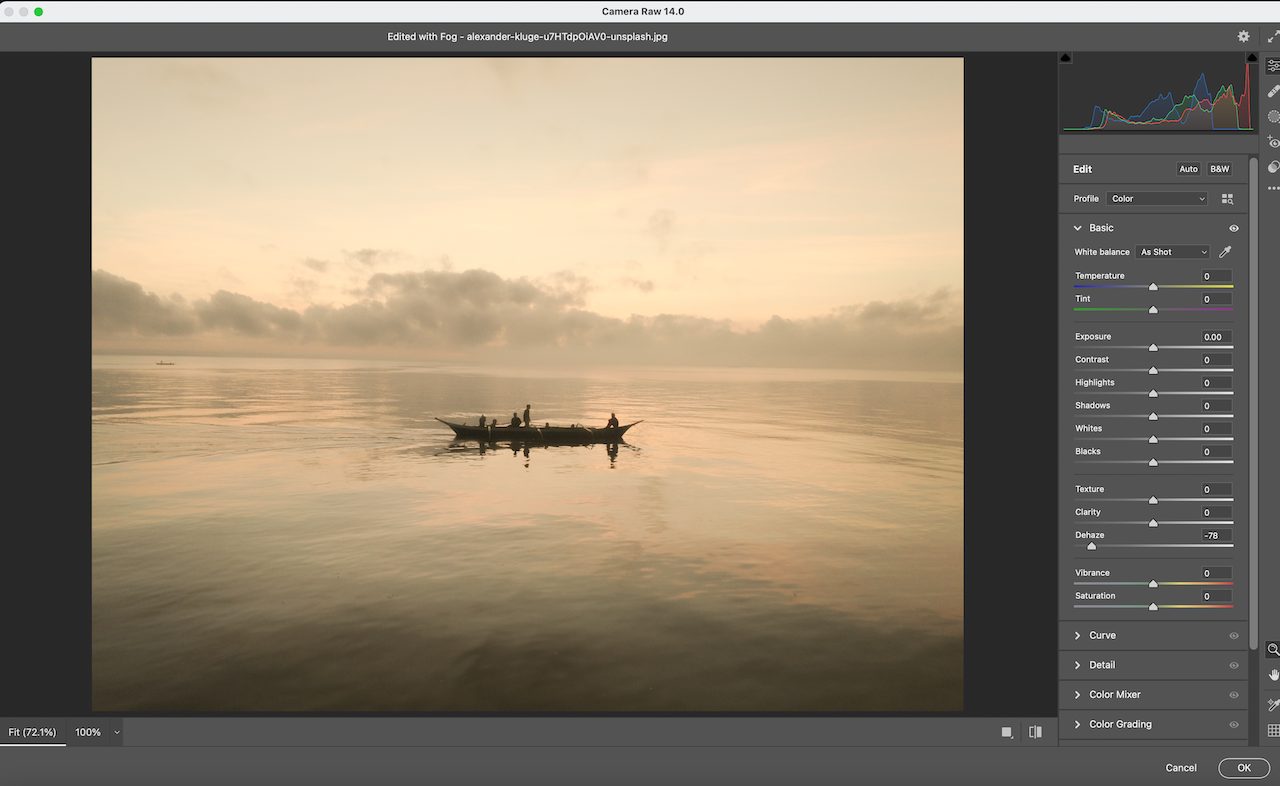
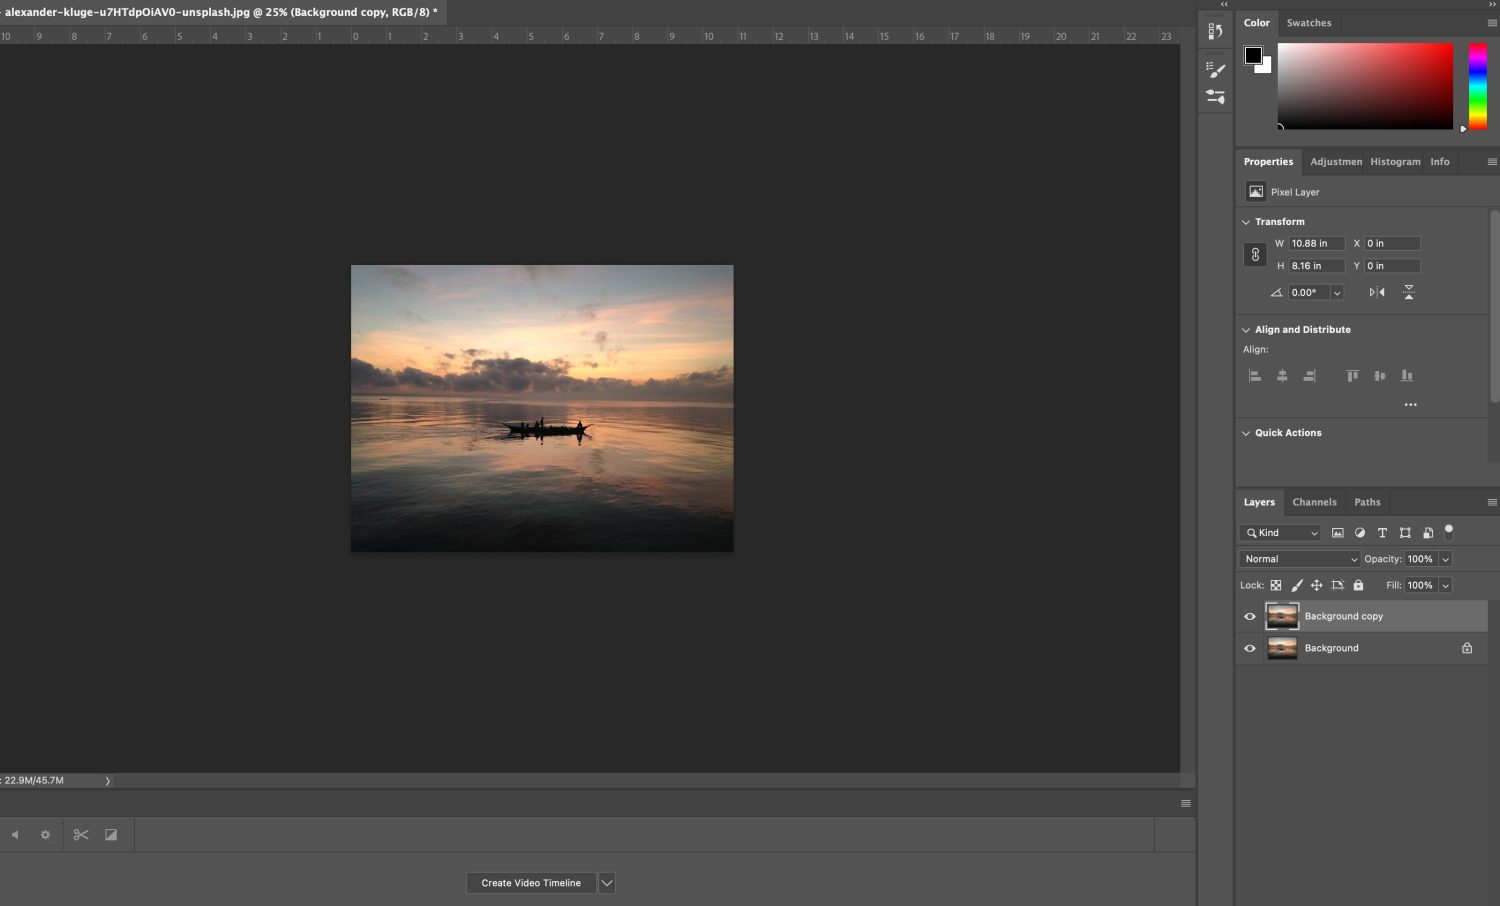
003
Select the duplicate second layer and open it in the Camera Raw filter. Set Dehaze to a negative number (between -70 to -100). I chose -78.
004
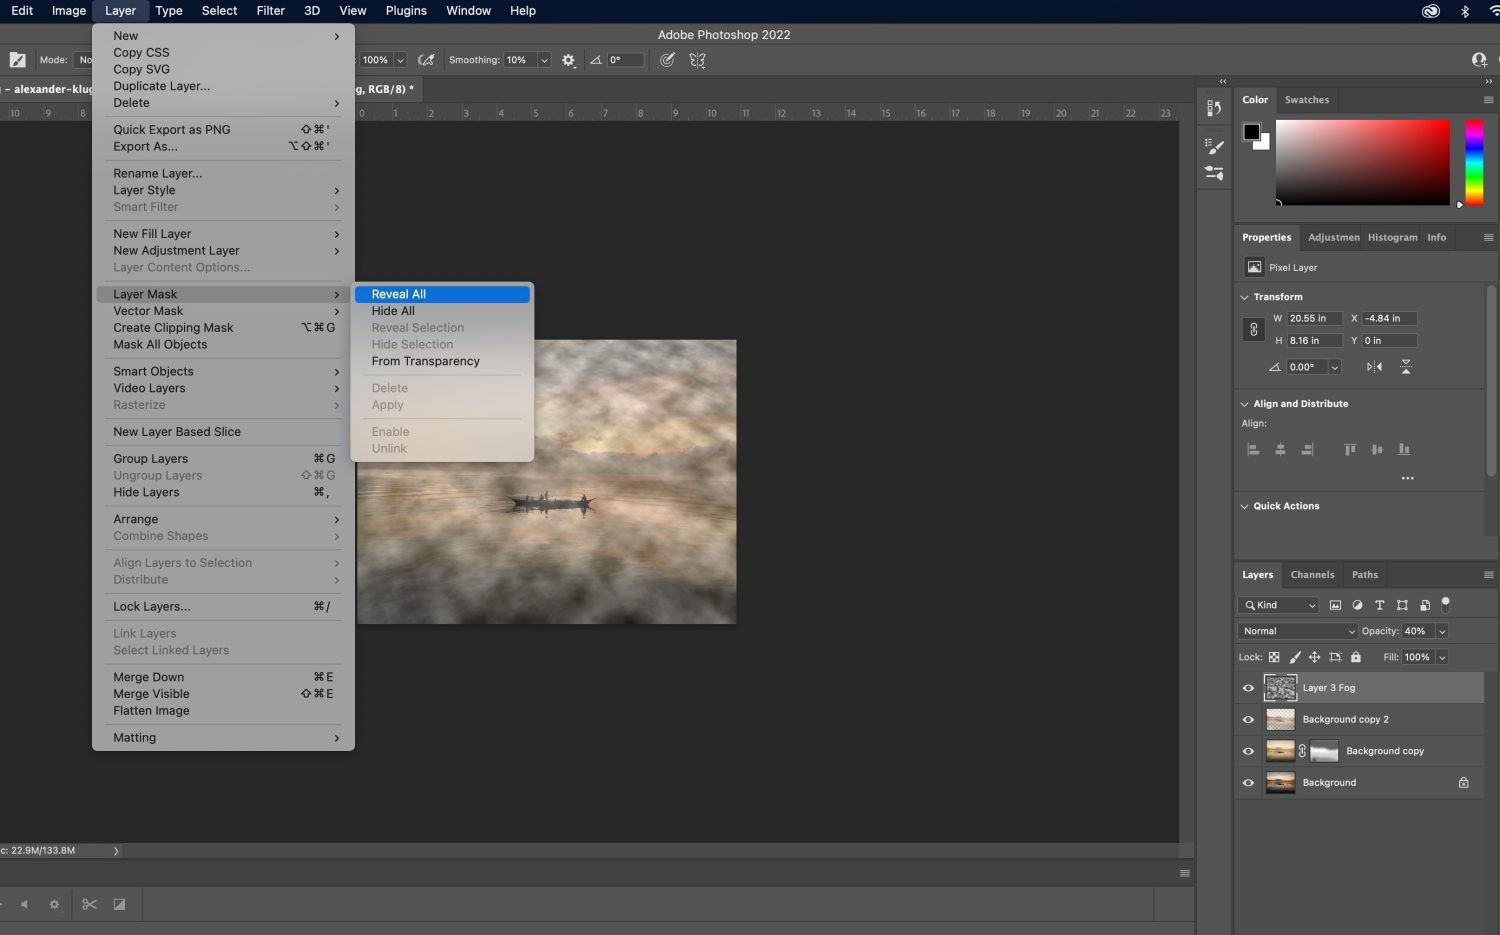
Go to the Layer dropdown menu and click on ‘Layer Mask.’ From the sub-menu select ‘Reveal All’ Layer mask.
A white box appears on the duplicate layer within the Layers Tab next to the thumbnail image.
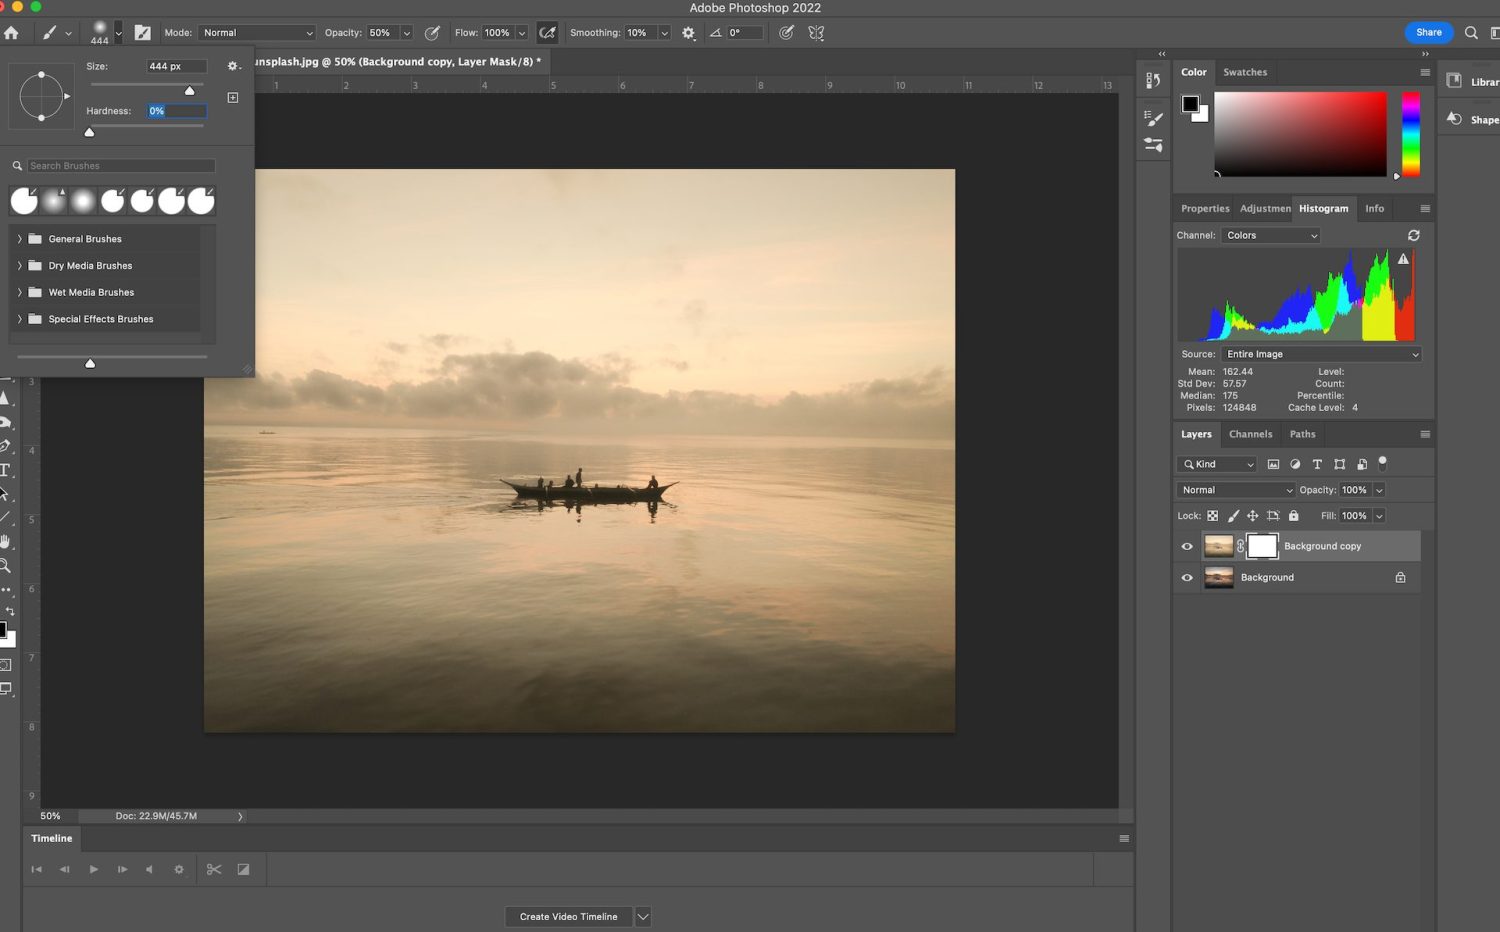
005
Select the Brush Tool and set the color to Black. Set the color opacity to 50%, the pixel size to 444, and the Hardness to 0.
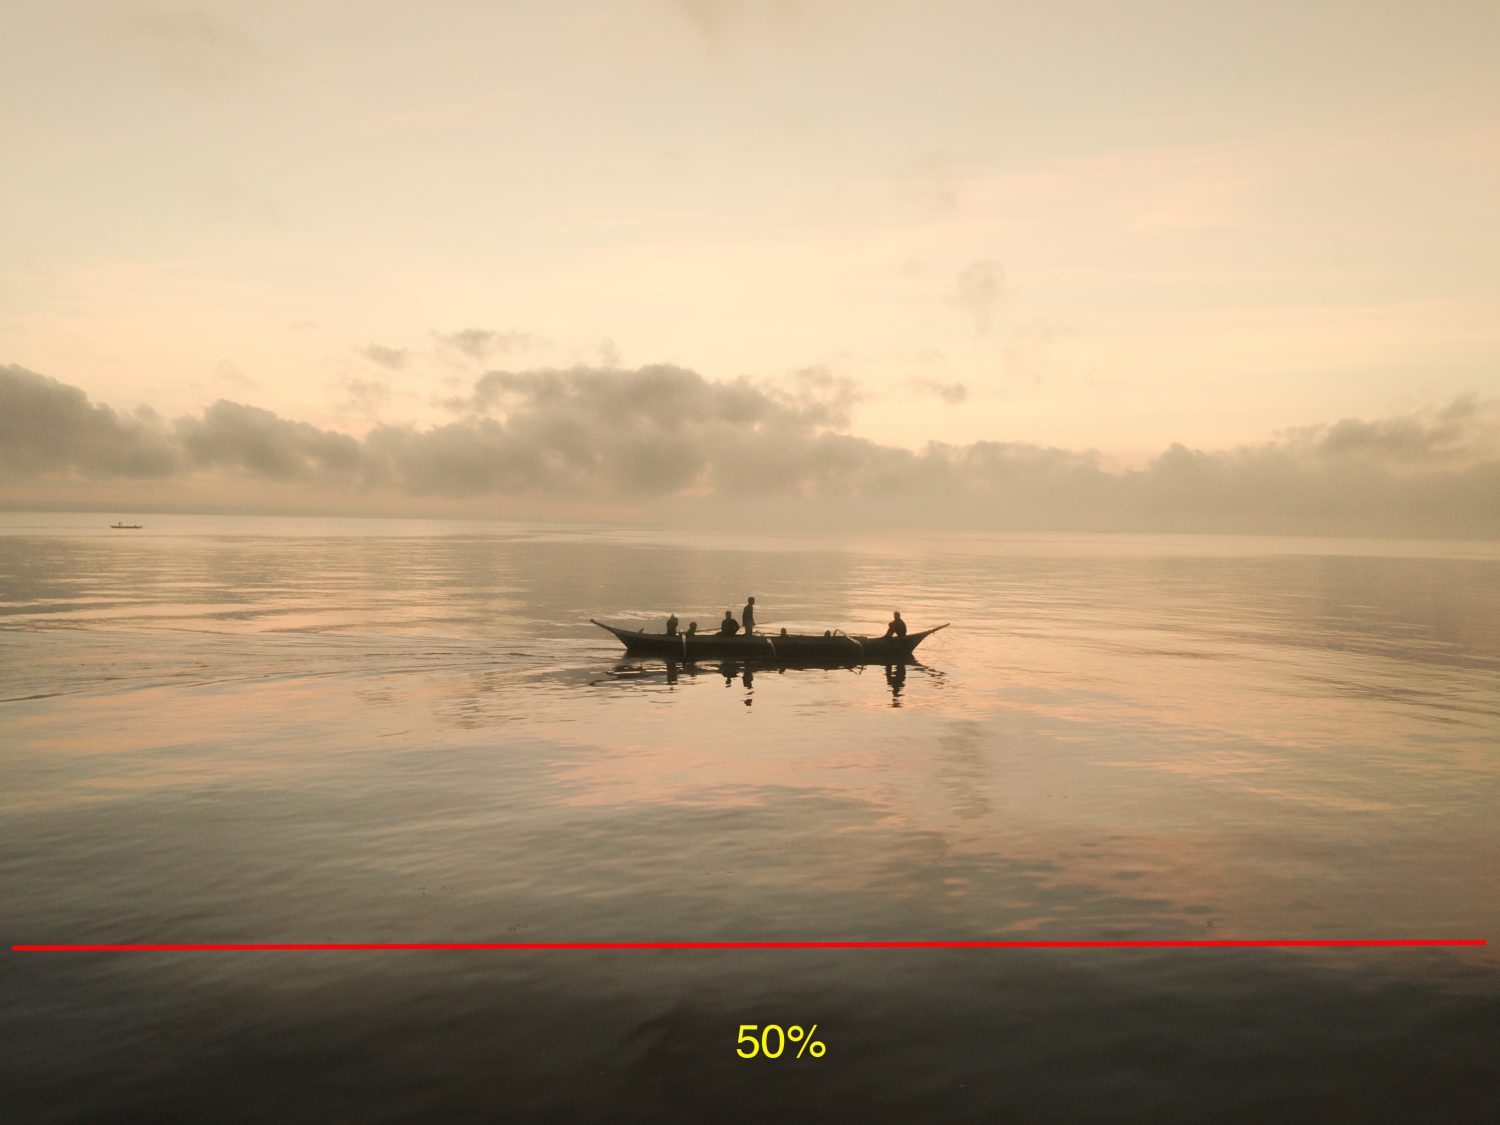
005a
Make sure the Mask icon is selected in the Layers tab. Paint the mask on the Preview image at the bottom of the frame, as shown in image 005a.
Note: Fog is less noticeable when it is close to us than when it is off in the distance. This step helps to mimic that effect and add realism to our edit. It will be less foggy in the foreground than in the background.
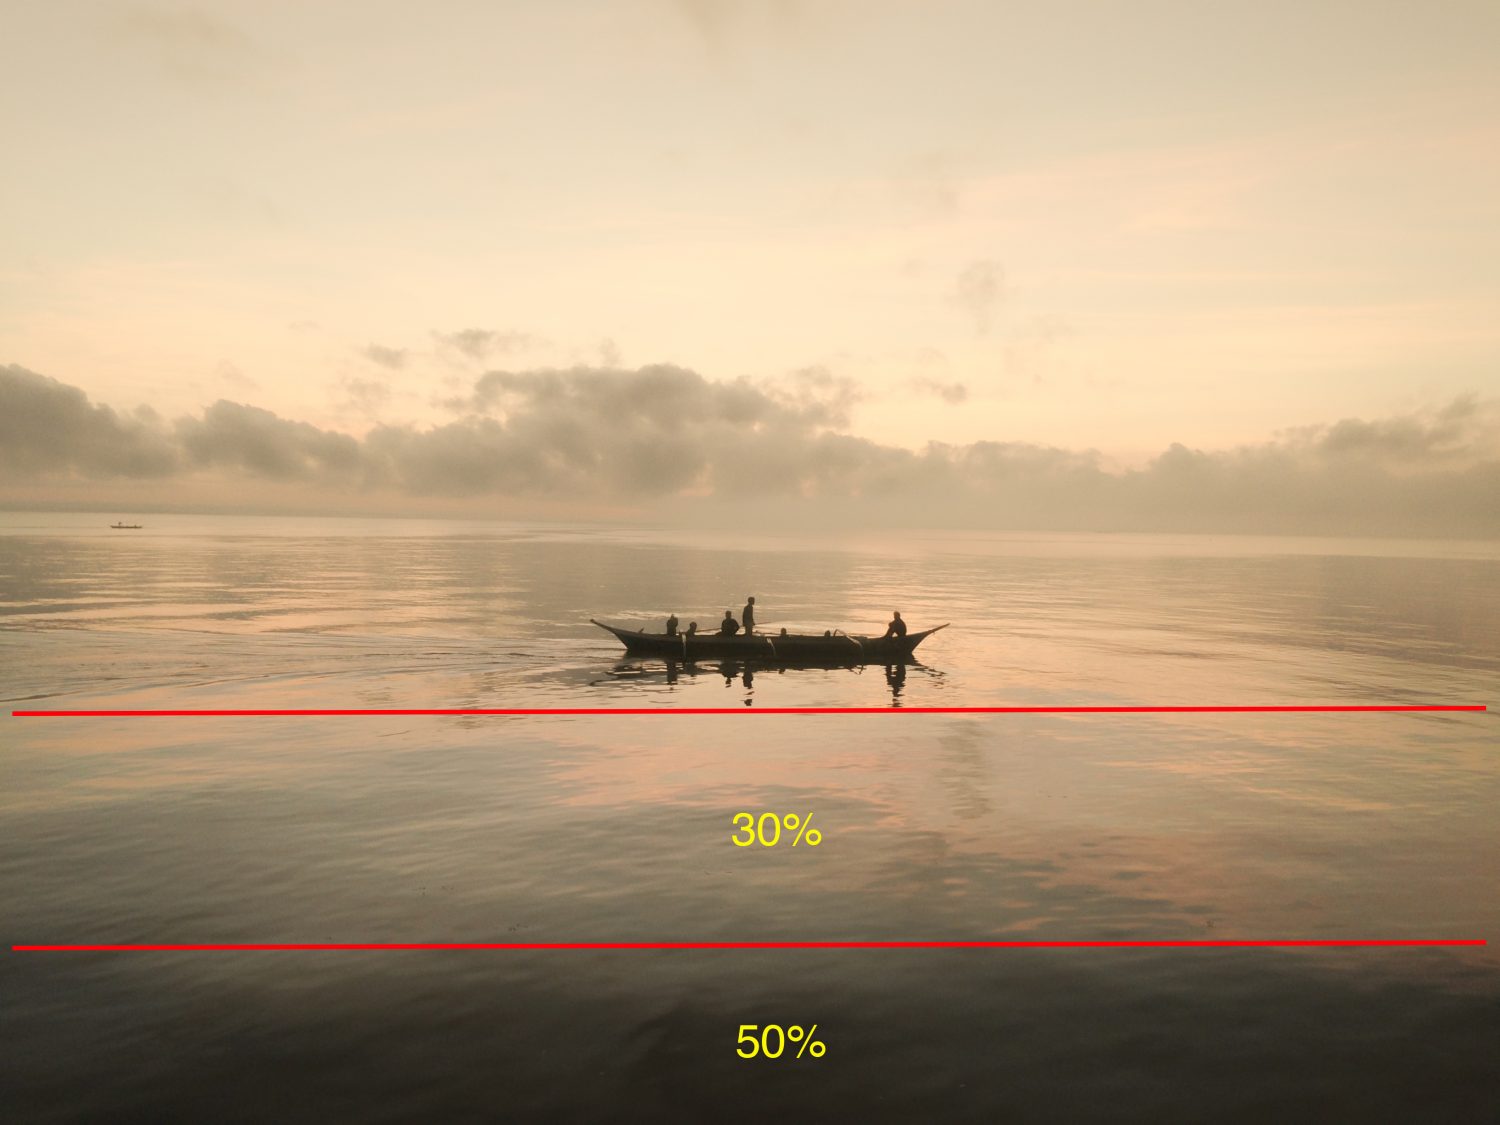
006
Now set the Black color opacity to 30% and paint the area between where you just painted and the boat. We are layering the fog effect into the shot.
007
Now set the color Black opacity to 70%.
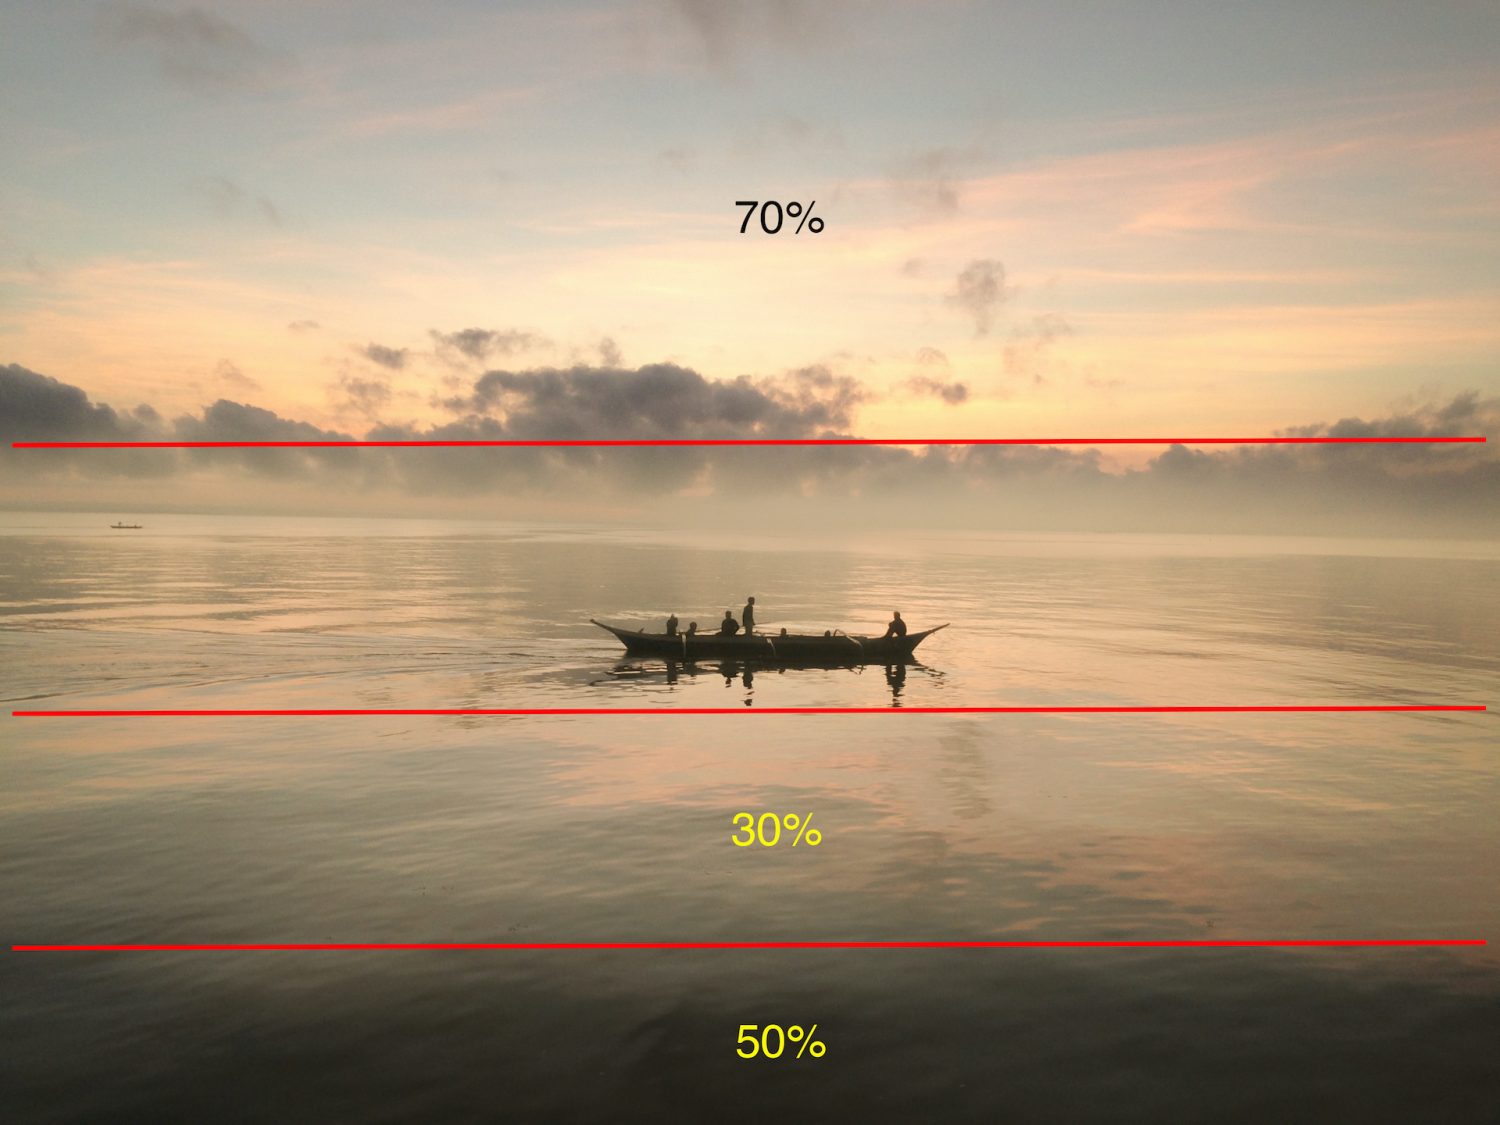
007a
Paint the sky from the top of the clouds to the top of the frame. Notice how the Mask icon is changing as you paint out the mask.
Note: When fog forms along a body of water, it is most dense near the water and dissipates as it rises into the sky. This step mimics that effect for realism.

008
Right-click on Layer One (not the background layer) and duplicate it.
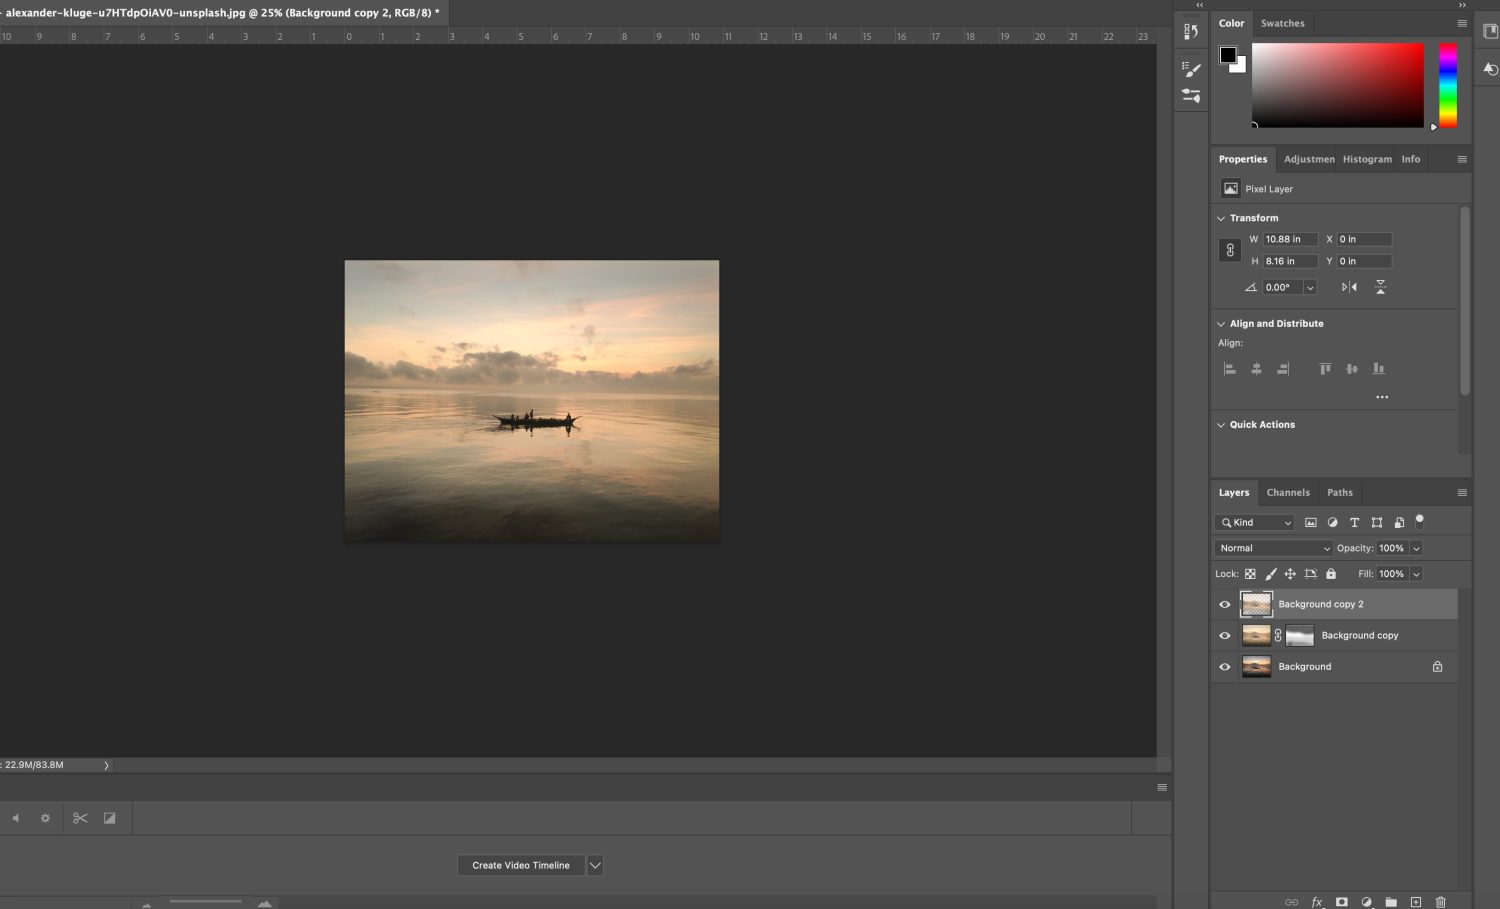
009
On the newly created Layer Two, right-click and apply the Mask. You should now see only the thumbnail image on Layer Two.
010
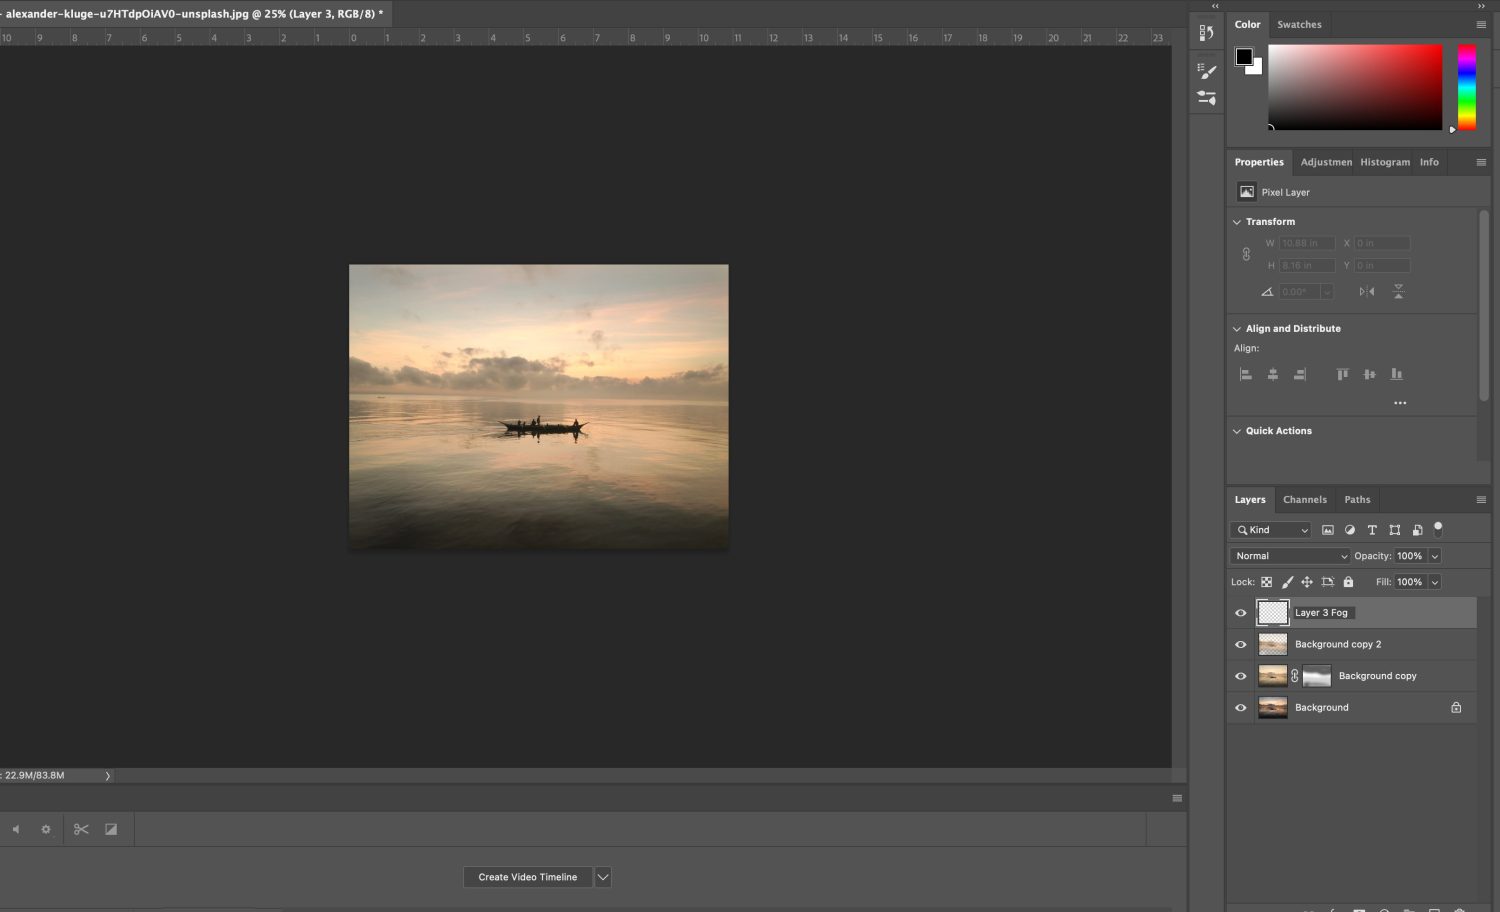
Create a new blank layer and name Layer Three “Fog.”
011
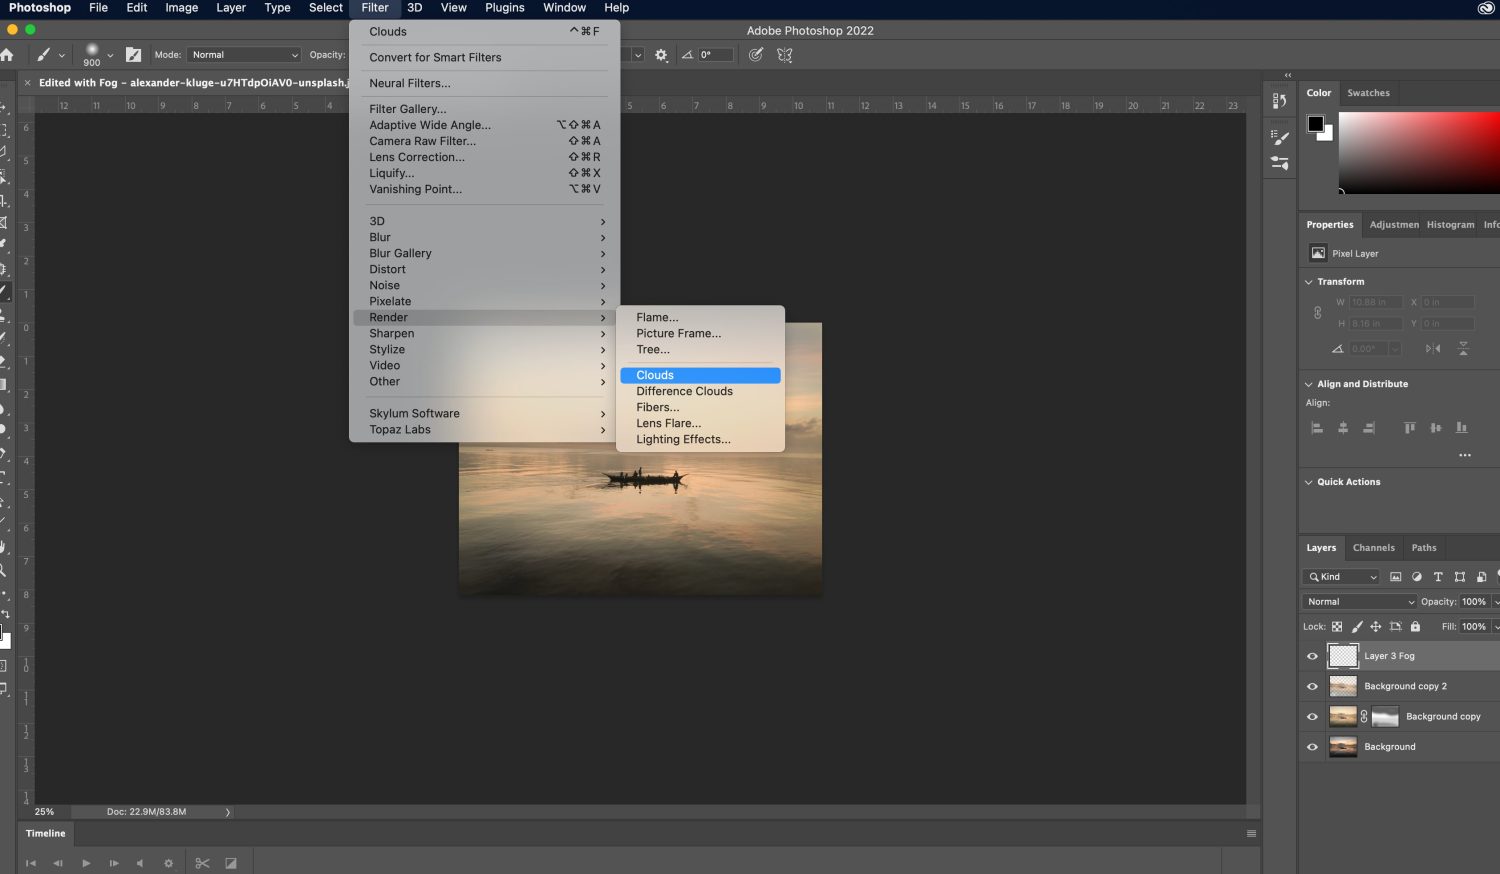
With the Fog Layer selected, go to the Filter dropdown menu and choose Render/Clouds.
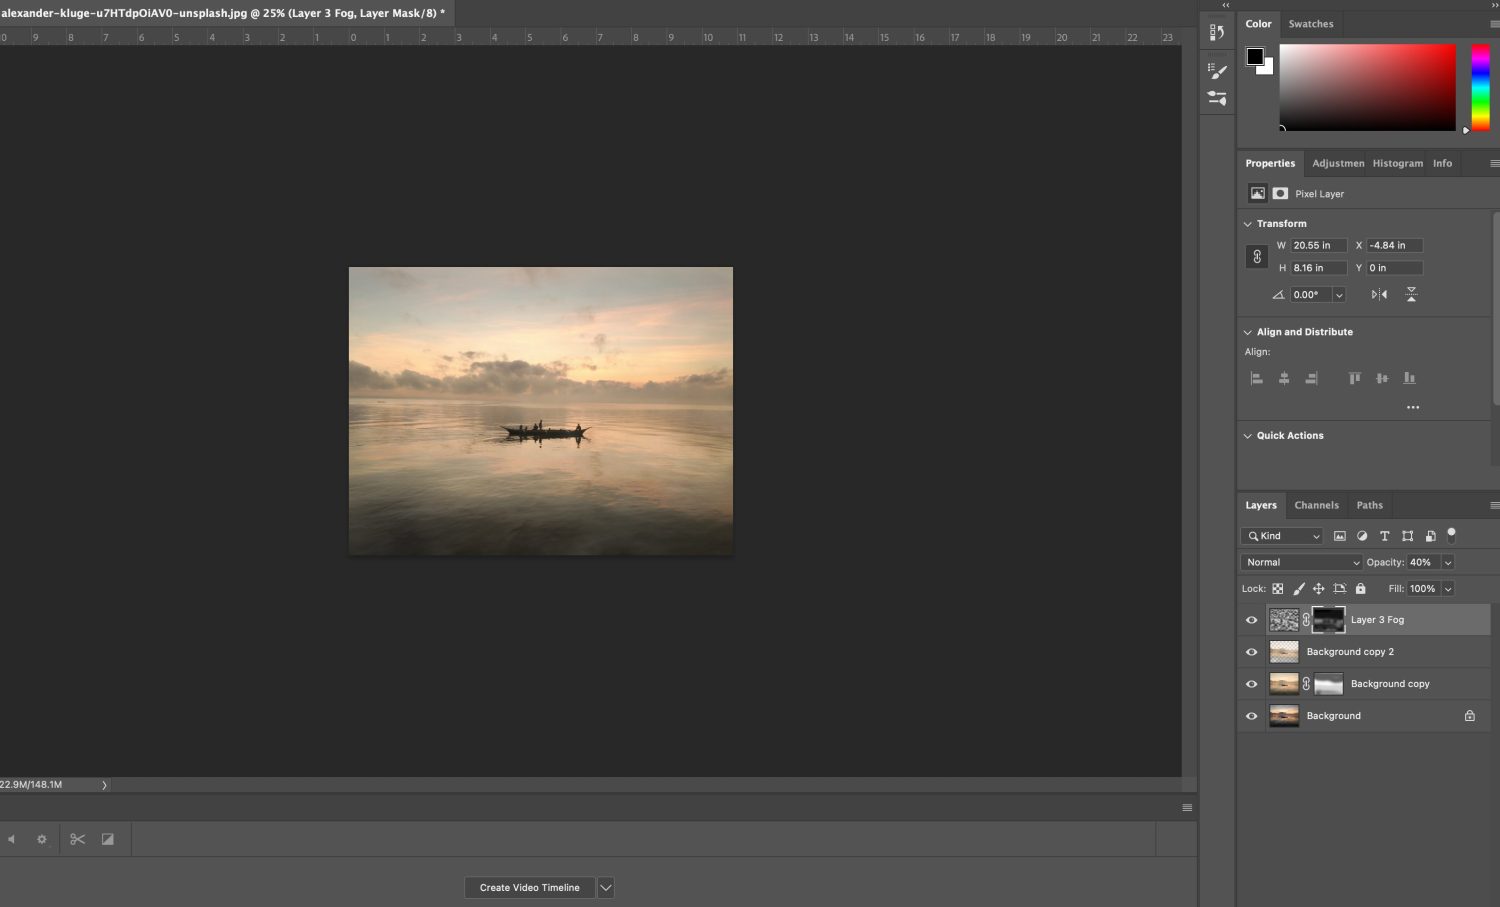
012
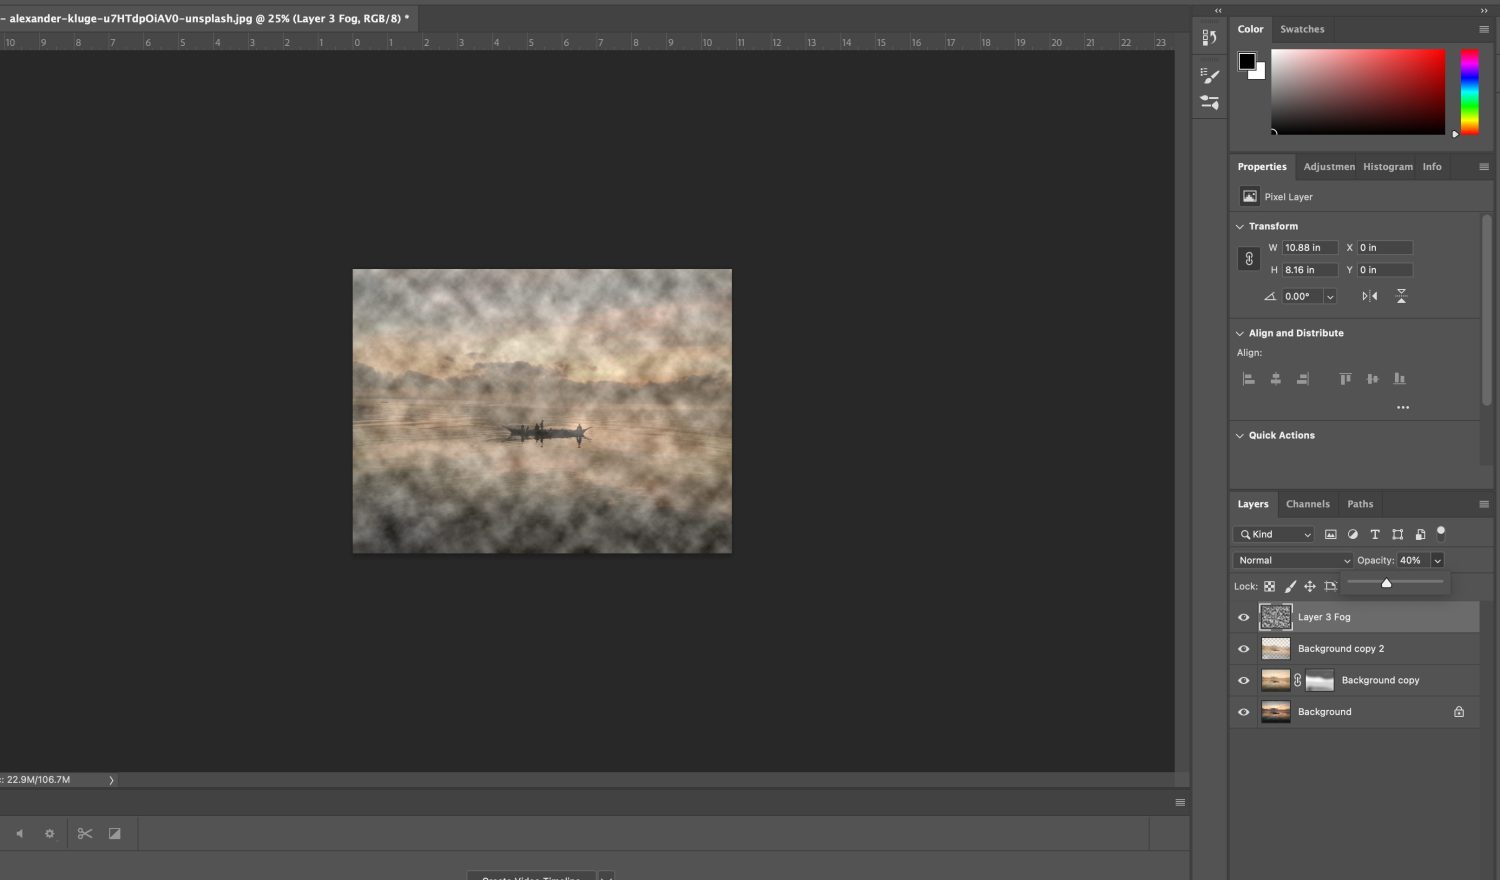
Set the opacity of the Fog Layer to 40%.
013
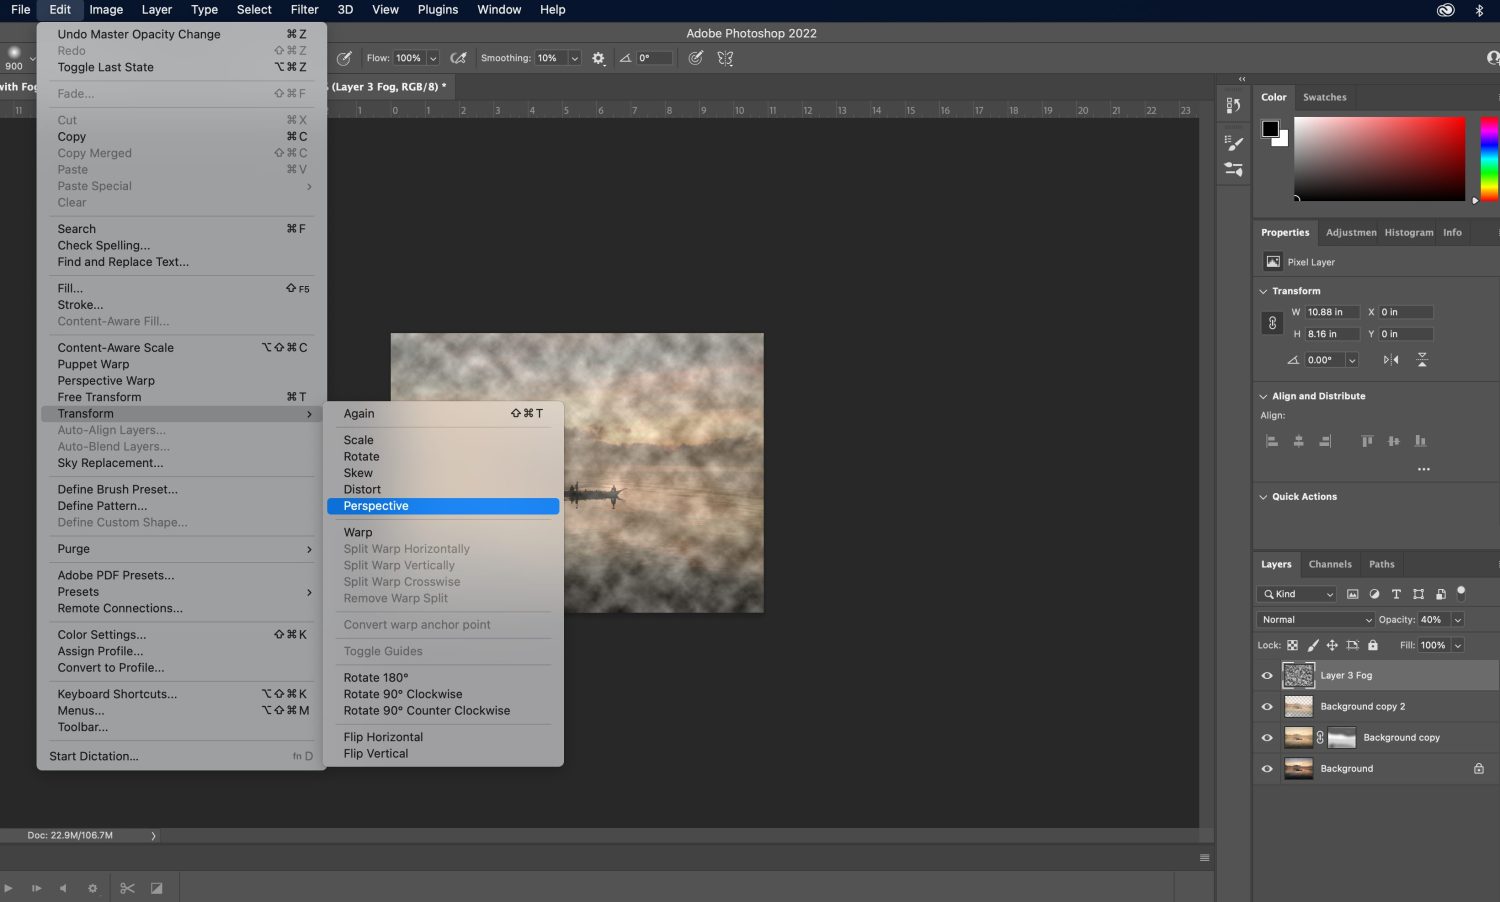
With the Fog Layer selected, go to the Edit dropdown menu and choose Transform/Perspective.
014
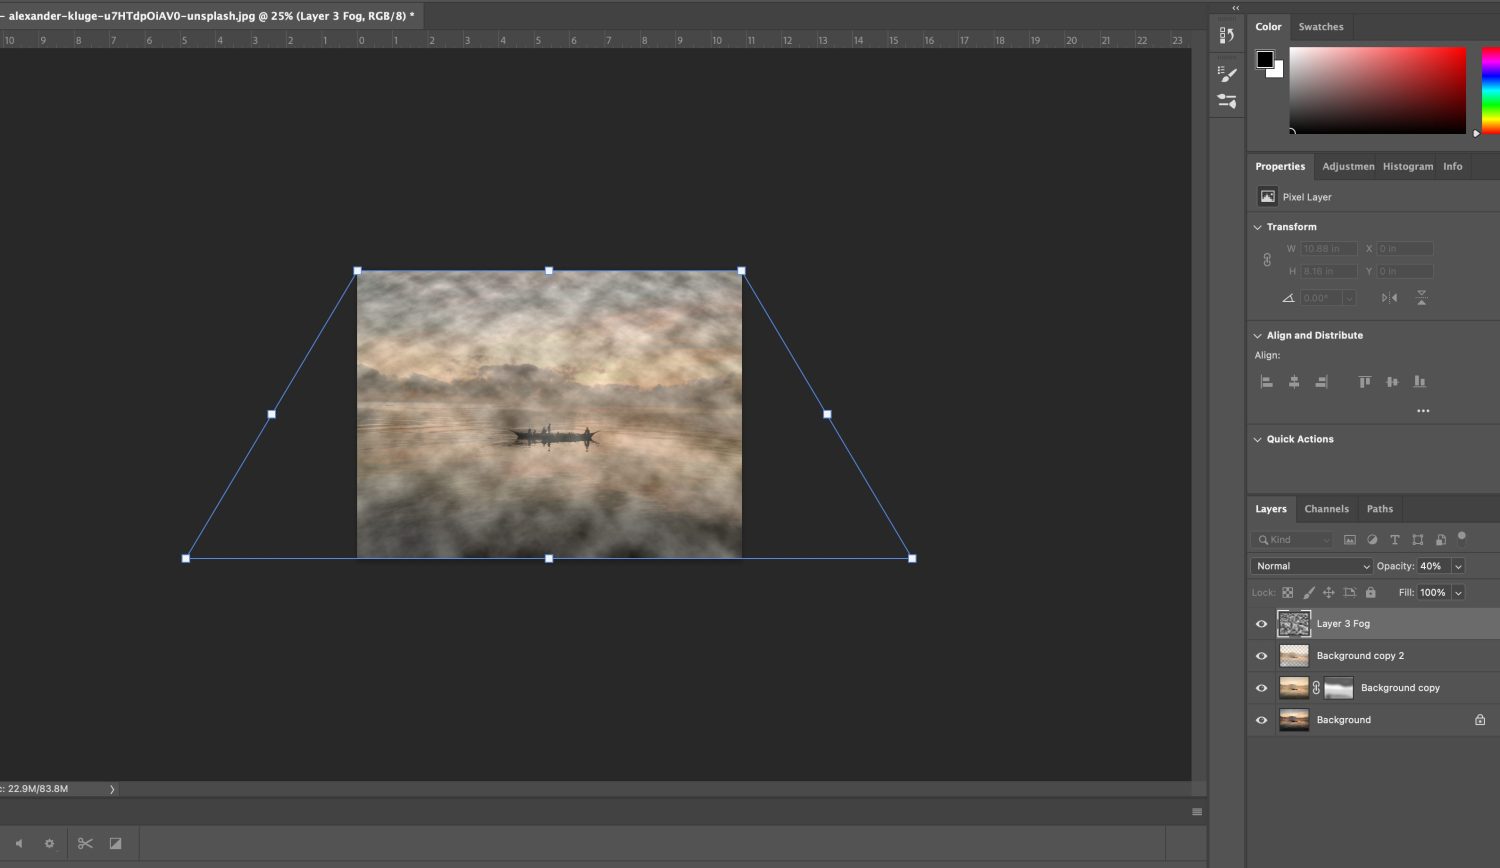
Drag the handlebars outward at the bottom to create a shape similar to image 014.
Note: This step creates the illusion of depth and distance. When an object is closer to us, it appears larger and more prominent, and as the view moves into the distance, it becomes smaller.
In this step, we create the illusion of a fog bank drifting across the water.
015
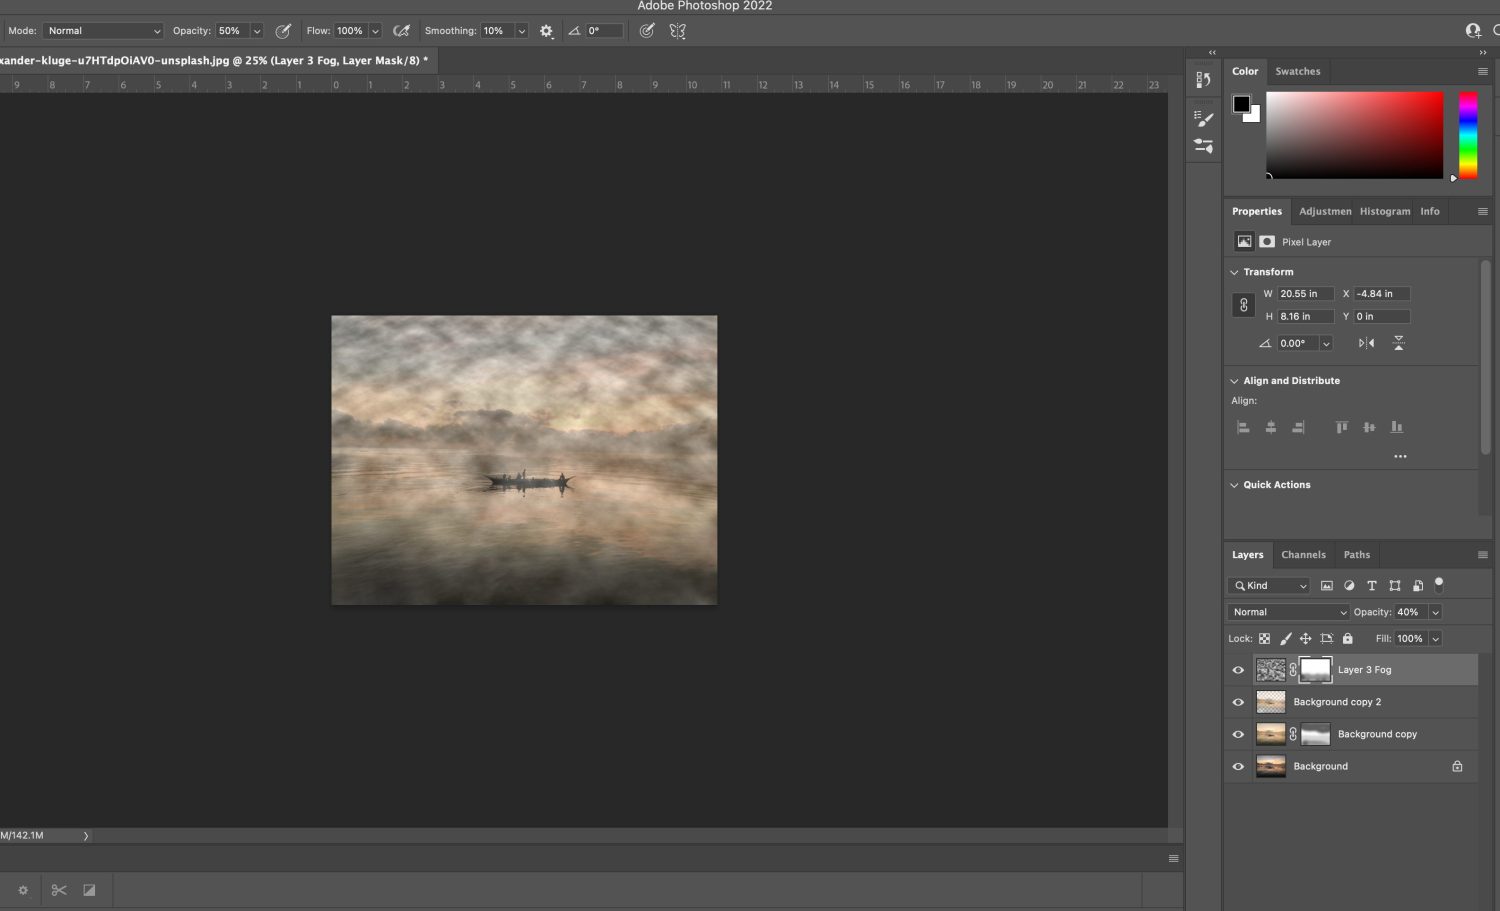
Select the Fog layer and select the Layer dropdown menu. Then, select Layer Mask/Reveal All.
016
Select the Paint Brush and the color Black. Set the color opacity to 50%. Paint the bottom third of the image (similar to the earlier step).
017
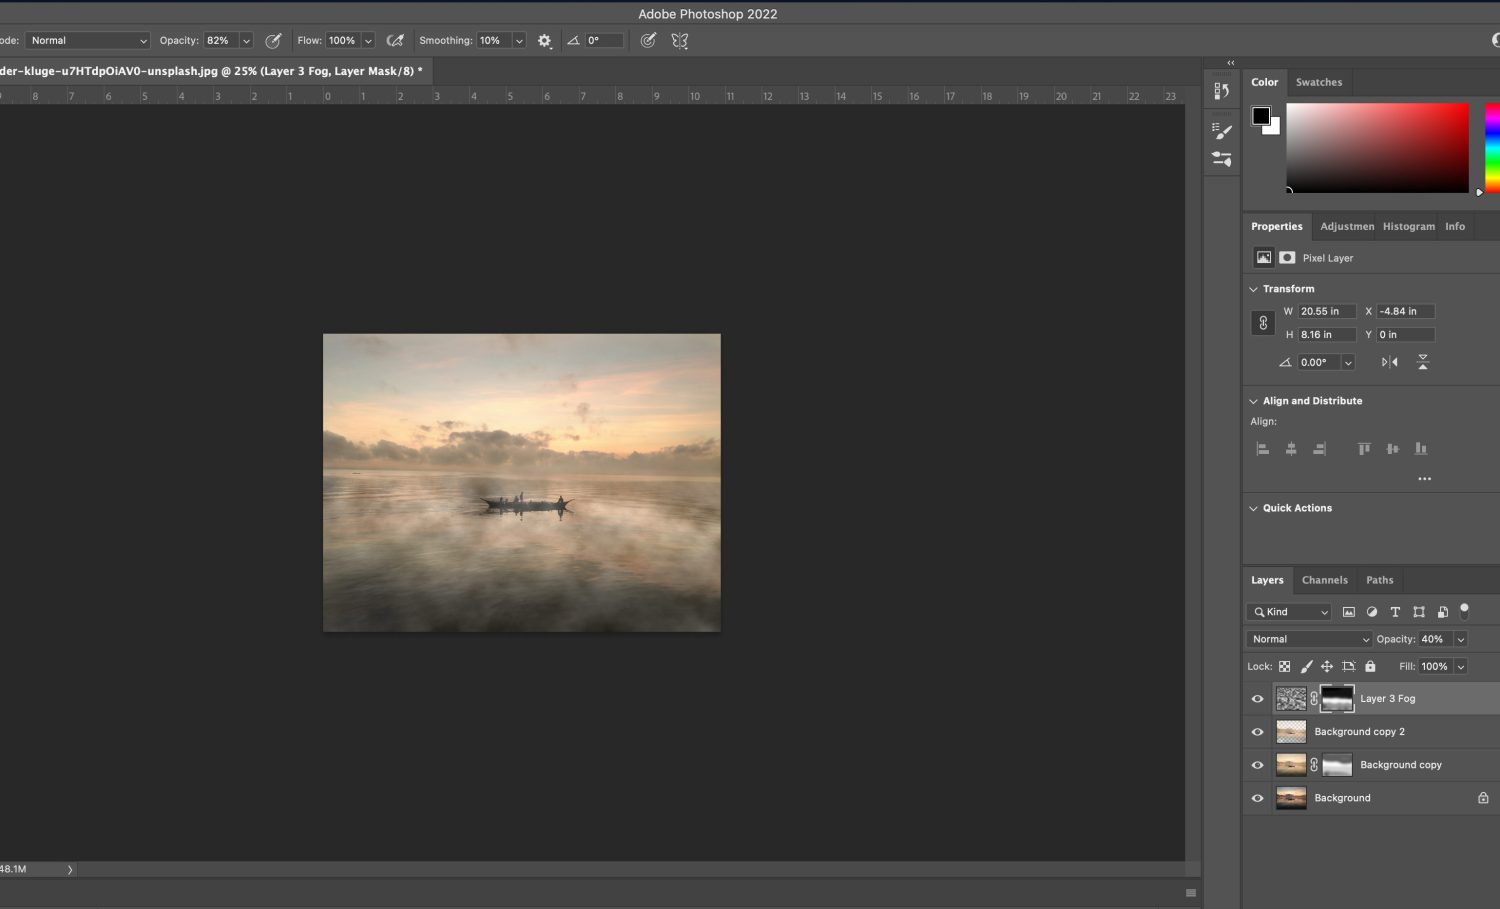
Set the color Black opacity to 80%. Paint the area from the base of the clouds to the top of the frame (similar to the previous step, only at 80%).
Can you begin to see how it looks like fog rolling across the water?
018
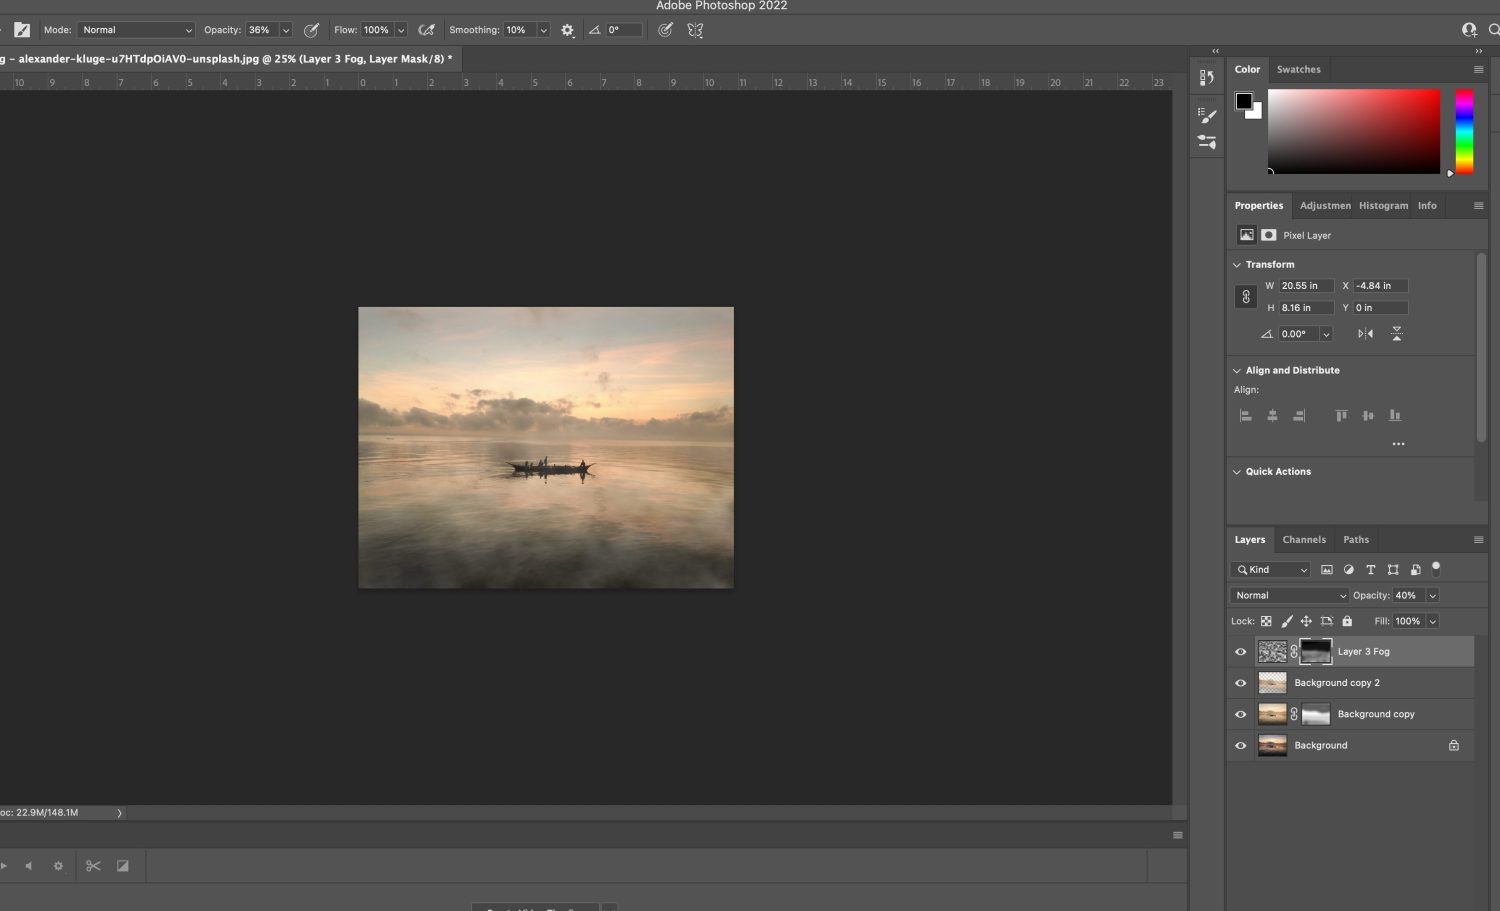
Set the opacity of the color Black to 35% and paint the remaining area around the boat.
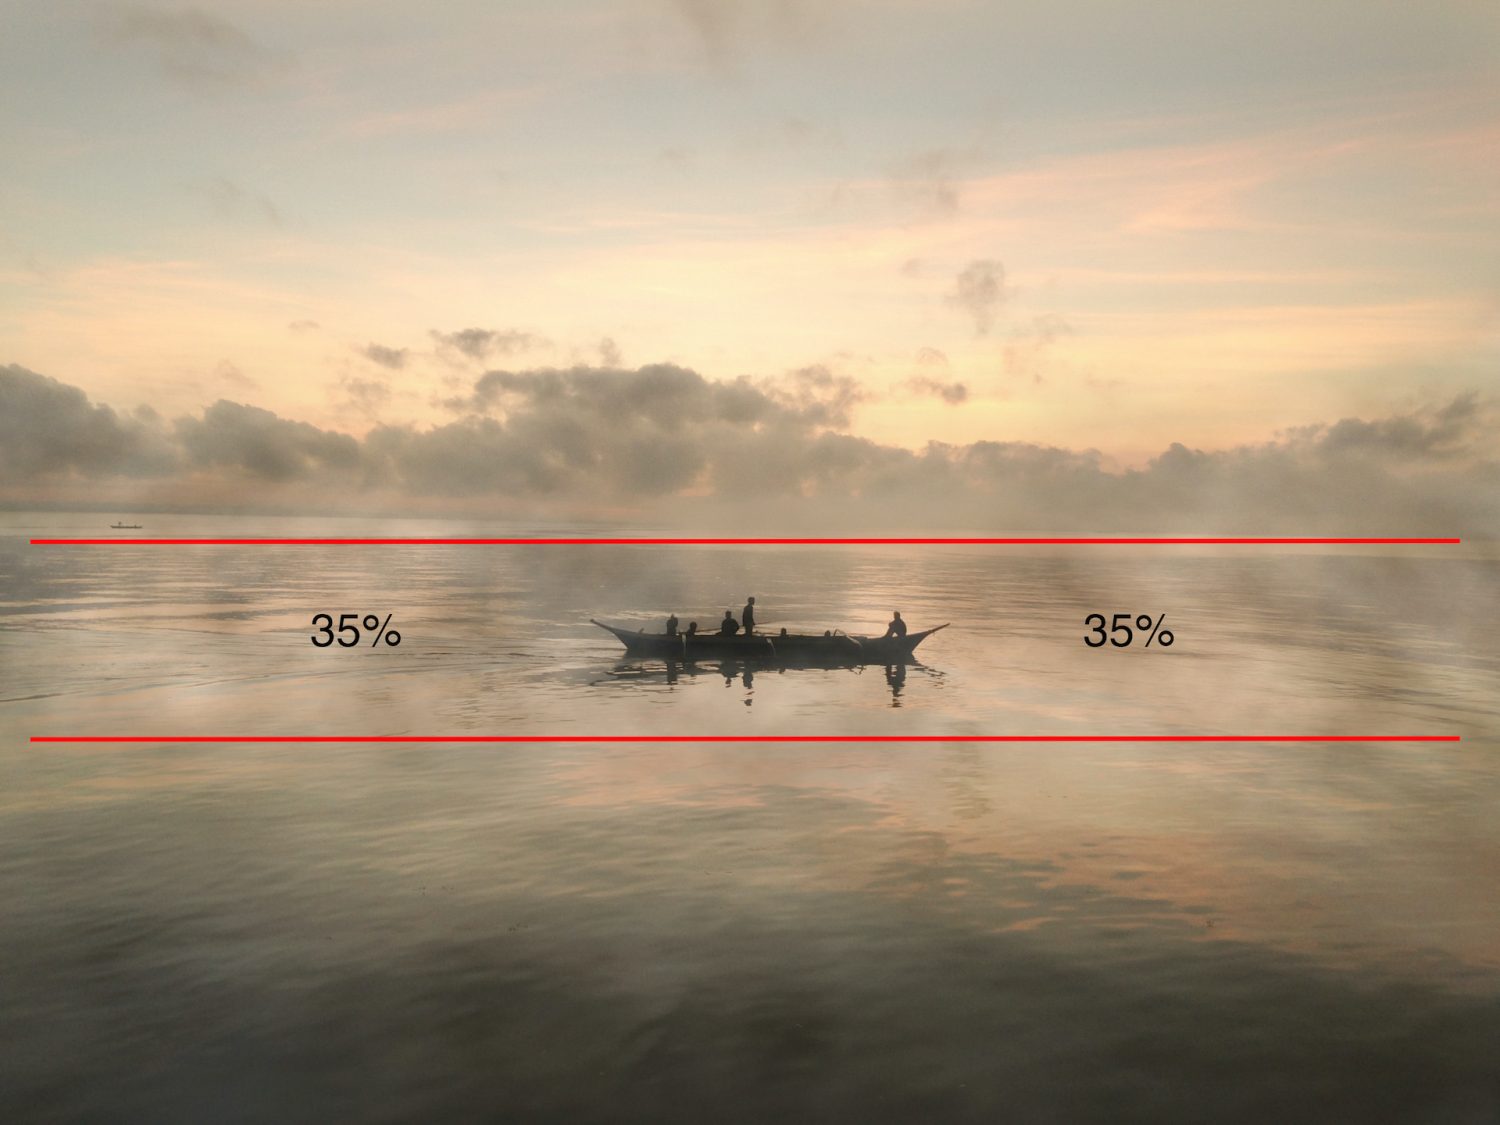
018a
019
Examine your result and touch up as necessary. Save a layered .psd file in case you want to make changes later.
Flatten the image to output a .jpg for printing or sharing.
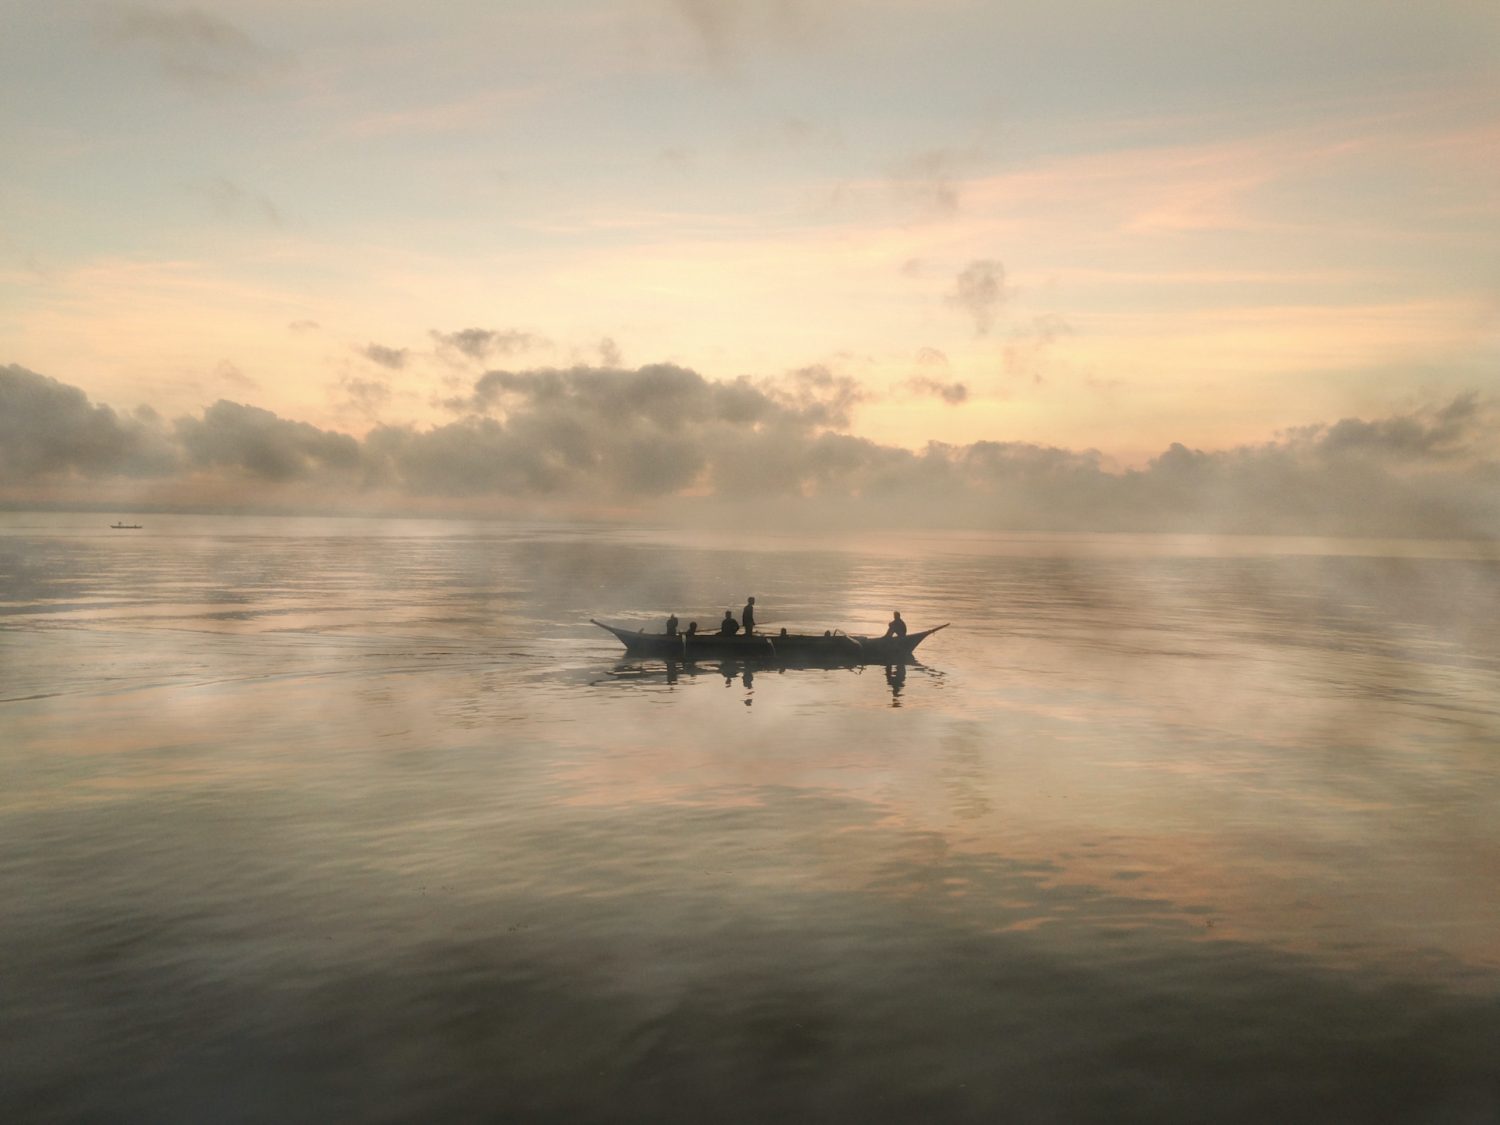
020 – Editing by Kent DuFault
Here is the final image!
If you would like to try this out step-by-step using this same photo, you can download it for free HERE.
Here’s a Before and After comparison
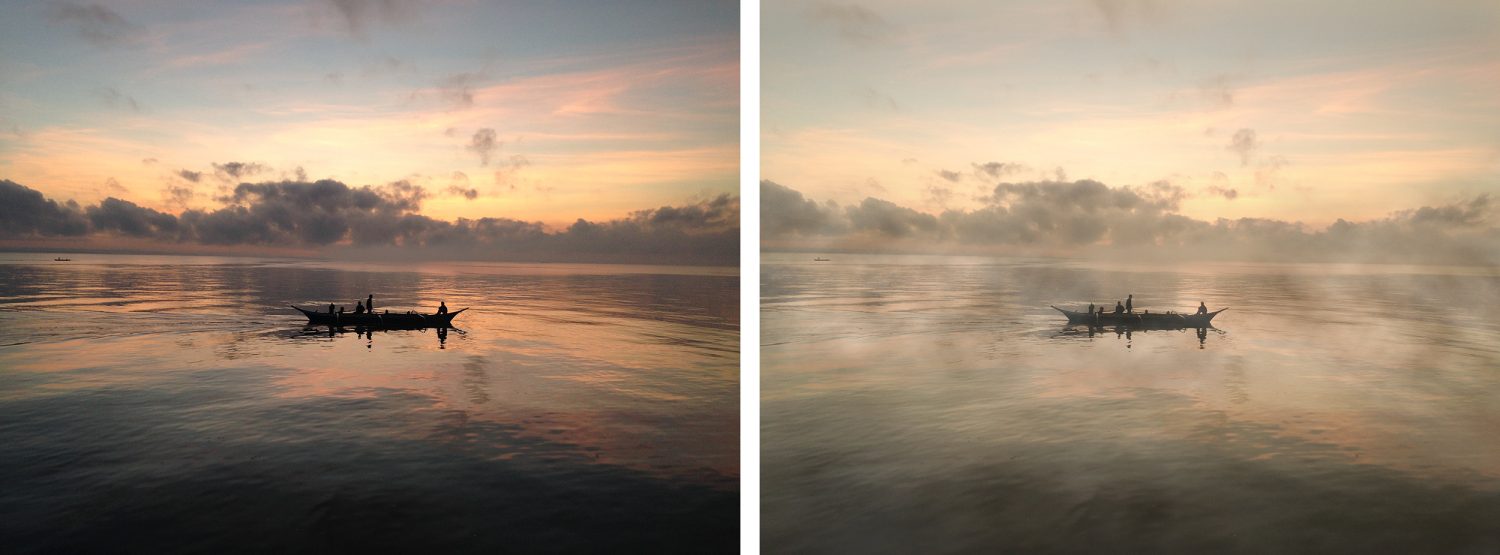
021
If you want to learn more about how to instantly begin “creating” photographs- not just relying on what Mother Nature delivers to you, then check out the Understanding Masking Guide. This guide includes 171 easy-to-follow pages of training, illustrations, and self-check quizzes, whilst covering all the masking techniques and secrets. Read all about the guide here.