Common Ways Photographers Screw up Proper Lighting
Screwing up lighting in shots is one of the most basic, common and widespread mistakes that photographers can’t seem to stop themselves from doing. Though lighting is a fundamental aspect of taking pictures, it’s still surprising how many common lighting errors show up in shots quite regularly. There is such a thing as good lighting and, conversely, there is bad lighting.
If, for some reason, you want to shoot a picture where your viewer can spot the error almost immediately, then you’ll make a lighting mistake. This will stick out like a sore thumb! Of course, it’s in your best bet to avoid lighting errors, as they won’t do anything for your photographer’s reputation.
Here are the most common ways that photographers screw up proper lighting in shots.
Your Subject Has Either Dead or Dark Eyes

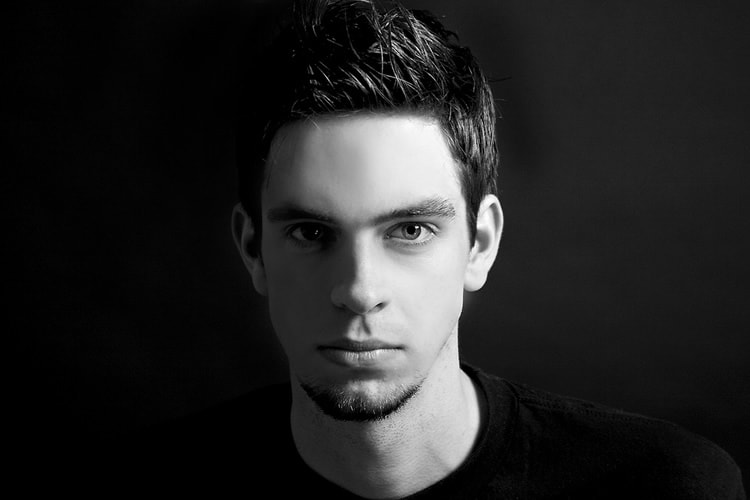
photo by Lauren Hammond – this is a good example of proper lighting on the subject’s eyes.
Unless you’re shooting for a zombie movie ad campaign, it’s best to steer clear of shots that feature subjects with dead or dark eyes. The eyes are always the most vital part of a subject, so it’s necessary to shoot them right. That’s why they should be filled with light. Fortunately, it’s quite easy to remedy this screw up.
Just have the subject turn toward your source of light if he happens to be in the shade when you’re shooting him. Another option is to obtain a white reflector to direct some light right into the subject’s eyes, and you can even get above your subject and then shoot down on him to permit the light of the sky to fall into his eyes.
You Put Your Subject Right Into Midday Sun

photo by Naim Naim – having your subject turn their back to the sun or have the sun at an angle can make for very interesting photos.
This is a big no-no. Putting your subject into the light of the midday sun will instantly create a few obstacles to having your photo turn out effectively and attractively. First of all, the subject will have a nearly impossible time opening his eyes, which makes it self-defeating to place him or her in midday sun. You don’t want your subject squinting into the camera! Sure, that can work if you want some sort of mischievous or dramatic shot, but chances are that you won’t.
Instead, attempt to have your subject turn their back to the midday sun, or have the sun at an angle. Then, you may also want to utilize a reflector or a reflective surface of some sort to direct some light onto the face of your subject. Make sure you watch for flaring and sun stars, unless that’s the effect you’re after.
Your Subject Has Excessive Shadow on One Side of the Face

photo by vanessa_hutd – a good balance of shadows and light on the subject’s face.
Sometimes, when you snap a photo, you’ll notice that the shadows on your subject’s face just aren’t balanced. How did this happen? What did you do? Chances are that there was an excess of light on one side that you failed to properly balance off on the other side. So what should you do to fix this glaring error?
In order to obtain a subject who has a face with balanced lighting on both sides, just set up your handy reflector on the other side of his face. This will help you to bounce off the light and thereby make both sides even in terms of lighting distribution. Of course, sometimes, you may want an imbalance of shadows on the face of your subject, such as when you’re aiming for added effect or emotion in your shot.
You Get Light Reflections in Mirrors and Other Reflective Surfaces
Up to this point in this article, we’ve been talking exclusively about common ways that photographers screw up natural lighting situations. Now, we’re going to be switching gears just a little bit and include artificial lighting and ways that photographers can screw that up, too.
First up is when you get light reflections in mirrors and other types of reflective surfaces. You normally get these light reflections in mirrors when you’re utilizing either flash or continuous light sources on location. You’ll notice that you’ll end up with a bad reflection of flash in a mirror or other reflective surface that’s just behind your subject.
Fortunately, you’ll be able to fix this quite efficiently. Simply reframe the entire shot in such a way that the whole reflection’s now outside of the frame. Alternately, you can also try to change up the shooting angle to your subject or even switch around the positioning of your light.
You End up Burning Out Your Flash

photo by Luke Hayfield
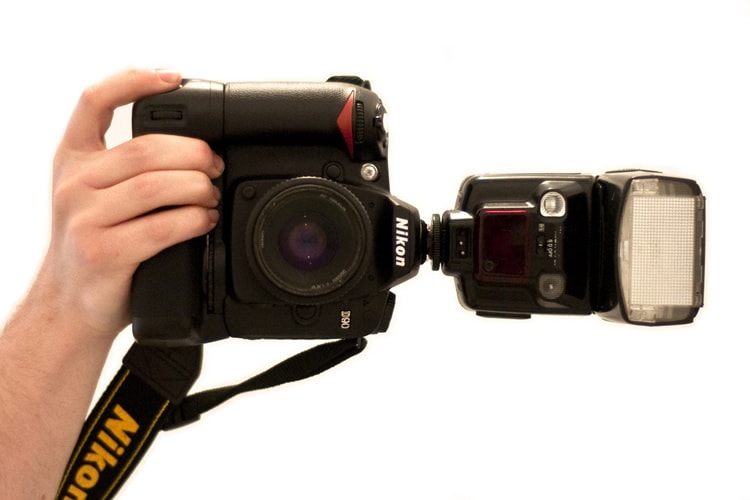
Yet another screw up as it relates to artificial lighting in photography, burning out your flash is a very real issue, particularly if you are taking multiple shots frequently and furiously. This normally can occur at full power, and “burning out your flash” is essentially when you overheat your flash, which will cause it to stop firing. As with all screw-ups related to lighting, you can correct this quite easily.
All that you have to do is increase your ISO to the 800 to 1600 range. Additionally, provided that your flash is being used in manual mode, you’ll definitely want to set your flash to a lower power setting. Interestingly, if you are utilizing TTL (through the lens metering), then the flash of your camera will automatically make adjustments and lower the flash output.
Screw-Ups Are Just Waiting to Be Corrected
Now you know some of the most common (and notorious) ways that everyday photographers can sometimes be their own worst enemies when it comes to light, whether it’s natural or artificial light that we’re talking about. If you want to look like a total amateur to your viewers, there’s no better way to do it than by snapping photographs with all of the above screw-ups!
However, it does not have to be like this for you. If you want to be taken seriously as a photographer—and perhaps snag some bigger and better clients in the process—we advise you to avoid these screw-ups. Even if you make some of them, note that you can correct them quite easily in all situations. So don’t fret, even if you commit some of these screw-ups when shooting—just remedy the errors quickly.
What about you and your lighting experiences during a shoot? Have you ever encountered at least some of the screw-ups we talked about above? If so, tell us all about them and how you’ve (we hope) remedied them.
