Selective Color: What is it, What isn’t it, and How to Use It
 by
Kent DuFault
by
Kent DuFault

Selective color is a technique that can occur in-camera with specific camera models or in post-processing with just a few simple steps.
The approach uses a singular color to direct viewer attention toward a particular location within the photograph- most typically the subject.
Let’s begin by discussing what selective color isn’t.
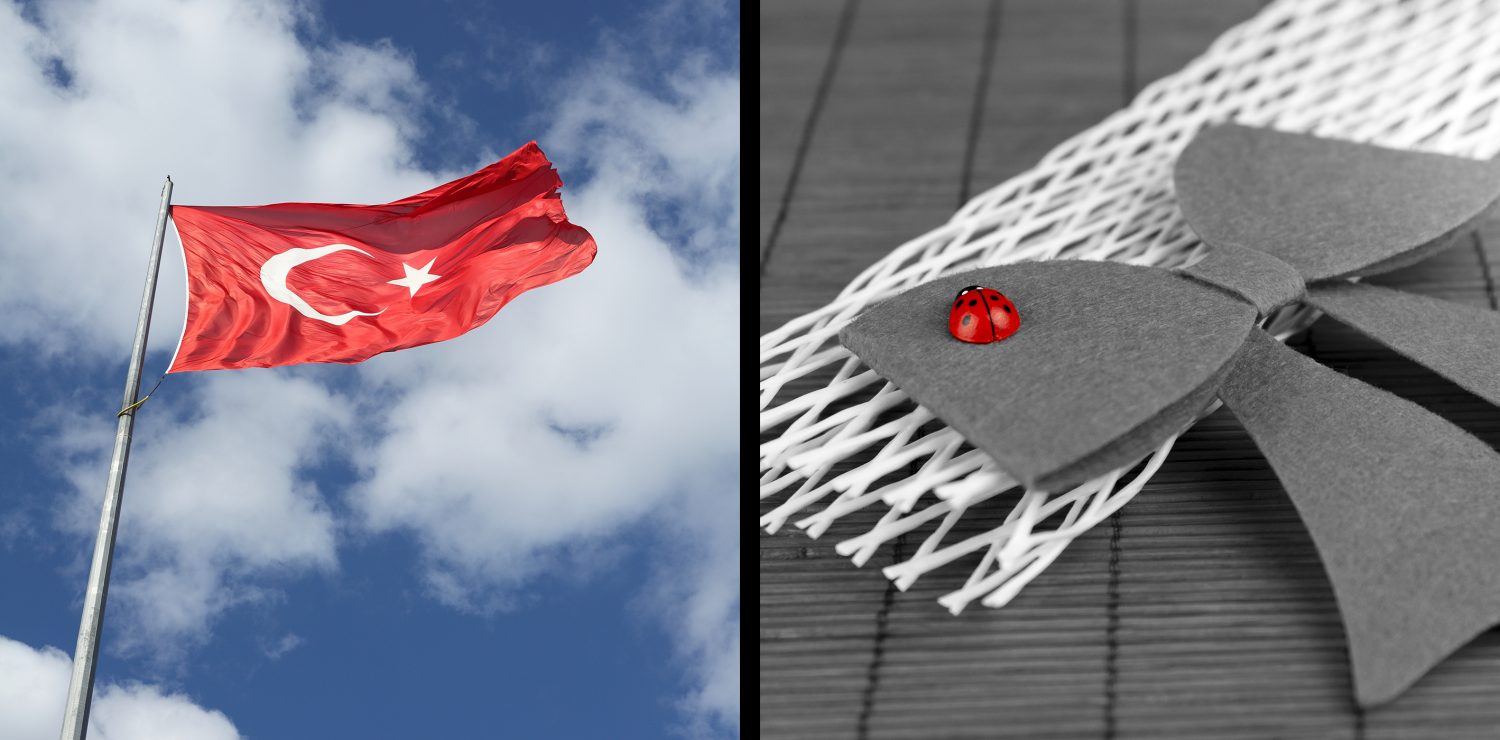 Image 001 – Photograph (l) by Engin Akyurt and Photograph (r) by Anonymous
The photograph on the left of Image 001 is typical of images mislabeled as being selective color.
This photograph is an example of ‘spot color’ or ‘color contrast’ and not selective color. It uses a singular color that is vastly contrasting to every other color in the photograph- to highlight the subject.
The photo on the right of Image 001 is an example of selective color. A color is ‘chosen,’ and all the other colors in the file are converted to black and white (monochrome).
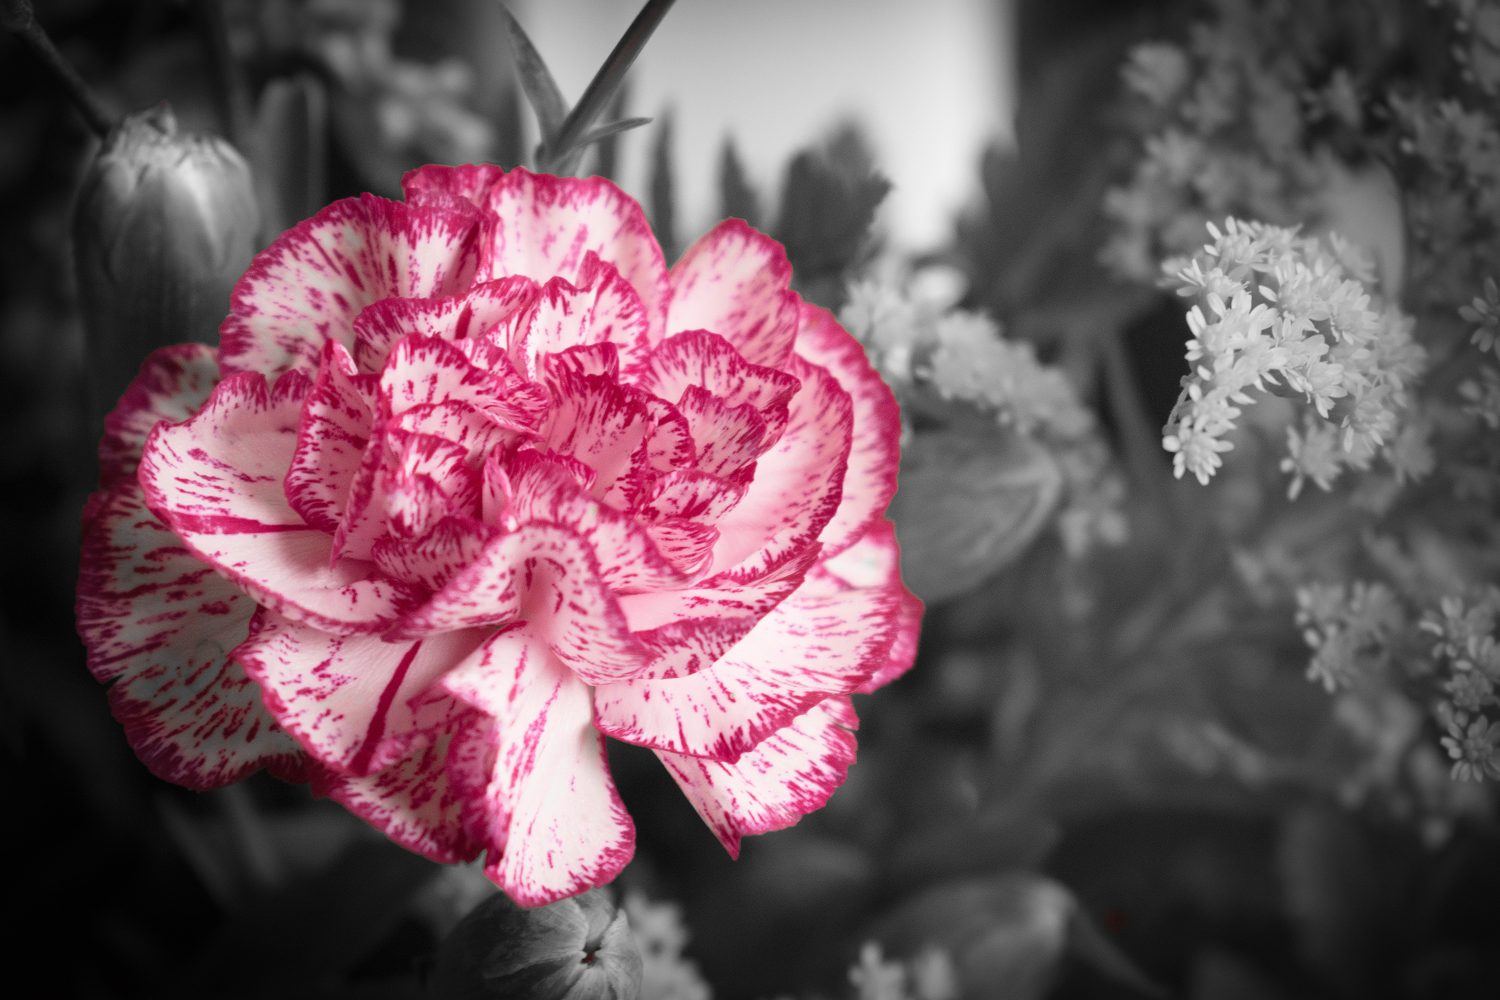 Image 002 – Photograph by Ale Gonzalez
Image 002 is an ineffective attempt at selective color. All of the monochrome areas in this image don’t provide value to the final photograph. One could easily crop off half of this photo without losing anything important.
Pro Tip: Selective color is best used when the black and white portion works succinctly with the overall composition’s color portion. If one, or the other, is there without reason- it begins to appear a bit unimaginative and forced.
Let’s look at a photograph that is vastly improved with the selective color technique.
 Image 003 – Photograph by cottonbro
This photograph begins with the use of spot color. The photographer designed the shot to emphasize the color red against other neutral hues.
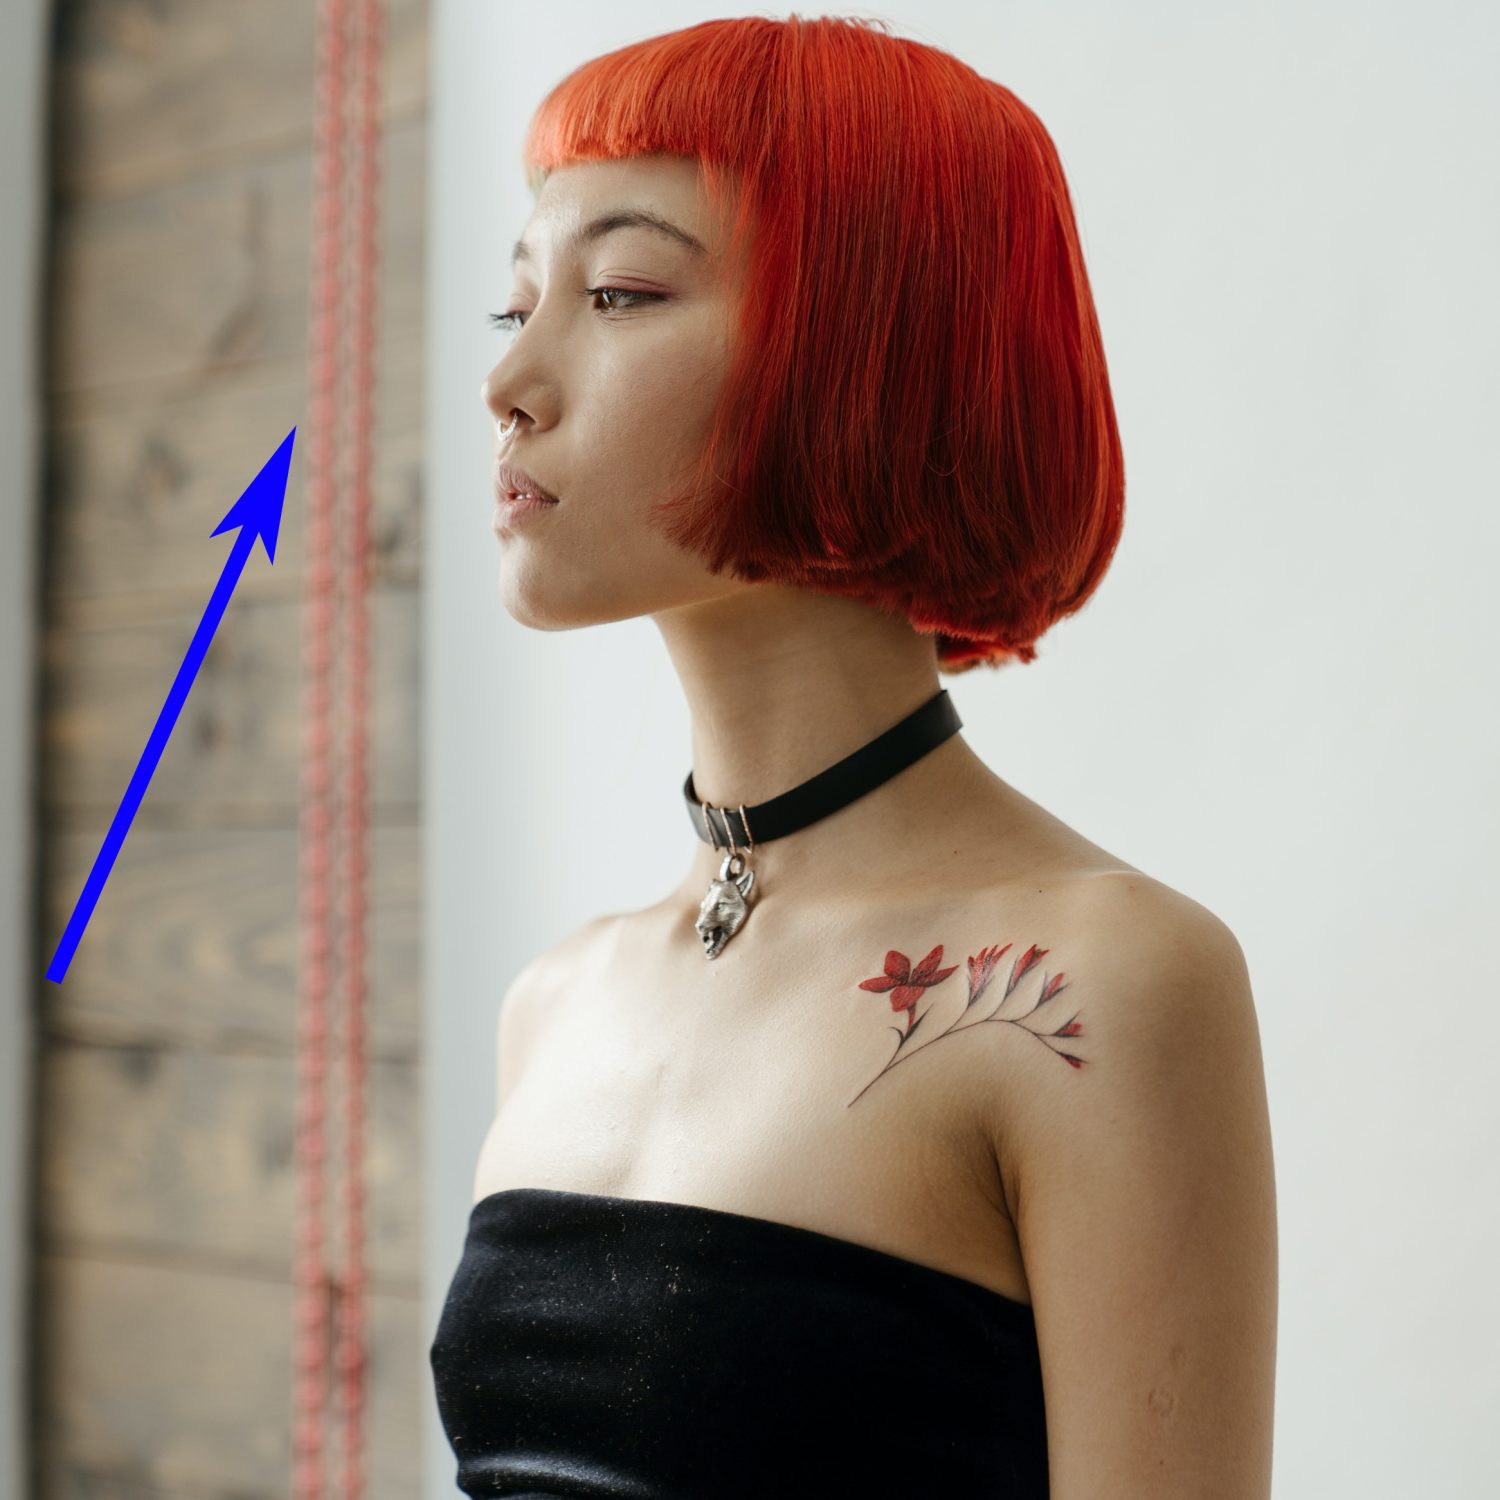 Image 004 – Photograph by cottonbro
However, the red beads in the background echo the spot color. Their shape and repetition draw a lot of visual weight away from the model (the subject).
This photo is a perfect candidate for the selective color process.
Let’s walk through it first using Photoshop.
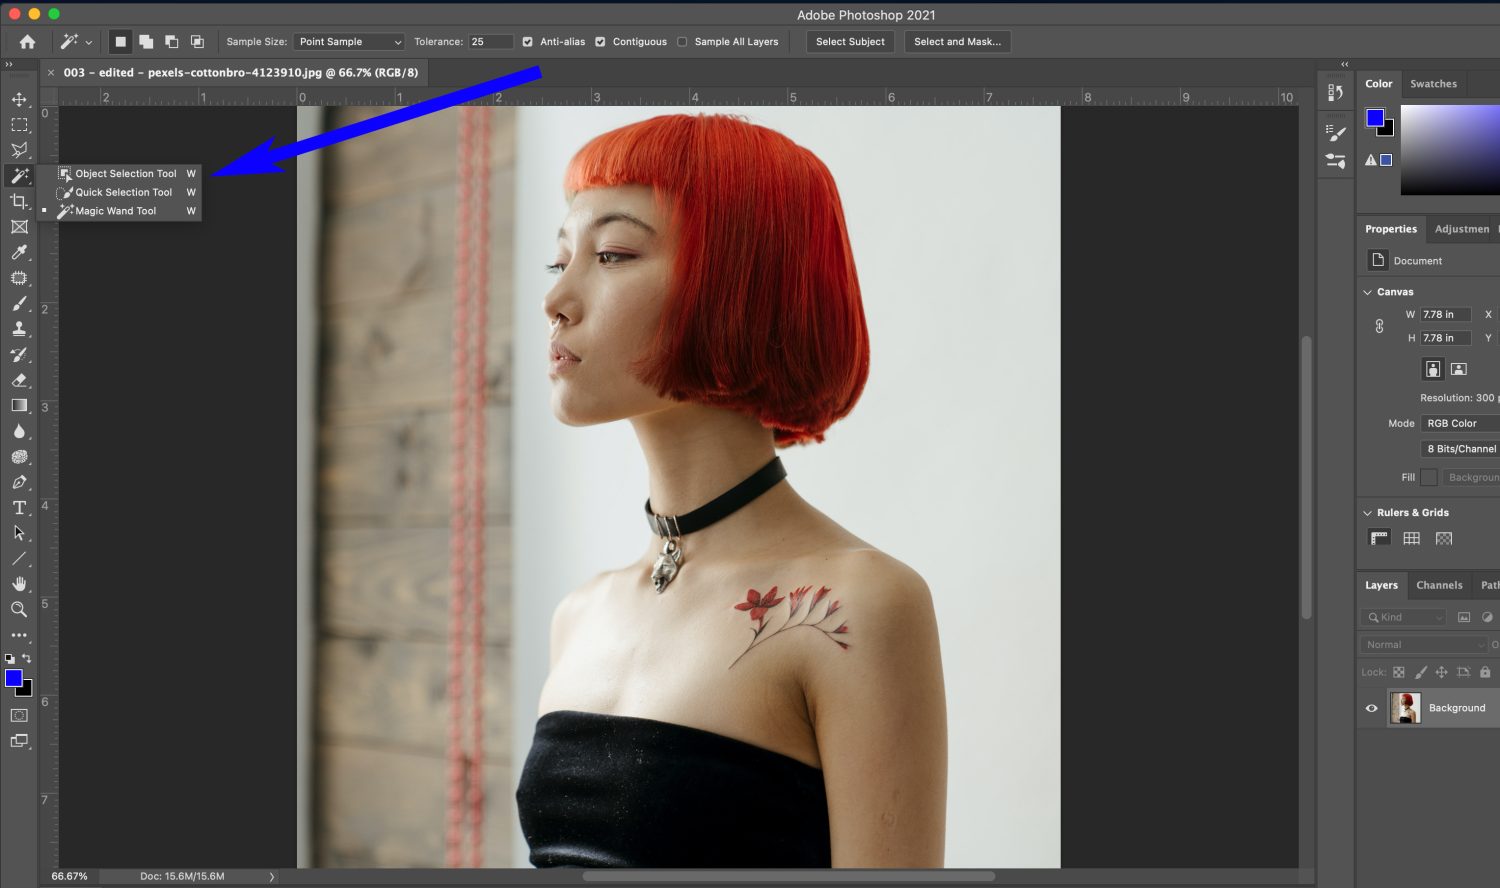 Image 005 – Photograph by cottonbro and editing by Kent DuFault
In the first step, I will use the Object Selection Tool to select the model.
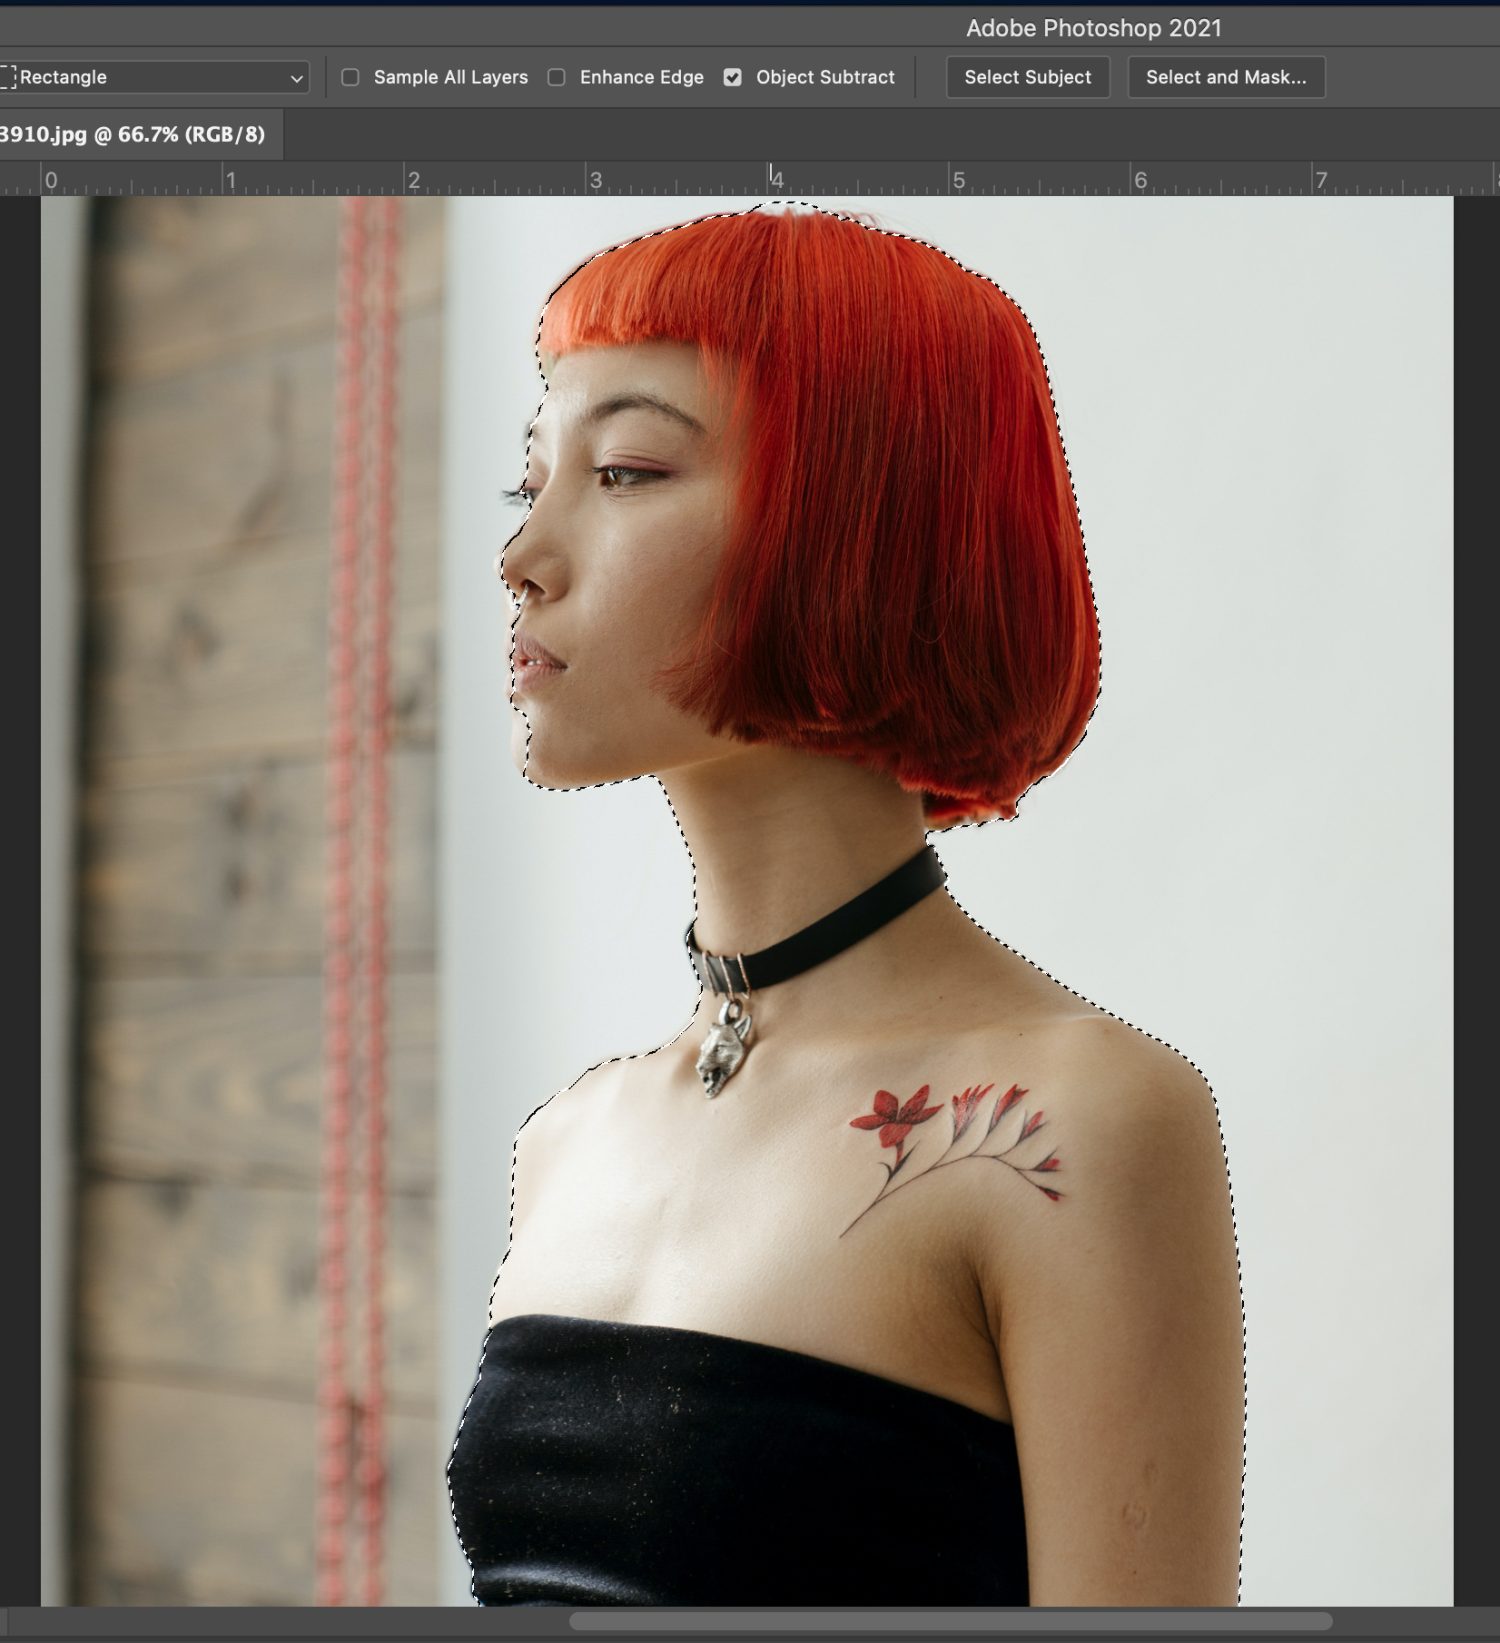 Image 006 – Photograph by cottonbro and editing by Kent DuFault
The tool did a fine job of selecting her. However, I need to tweak some of the edges.
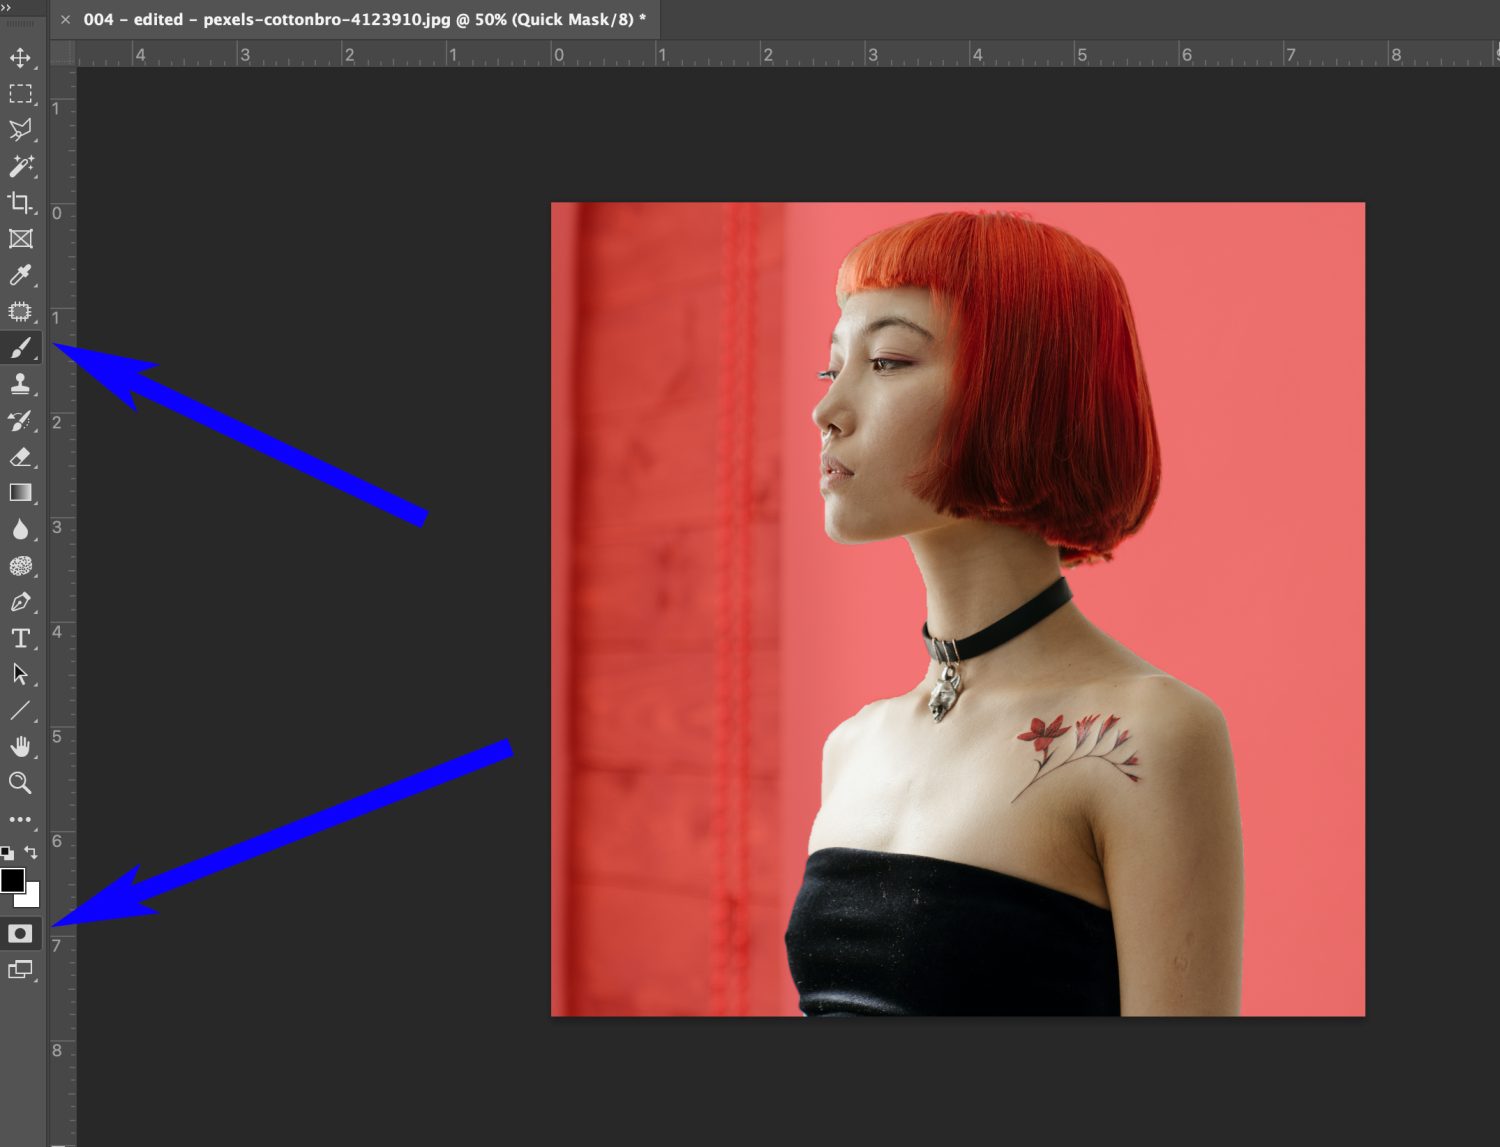 Image 007 – Photograph by cottonbro and editing by Kent DuFault
I switch over to the Quick Mask Mode, and then, using a brush, I adjust the edges of my mask.
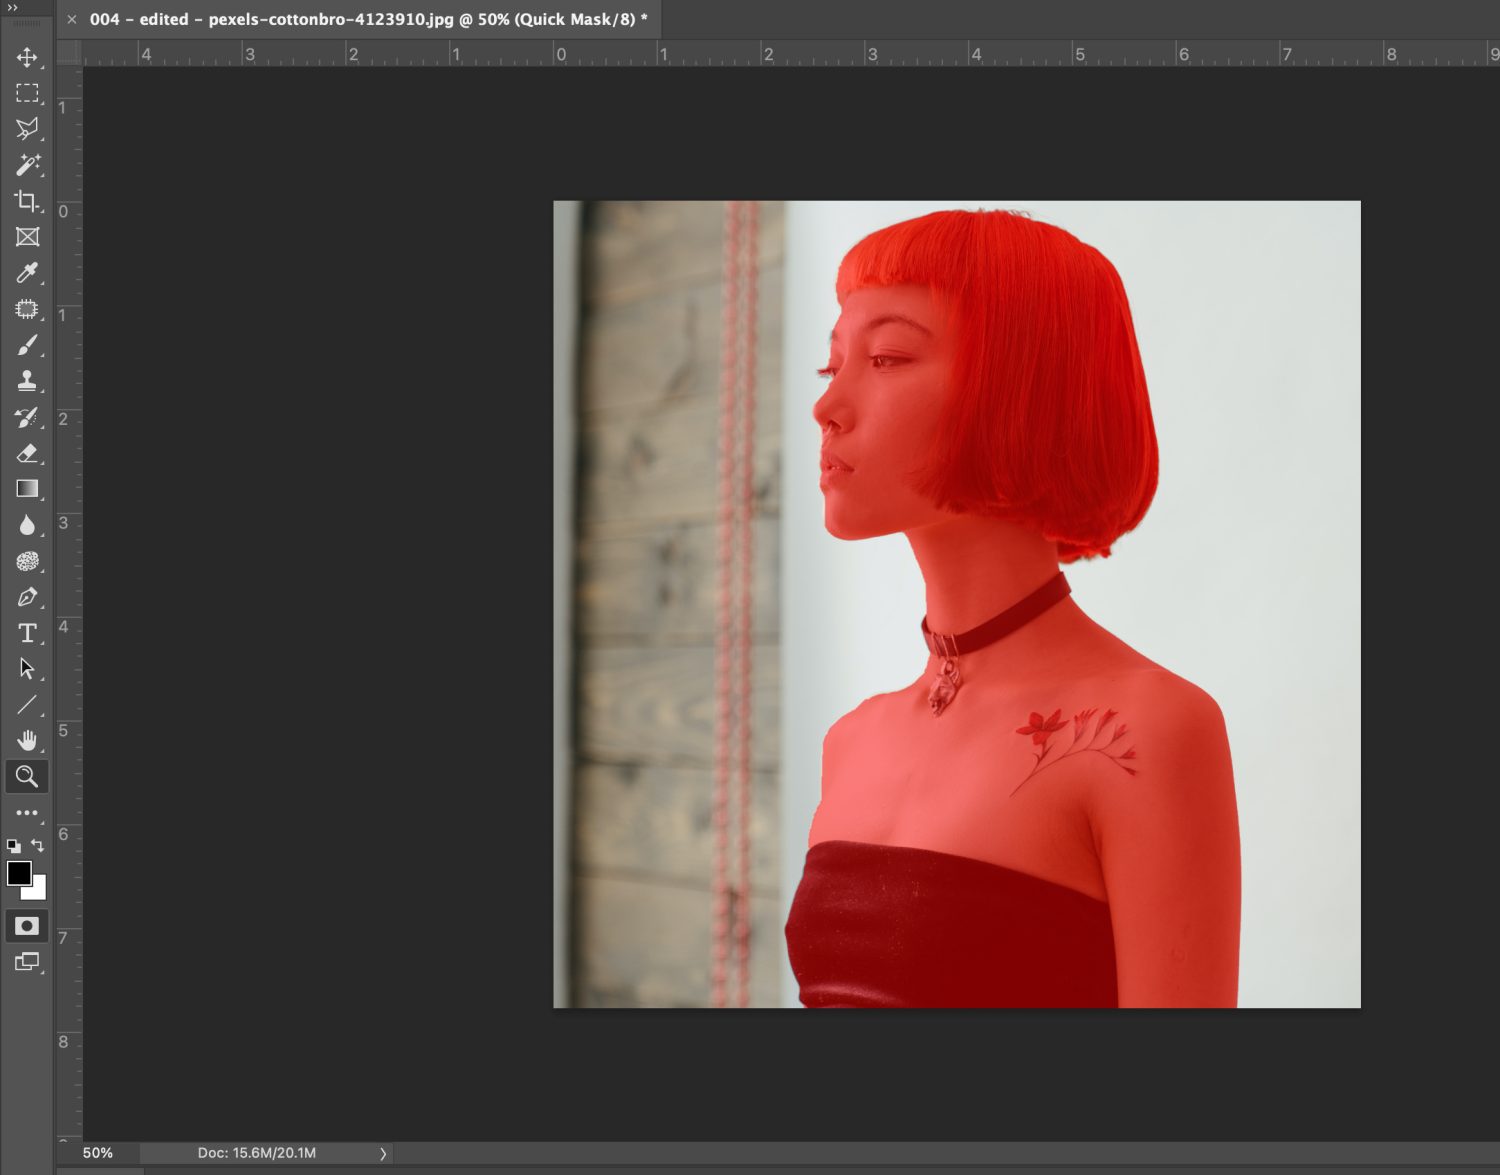 Image 008 – Photograph by cottonbro and editing by Kent DuFault
Here you can see my completed mask.
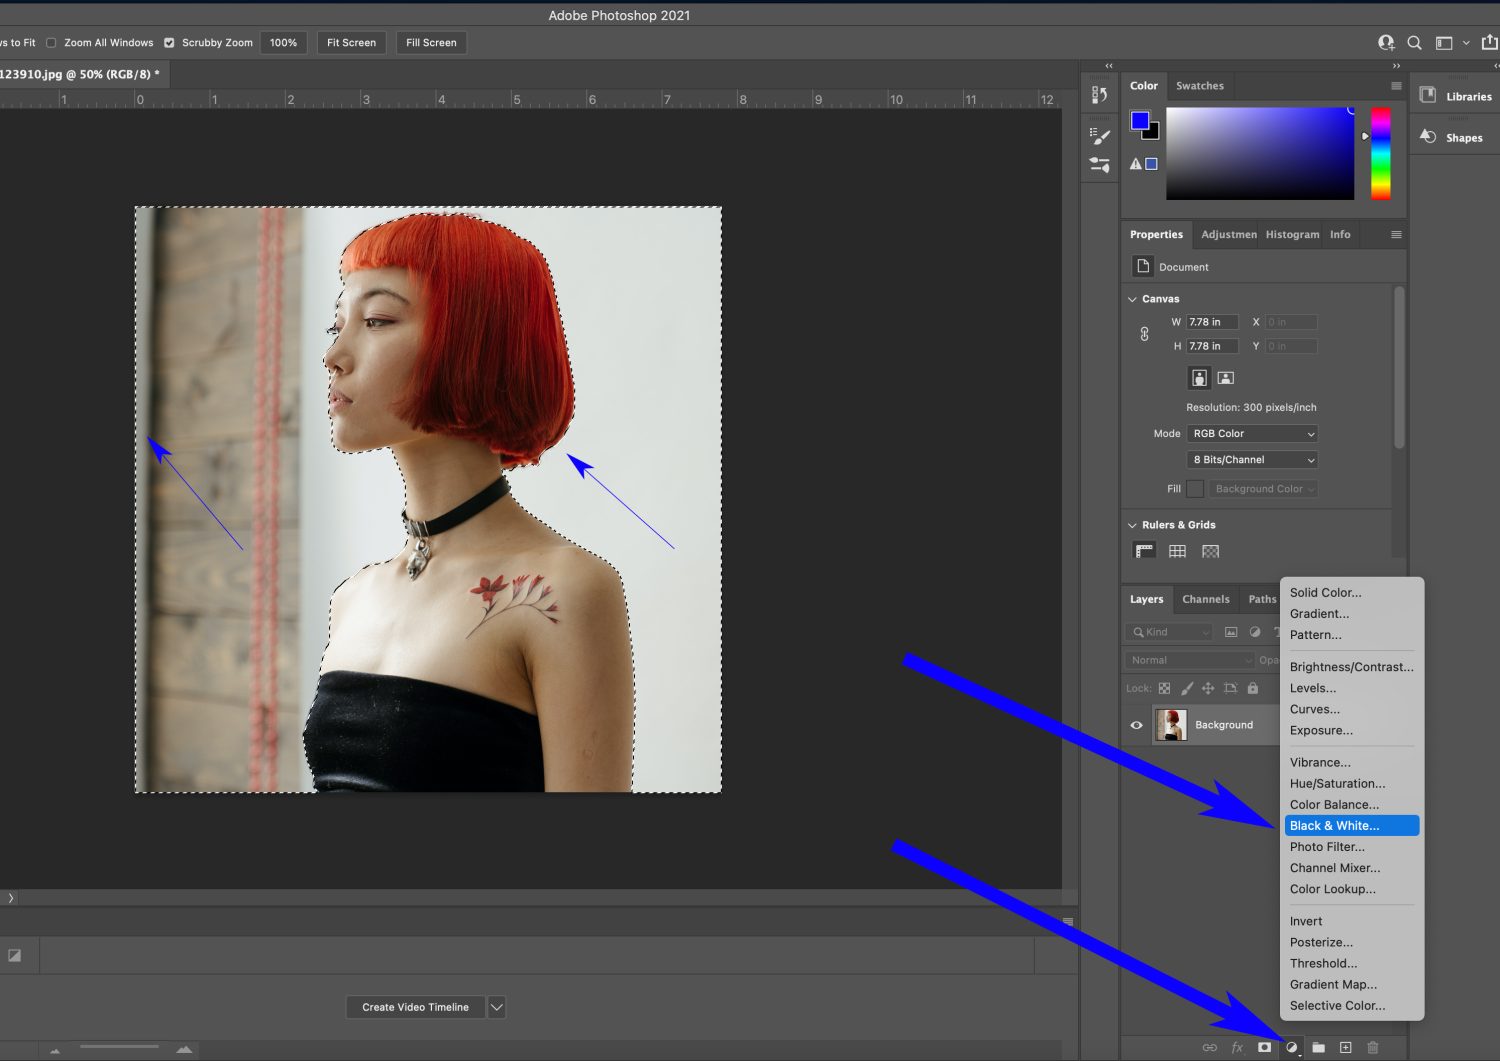 Image 009 – Photograph by cottonbro and editing by Kent DuFault
I exited from Quick Mask Mode and made an Inverse selection so that now it is the background that is selected.
I can now create a Black & White Adjustment layer.
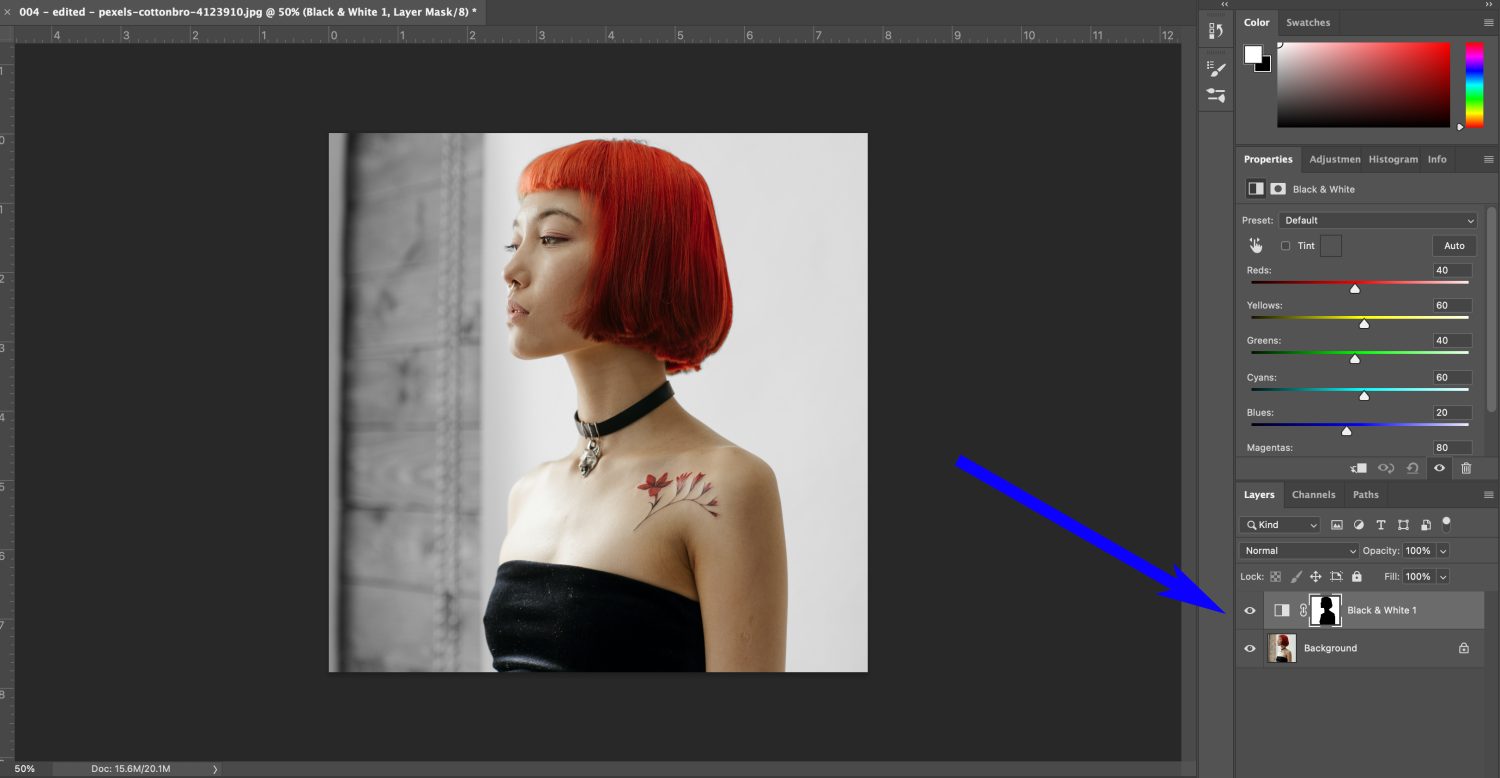 Image 010 – Photograph by cottonbro and editing by Kent DuFault
You can see the Adjustment layer and the mask in the lower right corner in the Layers Tab.
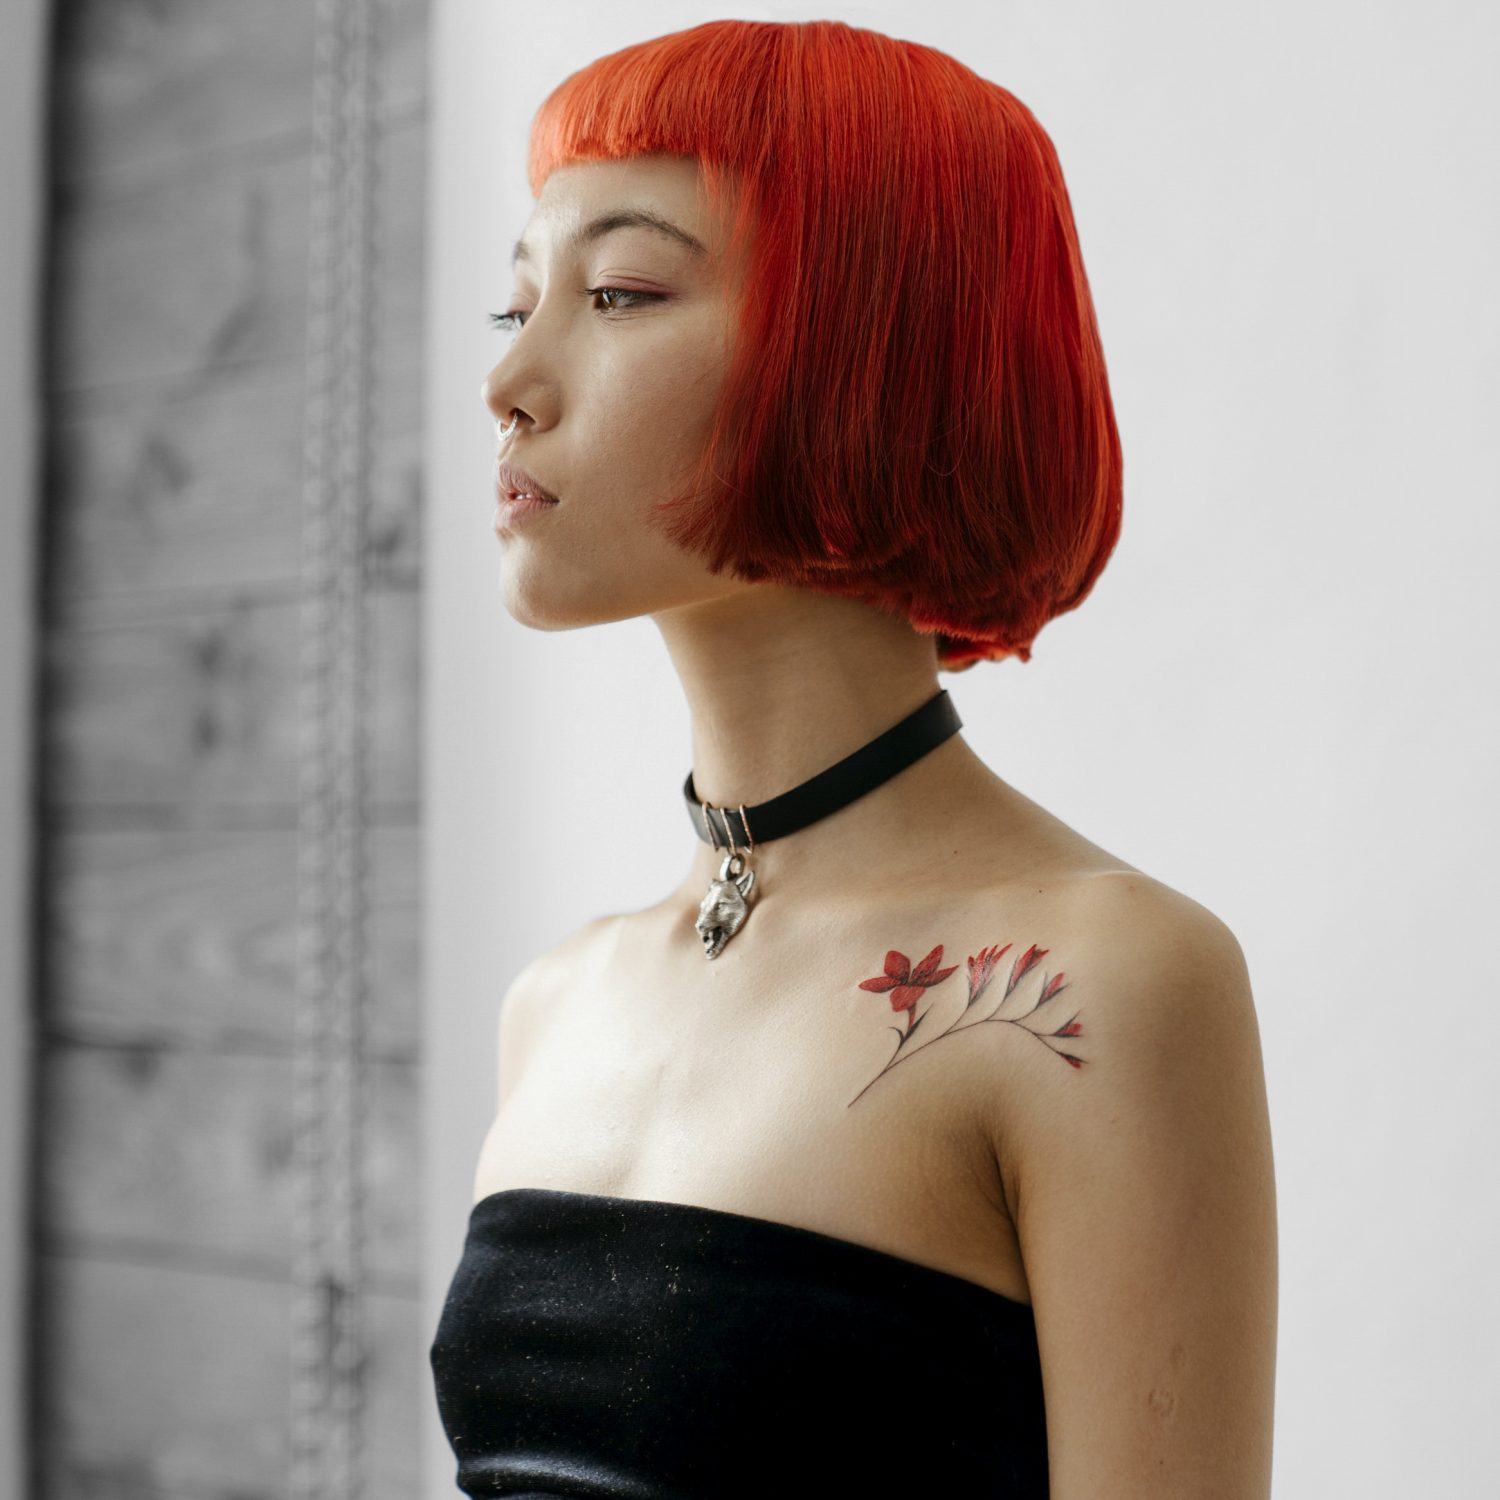 Image 011 – Photograph by cottonbro and editing by Kent DuFault
The selective color technique has now eliminated the eye snag created by the beads in the background, and the model is fully highlighted as the subject.
This image is an excellent use of selective color to enhance the model’s features while keeping the scene intact. The monochrome background now compliments the subject.
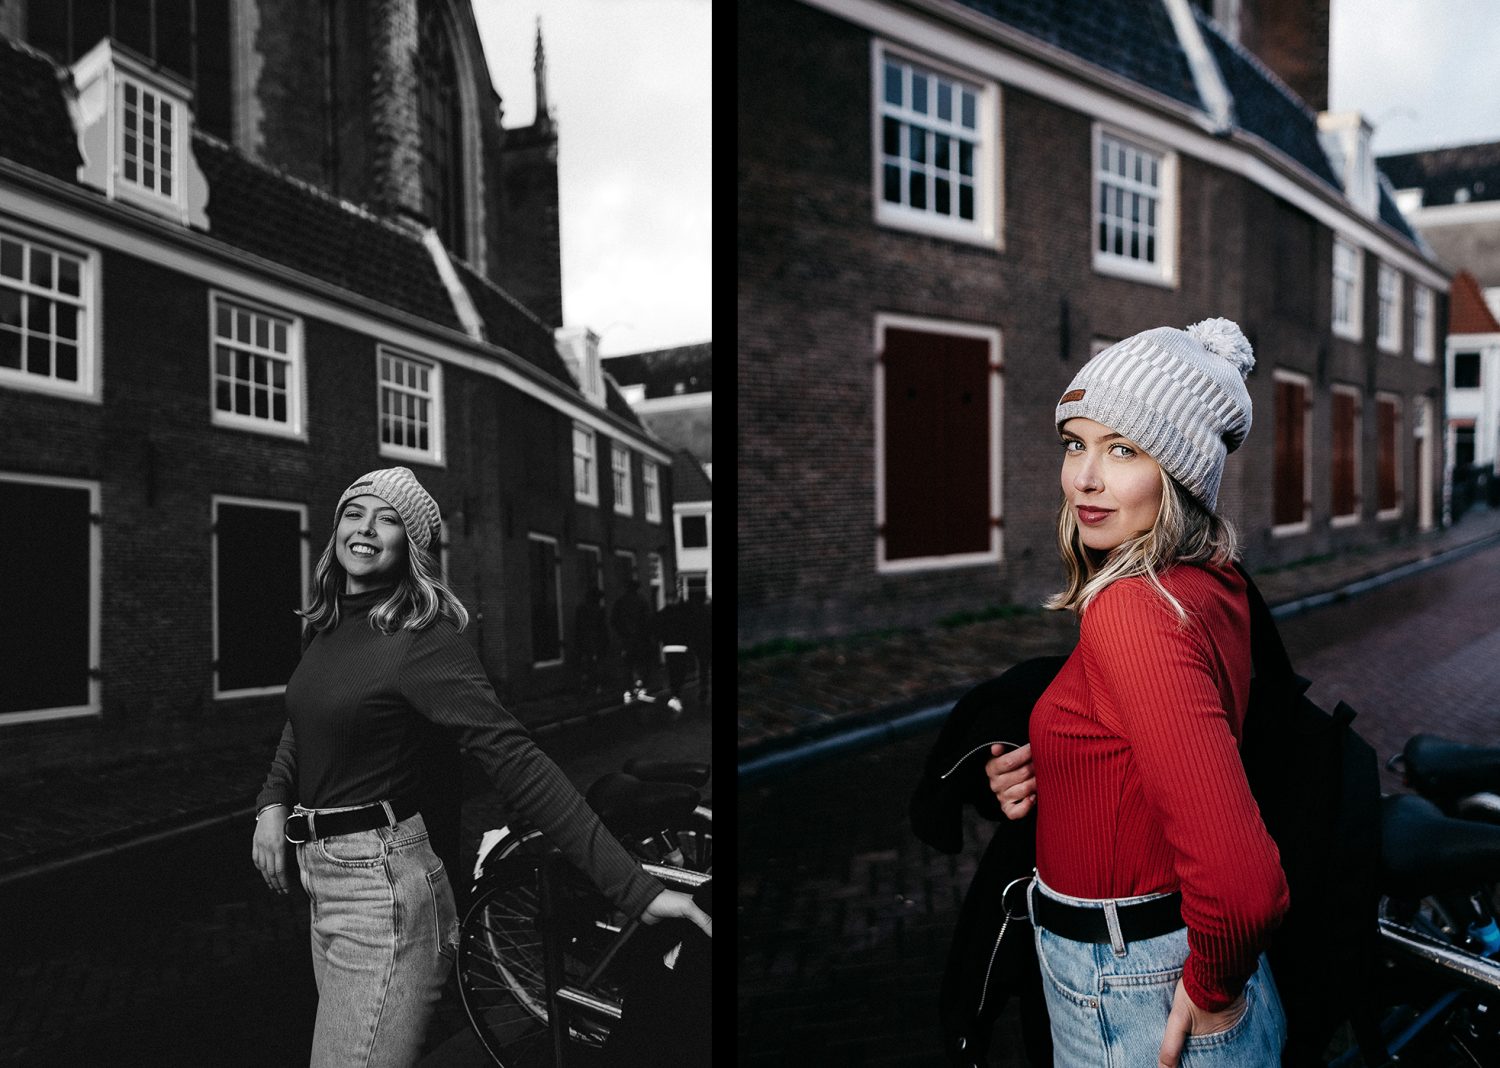 Image 012 – Photographs (left, right) by Matteus Silva de Oliveira
One might question if the background color is competing with the subject, why not convert the entire picture to black and white?
Sometimes that will be an option. However, at other times it may cause the subject to disappear as well.
The two photos in Image 012 were taken under similar lighting, with the same clothes and props.
In the black and white version, she disappears into the background due to several factors, including the lighting and color hues. The color version works better.
Could selective color be an excellent technique for this color shot as well?
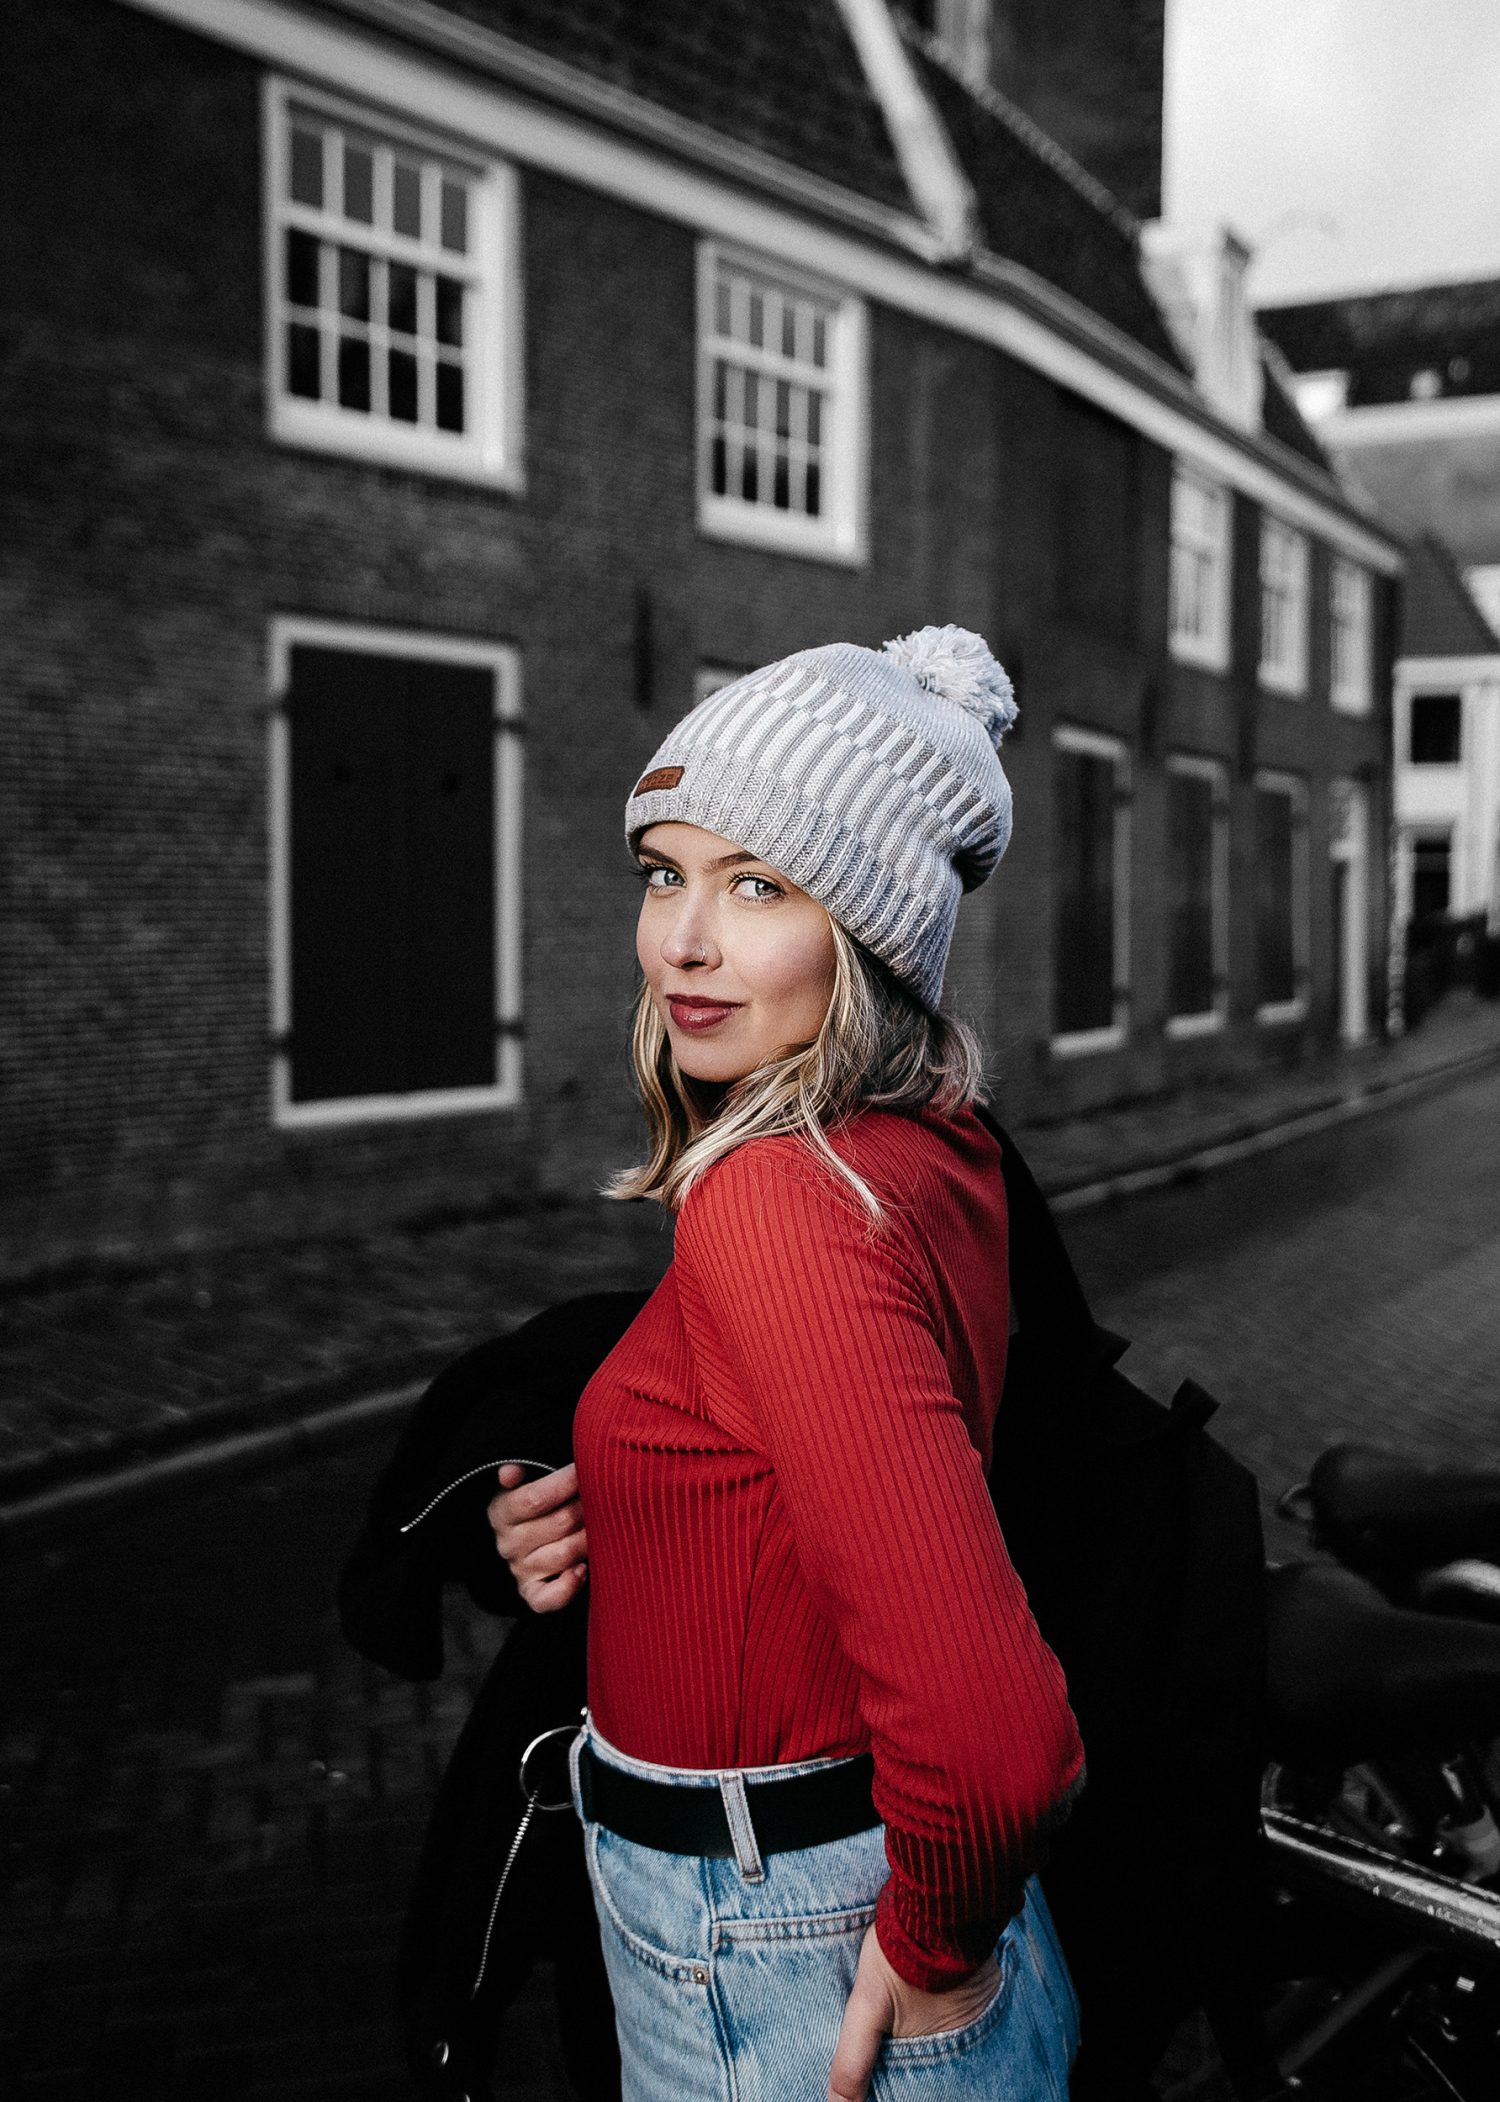 Image 013 – Photograph by Matteus Silva de Oliveira and selective color edit by Kent DuFault
I think the process works perfectly here.
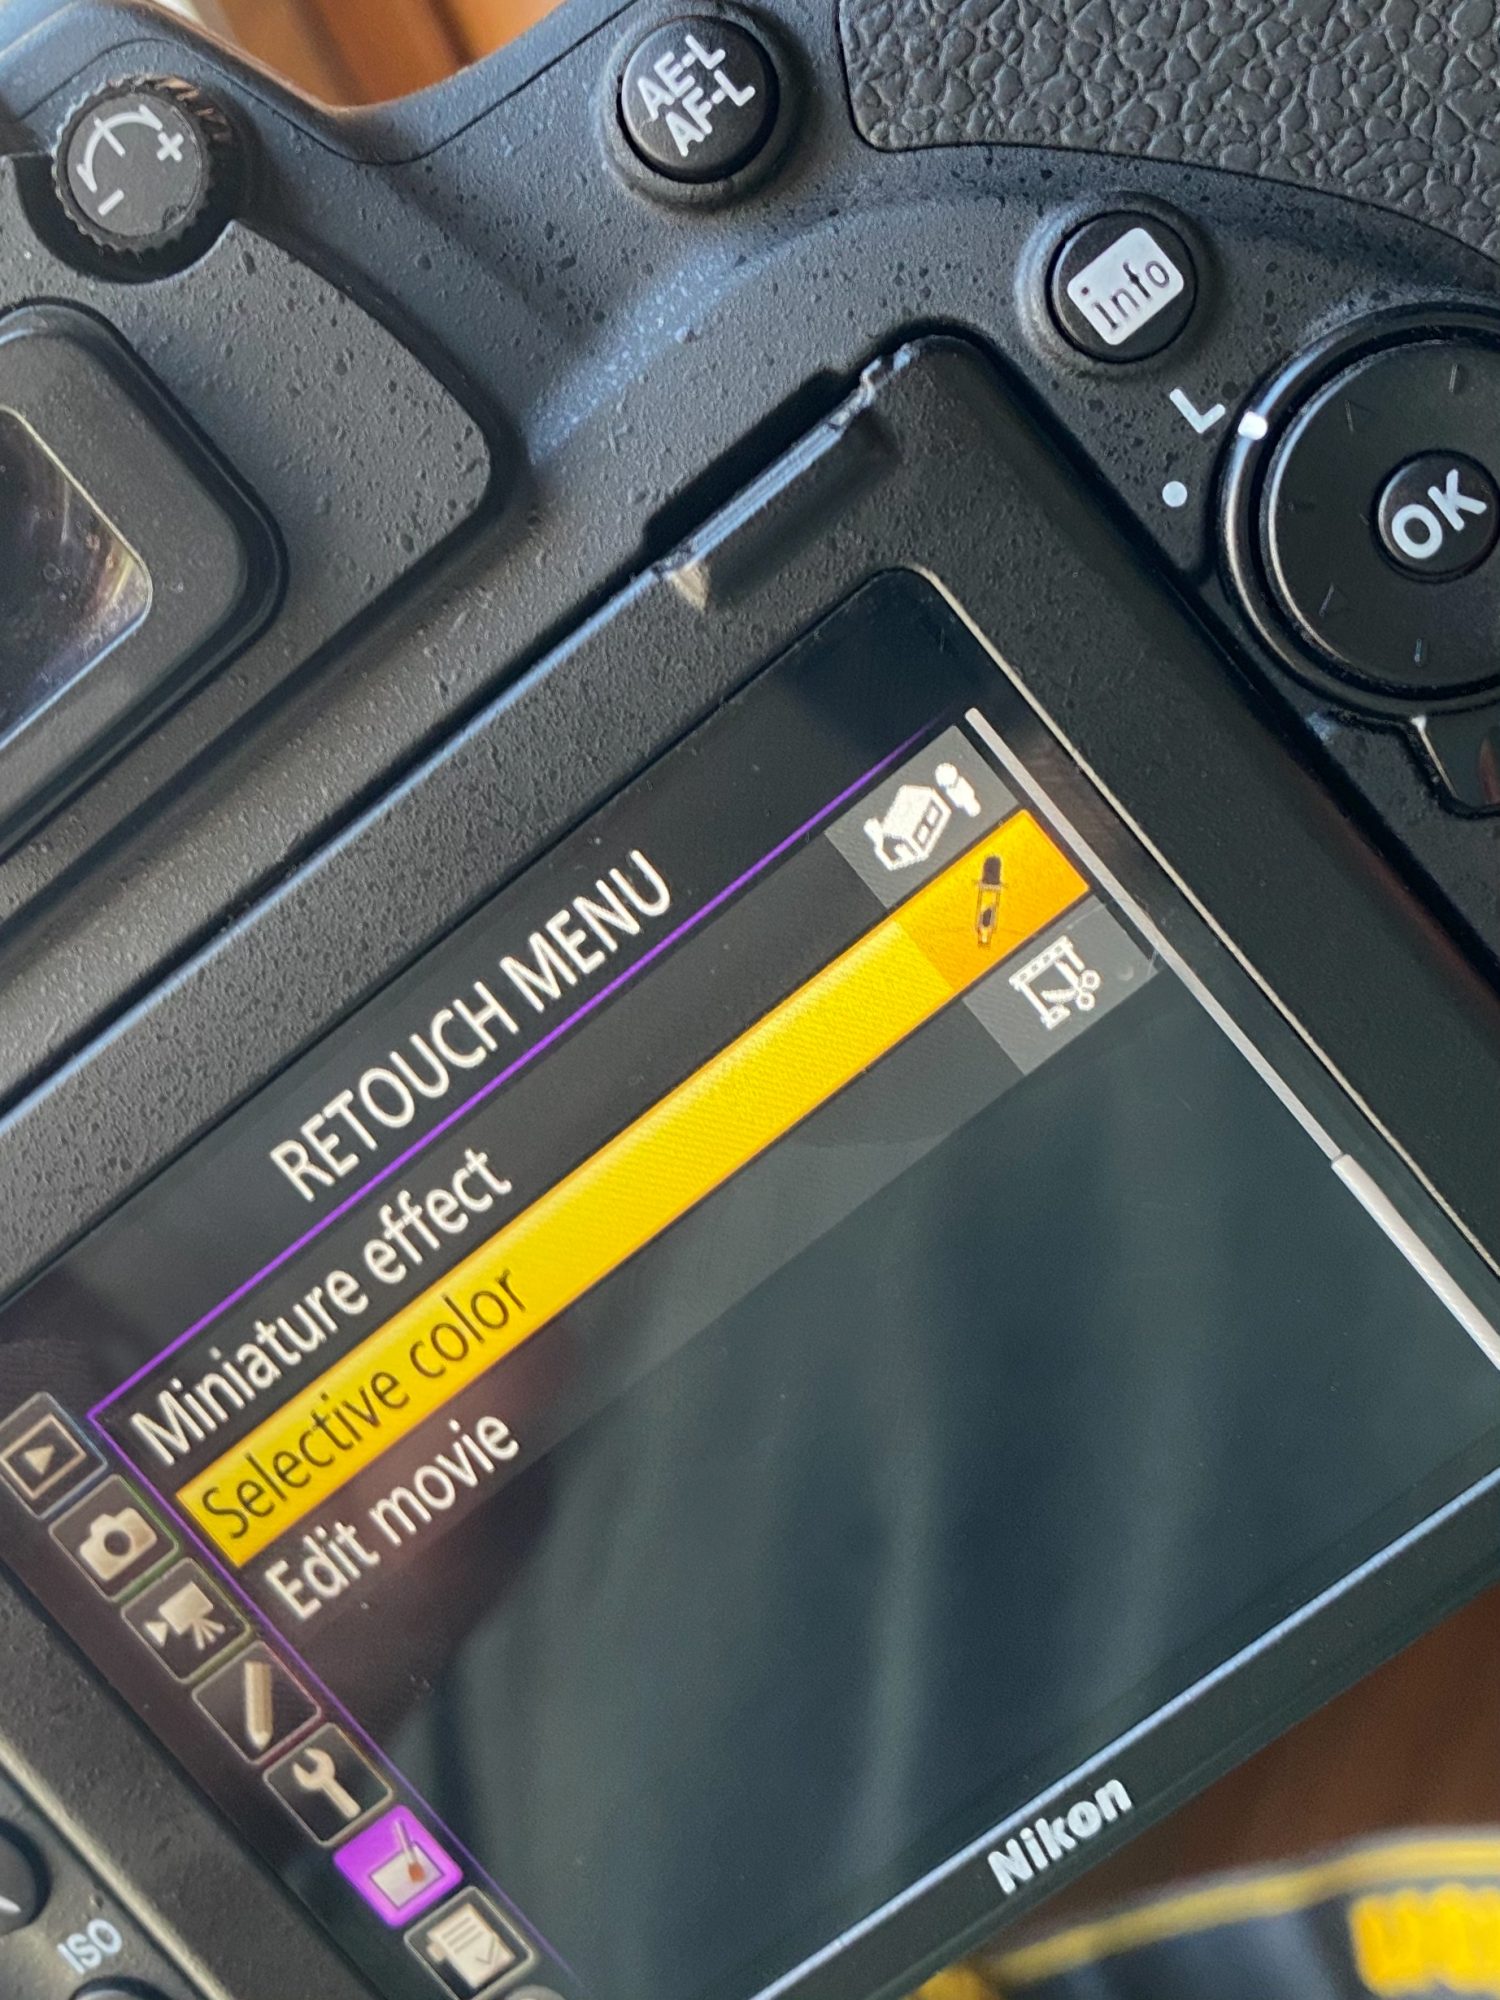 Image 014 – Photograph by Kent DuFault
Many camera models allow you to create a selective color effect within the camera. I don’t recommend using that method as it limits your ability to place the selective color process.
It’s true that you could refine a pre-processed shot somewhat in post-production software, but why not start with a clean slate?
Are you a Lightroom user?
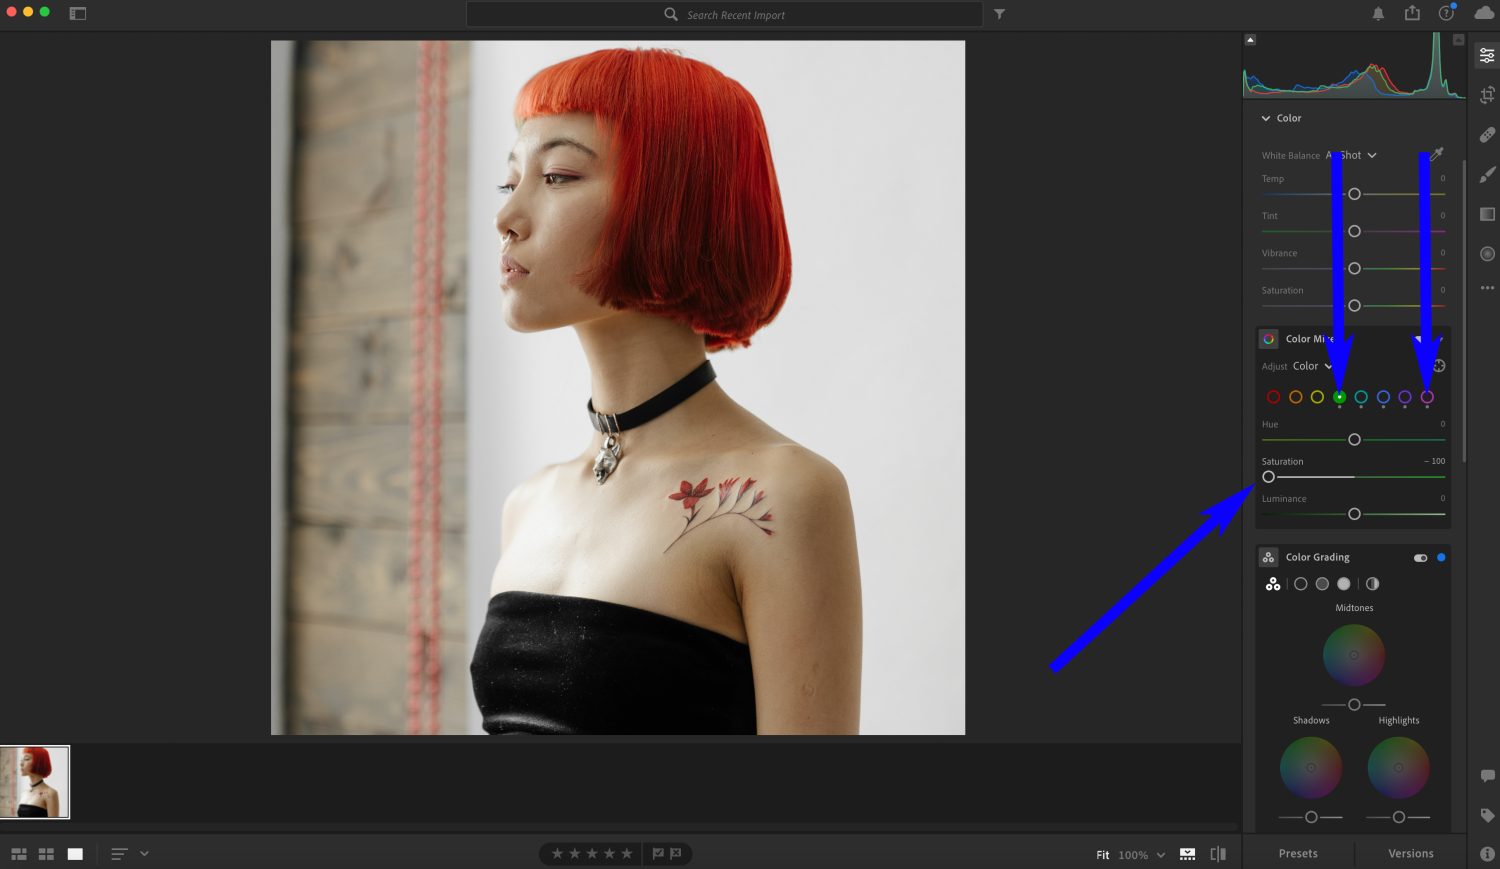 Image 015 – Photograph by cottonbro and editing by Kent DuFault
The same effect can be achieved in Lightroom CC or Classic. Here I’m using Lightroom CC 2021.
- Select the photo and the Develop Module.
- pen the Color Mixer and select each hue pulling the saturation sliders to -100.
- Select the Brush Tool.
- Set the Saturation slider to -100
- Select the ‘Show Mask & Tool Overlay’ option by pressing the ‘o’ key.
- Set the Saturation slider to -100.
- Paint the mask onto the background while excluding the model.
In this case, I will not slide the red, orange, and yellow hues sliders to a saturation of -100 because those colors are present in the subject, which I want to remain in color.
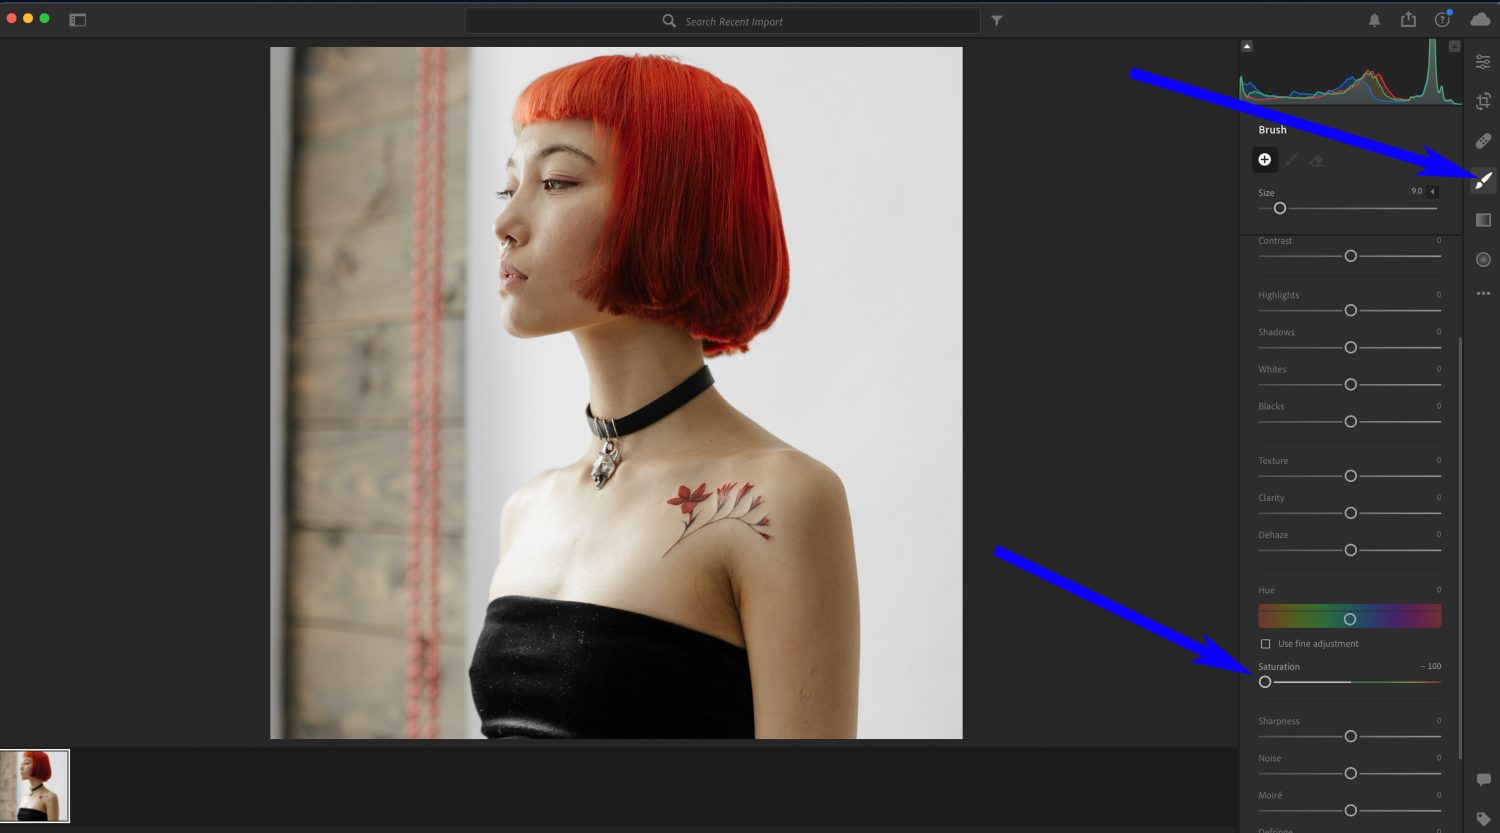 Image 016 – Photograph by cottonbro and editing by Kent DuFault
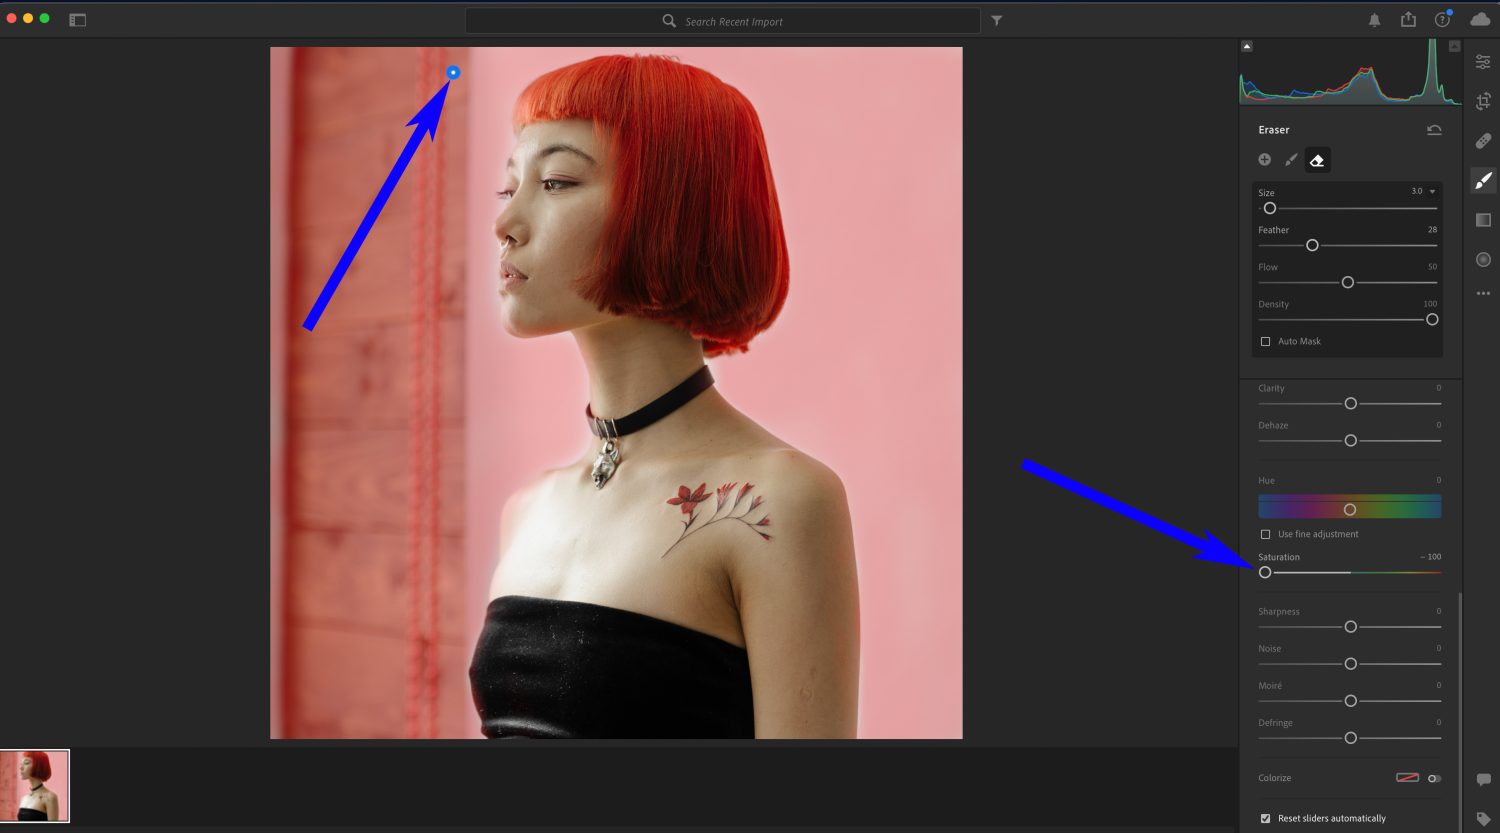 Image 017 – Photograph by cottonbro and editing by Kent DuFault
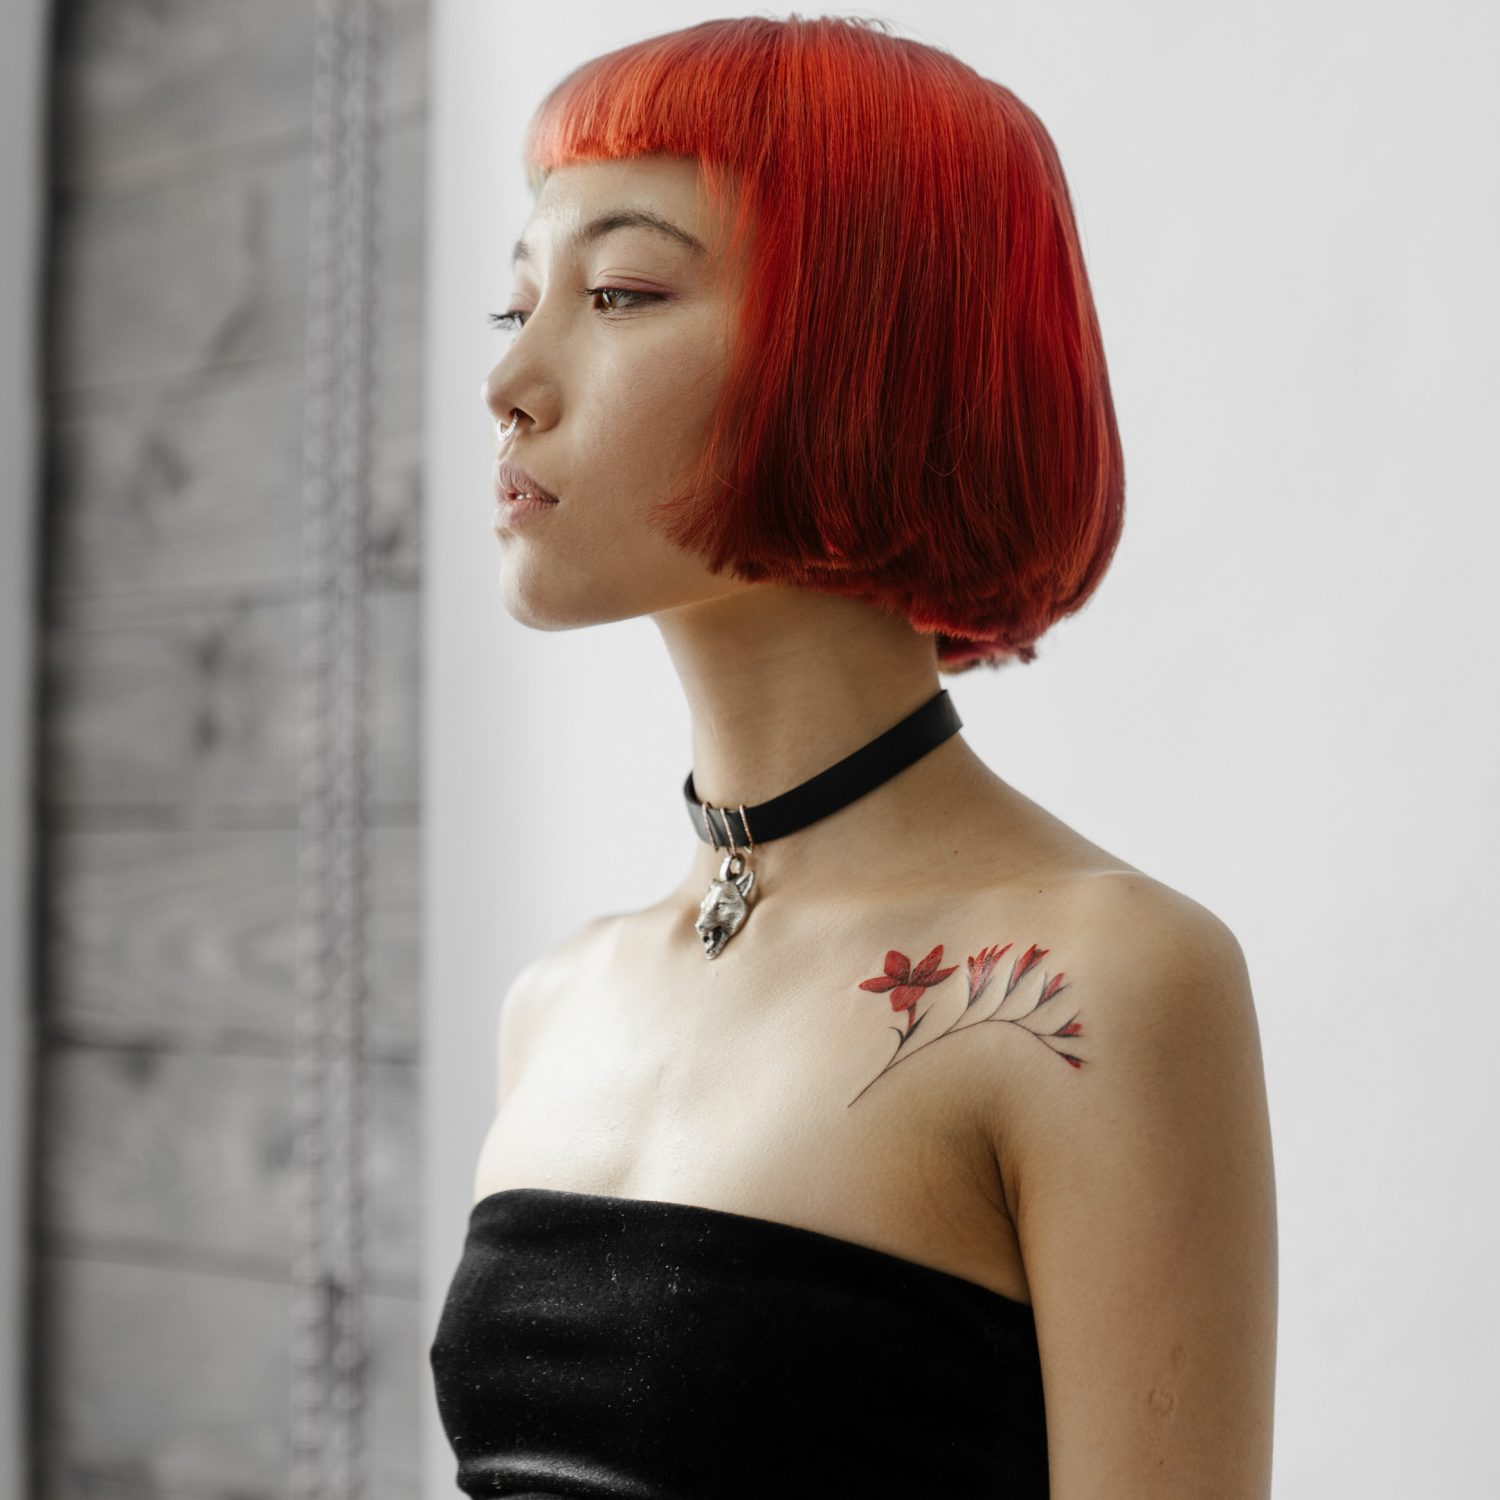 Image 018 – Photograph by cottonbro and editing by Kent DuFault
We now have a similar effect using Lightroom CC.
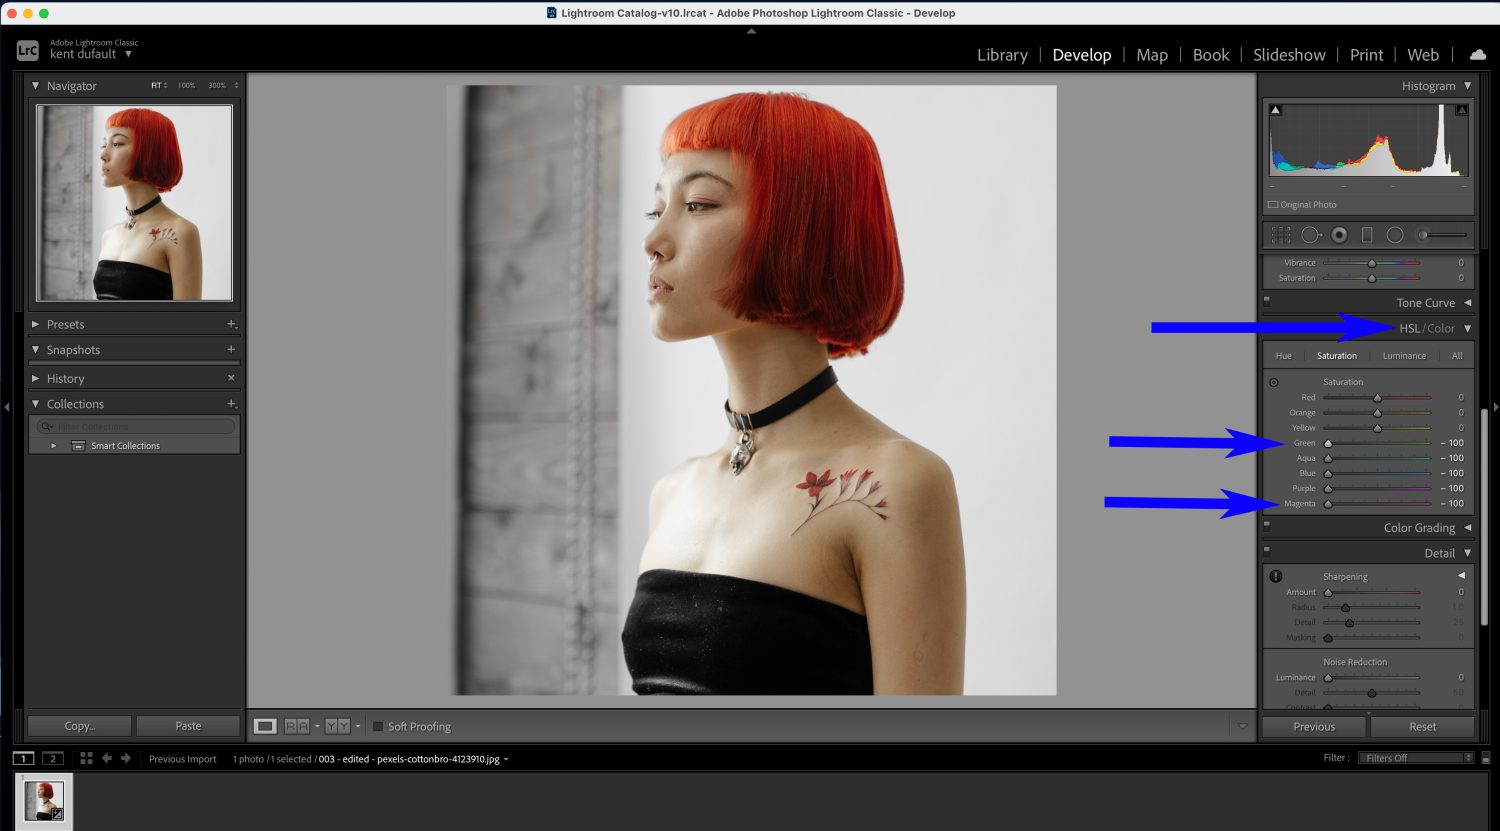 Image 019 – Photograph by cottonbro and editing by Kent DuFault
In Lightroom Classic, instead of selecting the Color Mixer, you would choose the HSL Tab in Step 1.
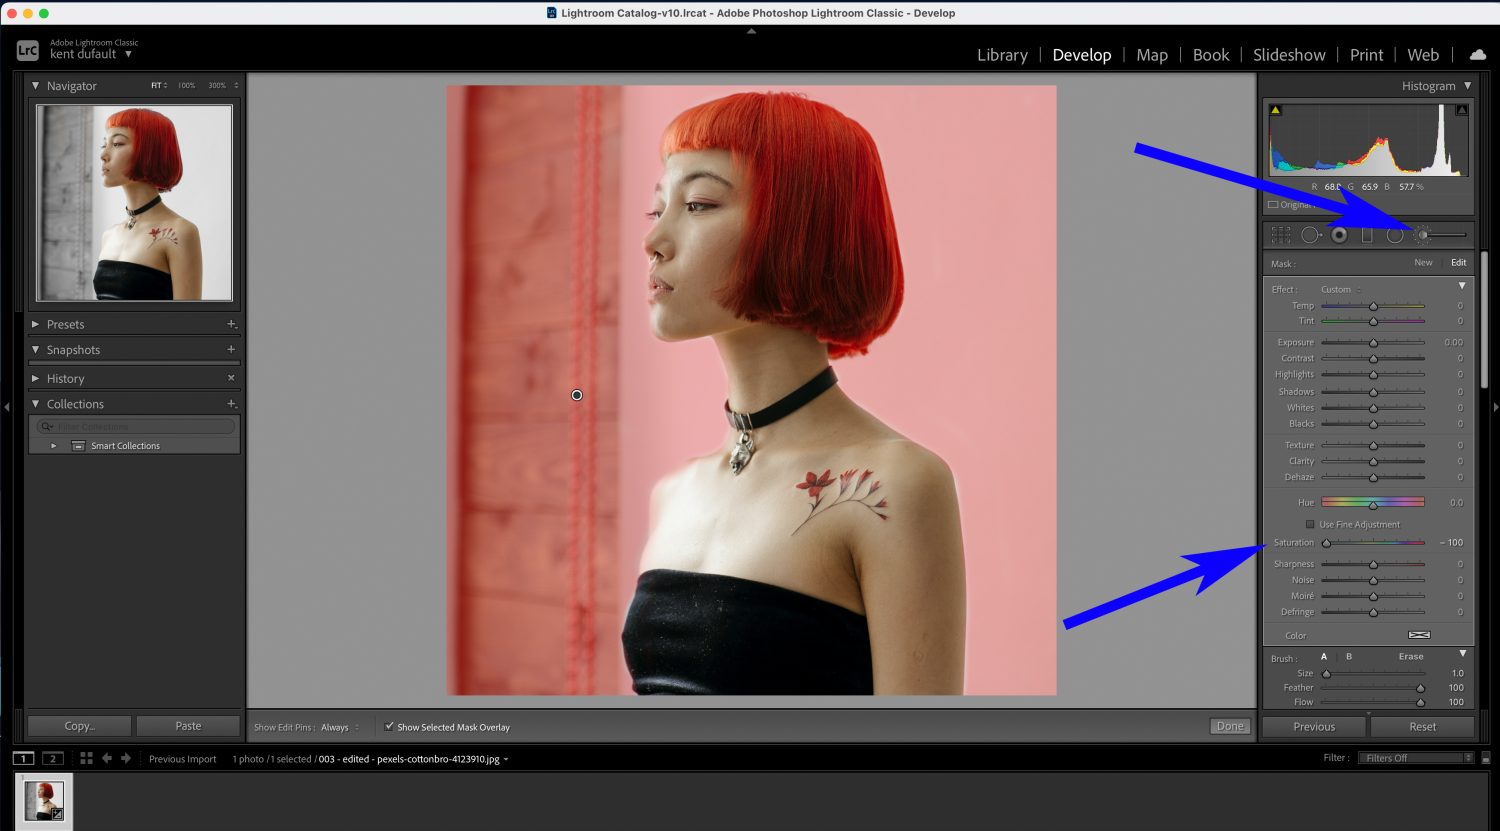 Image 020 – Photograph by cottonbro and editing by Kent DuFault
In Step 2, you would select the Adjustment Brush, set the Saturation to -100, and paint a mask around the subject.
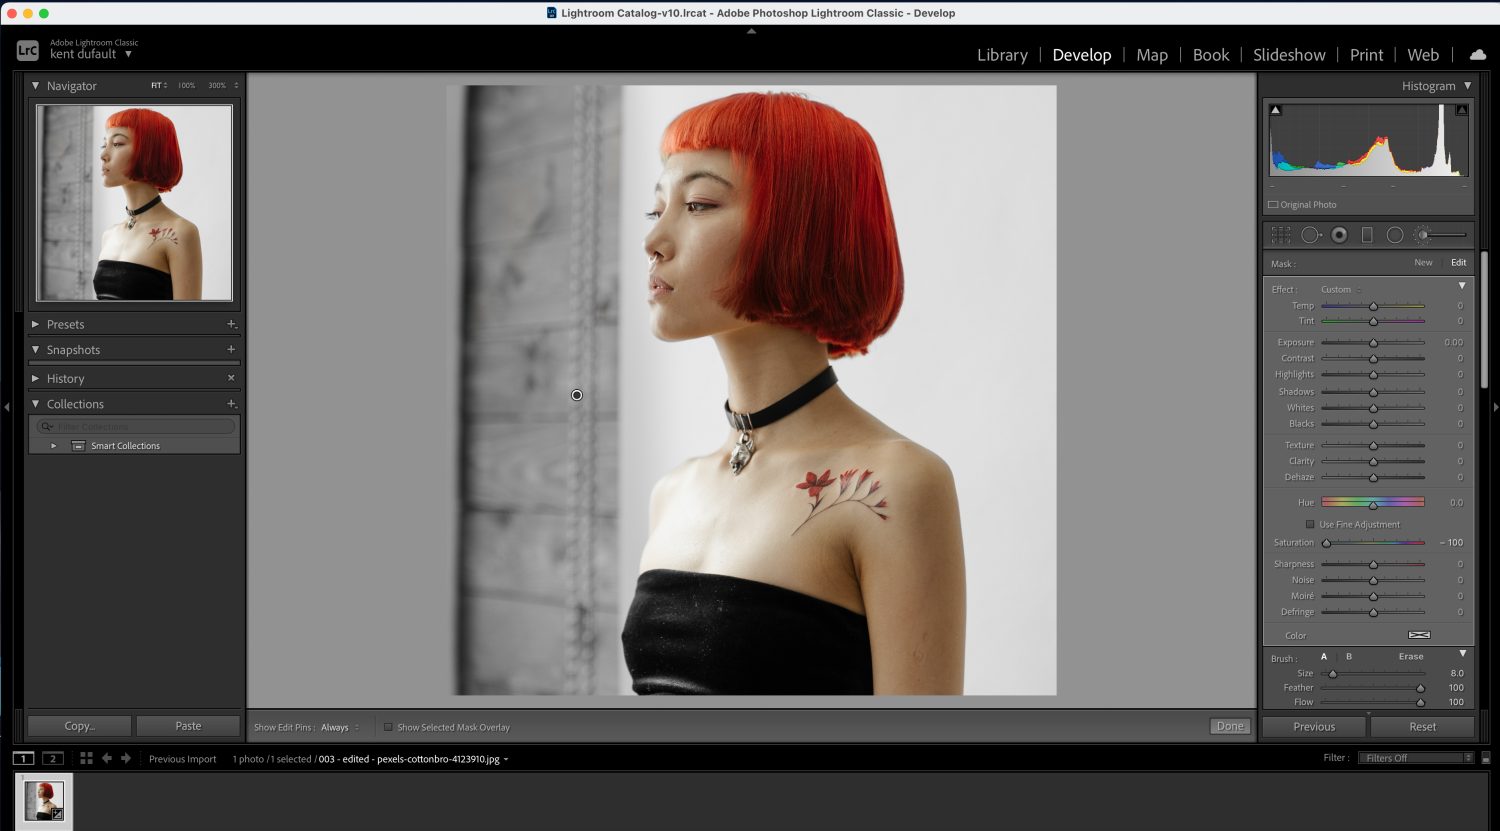 Image 021 – Photograph by cottonbro and editing by Kent DuFault
Here is the final image as completed in Lightroom Classic.
Conclusion
Selective color can be a powerful composition tool. The key to mastering it is in the selection of the subject and keeping your edges clean. I prefer Photoshop to accomplish selective color. However, as I’ve shown you, the process can be performed in almost any photo editing software or app.
Now it’s your turn
- Organize your photoshoot with a subject that contains a color that you would like to try the selective color technique.
- Create many different shots with your subject. For fun, to learn the differences, you could try a few in-camera, selective color photos.
- Select the best of your photoshoot and edit them to selective color using this blog post’s guidelines.
How did you do?
- Were you able to pick a subject that was enhanced with the selective color technique?
- Does your subject now stand out from the surrounding elements while still maintaining a cohesive feeling throughout the composition?
- Were you able to create a clean edge with no artifacts between the full-color areas and the converted black and white areas?