5 Compelling Composition Tools That Are Rarely Discussed
In my opinion, composition isn’t given the attention it deserves, especially from newer photographers. There is always much discussion about equipment and equipment techniques.
But the conversation on composition always seems to take on a familiar tone: Rule of Thirds, Leading Lines, Frames, etc. Composition is essential to the success of a photograph.
Look at this example.

What exactly did the photographer want us to look at in this image? Was it the oranges? They have significant visual weight due to their color, repetition of shape, and placement within the frame.
Yet, it’s doubtful that was the intended subject.
Was the intended subject the man? Probably. But his only contribution to the design of the image is forcing us to look off-camera to the right, and we cannot see what he is looking at. This creates a disconnect with a viewer known as a frame-break.
Was the intended subject the surrounding environment? I hope not because it carries almost no visual weight.
This photo is an example of a poorly composed shot. A poorly composed picture creates confusion and disconnect.
Let’s look closely at five tools of composition that are rarely discussed online.
Line of Sight
Line of sight is an extremely powerful manipulator in a photograph. Have you ever experienced the act of seeing someone staring off at something in the distance, and you turned to try and see what they are looking at? Of course, you have. We all have. That is the power of the line of sight.
Image 001 had the potential to use a line of sight. But it failed because it had no clues to help resolve what the man is looking at.
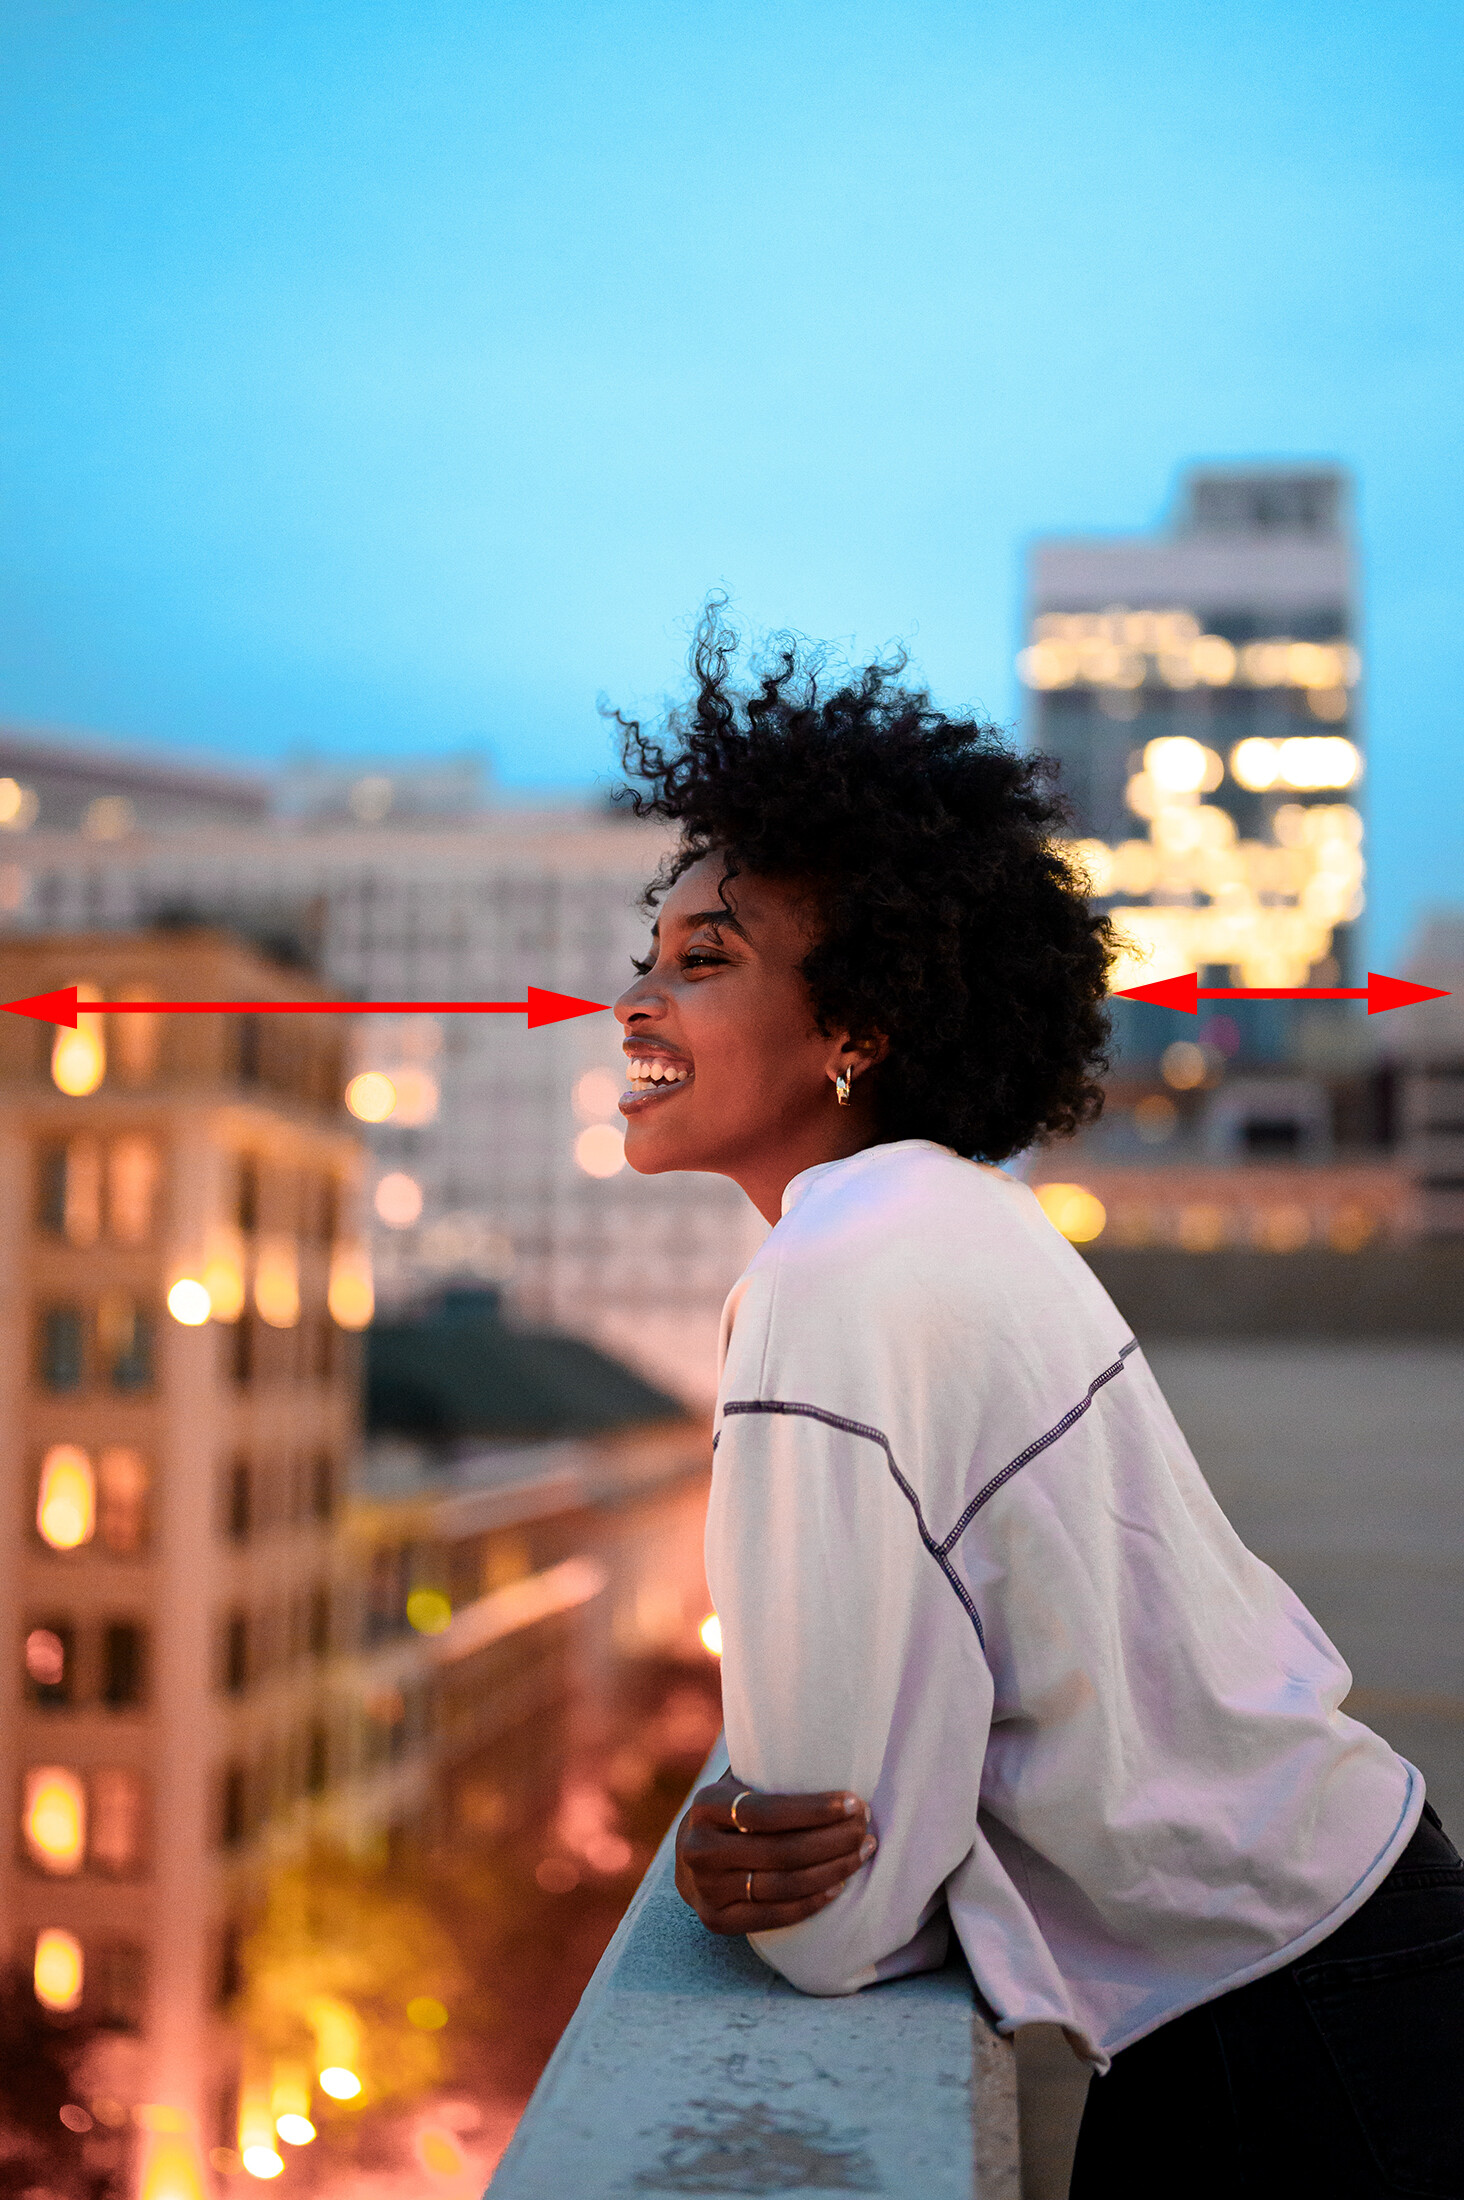
Image 002 is a better example. The woman is looking off-frame. However, we have a clue as to what she is looking at. She’s looking at the city lights at dusk.
Image 002 also touches on a second important use of line of sight. When someone or something is looking off-frame, there should be more space in front of the subject than behind them within the frame.
003
More space in front of the woman’s eyes than behind her head follows the line-of-sight rule and doesn’t create a frame-break.
004
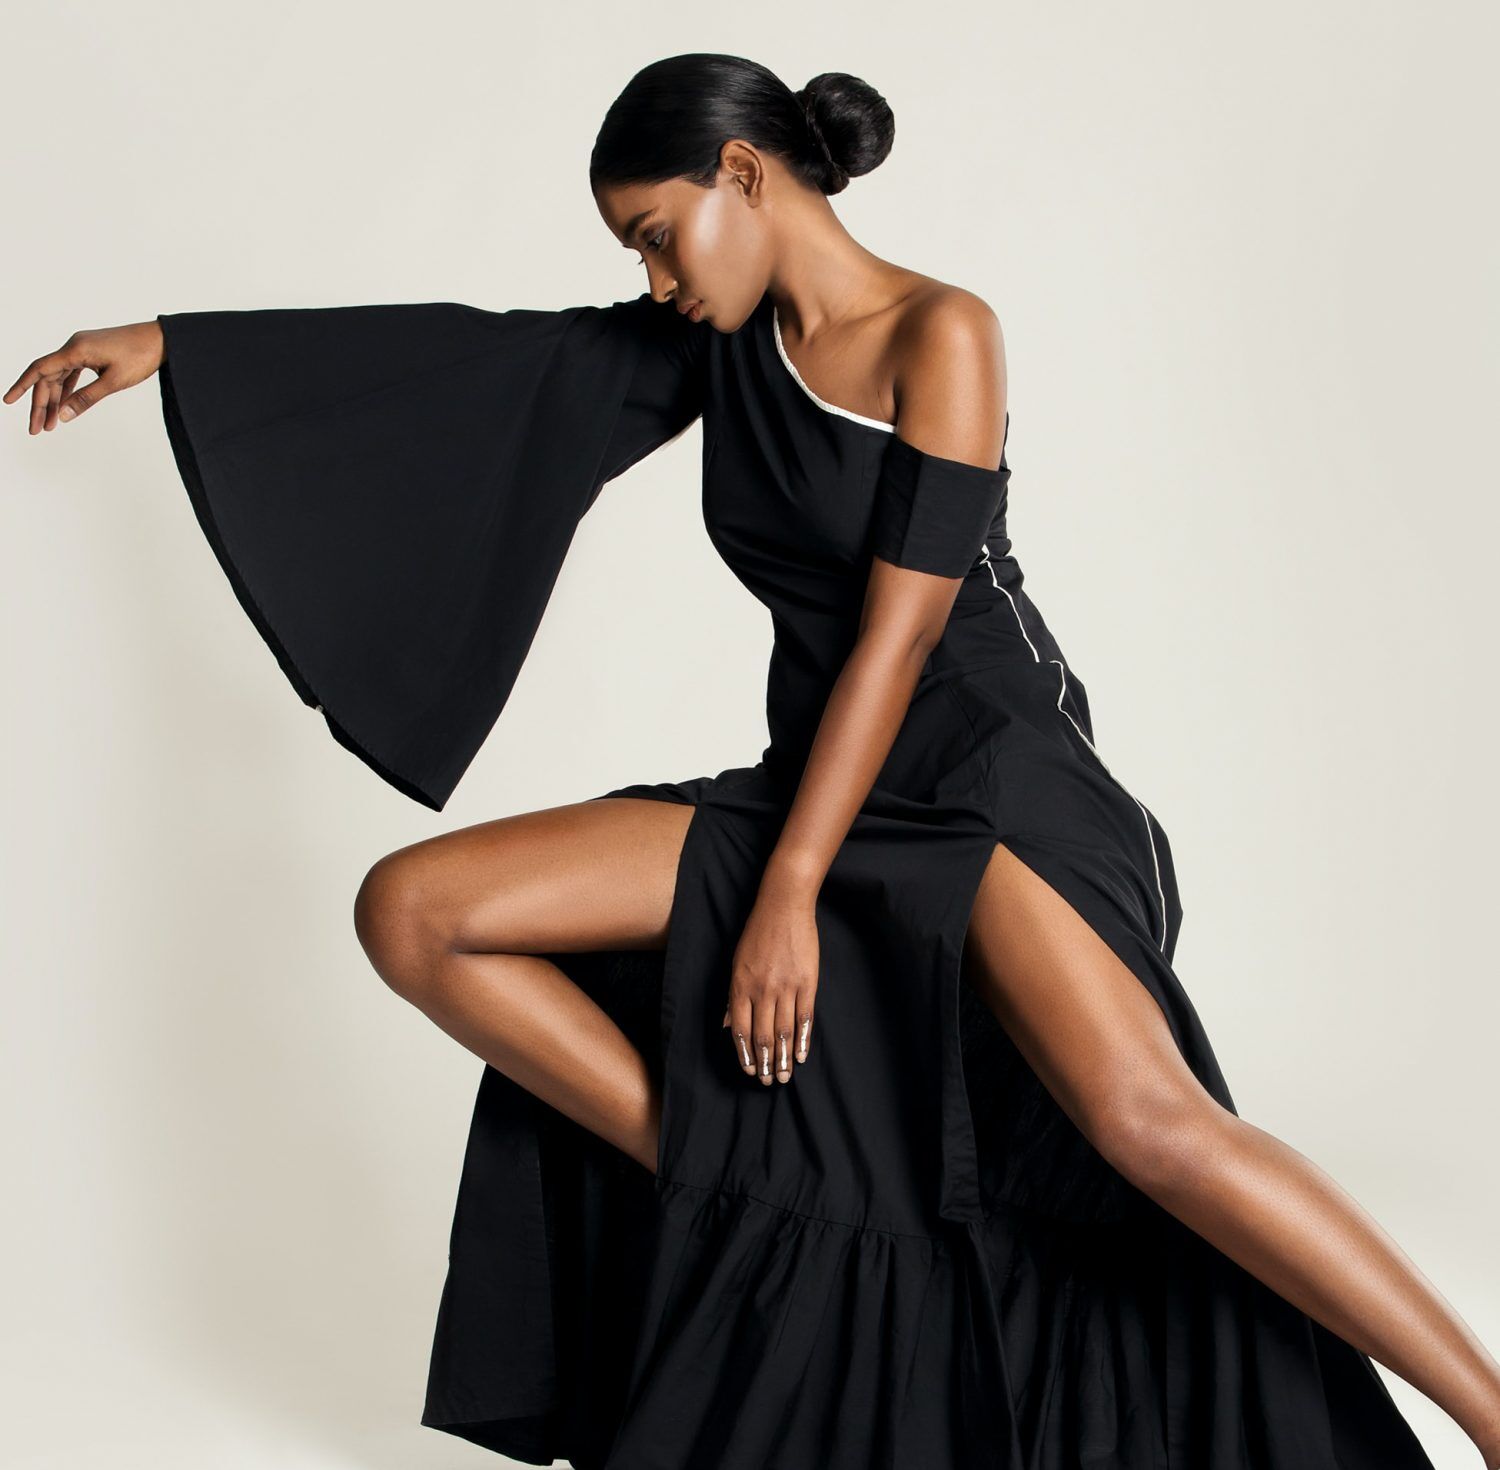
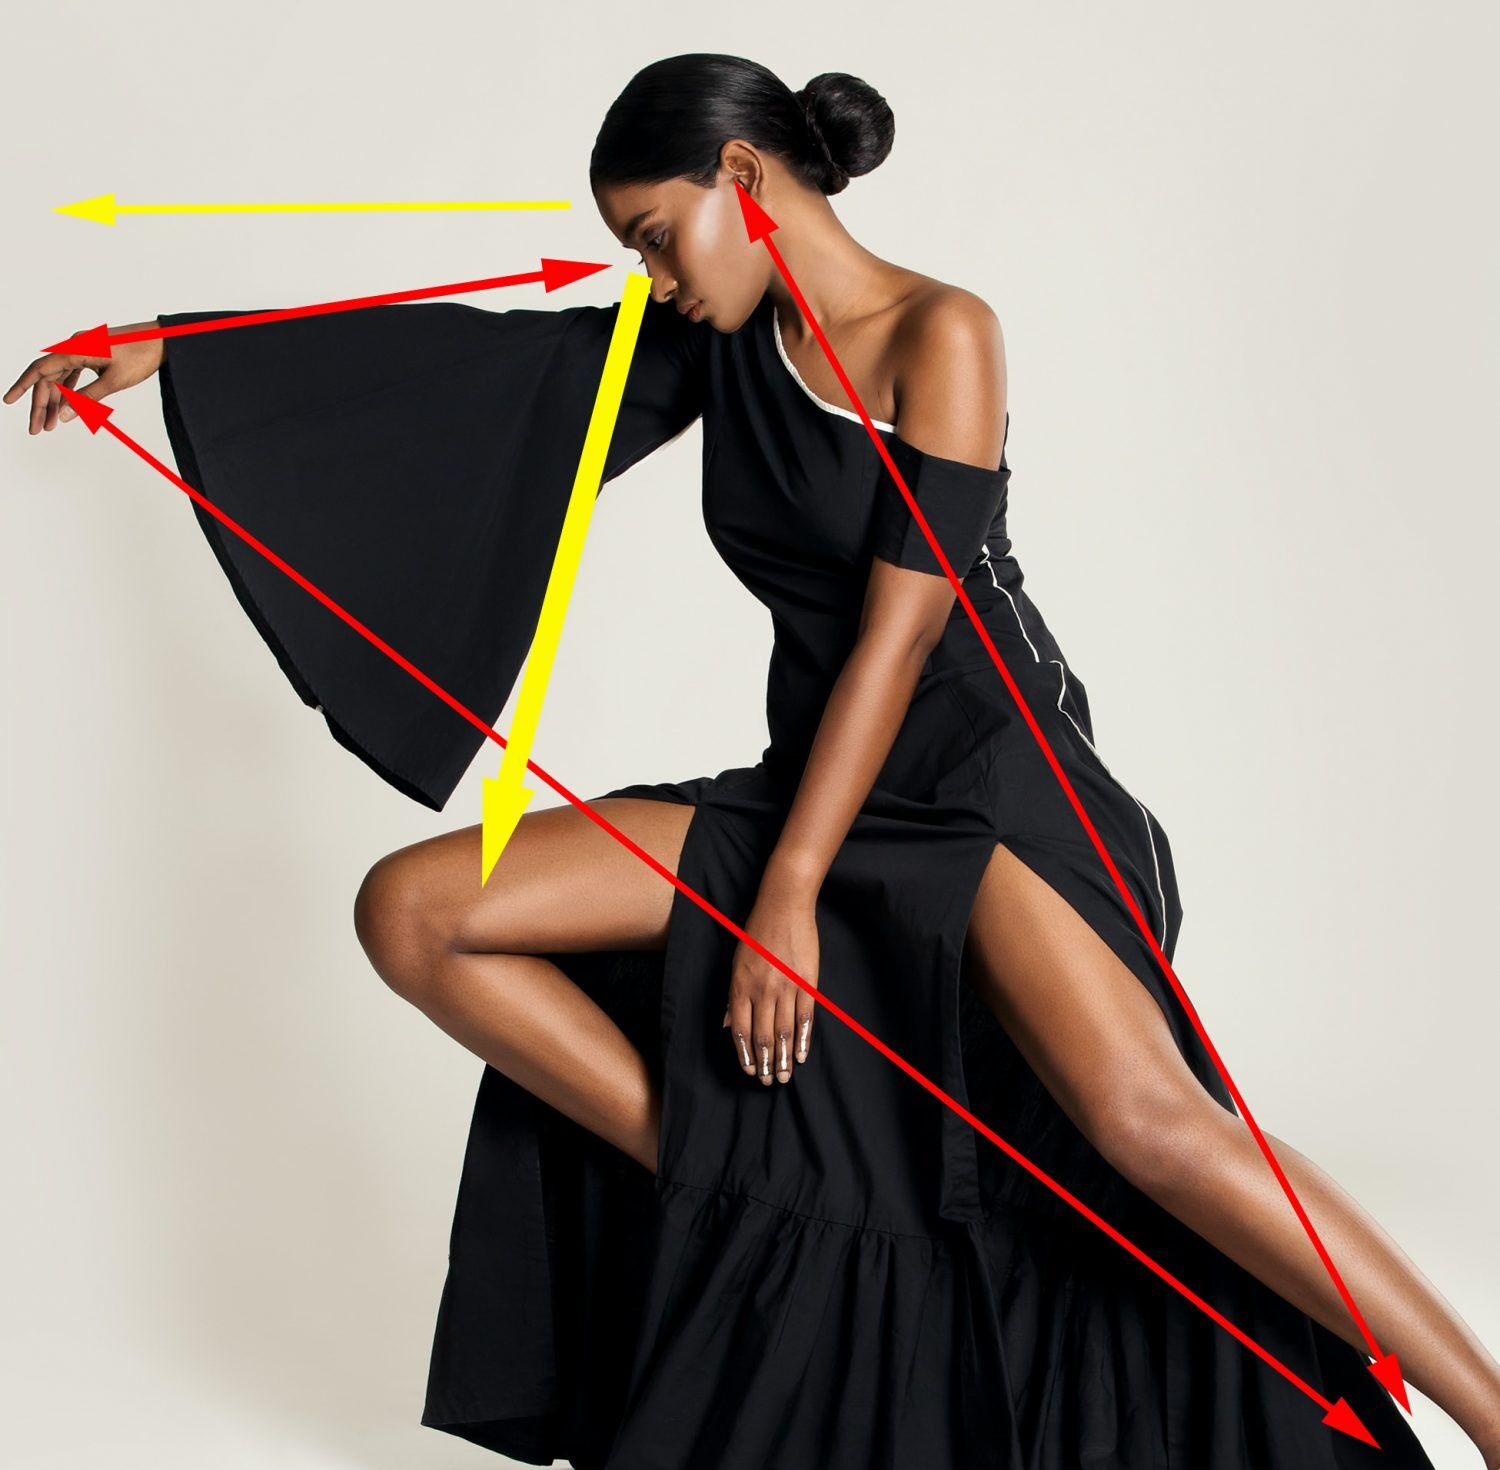
Image 004 is carefully composed and uses the line of concept composition tool.
005
The pose utilizes triangulation, which we will be discussing next.
But notice how the line of sight helps to confine the triangular composition as intended. Had the photographer instructed her to look straight ahead (or any other direction for that matter), the line of sight would be working against their carefully created pose.
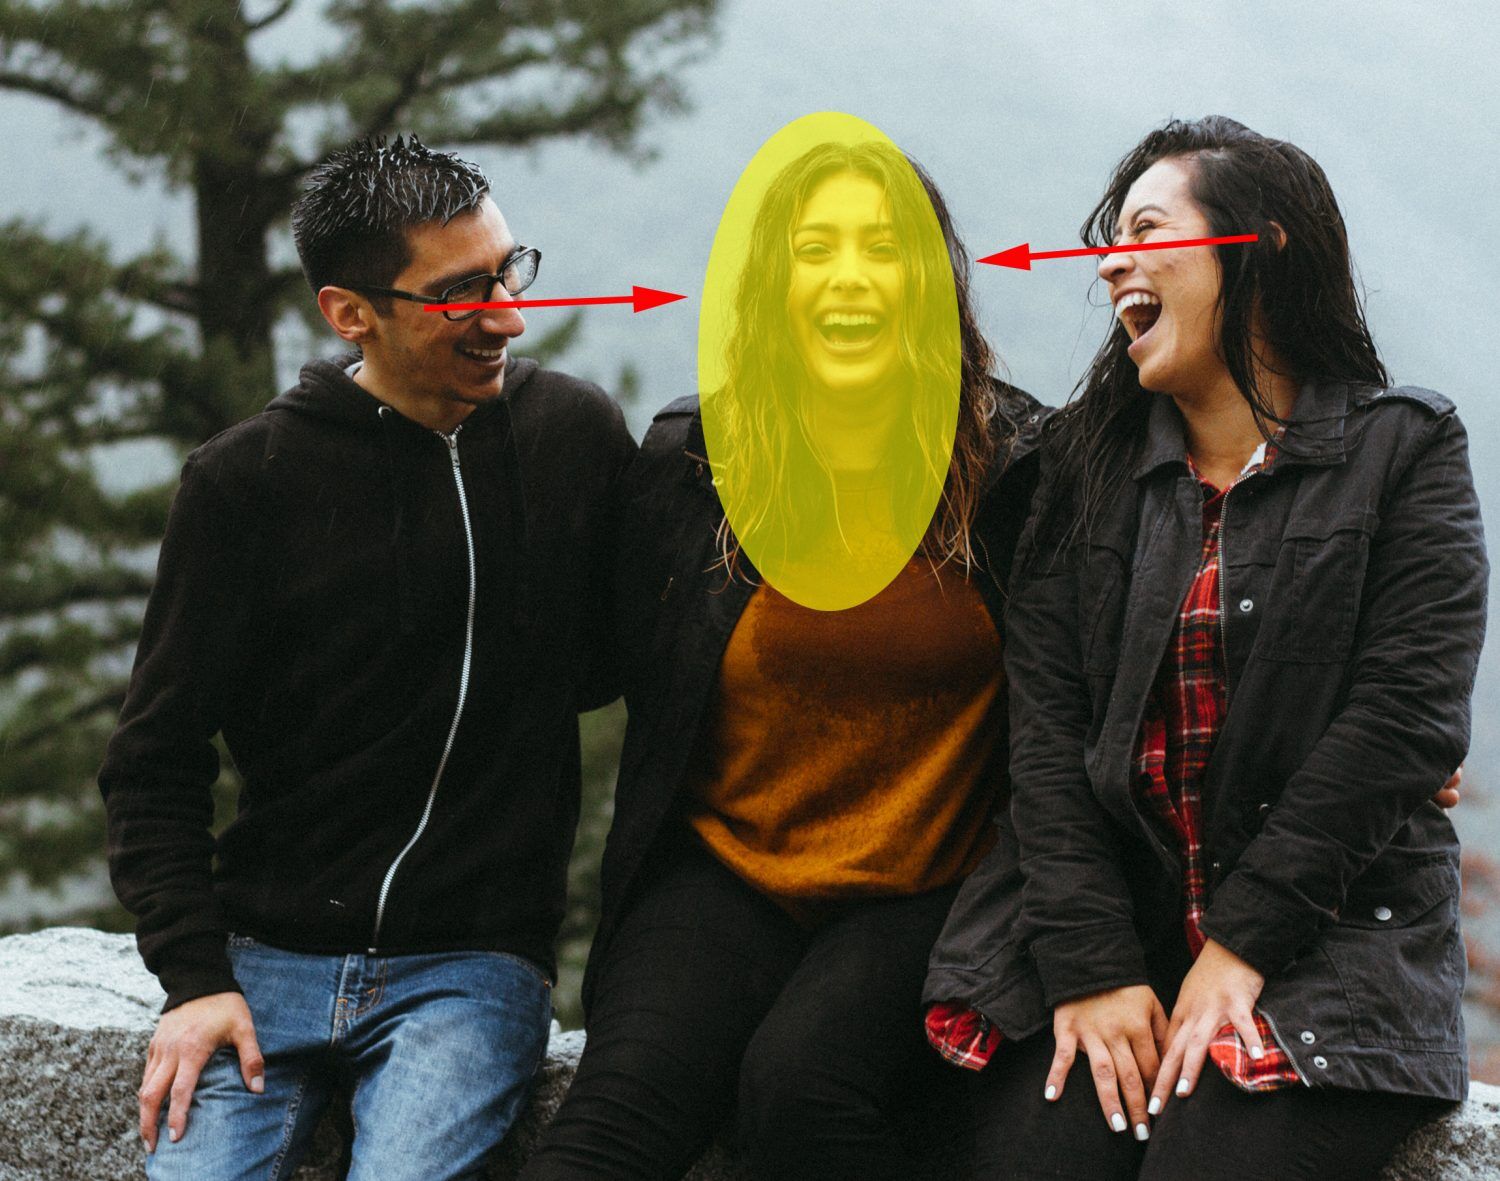
When there are multiple subjects within a photograph, a line of sight can be used to highlight one person as the main subject or as the subject area stopping point in the composition.
007
The line of sight establishes the center woman as the main subject.
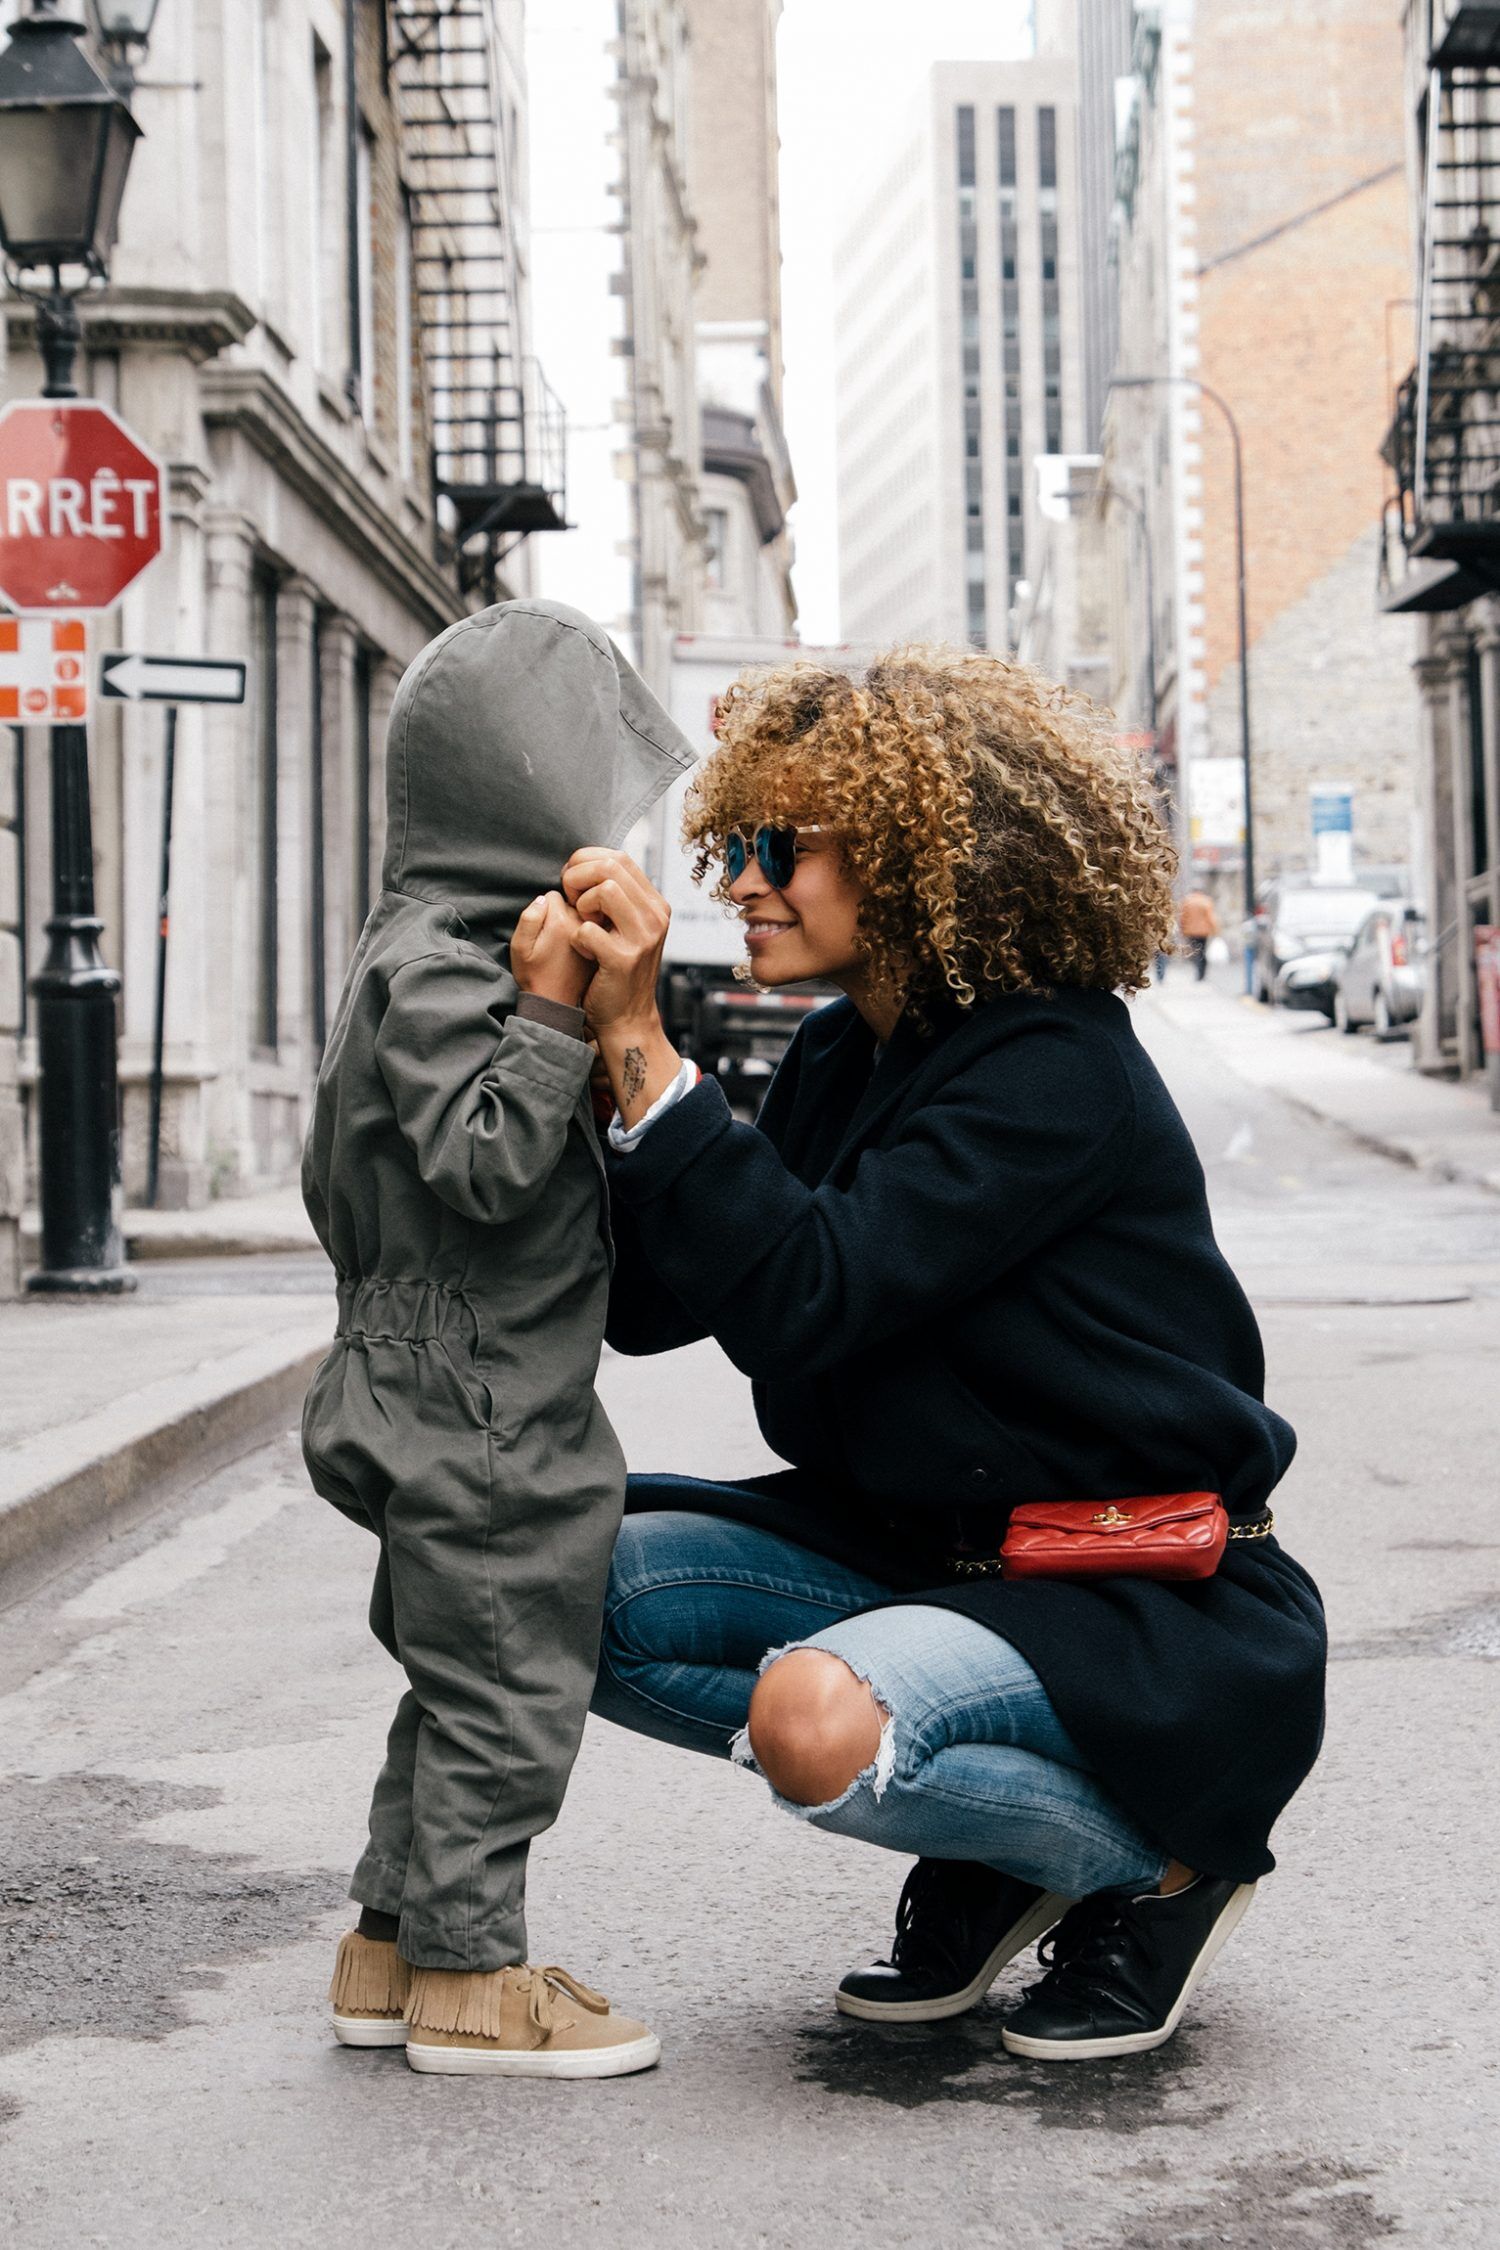
Line of sight is so heavy in visual weight that it can establish a human subject whose face we cannot see.
In this photo, the woman is clearly visible, but the boy is clearly the subject!
Triangulation
009 – Photograph by Kent DuFault
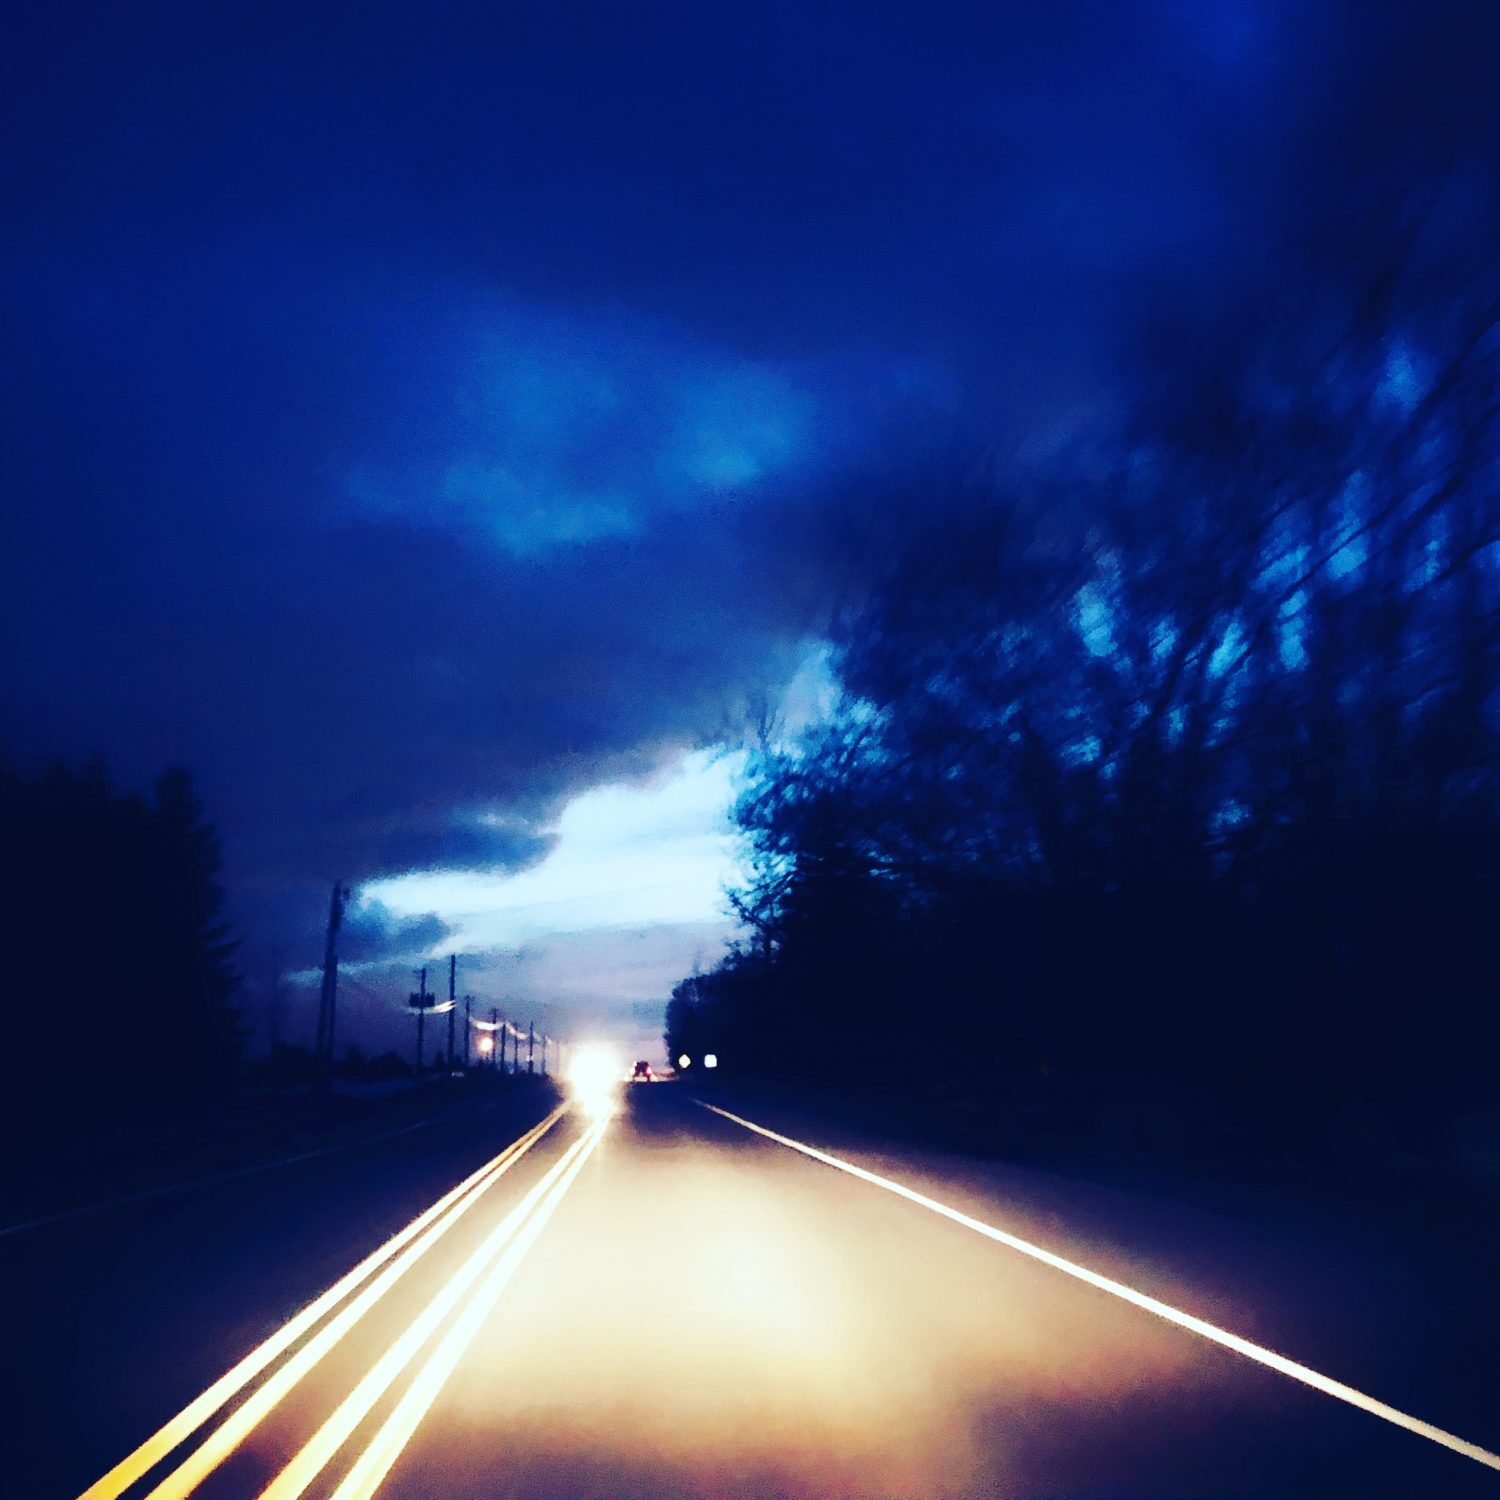
Many photographers discount the significance of the triangle as a composition tool. But I think it’s worth noting, as it predates photography by hundreds of years, going all the way back to the earliest Renaissance Painters.

010

011 – Photograph by Kent DuFault
I’ve practiced triangulation composition for close to thirty years. From experience, I can tell you that whenever I’ve been able to incorporate it into a composition, those images always garner more attention.
012
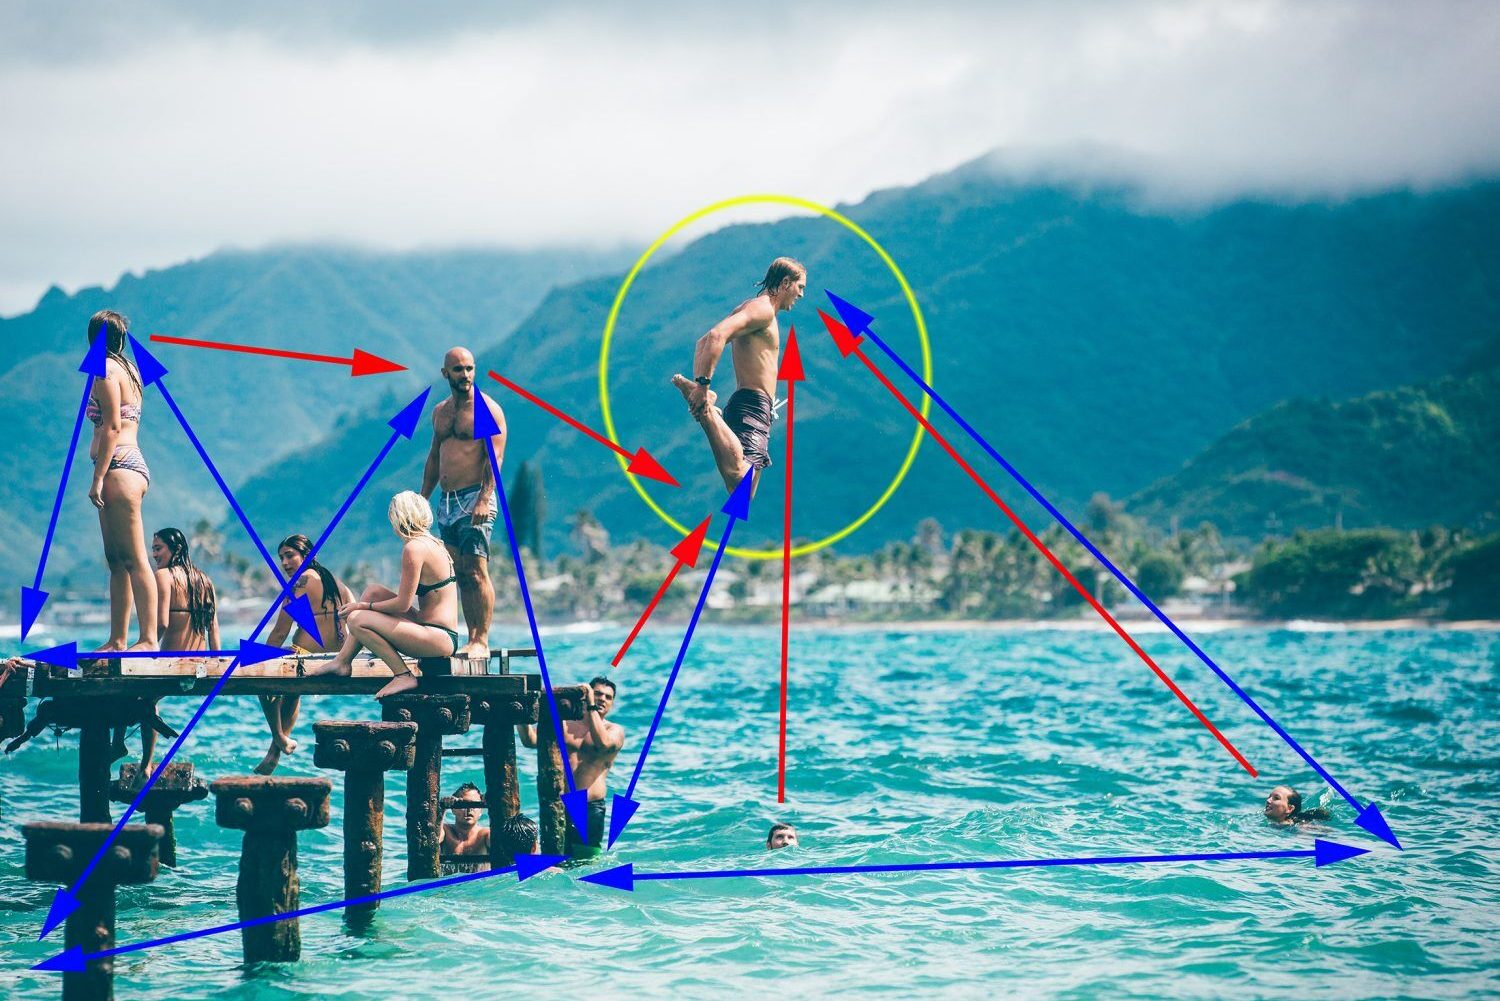
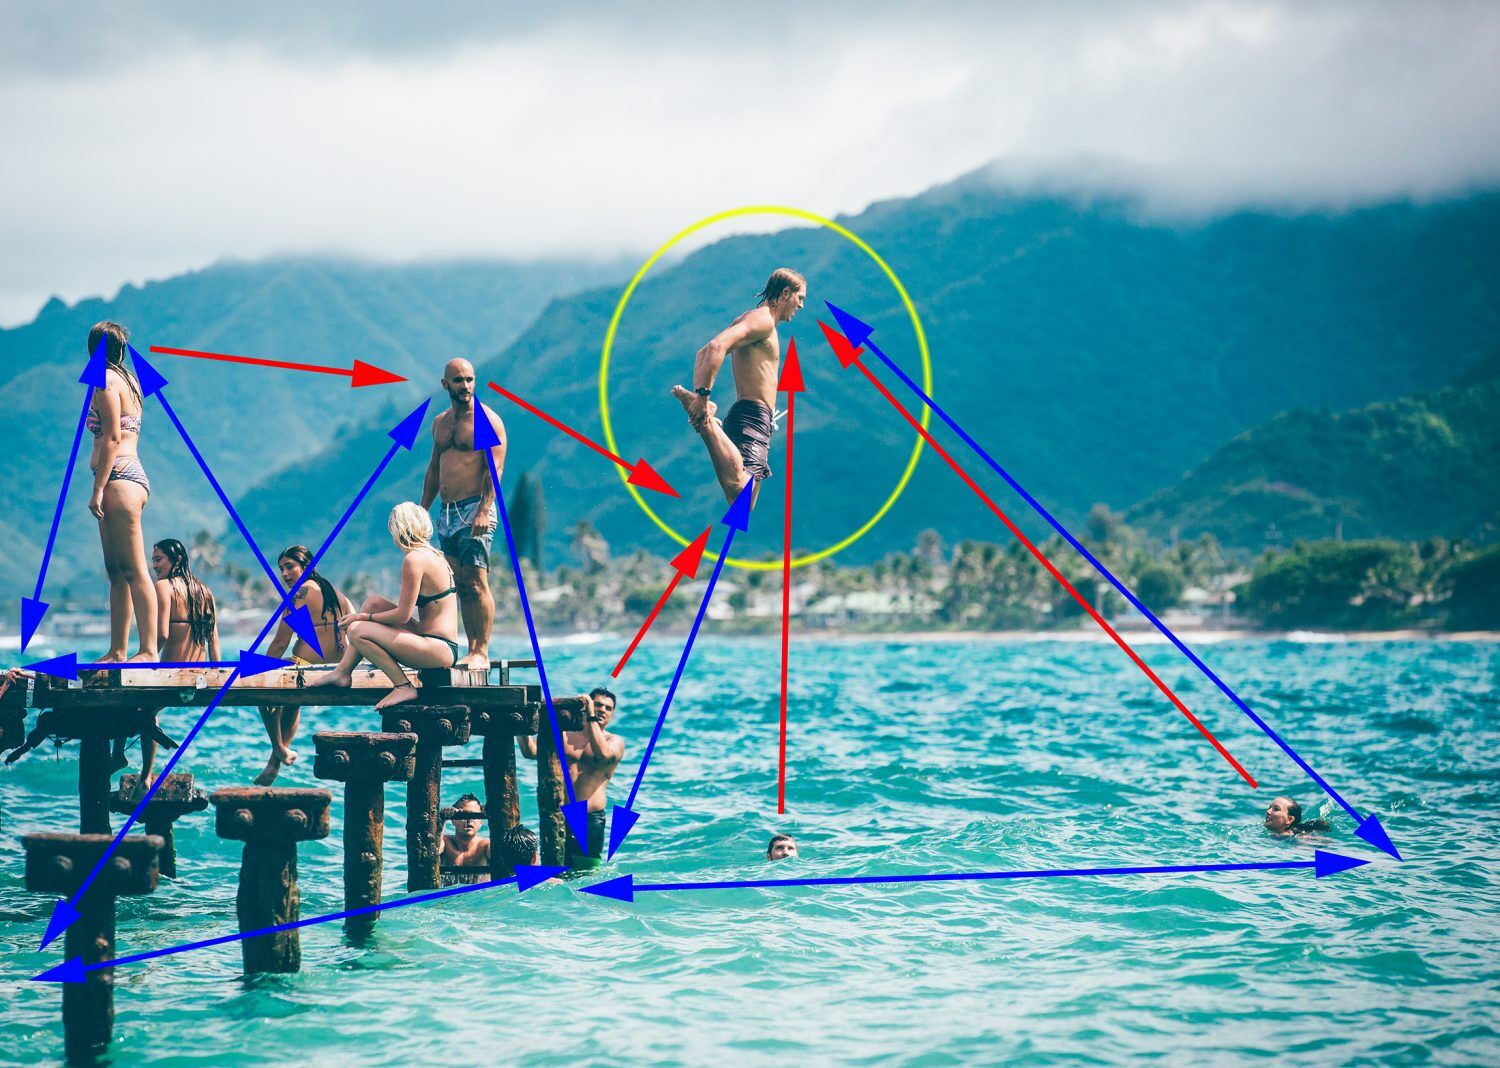
Triangulation can be a complicated form of composition. You might wonder, “How could I ever see this while I’m shooting?” It’s a lot like riding a bicycle. Once you’ve mastered it, the ability is hidden away up there in your brain. To begin, you must look for it. Pretty soon, your brain will be doing it automatically.
Notice that Image 012 also makes heavy use of the line-of-sight technique previously discussed.
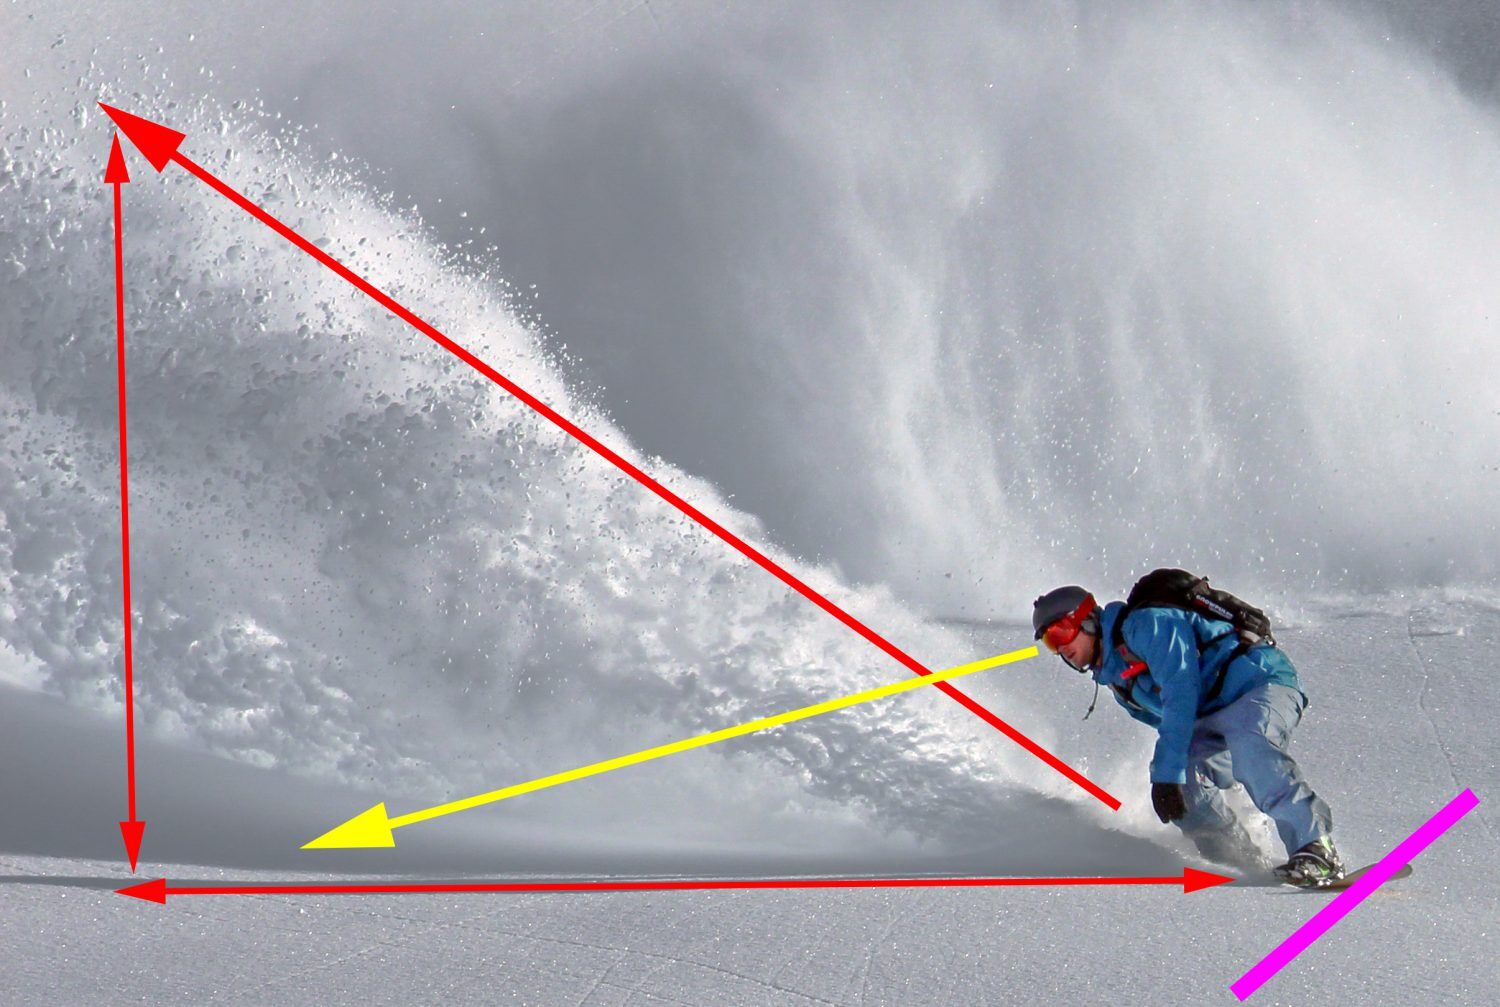
013
The photographer spotted this triangulation in a fast-moving action shot. Notice how they used line of sight. The snowboarder is almost going off-frame to the right. But the line of sight creates a STOP and pulls us back toward the left side of the photo.
Visual Weight
Using visual weight in a photo composition is the act of assigning each piece of your picture a level of importance. The subject should always be the most heavily weighted. This is typically followed by a focal point, and the focal point should be relatively close to the subject. These are then followed by guidance tools like leading lines and frames. These tools mostly push a viewer’s eyes in a direction within the frame.
An experienced photographer will compose with visual weight in the camera. However, for newer photographers, while you’re learning to compose in-camera, you can rearrange visual weight in post-production.
Let me show you an example.

014
This photograph of the jaguar is clearly a fantastic shot. However, the visual weight isn’t distributed very well. We can improve it in post-production, and that activity will make this an even better picture!
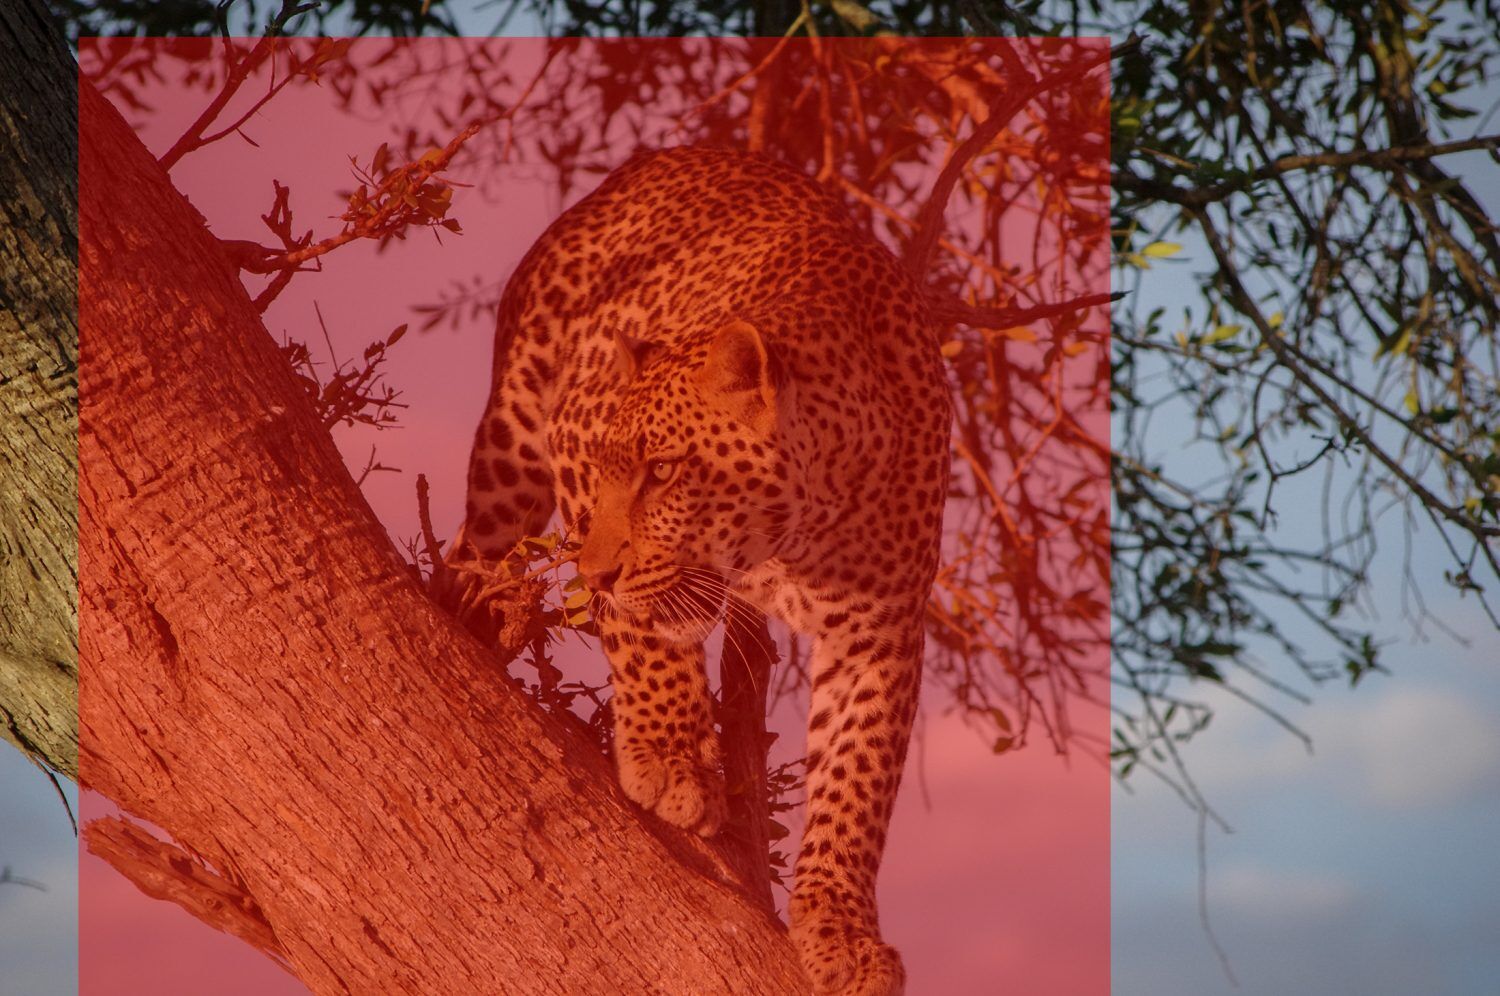
015
All the crucial parts of this picture are in the red box. Everything else is removing visual weight from the composition.
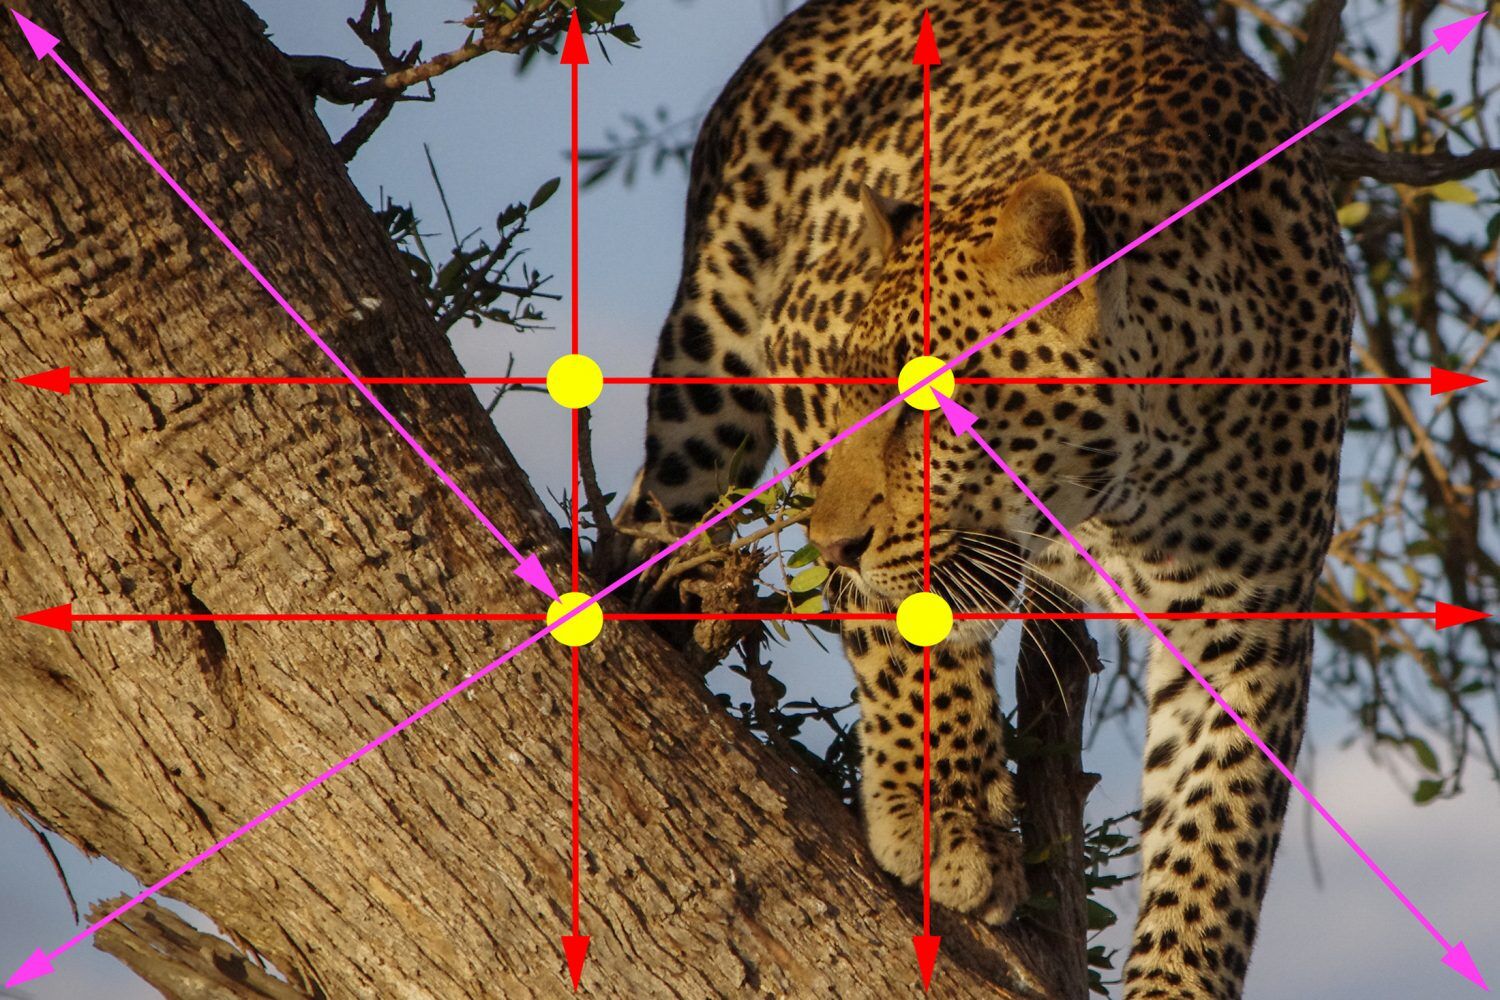
016
Here we use the Golden Triangle and Golden Ratio tools to help us correctly assign visual weight. Study where the lines and points fall within the frame after this crop.

017
Compare this version to the original. Everything in the frame now supports the jaguar as the subject.

018
There are different ways to manipulate visual weight. In the jaguar picture, we manipulated it by changing the subject’s position within the frame.
But what if you don’t want to do that? There are other methods to control visual weight.
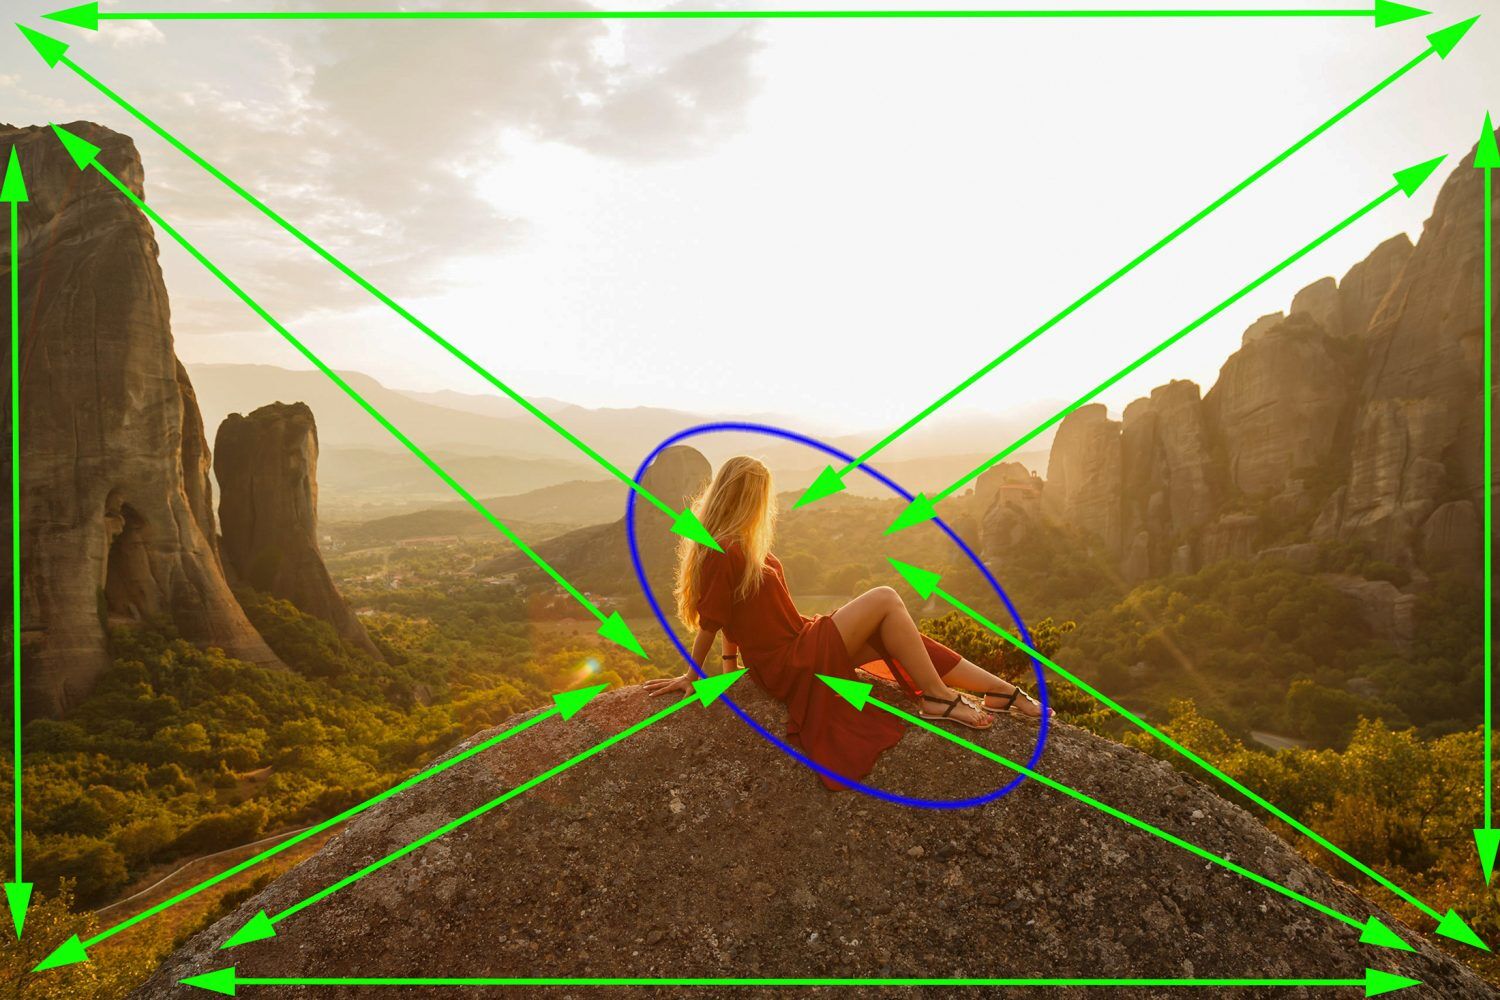
019
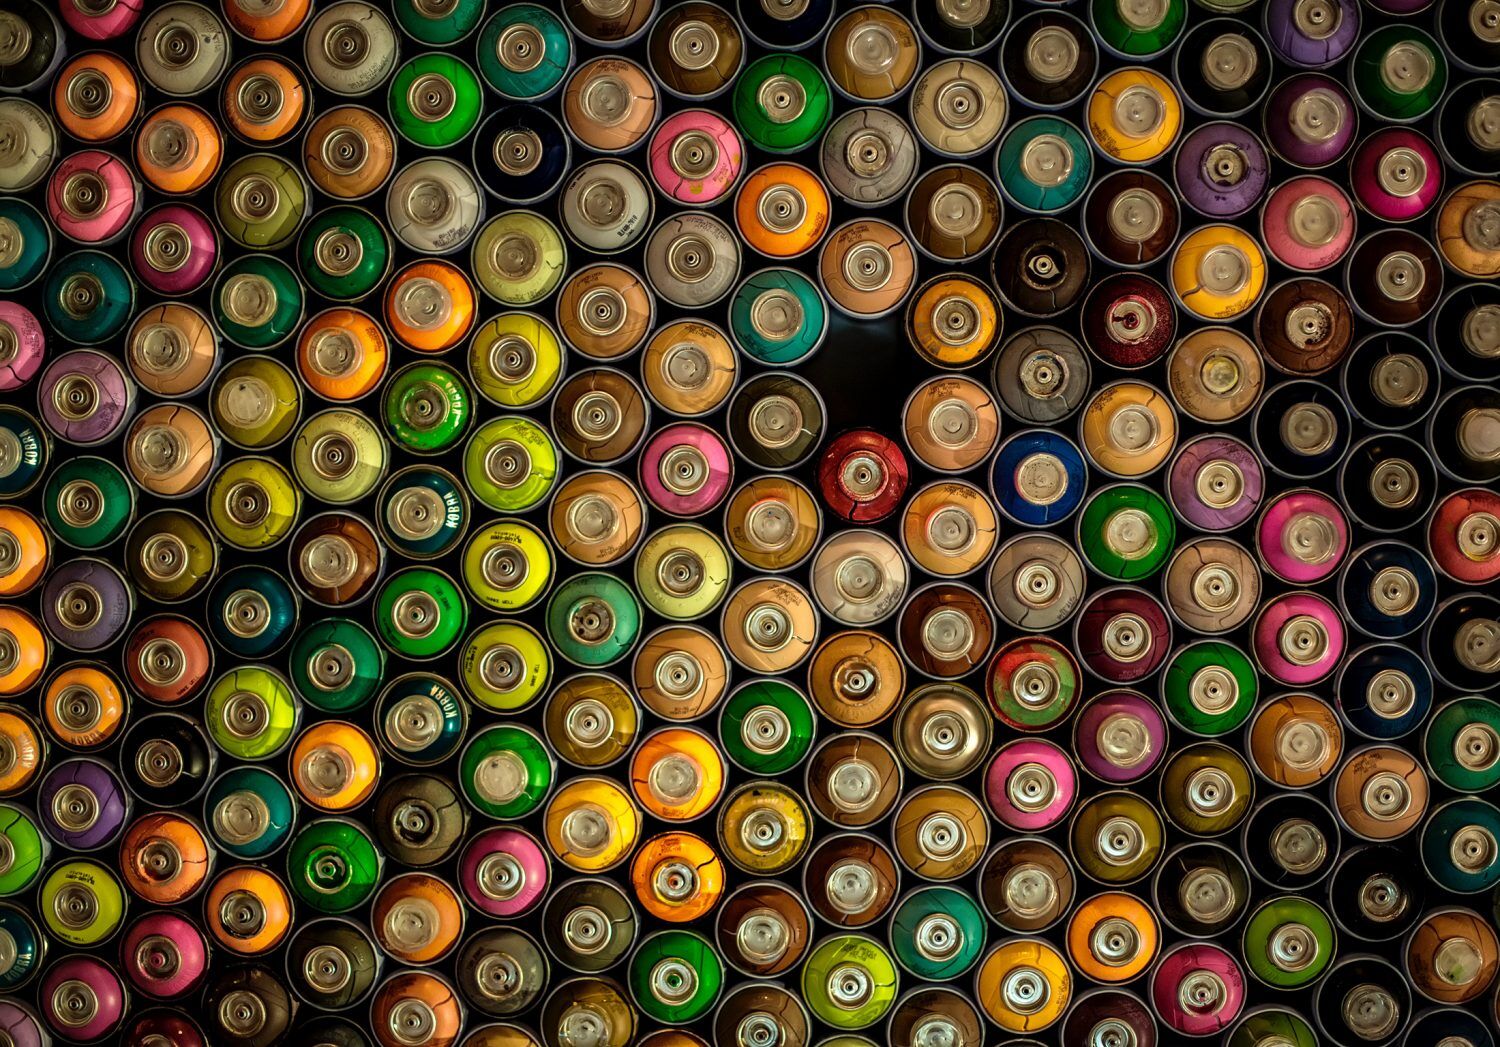
Visual weight was added to the woman through leading lines created by the contrast and texture of the rocks. The color red is often one of the most potent elements of visual weight. In this case, its significance has been reduced due to the overall warm color scheme.
020
You can also shift visual weight by removing an object to disrupt the mind. This technique makes it feel like something is missing to a viewer. You will find this to be especially powerful with images that rely on repetition and pattern.
Proportion & Perspective
When I’m teaching students, I cannot emphasize enough the importance of proportion and perspective in their pictures. Photographers are capturing a three-dimensional world and transforming it into a two-dimensional medium. Because of this fact- the photographer must trick the brain into seeing proportion and perspective.
Let’s start by taking the same scene and looking at it in three different formats.

021
Our first photo has a 5:4 image ratio- five measures wide by four measures high.

022
The second example has an image ratio of 16:9 – 16 measures wide by 9 measures tall.

023
The final example has an image ratio of 1:1 – For each step across (width) an equal measure occurs in height. The resulting format is a square.
Proportion and perspective are complicated topics that cannot be completely covered in a blog post. My goal is to point out a few highlights and get you thinking about them.
The format that you choose to present your photograph impacts the proportion and perspective to the viewer.
024 – Photograph by Kent DuFault
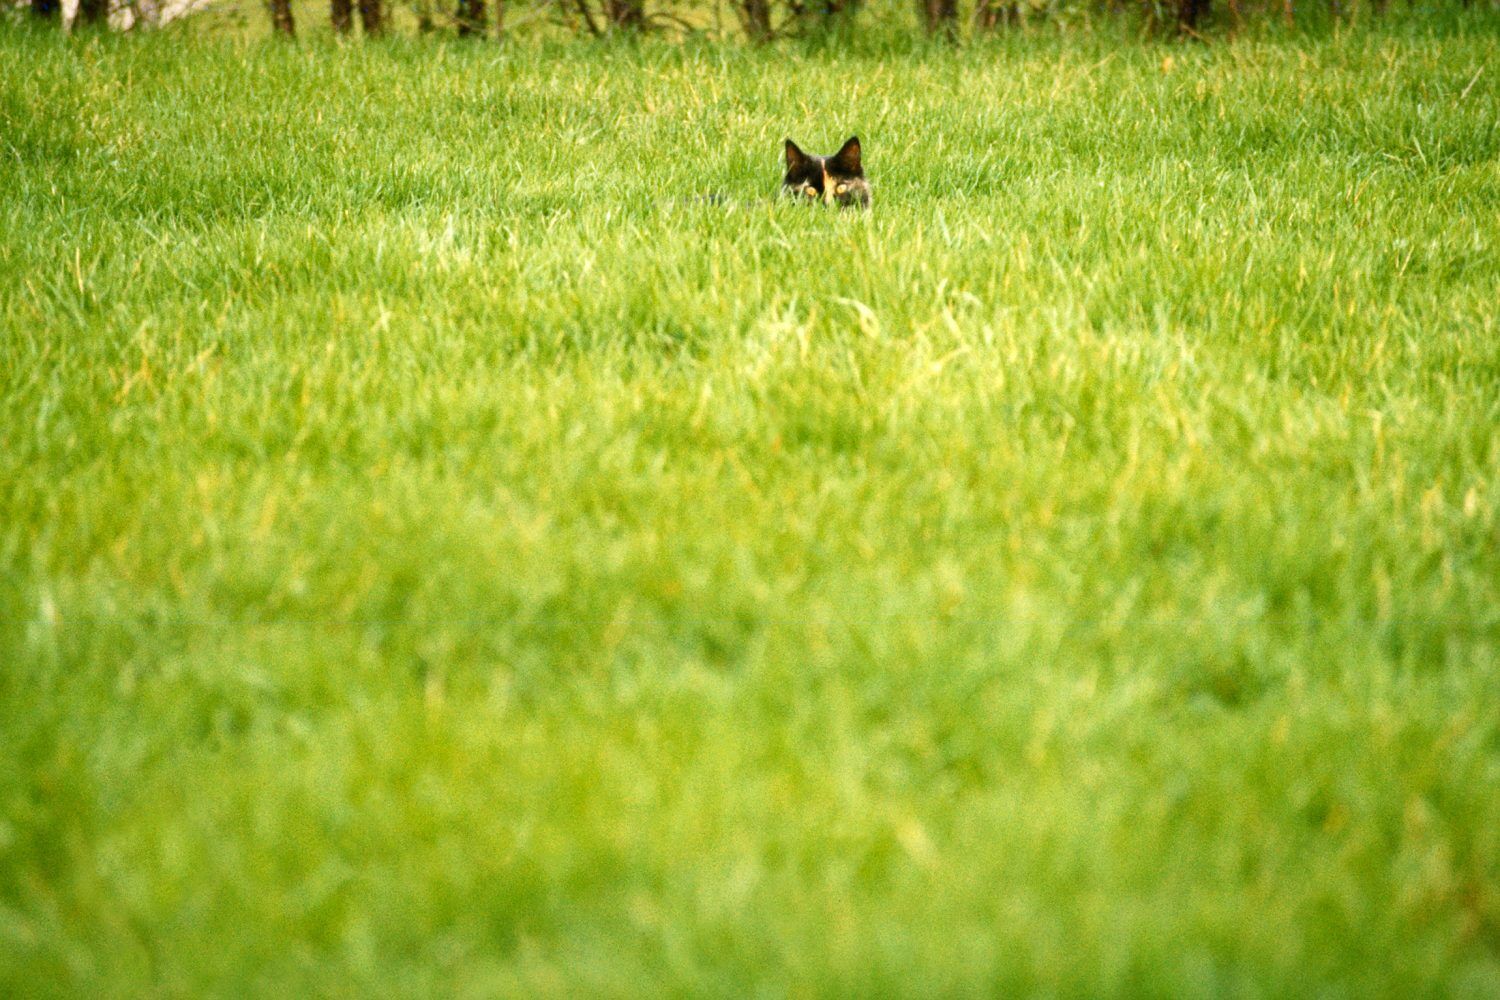
You can create the illusion of distance and space by isolating a subject with a plane of color or tone.

025 – Photograph by Kent DuFault
You can minimize proportion and perspective by photographing objects from an unusual camera angle and careful lens choice. For image 025, these two choices have flattened out the scene into a semi-abstract picture.

026
When photographing scenes of significant distance, including a foreground object helps viewers acclimate to the space they see in the photo. This technique is called “including an object of known size.” The viewer doesn’t know how far away those distant mountains are. However, our brain can calculate that distance because we know the approximate size of a tent.
Rhythm

027
Over the years, many photographers I’ve instructed tell me that they see rhythm as repetition.
I always tell them to think about it as music. Suppose you sat and listened to a radio station that played nothing but the same note repeatedly. Would that be satisfying and rhythmic? Of course not!
Rhythm needs variables. It needs ups and downs and starts and stops. Just like in music, everyone interprets it differently.
That makes incorporating rhythm more challenging but also more interesting. Plus, when you begin to find the rhythm in your picture-taking, your work becomes your own.
I remember a client from years ago who used to tell me that she would call me for an assignment when it needed the ‘Kent DuFault Factor.’
That was a massive compliment from her, and I knew that I stood out from a lot of the competition.

028
What tools can help you establish a rhythm in your imaging?
Some of the easier ones to master are the following:
- The interplay of Light and Shadow
- Texture
- Patterns with breaks in the pattern
- Dynamic angles (this is one of my personal favorites)
- Spot color
- Stacking (Image 028 uses stacking. The people are compressed and stacked from front to back)
Focal points
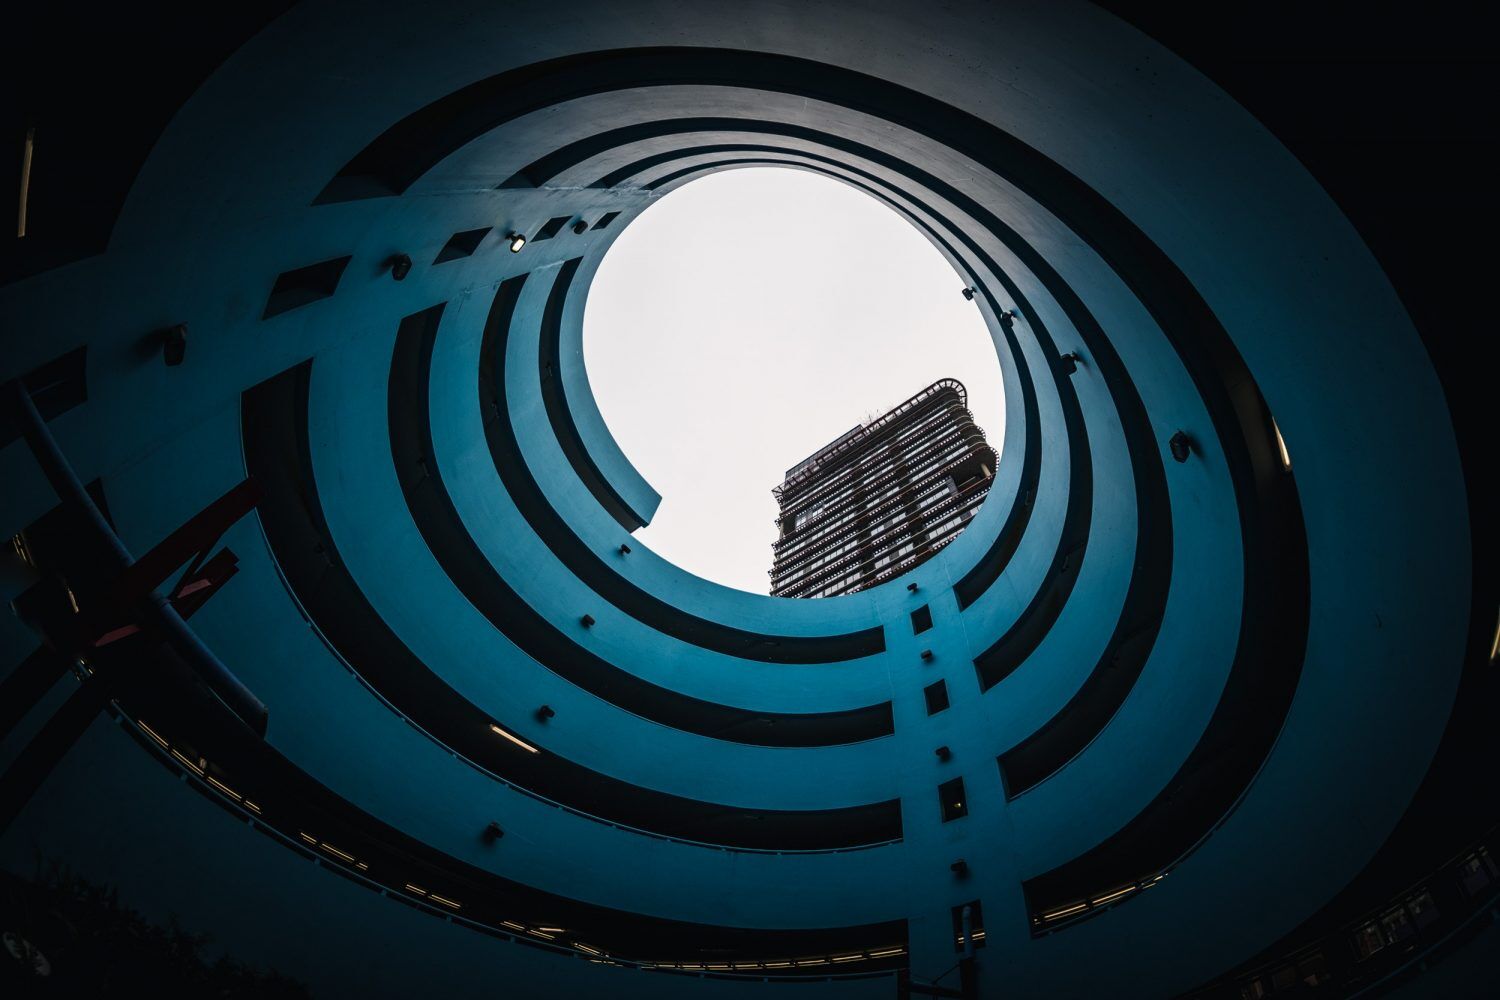
These tools create eye movement and stopping points within a photo composition.
029
The circular parking ramp creates eye movement. The building in the white oval makes a stopping point. Together, they establish a rhythm.
I hope you feel inspired to give these ideas a go and see how they can work in your photography!

