5 Tips for Better Image Management in Lightroom Classic
We all know that, as photographers, organization is key. It’s not uncommon for us to take hundreds of photographs in a single venture, and those numbers add up quickly!
Keeping these images tidy is essential, but not all photographers recognize another crucial part of photo organization—nailing down an efficient import and library workflow when photo editing in Lightroom Classic.
Thankfully, Lightroom is full of tools and features that allow us to effectively organize, categorize, and otherwise manage images in its library. Here, we’ll run through five tips to help you take advantage of the organizational functions Lightroom has to offer.
1. Use presets when importing photos
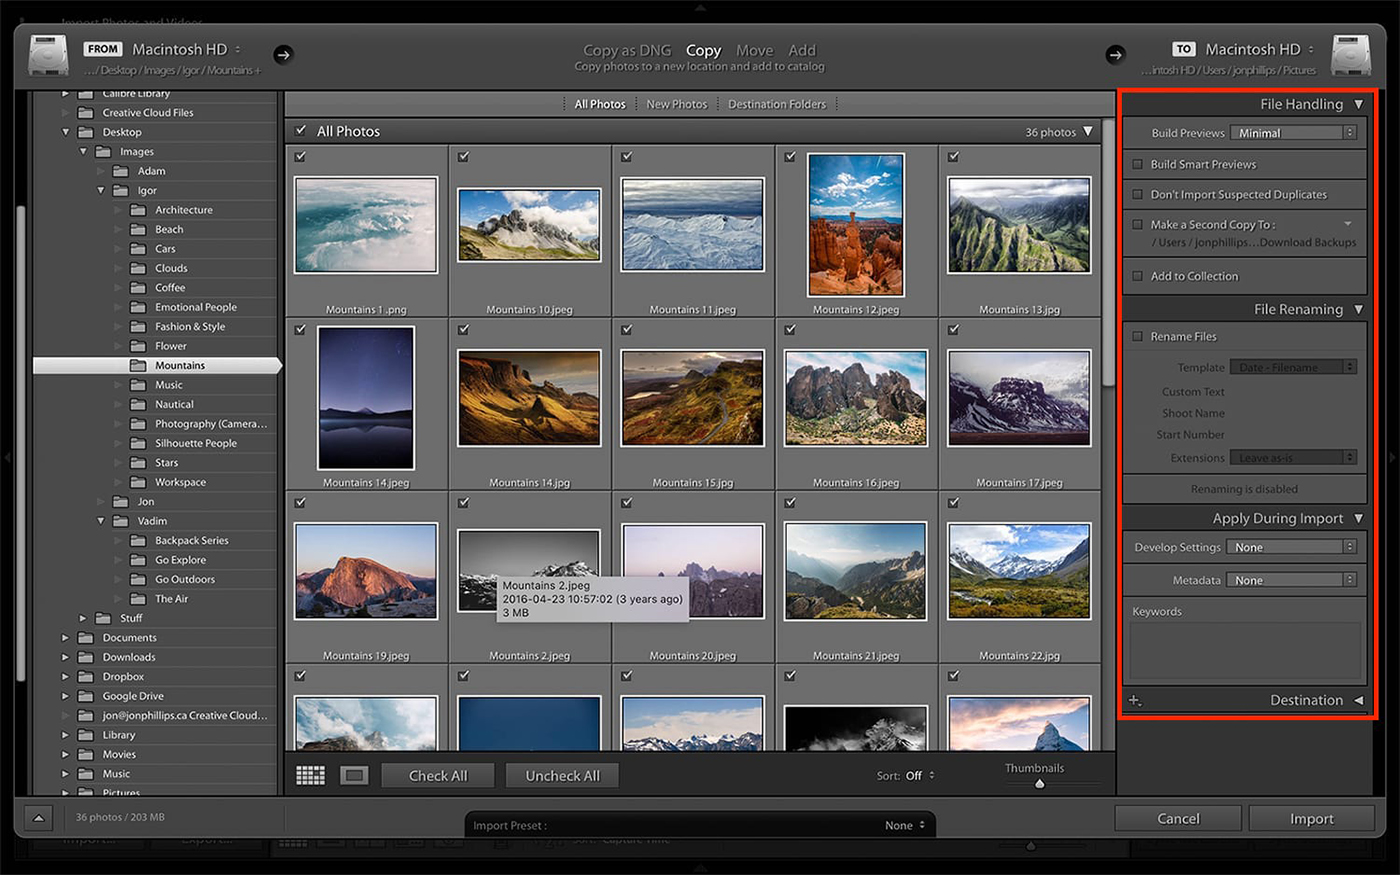
There’s no better way to save time when importing and organizing photos than to specify import presets in Lightroom. Once these presets are set up and applied, Lightroom will do much of the work for you during the import process.
For example, you can choose to automatically back up your photos, exclude duplicates, rename photos, and even assign metadata like keywords to photographs during the import process.
To begin setting up your own import presets, explore the File Handling, File Renaming, and Apply During Import panels. Within the import window, you’ll find each of these on the right.
2. Create Collections
If you’ve used Lightroom before, you probably know that importing photos involves creating a new catalog. For example, you may separate your photos into a personal catalog, travel catalog, portrait catalog, food catalog, or anything else.
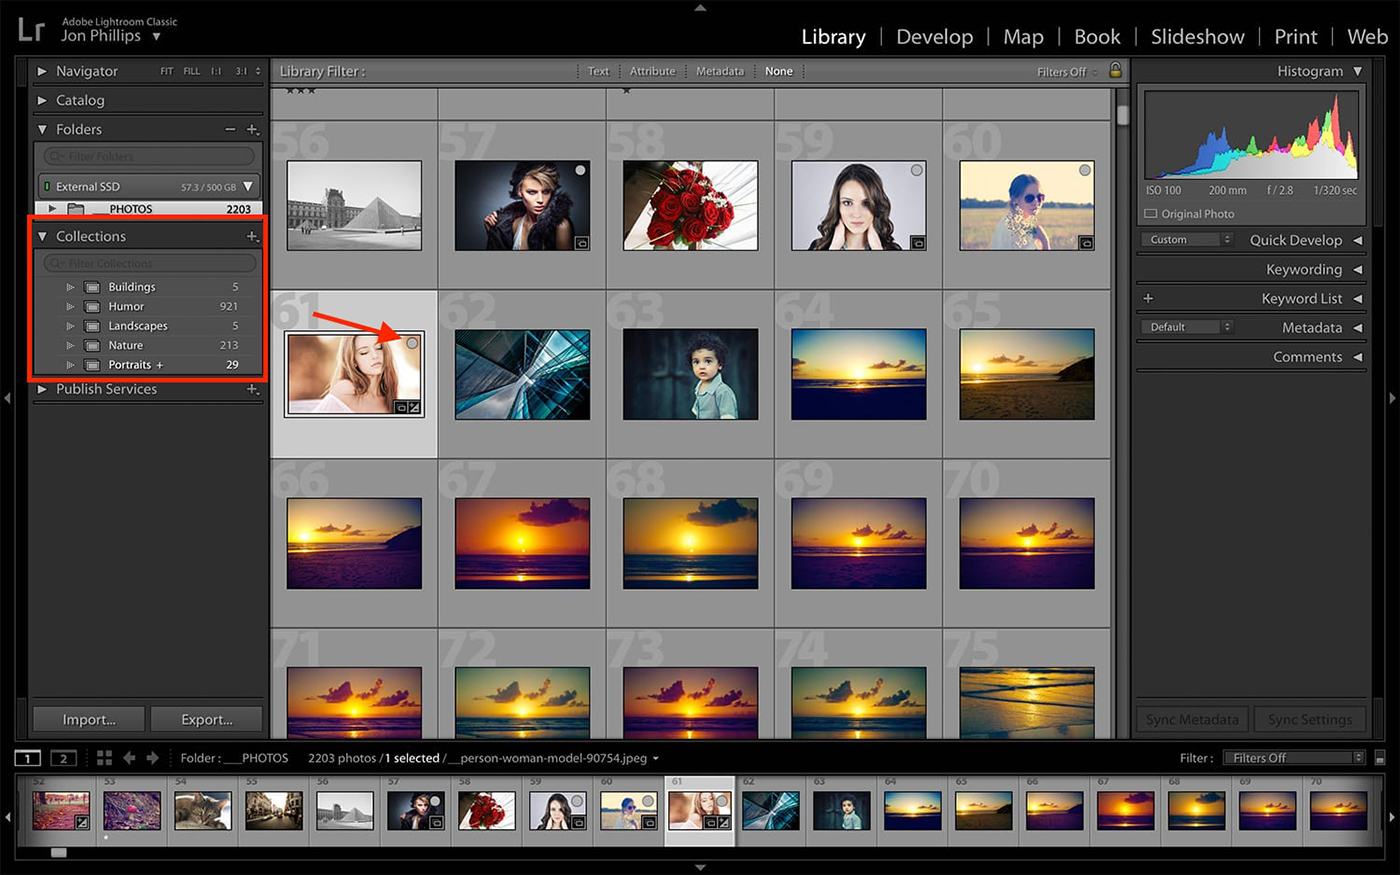
However, there’s more to Lightroom’s organizational capabilities than just catalogs – you also have the ability to further separate your photos into Collections. Within a catalog lives a collection set, and within a collection set lie as many collections as you care to create. These collections are different from file folders, however. Collections categorize your photos only within Lightroom, whereas a photograph’s assigned file folder designates its location on your computer’s hard drive.
It’s easy to drag and drop photos from the catalog into these collections, which you can organize and manage however you’d like. You can also quickly move photos to a new collection by setting a chosen collection as a target collection. Right-click the collection you’d like to set as your target collection and select “Set as Target Collection.”
Easy enough, right?
Then, find a photograph you’d like to add to that collection. Hover your cursor over the photograph’s thumbnail, then select the circle that appears over the photo. Once this is selected, you’ve added that photo to your target collection!
The Collections panel is also visible in every single module in Lightroom Classic
3. Use the Film Strip
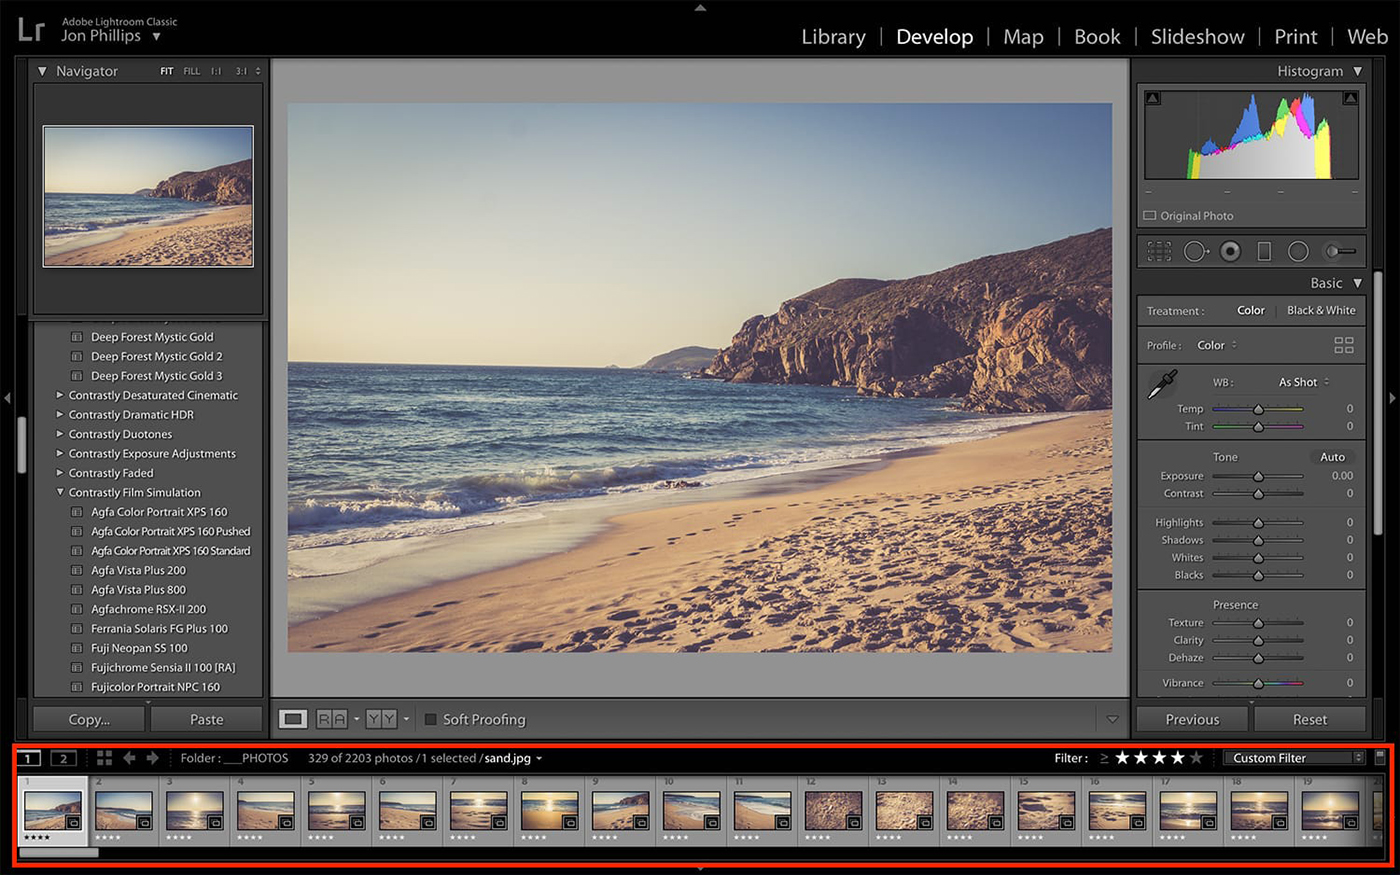
At the bottom of your Lightroom Classic window lies an important but oft-overlooked element – the Film Strip.
I like to recommend using the Film Strip for photo management because this side-scrolling view of your photographs is perhaps one of the most convenient ways to get your eyes on each photo within your catalog or collections.
Better yet, you can also see the ratings, flags, stars, or color labels you’ve applied to each photo as you view them, making the Film Strip a great tool for quick filtering as you browse photos without having to navigate away from your workspace.
Want to learn more about using Lightroom Classic, how to categorize and catalog your images, and a host of other topics? The Lightroom Mastery ebook has you covered! Grab your copy today and become a master of photo editing.
4. Identify your images with keywords
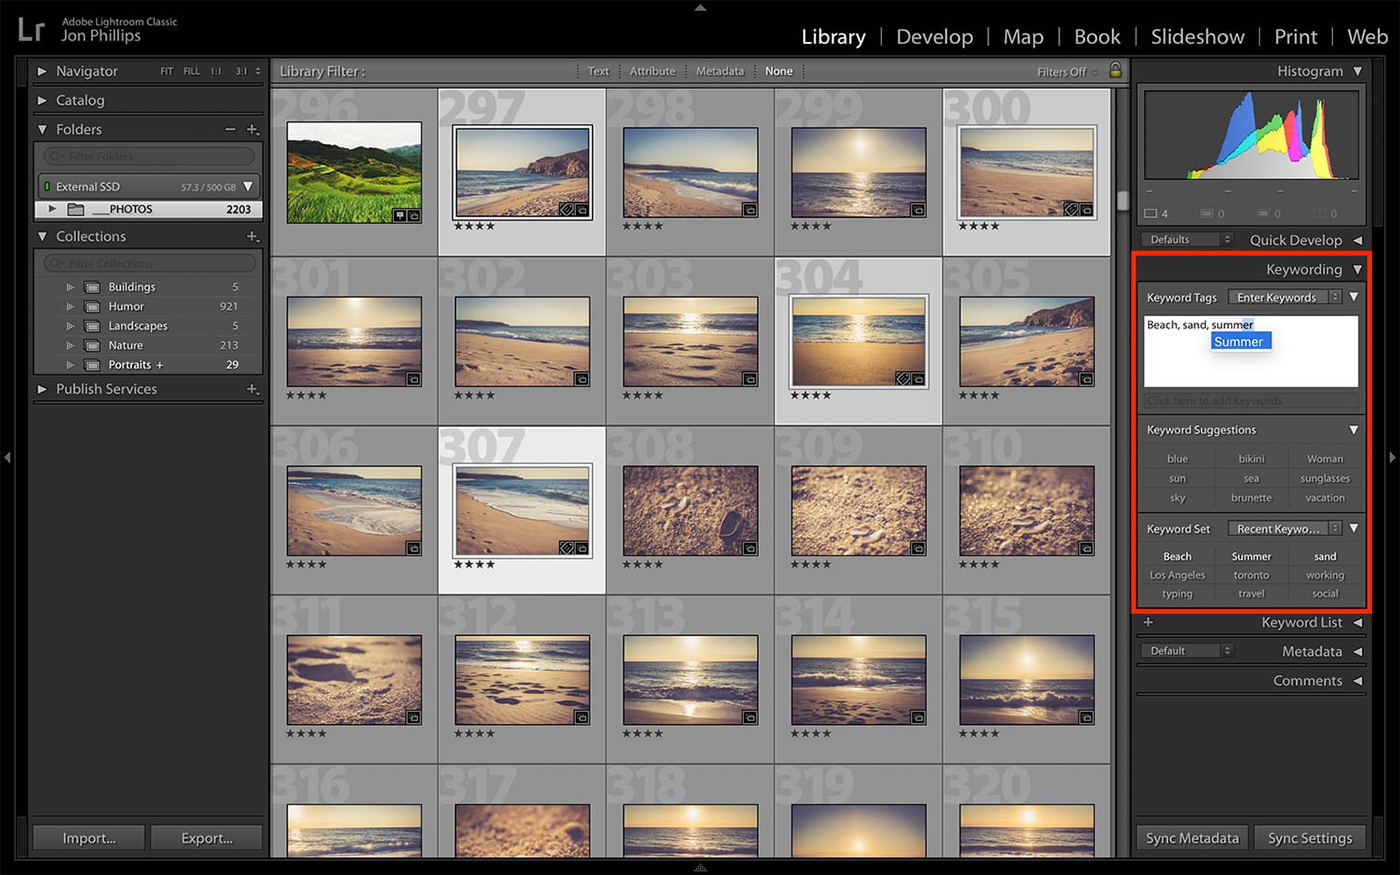
Keywords are a great way to organize photographs for easy organization later. You might choose keywords that broadly describe the genre of photography the picture belongs in, or you might get more specific and list the subject of the photo.
Why are keywords important? Assigning keywords to a photo means that you can find them more easily when using filters (which we’ll go over in the next point).
Add keywords by opening the Keywording Panel in the Library module, then select one or multiple images, and enter your chosen keywords into the entry box. Apply multiple keywords at once by separating each with a comma. Over time, Lightroom will begin to suggest keywords to you based on your past habits, speeding up the process. You can even work with import presets, as I mentioned above, in order to assign keywords automatically.
5. Browse your Library with filters
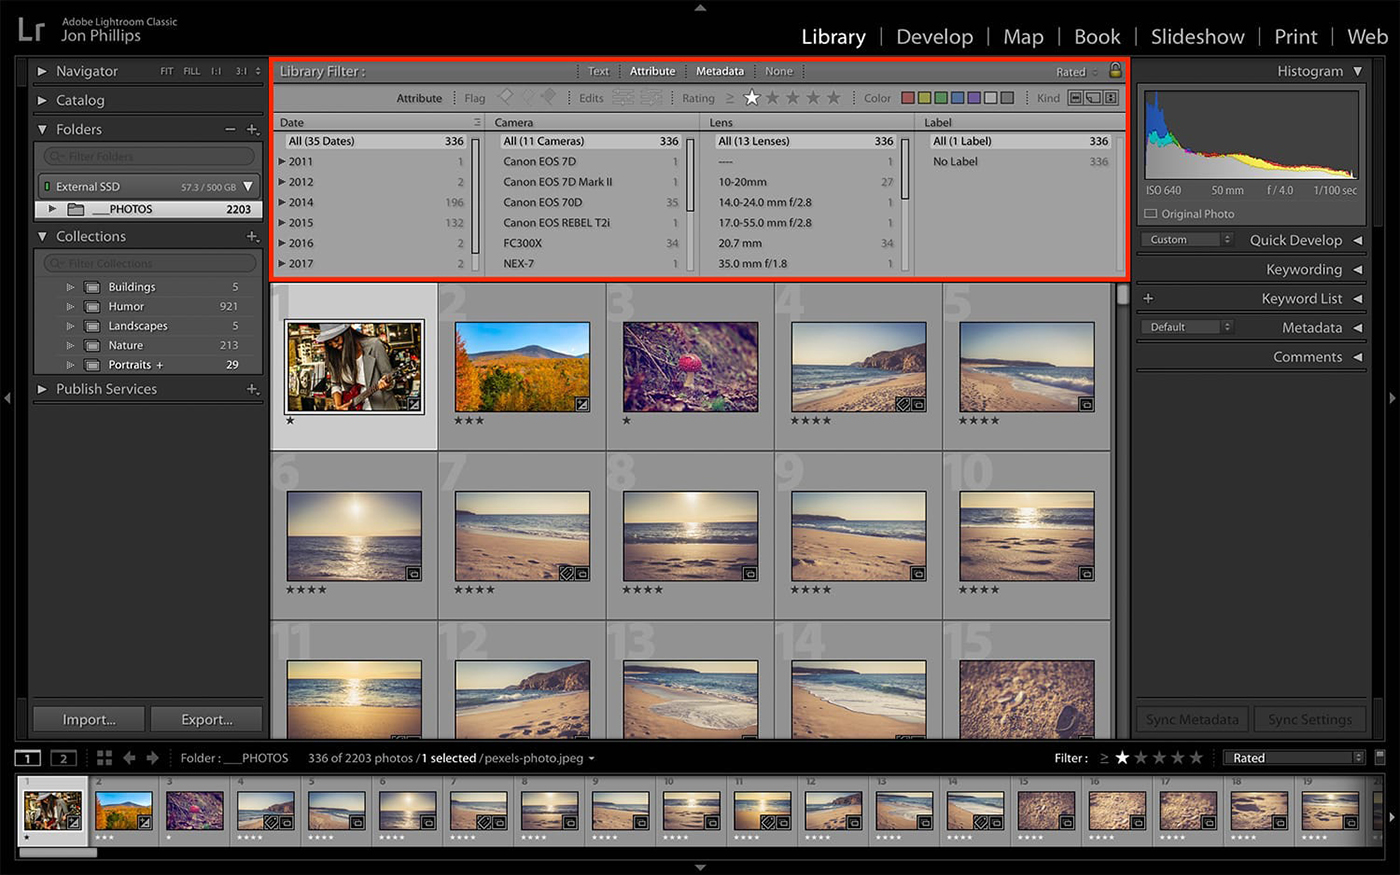
When you need to get your hands on a specific photo, forget about wasting time skimming through collections and instead utilize Lightroom’s ability to filter more thoroughly by metadata. In the Library module make sure you are in the Grid View, then navigate to the Library Filter bar at the top and browse the dropdown menu to narrow your search. Then, press “enter” or “return” to initiate the search!
If you don’t see the Library Filter bar in Lightroom, press “\” (backward slash).
Some examples of filters you can apply to photographs in your library include searching by GPS coordinates, keywords, color label, or rating.
It may take a bit of additional effort to adapt to a new photo editing workflow (hey, old habits die hard!) However, using Lightroom Classic in a more organized and methodical way will come second-nature to you once you settle on a workflow that meshes with your editing style. Also, make sure you check out this great review from Shotkit on Lightroom Classic.
Want to learn more about using Lightroom in your post-processing? The Lightroom Mastery ebook has you covered! Grab your copy today and become a master of photo editing.
