7 Common Exposure Problems And How To Fix Them
 by
Jo Plumridge
by
Jo Plumridge

All photographers are liable to take shots from time to time that don’t come out correctly exposed. When we’re first learning photography, there are a million and one ways to get the exposure wrong! But what happens when we’ve learned the techniques, but are still getting the odd shot incorrectly exposed?
Chances are that this will be down to one of a number of common problems that all photographers come across. This article looks at seven of the most common and how to fix them.
1. Changing the exposure mode
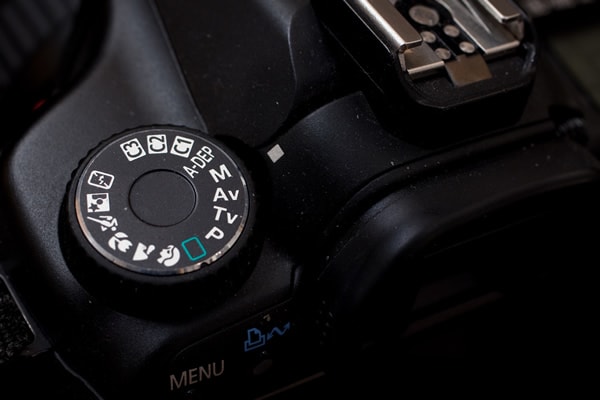
photo by Håkan Dahlström
Let’s start with an easy problem that many of us will come across at some point! One of the simplest ways to accidentally get the wrong exposure is to have knocked the mode dial or aperture / shutter speed dials out of position. Changing the aperture or shutter speed is obviously going to have an effect on your exposure. But so will knocking the mode dial from manual to shutter speed priority (for example).
There’s a simple way wrong the aperture / shutter speed dials problem, and that’s to ‘lock‘ the exposure into place after you’ve set it on the camera. Most modern DSLRs will have this function (labelled as AE-L). Unfortunately, whilst a few cameras have a lock for the mode dial, it’s an unusual feature. The best way to avoid this problem is just to check before you shoot!
2. Underexposed backlit subject
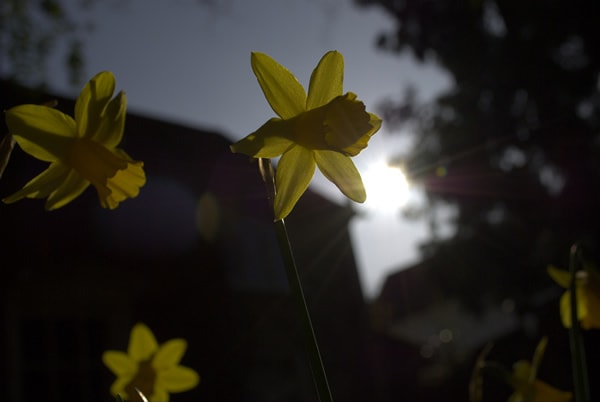
photo by ben_osteen
If your subject is lit from behind or is darker than their surroundings, it can cause confusion for your camera. Often, you’ll find that it has exposed incorrectly and left your subject underexposed, so as to try and balance the entire exposure across the frame.
Fortunately, there’s a simple way to correct this by switching your metering to centre-weighted. This will mean that greater emphasis is put on exposing the centre of the image correctly. With many DSLRs there’s also the option to link your active AF point to the spot metering area. This means that you can still correctly expose your subject, even if they’re not in the centre. However, you do need to remember that spot metering only meters for the centre 5% of the image.
3. Greying whites
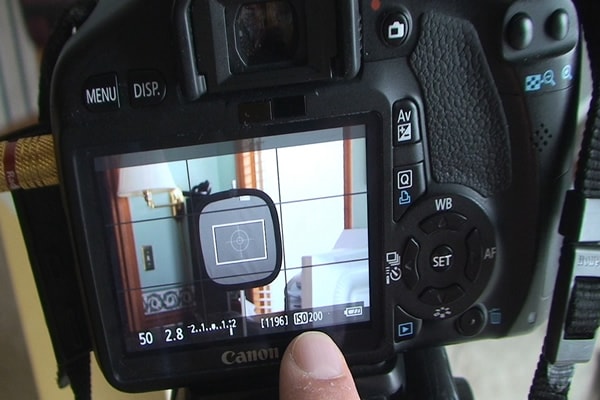
photo by Dave Dugdale
Modern DSLRs come with incredibly sophisticated metering systems, which can, most of the time, produce perfectly exposed shots. However, a large area of a light colour, such as white, can cause the camera great confusion. This is due to several factors. Firstly, the camera has some trouble actually seeing white in the first place. And secondly, but more importantly, camera-metering systems look for averages in a photo.
So, whilst a camera will expect there to be areas of bright and dark in the photo, they’ll expect that these will average out as a midtone. The problem is that if you fill the frame with a light subject, the camera will then reduce the exposure in order to create that midtone – thus turning the white grey.
Fortunately, this is very simple to correct by just dialling in some exposure compensation. This will set your exposure above the value suggested by the camera. The amount of +EV needed will depend on how much white there is in the photo, so be prepared to experiment a little.
4. Underexposed foregrounds when shooting outside
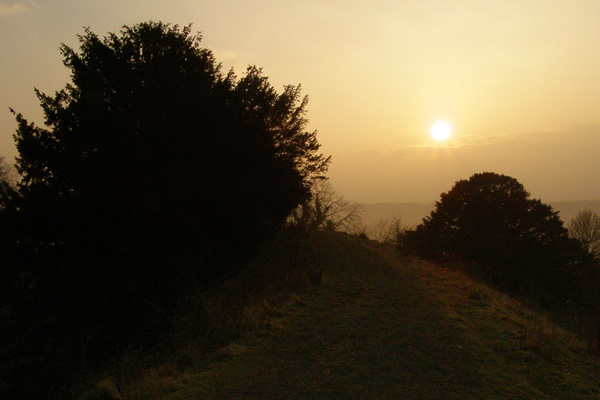
photo by Jim Champion
A common problem for landscape photographers is being left with very dark foregrounds. This is usually because the sky is much brighter than the land and, if the camera attempts to expose correctly for said sky, the land will be left somewhat underexposed.
The simplest way to correct this problem is to buy a graduated Neutral Density (ND) filter. The dark part of the filter is placed over the sky, with the gradient where the dark and light parts meet is placed over the horizon. This leaves the clear part over the foreground. The filters come in different f-stop ratios (e.g. 2, 4, 6, 8, 10), meaning that the dark part of the filter will be an allocated number of f-stops darker than the clear part. This allows photographers to easily balance the exposure.
5. Overexposed skies in landscapes
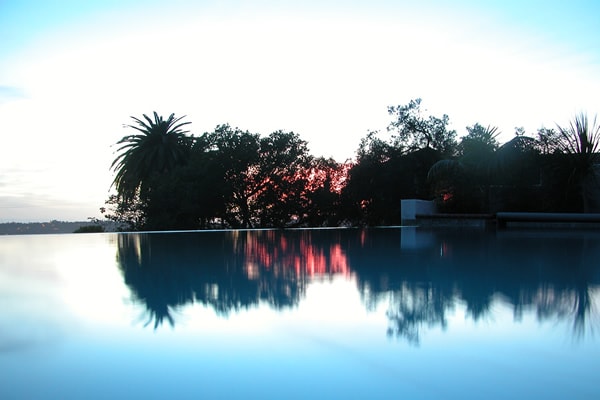
photo by Doc Searls
This is simply a reversal of problem 4 and is corrected with the same tool – the ND filter. This is a more common problem as well – most photographers will have had at least one shot with burnt out skies.
6. Relying on the LCD
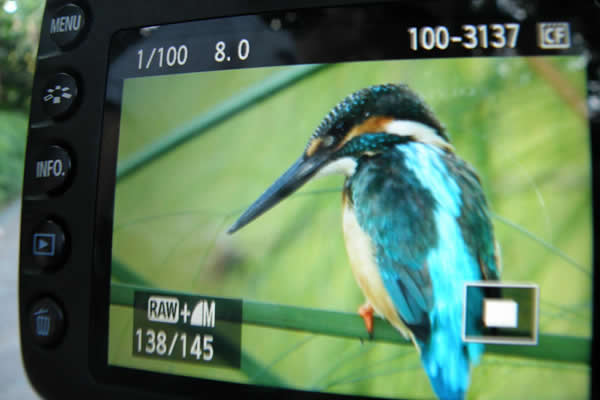
photo by Hanumann
Some people probably don’t remember a time before digital photography but, back in the old days (of not that long ago!) we used to shoot everything on film. And film cameras didn’t come with a LCD screen to check our shots as we went along.
One of the biggest problems though with said LCD screen is that many people rely on it to ensure that their image is correctly exposed. However, LCD screens are notoriously unreliable and are normally set around 2 stops brighter in order for the pictures to be easily viewable. This artificially bright screen can fool people into thinking their photo is correctly exposed.
The solution to this is simple – stop relying on your LCD screen and shoot like a proper photographer! The simplest way to tell if your photograph is going to be correctly exposed is to look at your exposure indicator line (going from – to +). If the line is in the middle or on zero, the image will be correctly exposed.
7. Using too slow a shutter speed

photo by Brett Curtiss
When you’re trying to ensure that your photograph is correctly exposed, it’s very easy to forget the importance of a fast-enough shutter speed. With about 90% of shots, the first thing set is the aperture, as this will influence the depth of field and therefore the overall appearance of the shot.
This is fine if you’re shooting outside with plenty of natural light. But problems often arise when shooting indoors – particularly if you’re in a place that has banned artificial lighting.
You need to be shooting at 1/60th of a second and above to ensure pinsharp shots. Obviously, a simple solution is to use a tripod. This will allow you to do slower shots without risking camera shake. But a tripod isn’t always suitable for use. In this case, the obvious alternative is to up your ISO to cope with the lower lighting conditions. A lot of photographers (myself included) aren’t very fond of high ISOs, as you can start to notice noise and deterioration in the quality of the shots. However, digital technology is improving all the time and higher ISOs are now achievable without so much loss in quality.
Hopefully, following these points will help you to overcome any exposure problems you may have without too much fuss!
About the Author: Jo Plumridge
Jo Plumridge is a UK based photographer, writer and lecturer. She specializes in portrait, corporate and travel photography, and writes photography, travel and comedy pieces for magazines, websites and books. You can see some of her work at her website, or follow her on Twitter.