Adventure Photography 101 – How to Do It Right

Adventure photography isn’t for those who like living life on the sidelines or those who don’t want to get their hands dirty. This genre of photography puts you right into the thick of things… where the action is. If you like the thrill and adrenaline that comes with being an active participant in your art, then this is right up your alley.
You see, adventure photography is one of the few genres in the field where, much of the time, you’ll have to actually partake in the exhilarating experience that you’re shooting. This is too much for some, understandably, but if you’re the kind of person who enjoys an all-natural high that comes with adventure, you may want to try your hand at this.
Doing adventure photography right can mean the difference between taking amazing shots that you’ll remember for a lifetime and actually hurting yourself! So read on to learn how to do it just right.
Hiking and Biking Shots
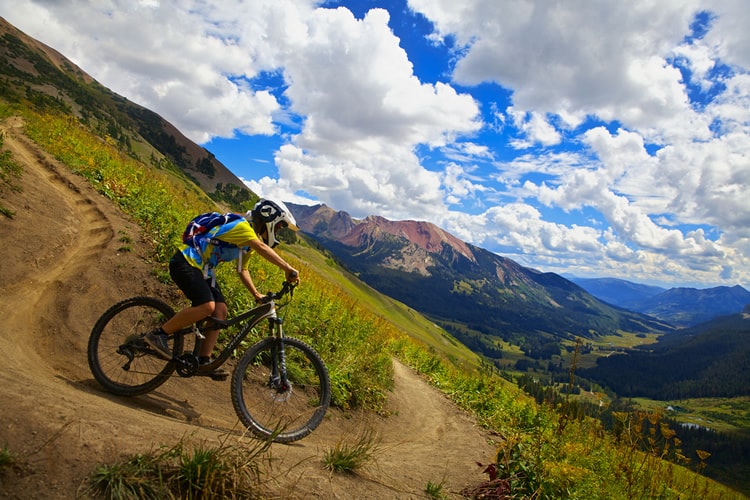
photo by Zach Dischner
Hiking and biking excursions are ideal for this kind of photography. Plus, they’re a very accessible pair of activities that everyone can easily throw themselves into. Of course, there’s the issue of what camera and equipment to take along, right off the bat.
Here’s the rule of thumb: Make your decision based on what shooting situations you expect to find yourself in. Let’s say you’re biking. Well, in that case, it’s advisable to keep your camera right above your hydration pack since it affords efficient access. Since you may not always have a lot of time to set up your shot, consider going with a simple point-and-shoot camera, too. You can place this inside of a pocket that’s attached to your hydration pack’s shoulder strap. When actually bicycling, just put the camera in a bike pannier or regular pack.
When hiking, go with what works best, which, in this case, would be carrying your camera in a belt pack or just around your neck. Naturally, you want your camera handy when hiking since you’ll come across interesting spots, terrain and maybe even a settlement or two. The best shooting times are both early morning (light is really clear then) and late evening (light is gorgeous then); even foggy shooting situations work, again, due to the interesting light conditions.
Winter Sports Shots
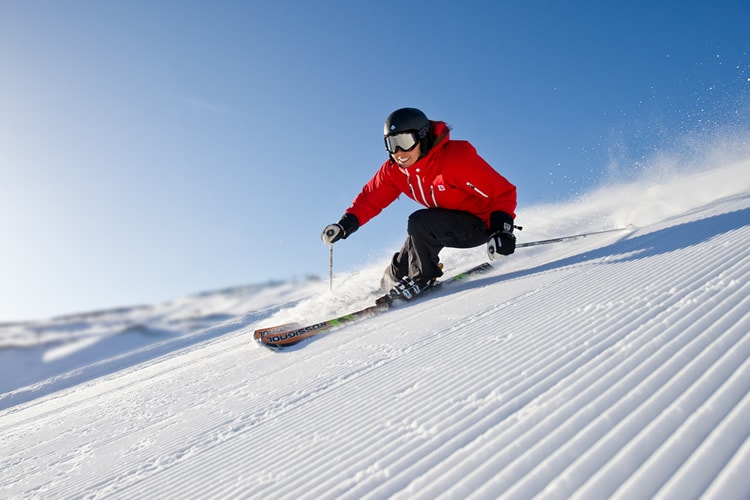
photo by Trysil
When winter rolls around, the average among us will want to break that old turtleneck sweater out of the closet. The more adventurous among us will want to take intense shots of winter sports activities. Hey – to each his own! Usually, when you’re shooting winter sports like skiing and snowboarding, you’ll be ahead of the skier or snowboarder as you determine a choice shooting location.
Skiing and snowboarding in particular demand photographers who are quick to react to the action and shoot. If you keep your camera in a normal pack, you’ll be impeded in getting to it in time. Instead, a hip pack with a useful shoulder strap and waist belt is the smart choice. Naturally, you’ll want a hip pack with a zipper to keep out snow and anything else that could damage your camera.
A note of caution: Never, ever wear your camera around your neck when skiing or snowboarding. This much should be obvious because, unlike with hiking, you could actually be injured if you fell on your camera.
Water Sports Shots
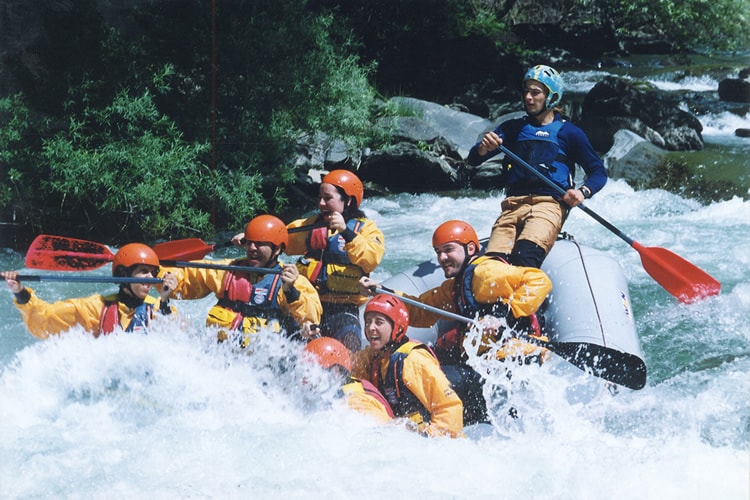
photo by sargue
In the summertime, what could be more ideal than incorporating water into your adventure photography? When you shoot water sports, know that both fresh and salt water are corrosive to your camera, so your thoughts must be with extra protection. It’s recommended to store your camera in a waterproof bag or case.
Rafting shots are always high-octane and exciting. Be prepared to invest a good deal of time in such a shooting excursion (we’re talking up to five hours a day!). It takes this long because of travel time, setting everything up and, of course, getting to a place on the river that offers exciting shooting opportunities. If you’re quite careful, you can snap pictures from a raft, provided it’s flat water and you have a waterproof case.
A wide-angle zoom lens is tops when it comes to taking pictures of boats. A 17-35 zoom lens should suffice. It’s recommended that you experiment with various, slower shutter speeds to determine what produces the best shots.
Mind reflections when shooting water pictures, as they’re great, creative tools. When the water is calm, look for reflections on the surface during both sunset and sunrise (again, coinciding with generally the best times of day to shoot, due to the light quality). Remember that reflections look more effective when the water is in between the brightest portion of the sky and you.
Bonus: Roundup of Must-Know Adventure Photography Tips
Now that we covered specific shooting situations in adventure photography, we thought a great place to end would be to offer some of the most vital, all-purpose tips in this genre. They are:
- Always look for the extraordinary (angle, perspective, point of view, etc.) in shots.
- Isolate subjects in composition.
- Use storytelling in your images.
- Do copious research before your adventure trip by understanding how other photographers before you have attempted to cover such treks.
Add Some Adrenaline Into Your Photography
Adventure photography is a genre that covers a broad range of shooting subjects, locales and approaches. It can be seasonal (winter sports versus summer activities like hiking or boating) just as much as it can involve your participation or simply photographing others in activities.
If you’re committed to trying your hand at this style of photography, it’s best to be very meticulous when you plan for your trip or excursion. This’ll be quite different from your usual shots of people relaxing in a park on Sunday afternoon. Accordingly, you’ll want to have all the right equipment and proper camera with you, so that your adventure-photography experiment won’t be in vain.
Have you ever tried adventure photography before? If you haven’t yet… think you’ll like it? Whatever the case may be, incorporate our tips above into your next excursion, and then come back and leave a comment to tell us how well they served you!
About the Author: Marc Schenker
 Marc is a copywriter and content marketer who covered photography. These days, he runs The Glorious Company, a content marketing agency.