The Importance Of Tuning Your Camera’s Diopter
 by
Adam Welch
by
Adam Welch

A successful image is the result of doing a lot of little things well. This means that your shutter speed, depth of field, ISO, and framing all must come together just right. A photograph, like most everything, is often only as strong as it’s weakest point.
Making sure your image is well-focused is one of the “make or break” aspects that can separate a great image from those that are just “good“. How can you ensure that what you’re looking at is really in focus?
If your eyesight is like mine and is less than perfect then you probably wear some type of contact lens or glasses daily. Have you considered how those glasses or contacts affect what you see through your viewfinder? How do you know your are perceiving a scene through your camera as sharp as possible?
The shockingly simple answer is by adjusting the camera’s diopter. If the word diopter doesn’t ring a bell then keep reading and if it does keep reading nonetheless. Adjusting the diopter of your viewfinder is one of the smallest yet important things you can do to ensure that your scene is focused properly.
Fine-Tuning What The Camera Sees
The basic function of an adjustable diopter is to fine-tune how you see what the camera sees. With SLR and digital SLR cameras, light enters through the front of the lens and is reflected by the camera’s mirror up into the viewfinder’s pentaprism (basically a five sided reflector) allowing you to compose your shot. The diopter adjusts only the clarity of the reflection from that prism and does not focus the captured image itself.
Today, virtually all cameras with physical viewfinders have some type of diopter adjustment so that you can compensate for your own unique vision. This adjustment is usually made through a small wheel located somewhere in the vicinity of your camera’s viewfinder.
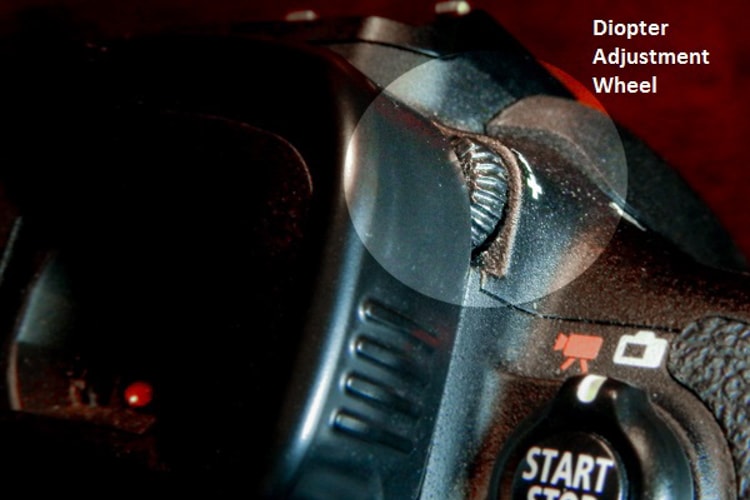
There will be markings indicating a negative(-) or positive(+) ends of adjustment. The best method I have found involves the following steps:
First, remove the lens from your camera body.
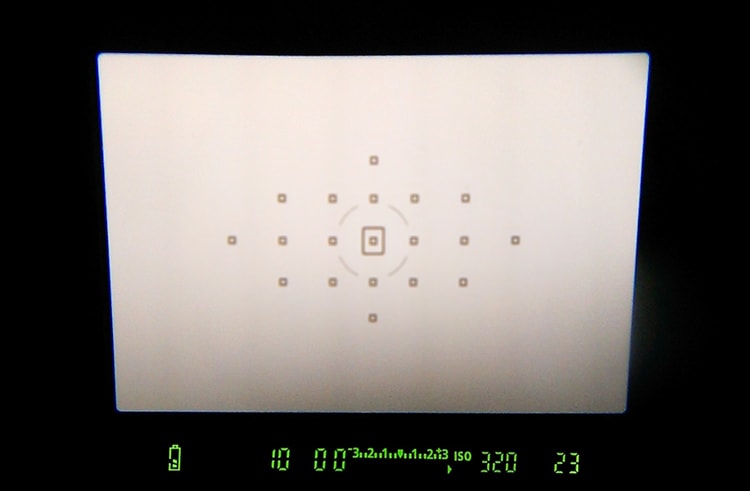
Second, point the camera (careful not to get anything like dust inside!) at a light color and well lit surface like a wall or ceiling. Look through the viewfinder and you should be able to see the focus points. Depending on your camera make, you will probably need to power on the camera to see these.
Third, turn the diopter dial all the way to the positive(+) side. Don’t poke yourself in the eye… yes, it does apparently happen.
Fourth, slowly, click by click, turn the wheel towards the negative(-) until your focus points appear to be at their most sharp.

Now, reach over and extend your right hand behind your head just below your shoulder and gently pat that area three to four times. You deserve to give yourself a pat on the back because you have just accomplished a small but very important step in becoming a better photo maker.
Making this adjustment becomes very important in helping you reach the true potential of whatever gear you might be using. Although the viewfinder focus does not directly affect the actual image focus it does enable you to see what your camera sees much more clearly. Furthermore, a properly adjusted diopter becomes essential if you have a manual-focus lens or when fine-tuning your autofocus.
About the Author: Adam Welch
Adam is an author, adventurer, photographer and a jolly co-founder of Contrastly. You can usually find him on some distant trail making photographs, in his darkroom or at his computer writing and planning his next project. Follow his work over at his
website , Facebook, Instagram and YouTube .