Creating Your Own Photography Gear – 5 Easy Projects

Part of the fun with photography, is creating your own photos. But did you know that you can create your own photography gear as well?
Making gear from scratch isn’t hard, especially if you enjoy creating things. DIY gear can be fun, and it is a great way to test out gear before you purchase it. Here are five DIY photography projects. Most of this gear can make out of simple items that you probably have at home right now.
1. Seamless Background – For Small Objects
Perhaps one of the easiest DIY photography projects is the seamless background. This background is perfect for macro photography, or for photographing small objects.
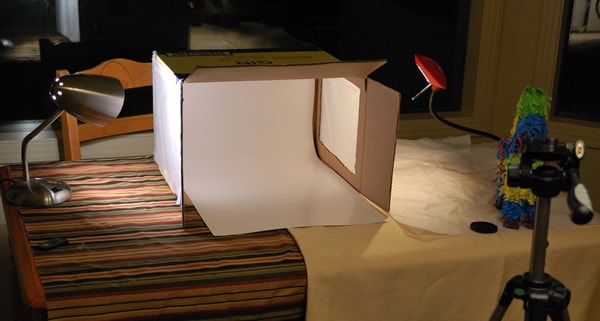
photo by Craig Dugas
To make the seamless background, you will need a chair (or a cardboard box), a poster board, and tape – that’s it. Tape the poster board to the back of the chair, and let the poster board slant down onto the chair’s seat.
Place this seamless background next to a wide window to let in plenty of light; this will help give your photos a professional look. The seamless background works great for photographing food as well as small items, and is useful for when you need a simple, professional looking background, without the creases that a standard background would have.
2. DIY Bokeh Shapes
Creating shapes out of bokeh is easy and fun. You can make your own bokeh shape kit with black paper and tape. To create bokeh shapes, it’s best to use a large aperture lens. Something like a 50mm f/1.8 is ideal, a 50mm f/1.4 is even better. While you probably can’t create a DIY large aperture lens, you can create the shape adapters that fit onto the lens.

photo by Christina Harman
To create a DIY bokeh shape kit, cut and shape black paper to create a fake lens hood. Then cut a square shape in the center of the front of the cover. To create the slides that will go over this square, cut out a rectangle from black paper, and use a hole punch to cut a shape in the center.
Alternatively, you can cut your own shapes out using a craft knife. Secure this slide to the lens hood, by taping two pieces of paper onto the lens hood, and slotting the slide through. You can make as many different slides as you wish!
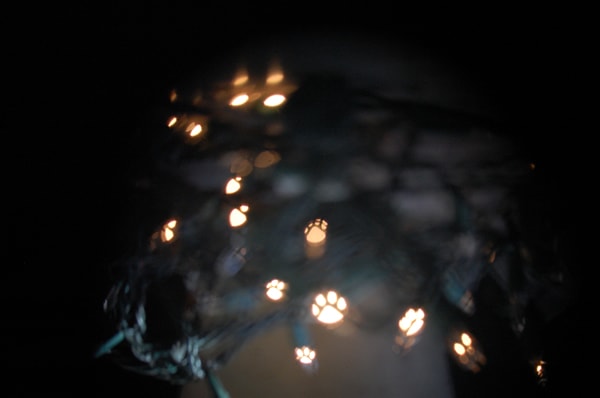
photo by Christina Harman
When cutting out the shapes, gauge the size of the shape hole by looking through the viewfinder. You will want the shape to be about 15mm. You can use a hole punch for shapes or create your own. You can make stars, hearts, paw prints -anything you can think of really. Check out the video below for more details on making the bokeh shapes kit.
3. DIY Light Tent
Light tents are perfect for diffusing light, helping to eliminate harsh shadows. They work great for winter photography, when natural light is scarce, or for situations where you need the object to be well lit at all angles.
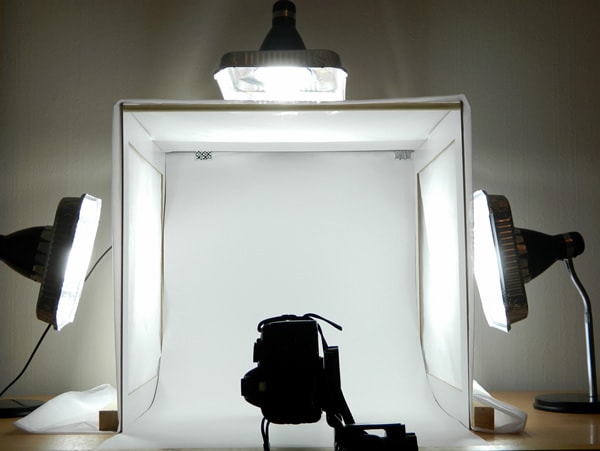
photo by Alison Christine
Make your own light tent by constructing a simple frame from wood. If you don’t have any wood, a large cardboard box will do. Cut the sides out of the cardboard box to create windows, leaving behind the supporting frames.
Then cover the sides with white paper, or some white net curtains, leaving the front open. For the background, hang a piece of white paper from the back of the light tent, and allow it to hang down towards the front, creating a slight curve. This will give you a nice smooth background, without a crease.
To light up your tent, set up two lamps, one on each side of the box. You could even have a third one shining down through the top. If the lighting is too bright, adjust the lighting by moving the lamps away from the tent. Now have fun taking professional looking photos of various items. You can even do portraits if your light tent is big enough –as long as you can convince your subjects to step inside!
4. DIY Ring Flash Adapter
Commonly used in fashion shoots, a ring flash creates a nice, even light without any hot spots. It also provides an almost shadow-less look to the front of the subject, and surrounds them with a halo type glow.
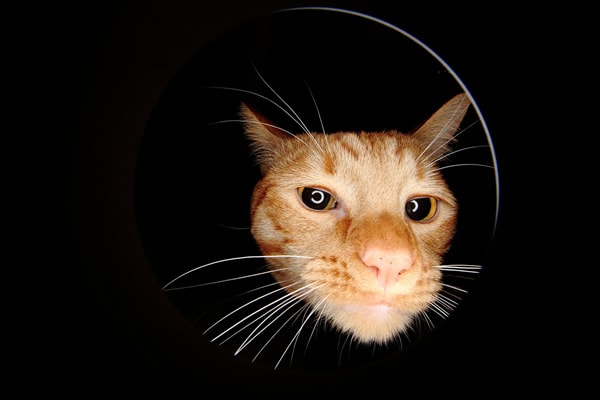
photo by cvc_2k
As a side note, ring flashes also create those ring shaped catchlights that are found in subjects’ eyes. Ring flashes aren’t just for fashion shoots though, they can also be used for portraits or even macro photography. If you are interested in trying out a ring flash, but don’t want to shell out $200 for one just yet, try making one yourself. These can easily be made by using a template for a paper ring flash adapter from DIY Photography.
Or, you can get a bit more fancy and make a more durable and professional looking one from flexible cutting boards, reflector tape, and black paint. The instructions for this ingenious ring flash can be found here.
5. Reflectors and Diffusers
Reflectors and diffusers are easy to make. White sheets work great to diffuse light, and can help to soften shadows for outdoor portraits. A white sheet also doubles as a reflector, helping to bounce the light back onto the subject’s face, adding a nice glow. You can construct a frame for your sheet diffuser/reflector out of PVC pipes.
By purchasing PVC pipe, along with elbow connectors, you have the option to create and recreate multiple sized frames. The PVC frames are a great option for travel, as they can be taken apart and reconstructed easily. By using clamps to attach the sheet to the frame, it makes it easy to hold the reflector too.
A car sun shield, mounted to a foam board is an easy way to create an instant silver reflector. When photographing a subject outdoors, place the fill flash on one side of the subject, and the reflector on the other side. The reflector will act as a type of fill flash, helping to reflect and distribute the light more evenly. Silver reflectors are more powerful than white ones, and work best in low light situations, or in situations where you need a stronger light reflection.
When it comes to photography equipment, you can make tons of gear yourself. While lenses and camera bodies generally can’t be recreated at home, many accessories can easily be made. DIY projects are a great, economical alternative to buying new -especially if you are only planning to use the equipment occasionally.
For more information on DIY photography projects, be sure to check out DIY Photography. They have a whole collection of projects available, complete with detailed instructions for each one.
Have fun and happy shooting!
About the Author: Christina Harman
 Christina is a part time blogger and full time photography enthusiast living in Southeast Alaska. She enjoys travel photography and has taken pictures in countries such as Mexico, England, France, and China. She likes sunny days, new lenses and drinking good coffee. You can visit her at Tangled Thoughts.