Ensuring Quality When Printing from Photoshop

As a photographer, there are few things more satisfying than being able to print your own work!
Taking your photos from start to finish is a rewarding experience – and a great way to showcase some of your best images. But even though the printing process has become simpler over the years, there are still a few things that you’ll want to do to ensure that your finished printed image is high-quality.
Often, though, what we see on the screen and what the final printed product looks like, are two entirely different things. The challenge is finding a way to translate the image that you see on your computer, into a tangible printed product.
Fortunately, taking your photos from Photoshop to printed image isn’t too hard… once you know what you’re doing, that is! With this in mind let’s take a quick look at what you can do to ensure the best results when resizing and printing from Photoshop.
Calibrate Photoshop
First things first, you’re going to want to make sure Photoshop is calibrated properly. This will allow you to view your photo at actual print size on the screen. To do this, you’ll want to find out what your screen resolution is, and then make the change in Photoshop’s settings.
Step 1: Measure the width of your screen
Measure your laptop or pc screen horizontally in inches. You can find this information in the owner’s manual, on the manufacturer’s website, or you could even just measure it yourself. The horizontal measurement of my screen is 13.5” across.
Step 2: Find your screen’s resolution
Next, make sure your monitor is in native resolution (if you have a retina display, make sure it’s set to the native resolution and not scaled up or down).
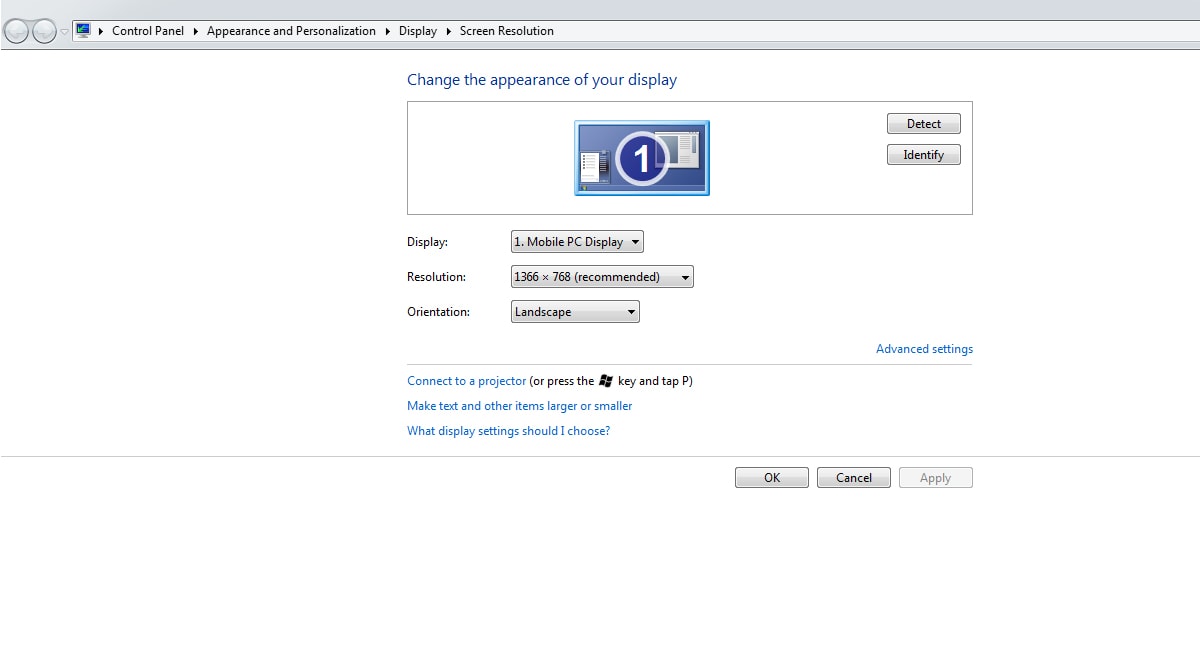
Windows: To find this on a PC, right click on the desktop to get the display settings. On most PCs you can right click on the desktop and then click screen resolution to find this.
Mac: On a Mac, go to the Apple Icon, click About This Mac > More Info. On my laptop, the resolution is 1366 x 768 – the recommended settings.
Step 3: Do the Math
Take the length of your screen horizontally in inches – this is 13.5” in my case – and divide it by the number of pixels horizontally – this is 1366 for me.
So, in my case:
1366 pixels / 13.5 inches = 101 pixels/inch (PPI)
Feel free to round up or down to get a whole number!

Step 4: Change the Settings in Photoshop
Now, head over to Photoshop, and find your “Units & Rulers” section. This should either be under Photoshop > Preferences, or Edit > Preferences. Next to “Screen Resolution,” put in the PPI that you just calculated. In my case, this was 101. Hit save!
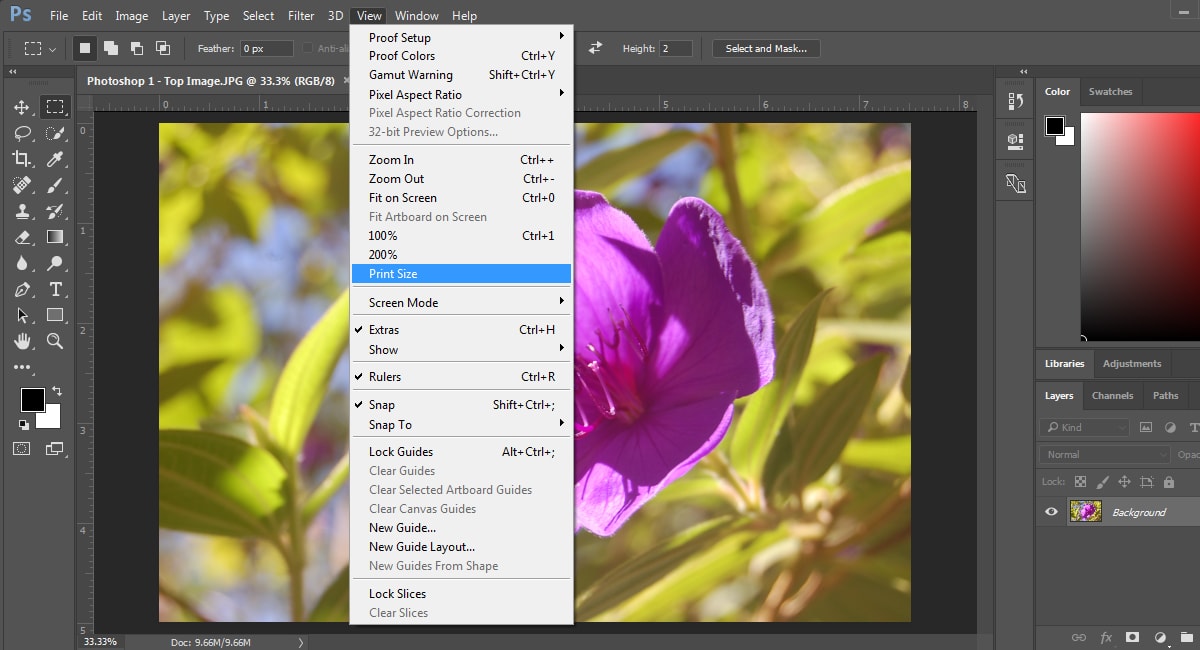
Step 5: Check It Out
Now, open a photo in Photoshop, and view the print size to see what it will look like. To view the current print size go to View > Print Size. Make sure it’s in inches. This is what your image will look like when it’s printed. If you don’t see a ruler, enable it by going to View > Rulers and selecting it. The inches on the ruler that appear on the screen should represent an actual inch – you can verify this with an actual ruler to make sure. If everything lines up, congratulations! You’ll be able to view your images in actual print size now.
Change the Image Size
Ok! We’ve calibrated Photoshop. Now, let’s see how we can resize an image for print.

Here’s a look at how you can resize an image to a 6×4 print
You want to make sure the images that you’re printing will work for the frame that you have, or the photo album that you’ll be using. Let’s look at resizing to a 6×4 print as an example.
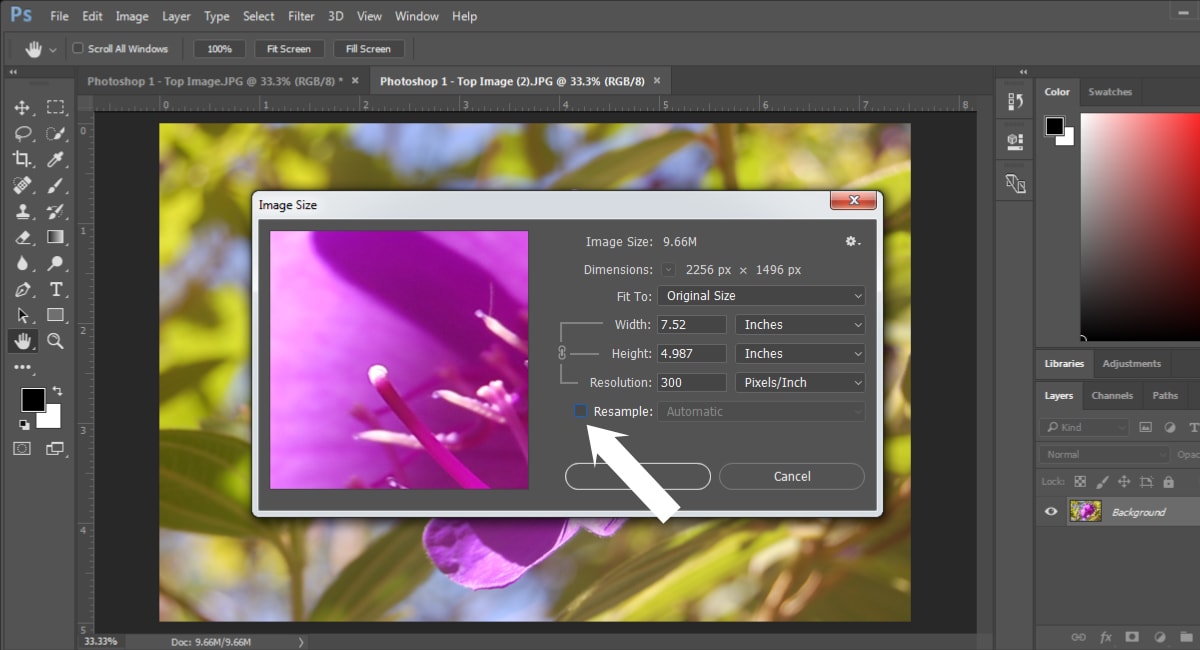
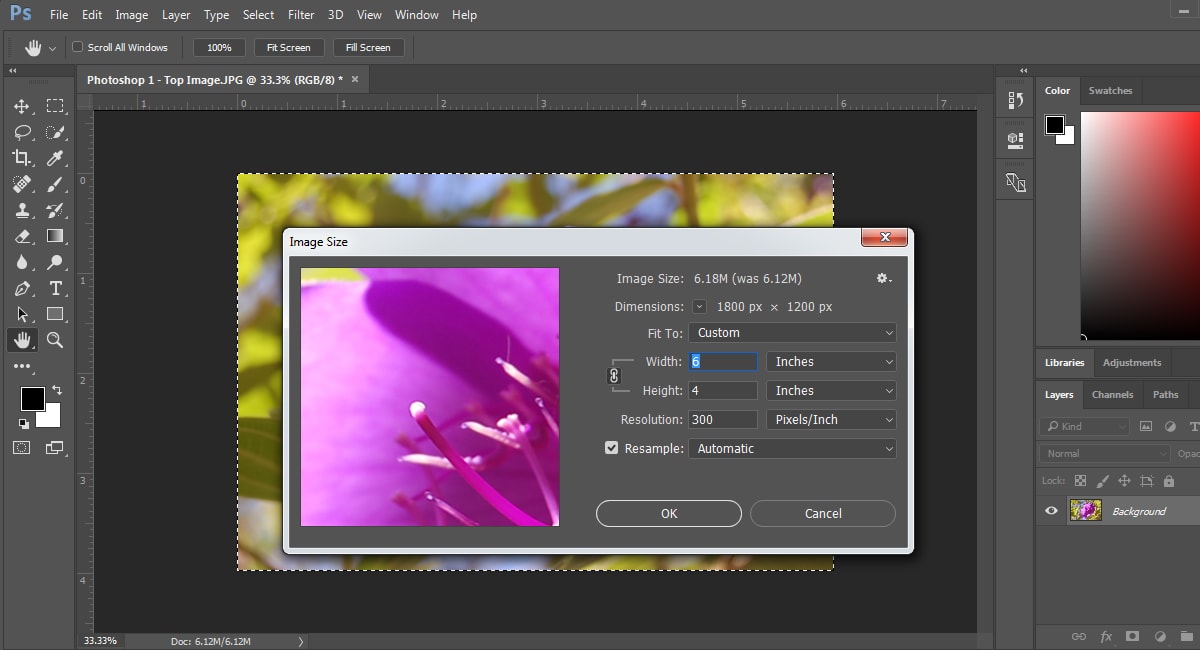
The Resample Field
Head to Image > Image Size. Make sure the box for “Resample” is unchecked. Find the Resolution field, highlight the number, and enter in 300. Once you’ve changed the resolution, the physical dimensions of the image, that is, the width and height should change too. By unchecking the Resample box, and changing the resolution, you can make the image smaller, without losing any valuable data in the process.
Now, recheck the Resample box. Go to width, and enter in 6. The height box will probably read something like 3.979 – which is close enough for more cases when you’re printing, but in order to ensure absolute accuracy, you’ll want to take things a step further.
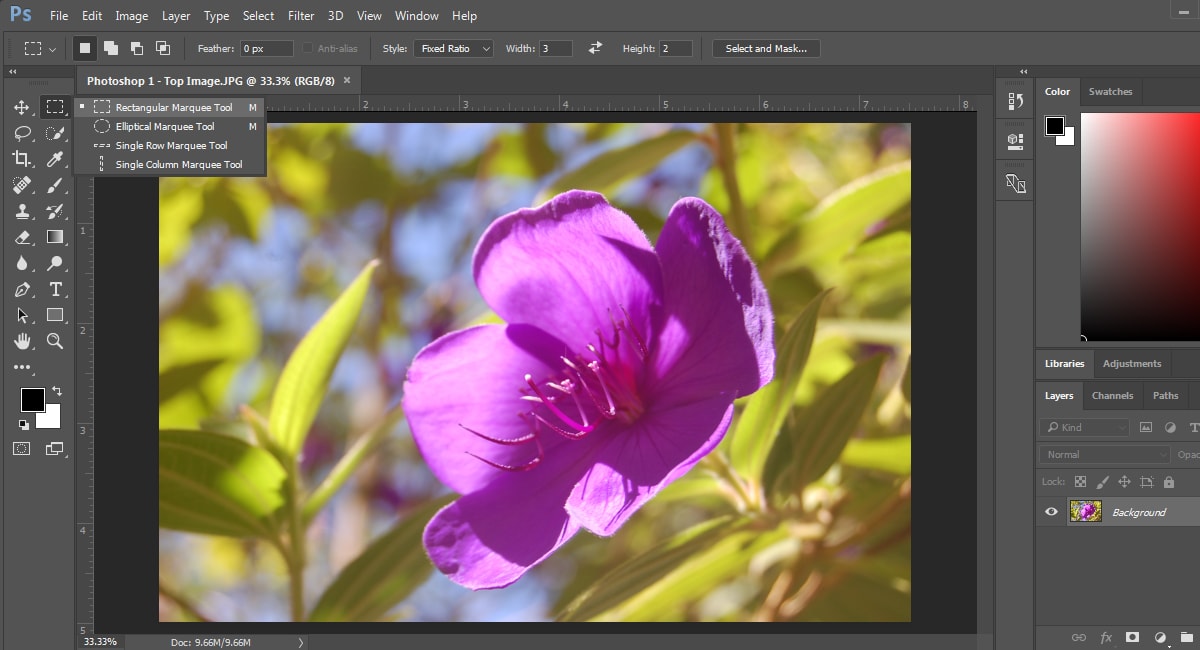
Using the Marque Tool
After hitting OK, navigate to the Marque Tool, located in the top left-hand corner, and select the rectangular marquee. Go up to the style drown-down dialogue and select Fixed Ratio. If your picture is in landscape orientation, you’ll want to input 3 for width and 2 for height at the top of the menu.
Now, go to the upper left-hand corner, click on the corner of the image, and drag open the box. You can drag the box around to position it. Once you’re happy with it, go to Image > Crop.
Adjusting the width
Now go up to Image > Image Size, and, making sure the Resample box is checked, click the width to change it to 6. The height should automatically change to 4. Your picture should now be a perfect 6×4. Save your image to your desktop, and it’s ready to go for print!
What Size Prints Can You Make Without Losing Quality?
“How large can I print my image?”
This is a common question. Naturally, since you’ll want to know how large you can take your print before things start to look grainy. Unfortunately, though, there’s not a one-size-fits-all answer to this question. The answer is that it depends on a number of variables, including the quality of the camera, and the native pixels of the camera.
Generally, though, printing is done between 150-300 PPI, with 300 being the optimal standard for magazine quality prints. As a general guideline, the more pixels per square inch that you have, the better the quality the image will be.
Still, despite all of these variables, there’s a fast and simple way to tell how big you can make your images, without losing quality. Here’s what you should do:
Go to Image Menu > Image Size.
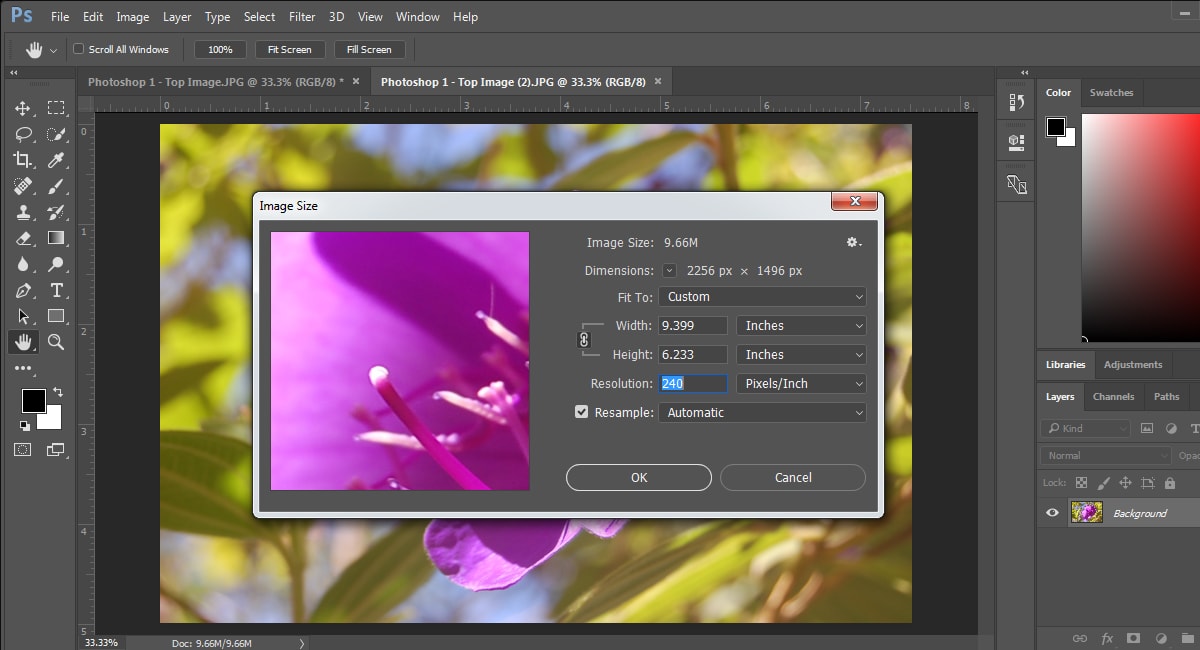
Determining the maximum size
Keep in mind that a common resolution for an inkjet printer is 240 PPI. So you’ll want to deselect the Resample box, click on the Resolution box, and then type in 240. In the width and height fields, you’ll see the numbers automatically change. This is the maximum size that you can safely print the image, before it starts to lose quality.
Next, recheck the Resample box to lock in the resolution at 240. Now, you’ll want to change either the height or the width field, to the size that you’d like one side of your image to be, making sure that it’s less than the maximum that it should be for high resolution.
In our example above, the width is 9.399 and the height is 6.233. This is the biggest size that the image can safely be resized to. So if you’re trying to get a 6×4 image, or even a 5×7 image, you’ll be ok!
Next, you’ll want to resize the image to your desired size. Let’s say you’d like a 5×7. Enter either a 5 into the height box or a 7 into the landscape box – if you’re doing a landscape orientation. Photoshop will automatically adjust the other field for you, to keep the ratio correct.
Note: When entering the height or width fields, you’ll want to ensure that both fields are the same size, or higher than the size that you’d like them to be. This will allow you to easily crop the image down to size later on. So, for example, if adjusting the height field causes the width to dip lower than the desired number, try adjusting the width manually instead and letting the program compensate on the height.
Click OK. Now it’s time to crop!
Select the Crop tool from the toolbox, and navigate to the options bar, and click the ratio field. This will contain a number of different popular print sizes for you to choose from. Choose the size that you’d like, in this case a 5×7. Click and drag the box around to adjust it, and then crop.
Go back to Image > Image Size. The width and height fields should say 5 and 7, and you now have a perfectly sized and high-quality image that you can print.
Hopefully, this tutorial helped! If you have any questions about Photoshop or photo editing in general, feel free to reach out!
About the Author: Christina Harman
 Christina is a part time blogger and full time photography enthusiast living in Southeast Alaska. She enjoys travel photography and has taken pictures in countries such as Mexico, England, France, and China. She likes sunny days, new lenses and drinking good coffee. You can visit her at Tangled Thoughts.