How to Change the Photo Story with Your Camera Lens
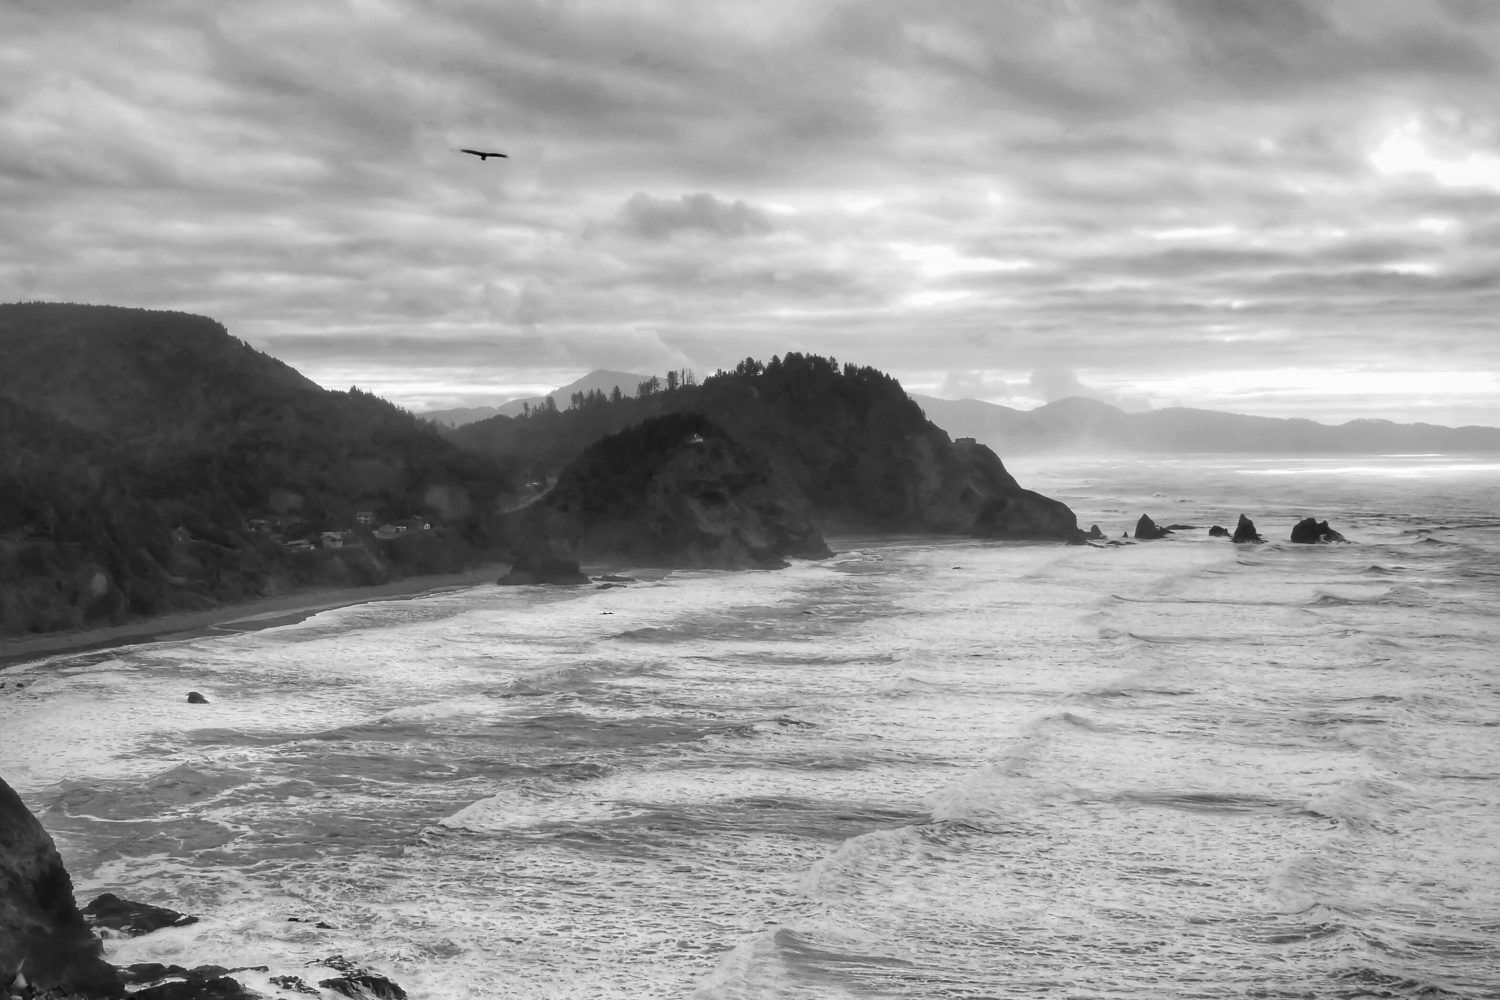
Photograph by Kent DuFault
LUMIX GX-85 with a 14mm lens, ISO 400, at f/11 and a shutter speed of 1/200th of a second using the aperture priority shooting mode and pattern metering. The original camera file is camera raw. It was converted to black and white in Photoshop.
When we reach for a lens to attach to our cameras or change the focal length of a zoom lens, there is typically one of two thoughts on our minds.
We want to bring something closer, causing us to go with a telephoto focal length.
Or we go the opposite direction with a wide-angle lens to expand the field of view and include more of the subject in front of us.
However, have you considered how changing the focal length of the lens changes the story you are about to tell with your photo?
In the opening photograph of this blog post, I have captured a scene along the Oregon coast using a wide-angle lens.
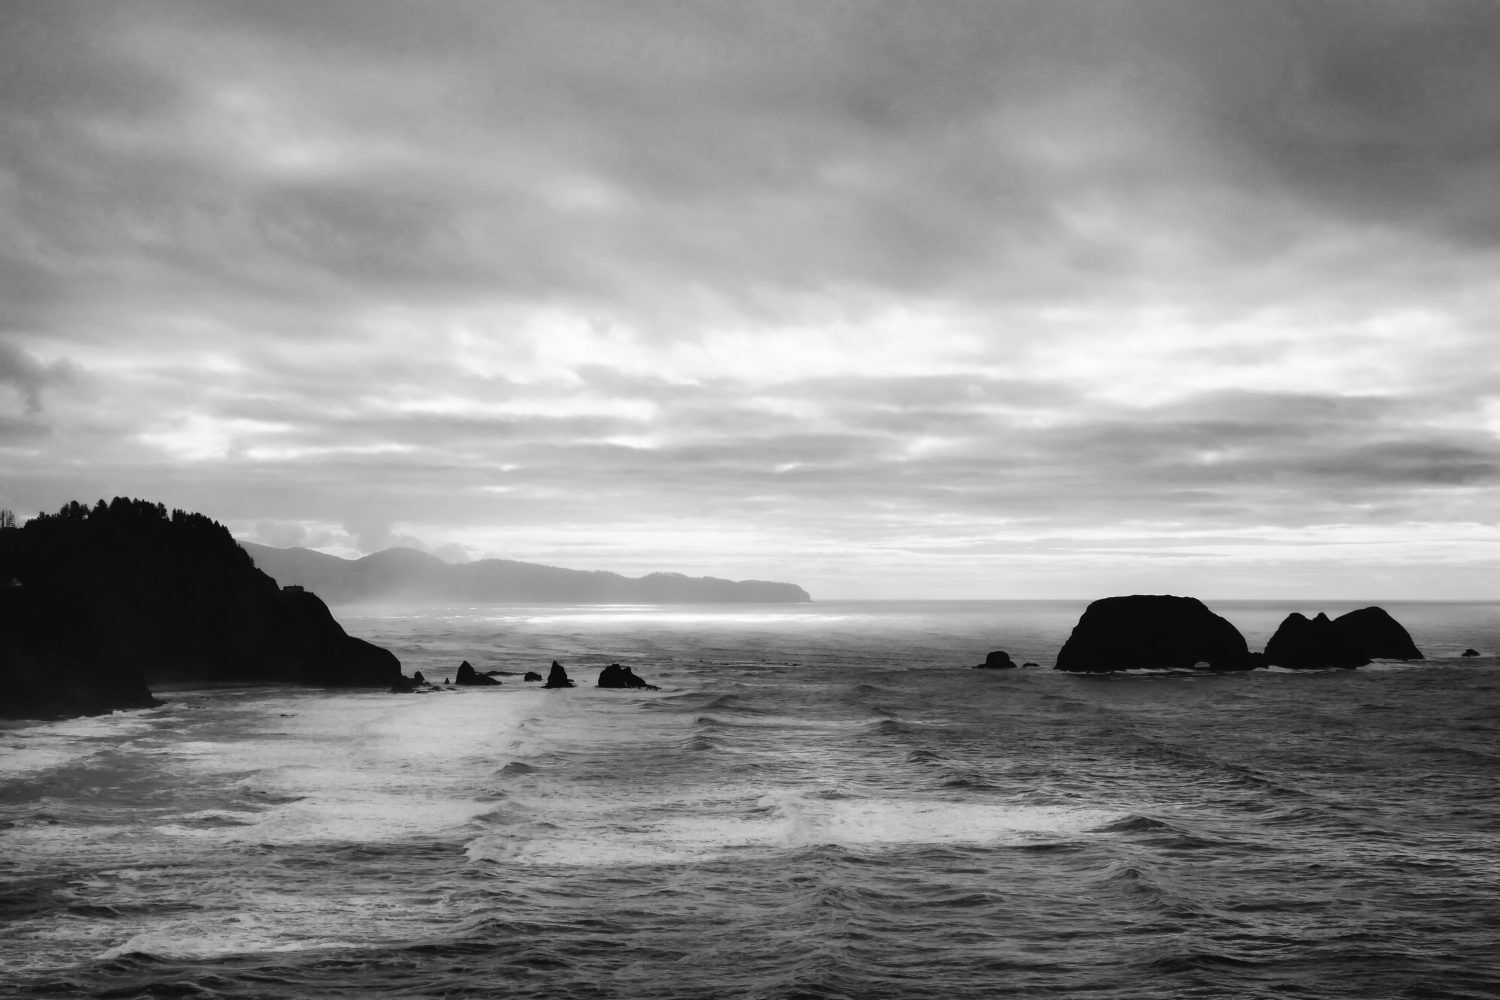
Photograph by Kent DuFault
LUMIX GX-85 with a 50mm lens, ISO 400, at f/10 and a shutter speed of 1/320th of a second using the aperture priority shooting mode and pattern metering.
I then decided to go through various lens focal lengths to see how it changed my scene’s narrative.
At the end of the article, I will show you all of the variations side-by-side for a pretty dramatic presentation.
The opening photo was the sweeping vista shot. It took in most of what I could see in front of me with my peripheral vision.
The second photo was created with a 50mm lens. It represents a more focused view on what was directly in front of me.
While it still has a ‘distant landscape’ effect, it no longer effectively communicates the idea of a sweeping vista.
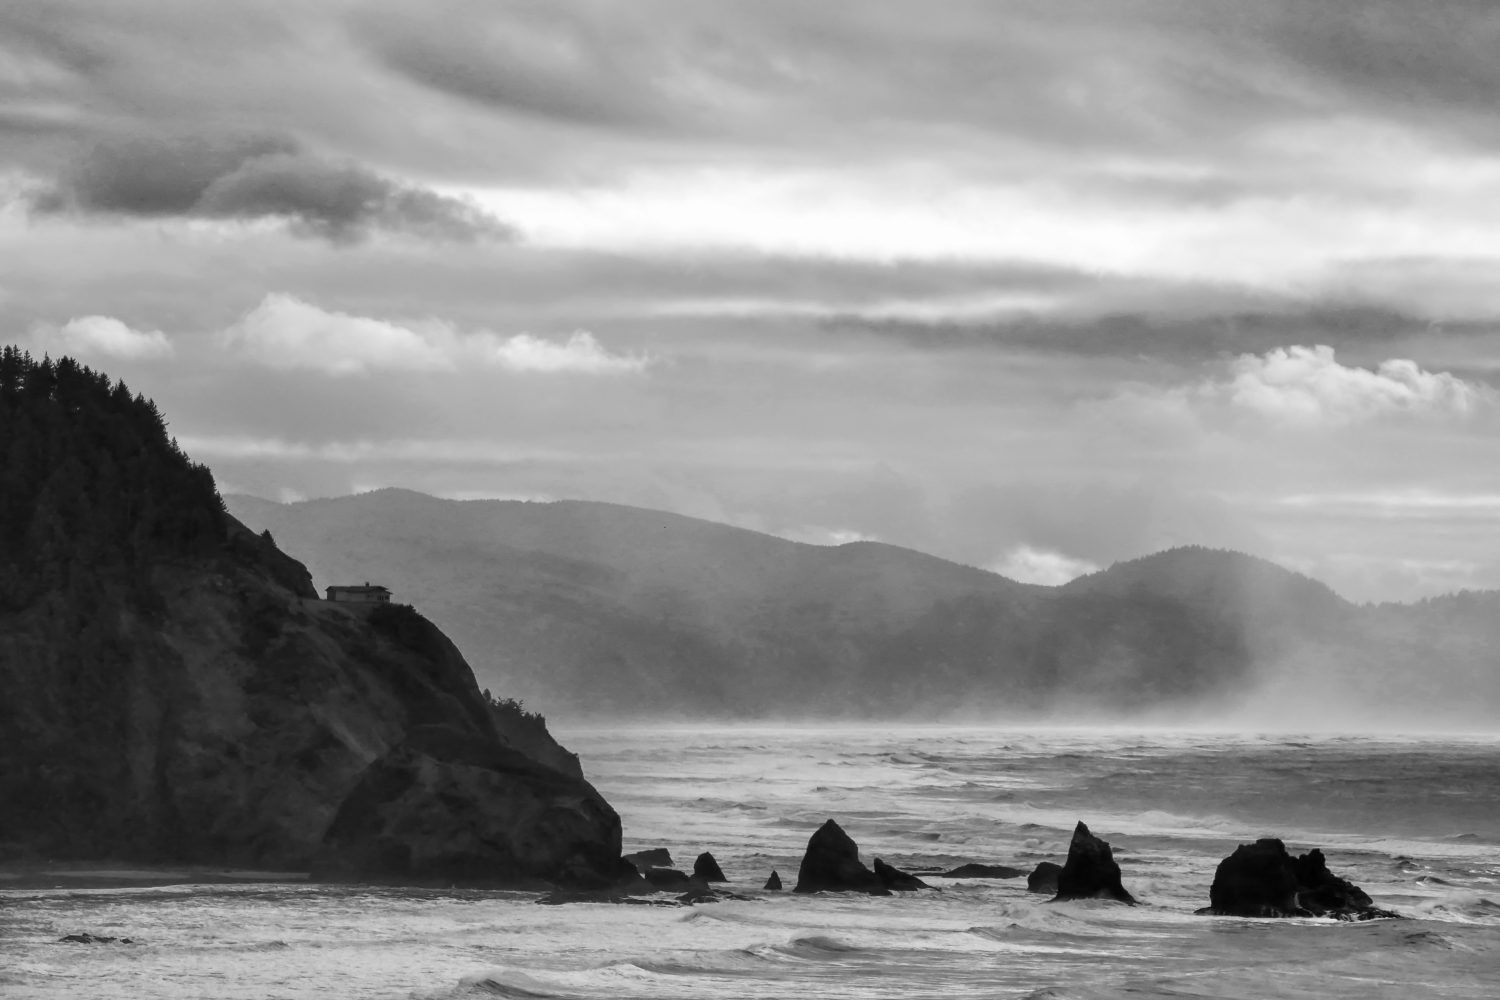
Photograph by Kent DuFault
LUMIX GX-85 with a 75mm lens, ISO 400, at f/10 and a shutter speed of 1/400th of a second using the aperture priority shooting mode and pattern metering.
At 75mm, the angle view is now a moderate telephoto angle of view on my GX-85 camera sensor.
Lens compression is now clearly evident. The story has drastically changed from a vista point-of-view (POV) to a ‘distant’ landscape.
What happens when I increase the focal length to 125mm?
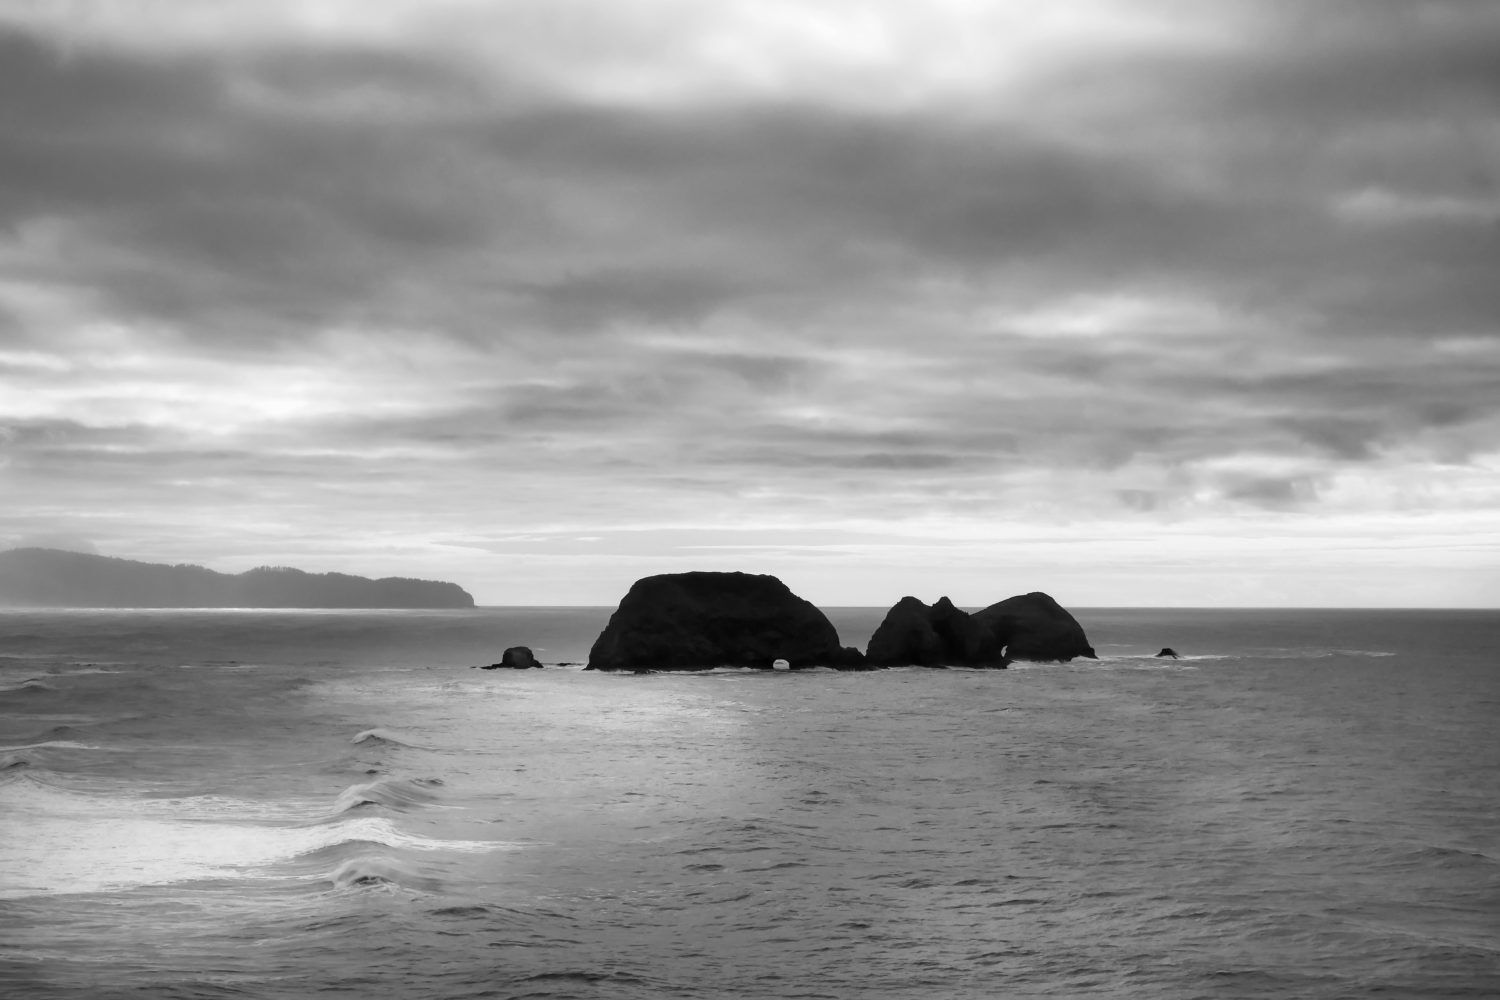
Photograph by Kent DuFault
LUMIX GX-85 with a 125mm lens, ISO 600, at f/9 and a shutter speed of 1/500th of a second using the aperture priority shooting mode and pattern metering.
My new focal length now forces me to decide on what story I want to tell. I can no longer include both the shoreline to my left and the interesting rock formation to the right.
Without changing my camera position, I decided the story was more interesting to me by concentrating on the rocks out in the ocean.
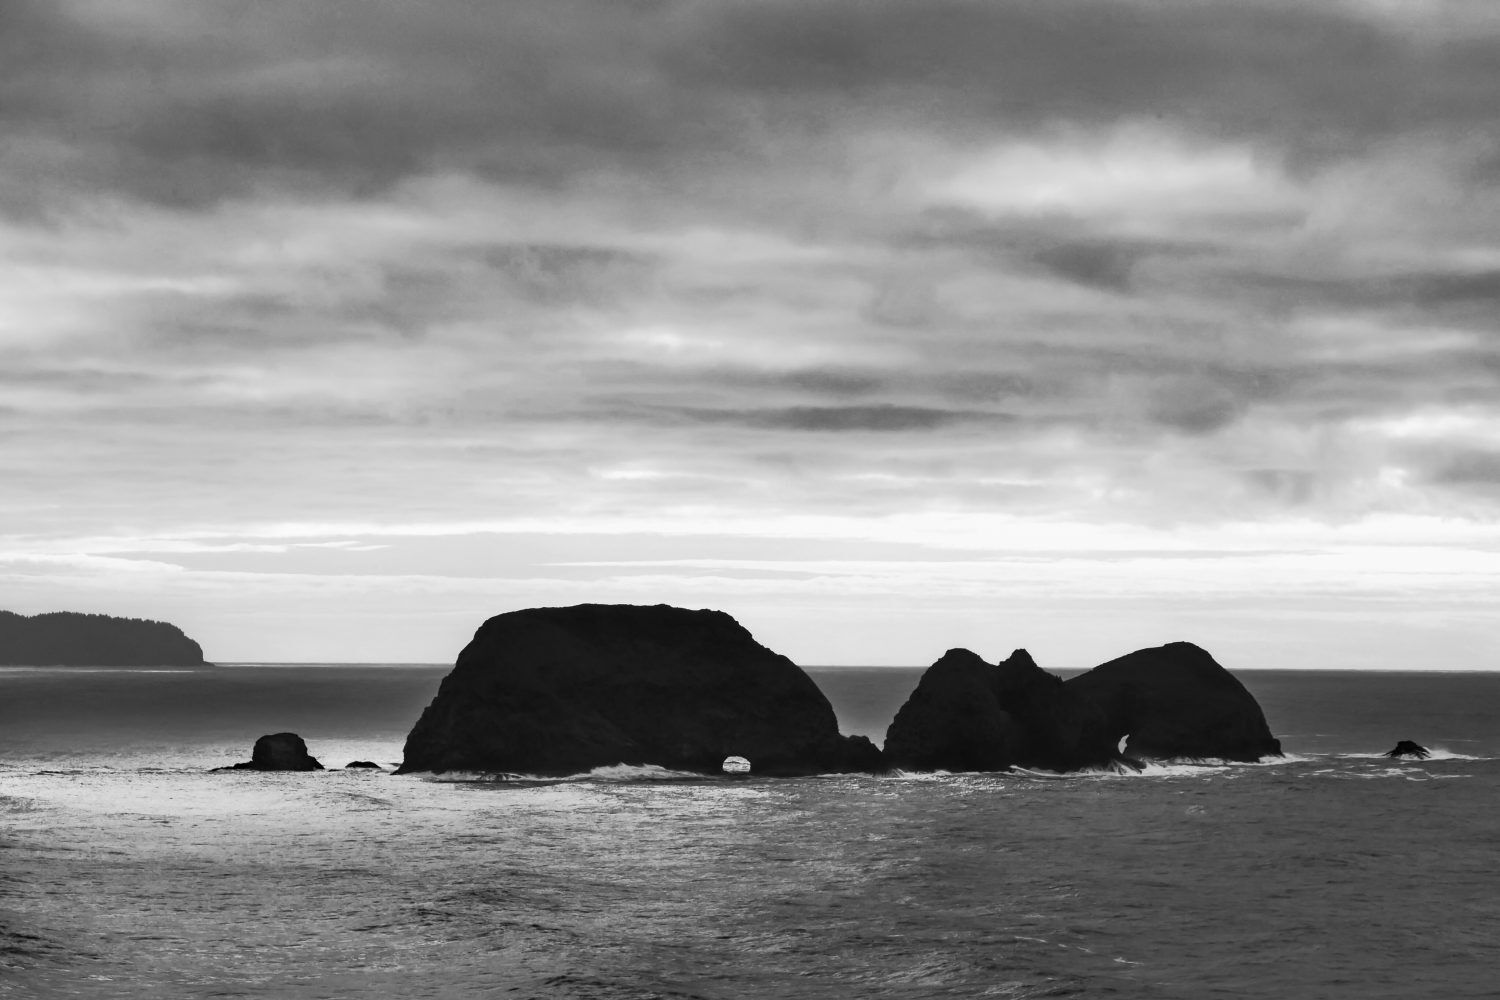
It was at this point that I noticed the holes in the rocks.
Photograph by Kent DuFault
LUMIX GX-85 with a 150mm lens, ISO 400, at f/8 and a shutter speed of 1/600th of a second using the aperture priority shooting mode and pattern metering.
At a focal length of 150mm, the rocks take over the story, with the holes becoming a very nice focal point to the subject. 150mm was the longest telephoto lens that I had with me.
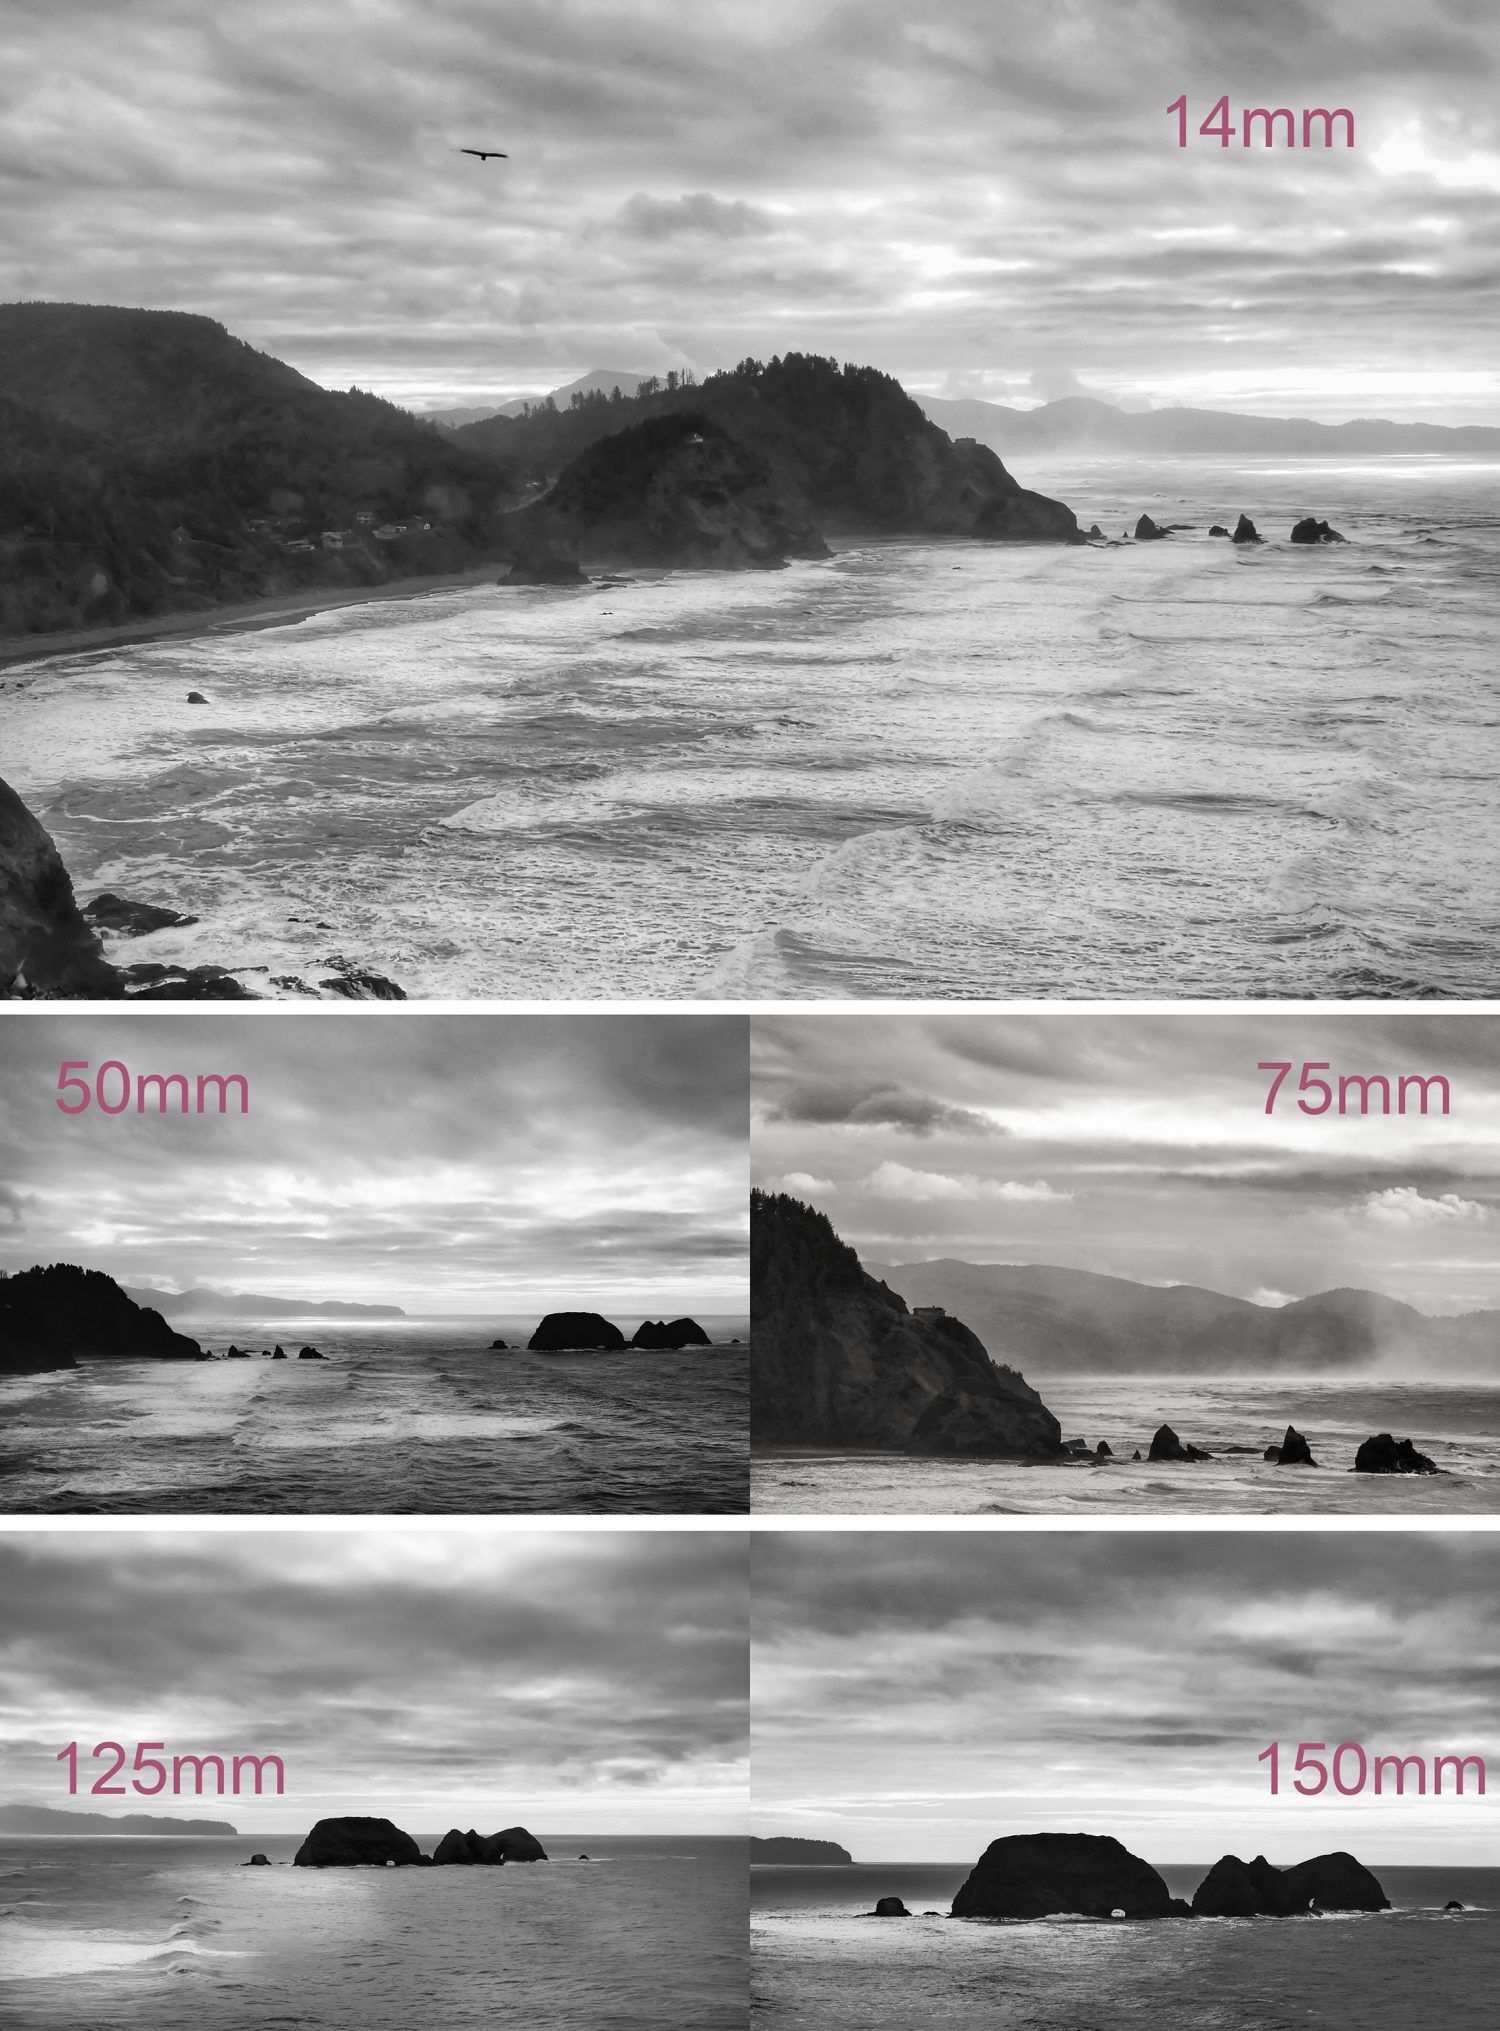
Let’s look at all five versions together.
Photographs by Kent DuFault
This collage illustrates the dramatic change in photo storytelling that is open to you by simply changing your lens’s focal length.
Important: Notice how I adjusted the composition with slight changes in the framing. My feet never moved.
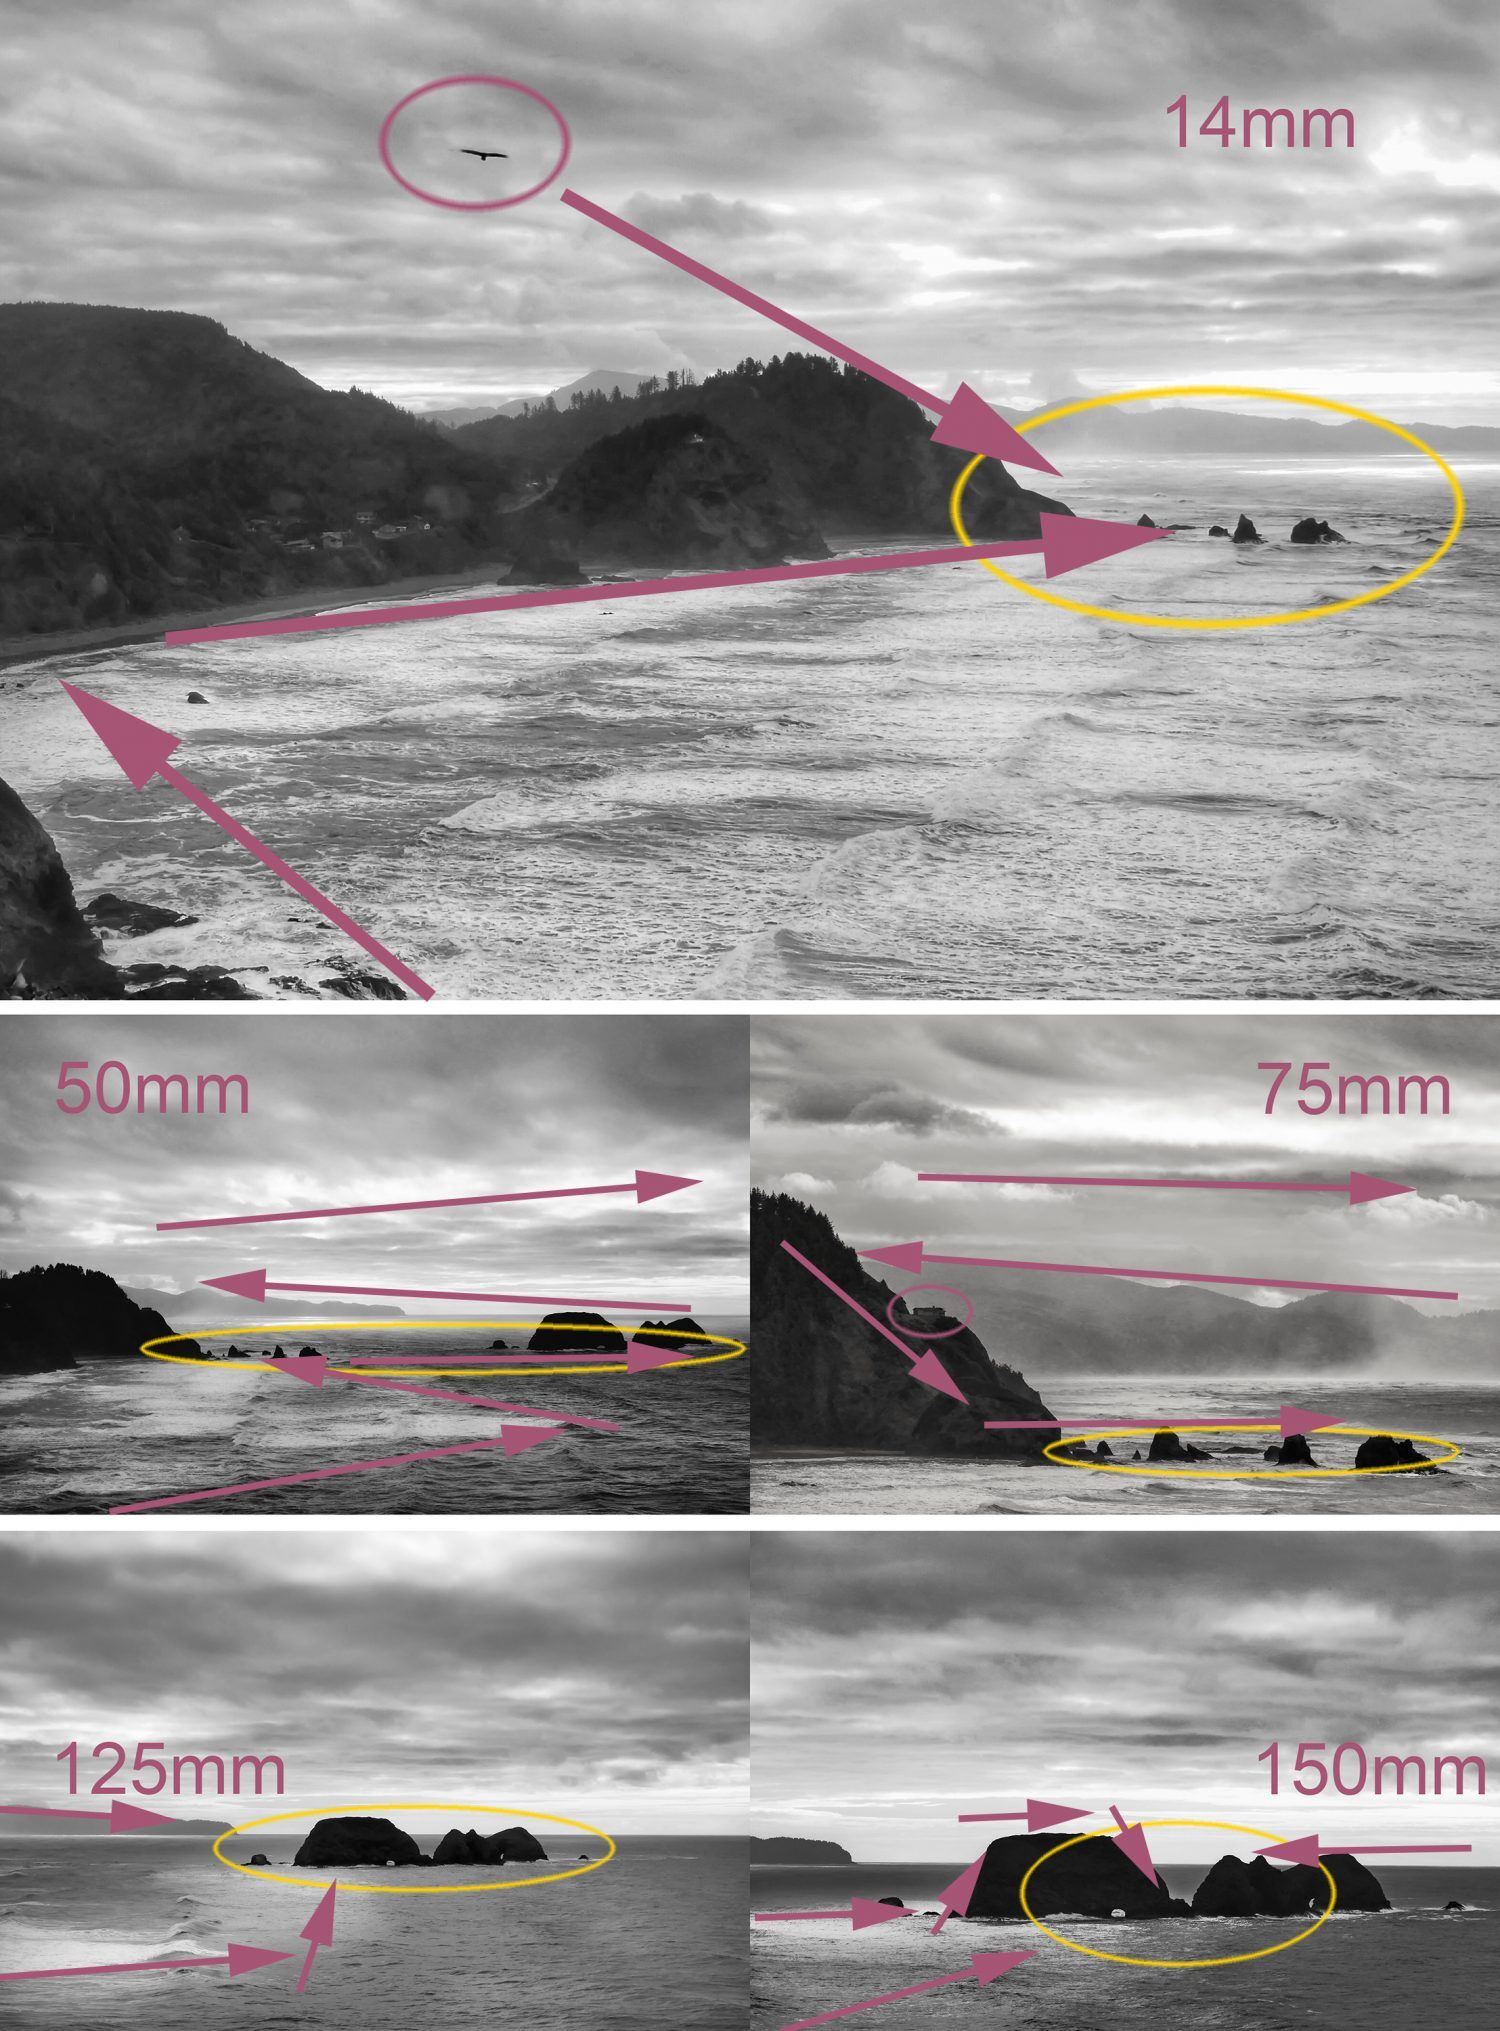
Let’s see the compositions change with the change of lens and story.
Photographs by Kent DuFault
- 14mm – The subject, the group of rocks located off of the peninsula of land, uses the Rule of Thirds for placement, along with a classic Z curve and the flying bird as the focal point- mostly definitely a sweeping vista shot.
- 50mm – The composition is shifted to the right, keeping the rocks off of the peninsula as the subject. However, the subject area is now stretched horizontally. Contrasting areas of water and sky are creating a Z curve into the shot.
- 75mm – The subject area has been squeezed tighter. The Z curve is no longer relevant. The composition has now shifted to the tool of ‘layering.’ The included portion of the peninsula acts as a leading line, and the home located on that leading line is now a focal point.
- 125mm – The field of view has narrowed to the point where I had to choose between the peninsula and the outlying rocks in the water. The composition elements have drastically reduced, and I am now relying heavily on the use of shape for viewer interest.
- 150mm – The central portion of the two large rocks becomes the subject area. The contrast of the left hole within the stone creates a strong focal point. Some variations of contrast make weak leading lines, as well as the horizon line.
As you can see, each has a unique story- as told through the lens choice, framing, and composition.
I invite you to repeat my experiment and see what your results are. Remember, once you start, your feet are firmly planted!
If you are interested in getting more tips like this, check out Photzy’s guide to Effective Storytelling. This step-by-step deep training guide will help you to get a simple and practical understanding of using storytelling so your photographs stand out. Your stories and creative process are uniquely yours, and you can start storytelling now with the Effective Storytelling guide here.
