How to Give Your Images a Polished Feel with Adobe Photoshop
 by
Jo Plumridge
by
Jo Plumridge

Photoshop, or similar editing apps, are a ubiquitous part of the modern photographic world. If you’re a professional photographer, you are expected to be knowledgeable on post-production. But it can be easy to take editing too far – producing images that look overly retouched.
Perhaps the best way to think of Photoshop (as well as Lightroom) is as a digital darkroom, where you can make subtle alterations to your imagery to bring out the best in a photograph. Here are some tips on how to get that polished feel in your photos.
Camera Raw (Bridge)
To get the best out of any photo, you’ll want to be shooting in RAW as this gives you the maximum quality to work with. This means that you will start off editing your images in Adobe Camera Raw, so that you can convert them to a readable file format. There are a lot of alterations you can make at this stage, but let’s focus on a few of the key ones.
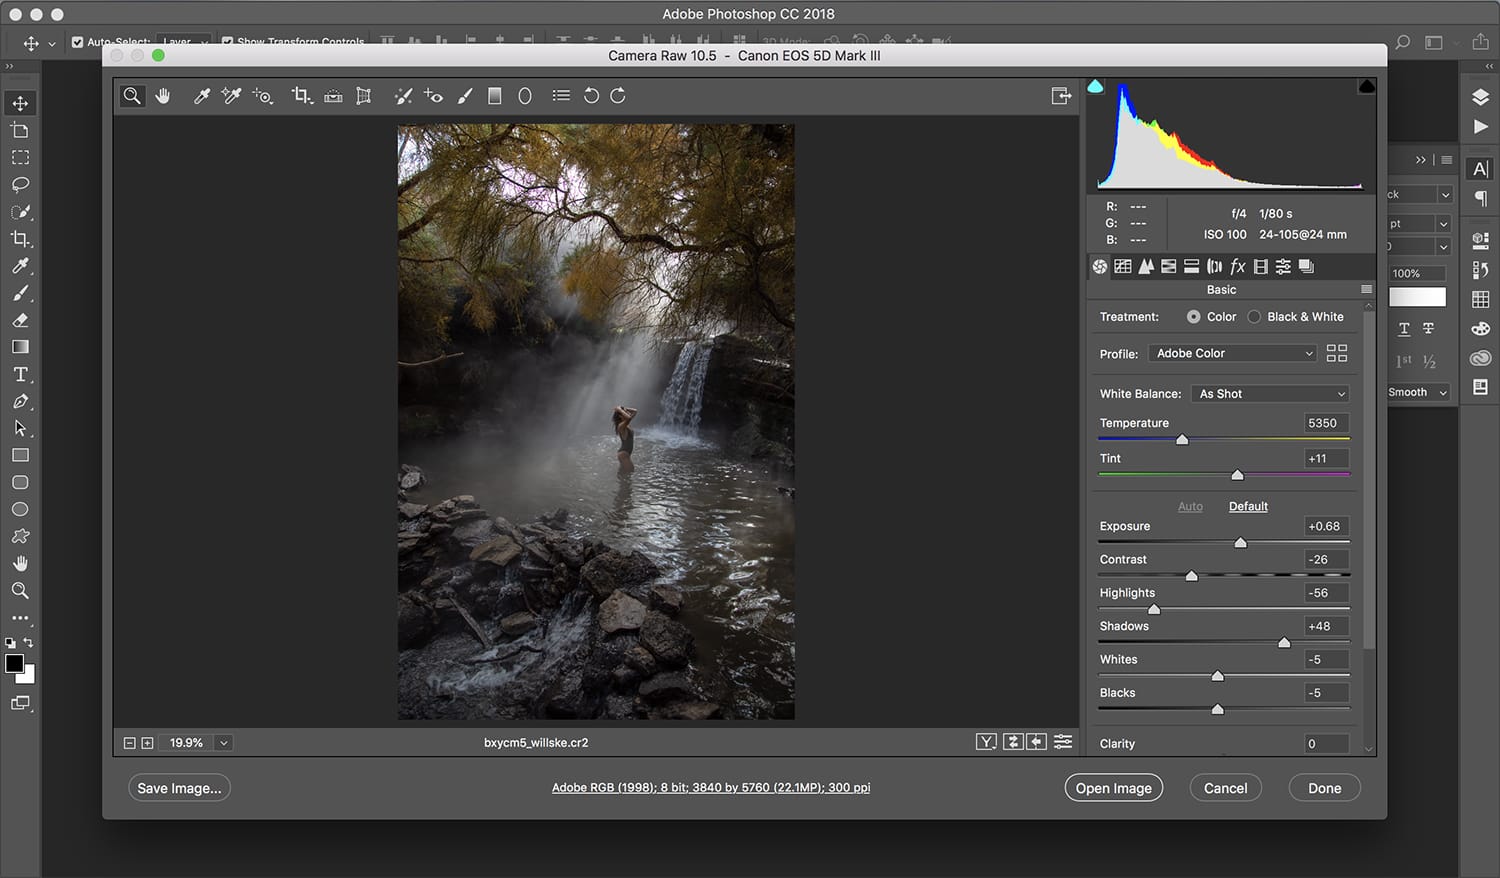
Firstly, it’s a good idea to add a little sharpening at this stage and to enable lens correction for any distortion. Under the ‘Basic’ menu of Camera Raw (which is, for the most part, the same as Lightroom Classic), you’ll find a whole host of useful sliders as well as the option to alter the white balance of your shot.
All of these sliders can be useful, depending on what you’ve shot but I’d like to draw your attention to the ‘Clarity’ slider. The Clarity slider adds midtone contrast to your image, which helps to make the image ‘pop’ and gives your subject distinction.
Healing Brush
I actually prefer using the original healing brush in Photoshop, as opposed to the spot healing brush. This allows me to pick my own source points and closely match differing skin tones. There is no better tool in Photoshop for working on skin – use the healing brush to remove pimples, wrinkles and imperfections on the skin.
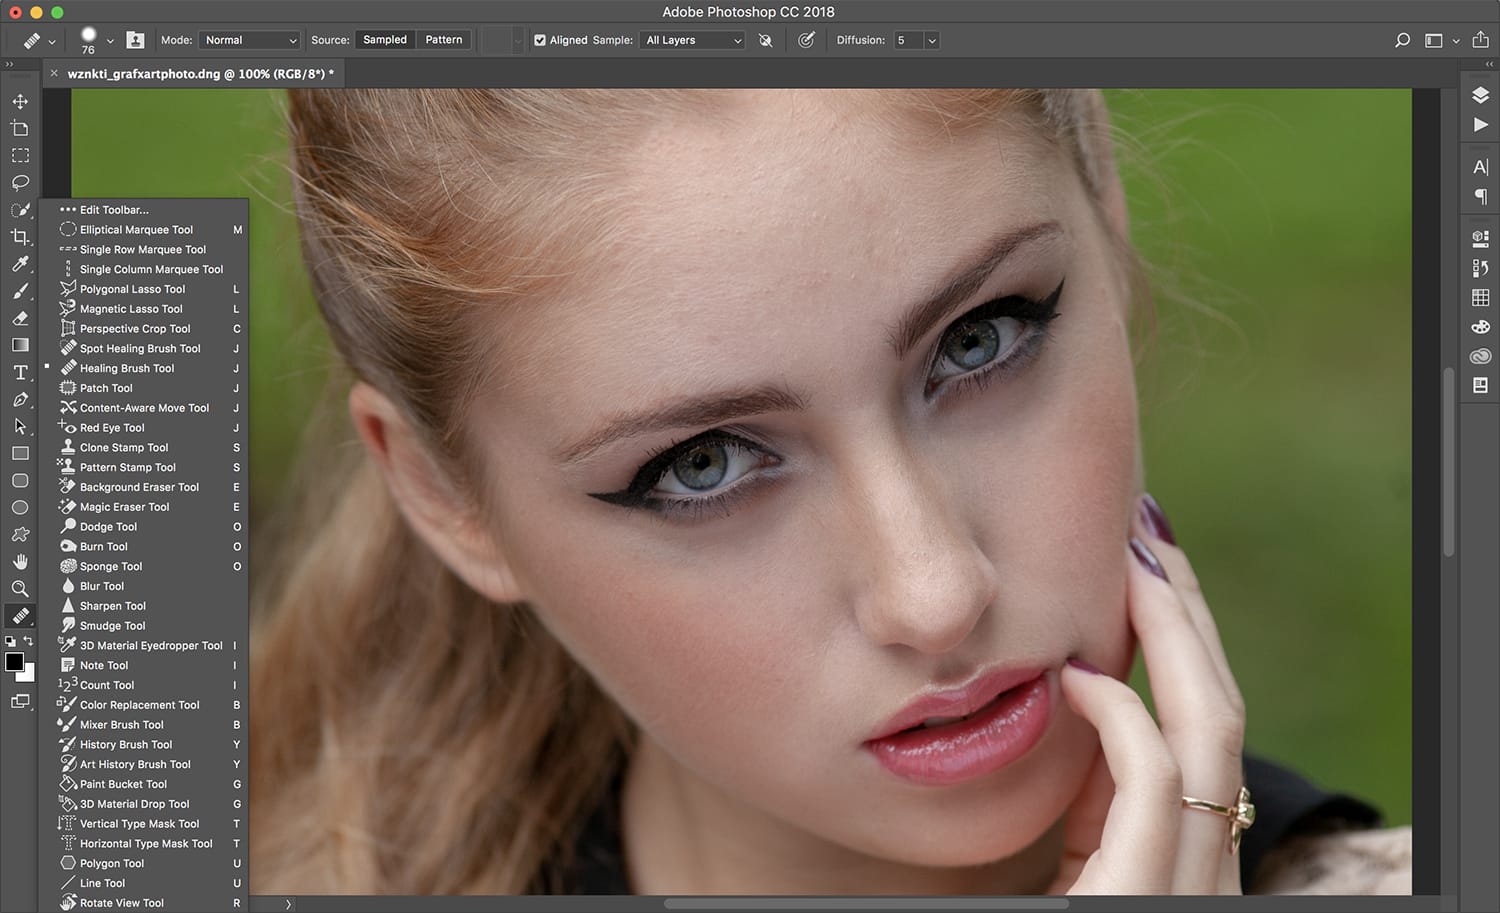
The healing brush can also be useful to remove distractions in the background.
Dodge and Burn
If you ever shot on film and developed prints in a darkroom, you’ll instantly recognize the concept of dodge and burn. Simplistically, these tools allow you to either lighten or darken an area of the image.
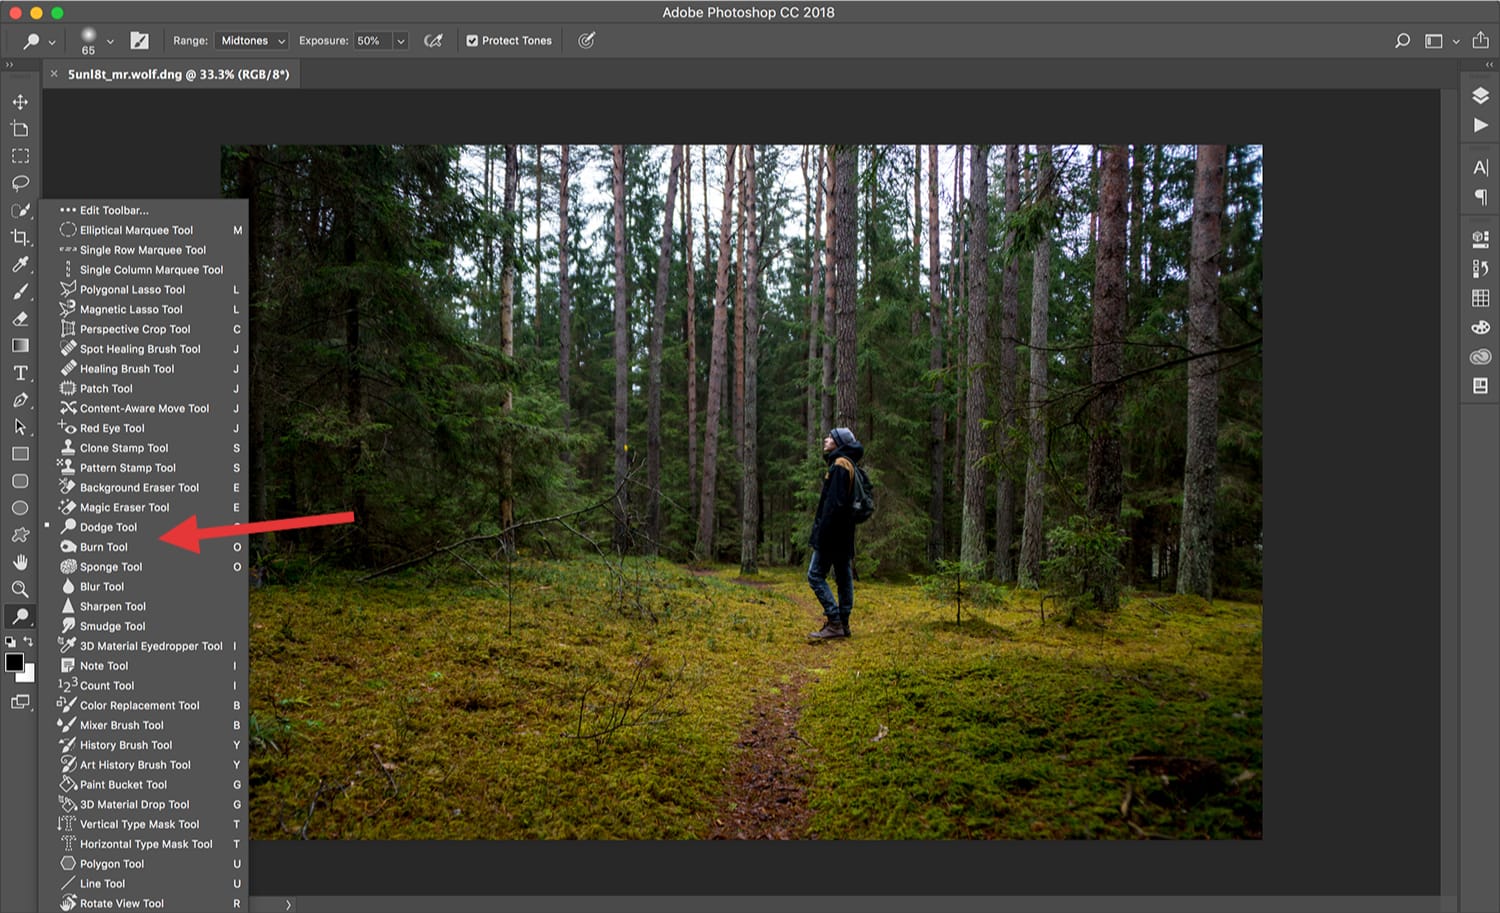
You can also set the opacity of the tools and set them to affect either the shadows, midtones or highlights. The dodge and burn tools allow you to add depth and more drama to an image. Do bear in mind it’s advisable to make these adjustments in a separate layer.
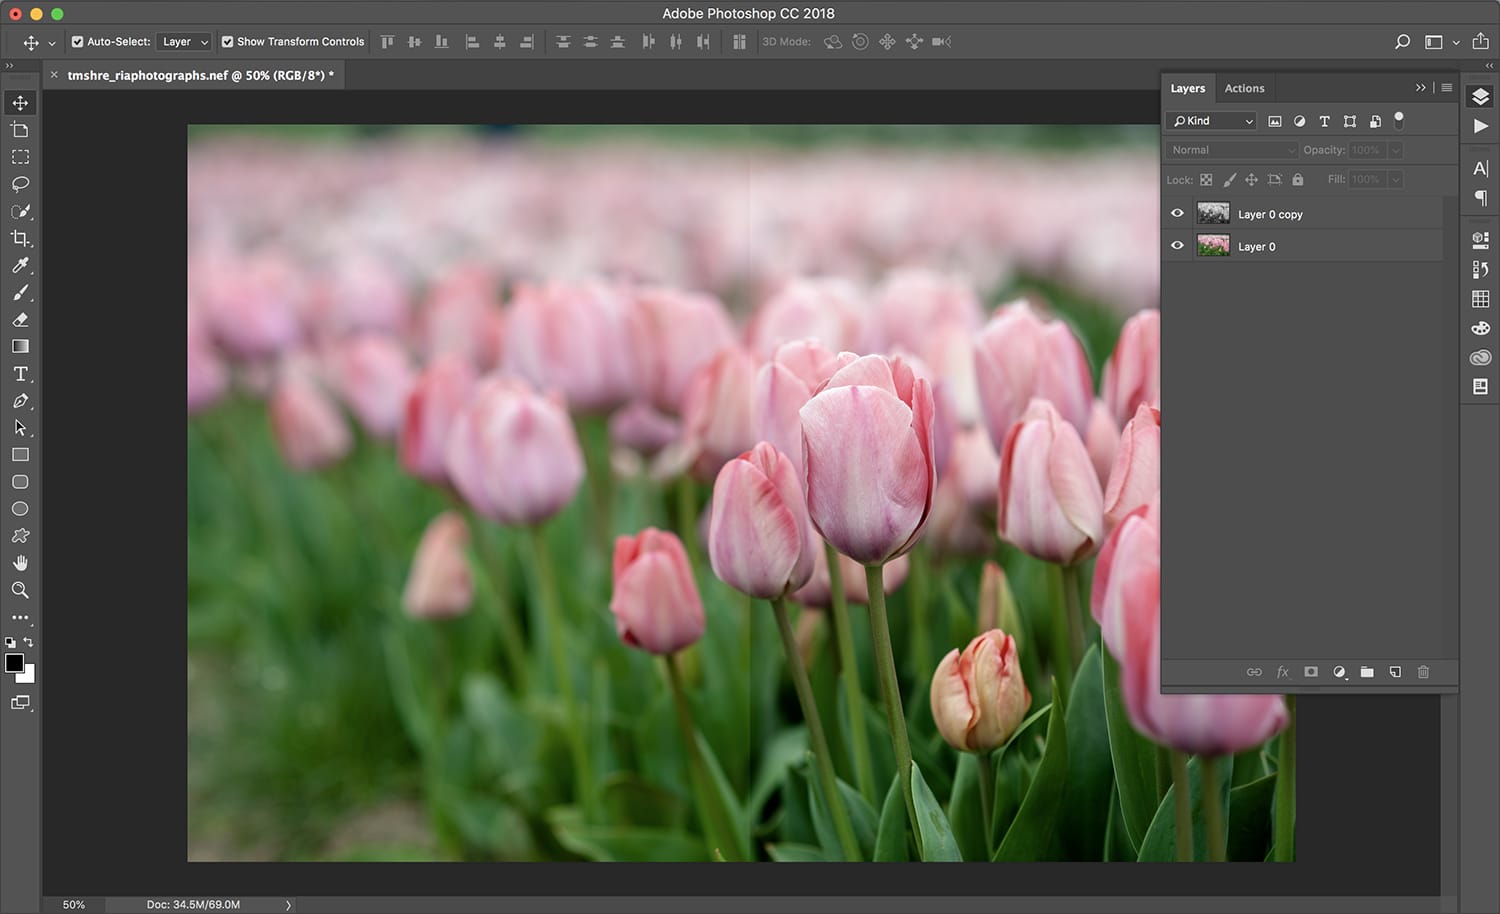
Layer Blending
This is a clever way to make your images look polished, although care needs to be taken not to take the effect too far. Create a new layer and apply a Gaussian blur with a radius of around 10-15 pixels.
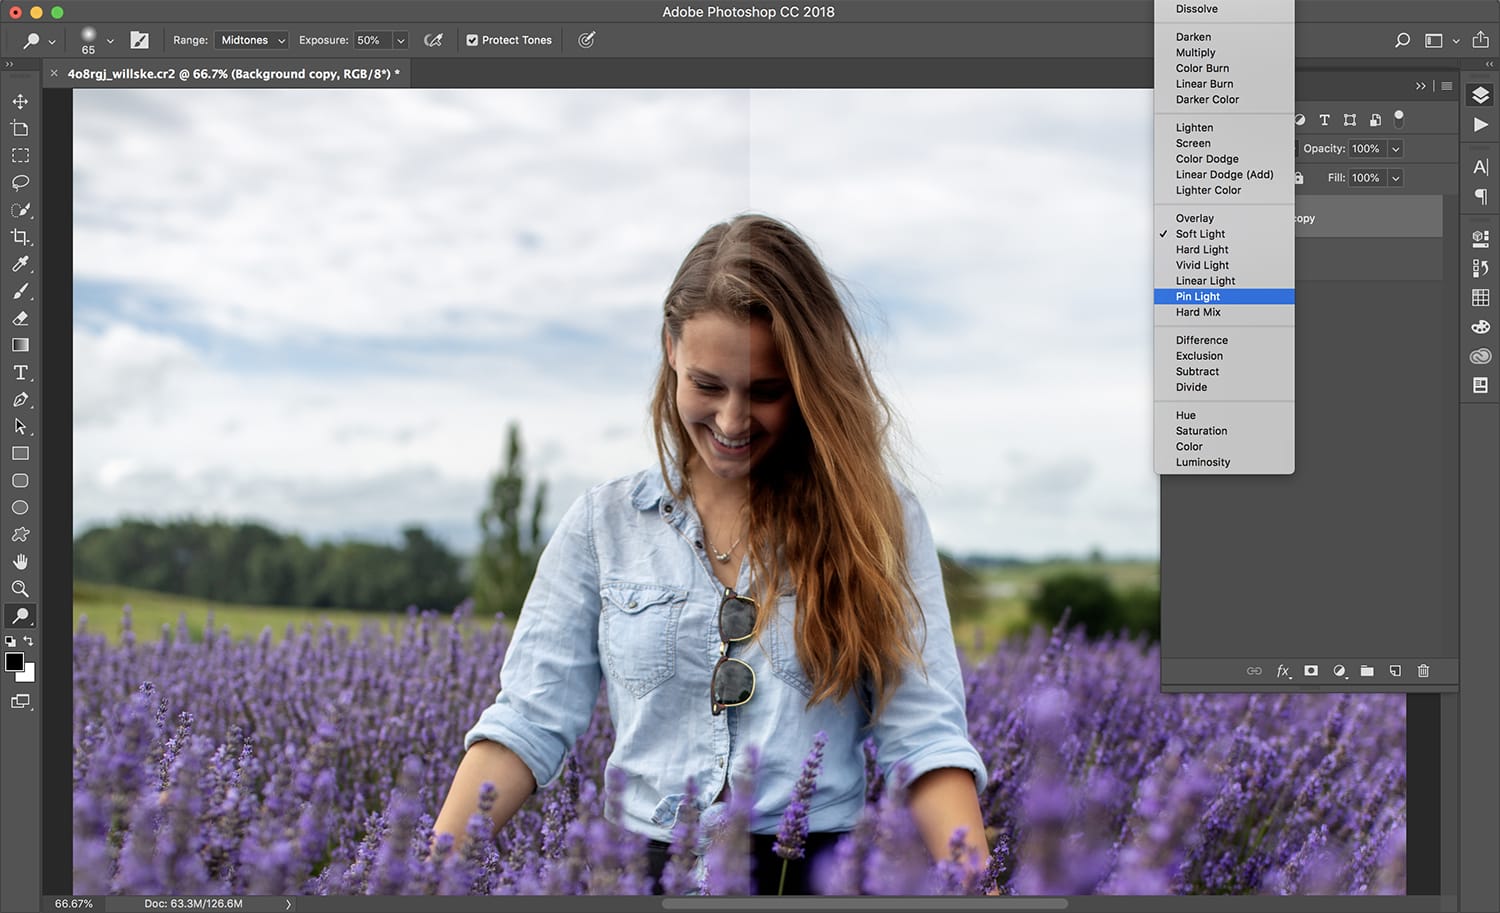
Now change the layer blending mode to Soft Light. You’ll see that the image has really started to ‘pop’ but the effect may be a little harsh. So adjust the opacity and fill down to around 60% before flattening the image.
B&W Layer and Soft Light
For a slightly sharper commercial look, try this method. Open a b&w layer and change the blending mode to soft light. This will produce overly strong contrast, so lower the opacity to around 20-60%.
You can then fine-tune your image by controlling the luminance of each colour with the sliders on the b&w layer.
Of course, these are just a few ideas to try out and there are many other techniques you can use in post-production. But these will give you a polished but still natural look to your imagery.
About the Author: Jo Plumridge
Jo Plumridge is a UK based photographer, writer and lecturer. She specializes in portrait, corporate and travel photography, and writes photography, travel and comedy pieces for magazines, websites and books. You can see some of her work at her website, or follow her on Twitter.