How To Isolate Your Subject For Better Images Than Ever

There comes a time in every photographer’s journey when he or she wants to stop the background from interfering in your snapshot. There’s an old saying that goes something like this: “photography is the art of exclusion.” Nowhere is that more applicable than when you want to isolate your subject.
When you want to create a really compelling image, you have to know what to exclude from the frame. In fact, it’s advisable to isolate your subject because you don’t ever want to introduce too much to the shot. Doing so will water down the influence of the elements (and only those elements!) that you want to stand out in the frame.
Isolating your subject is a technique that you can hone over time… or you can read on and just learn how to do it right here and now.
Using Light to Your Advantage
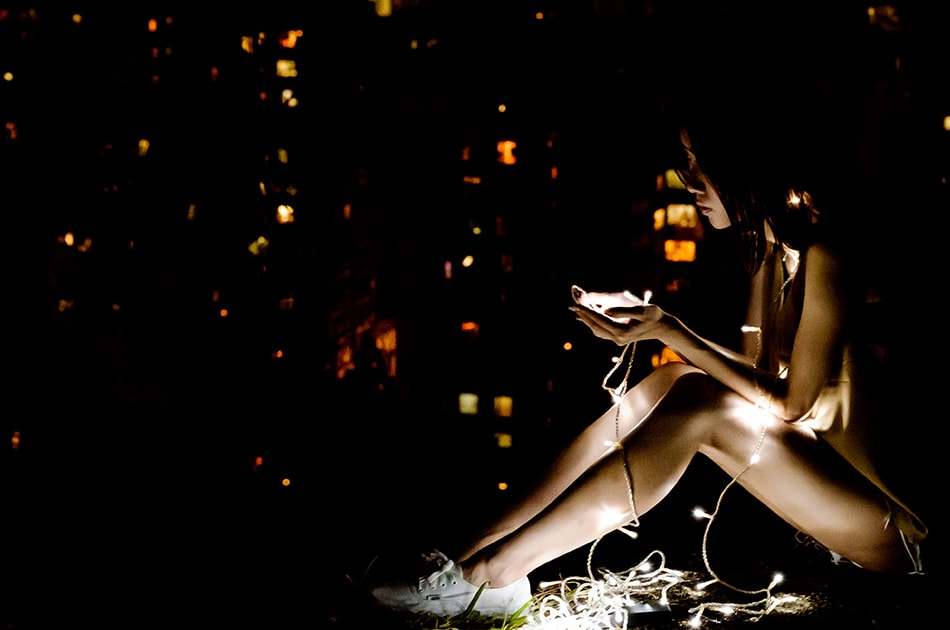
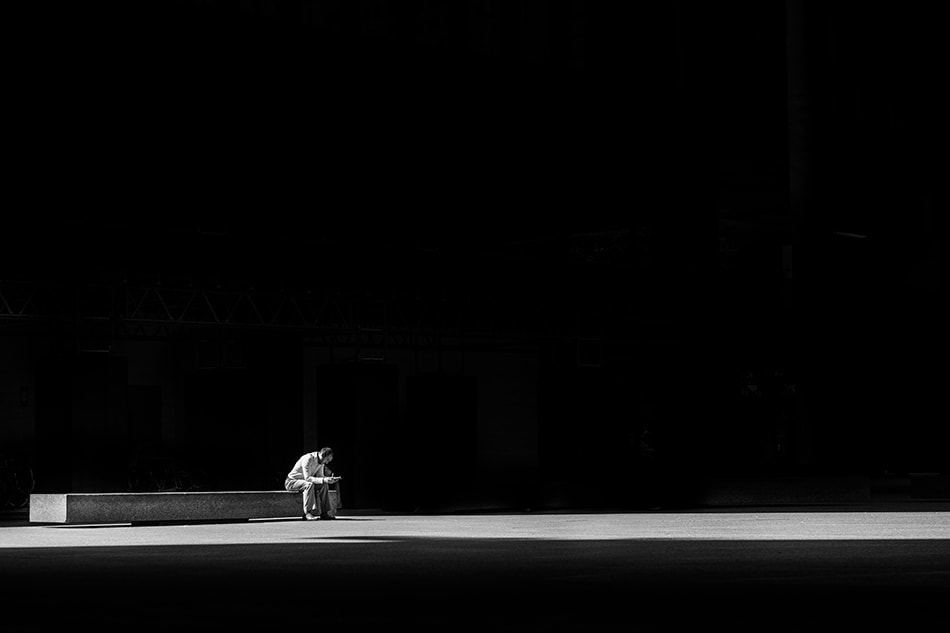
The way that you use light in your shots can seriously isolate a subject to great effect. Take, for example, shafts of light. Try focusing a beam of light right onto your subject, leaving the rest of the shot in semi-darkness as opposed to being completely invisible. It’s like having a spotlight shine on an opera singer, except your opera singer is the subject being isolated in the shot. If you leave the remainder of the scene a bit visible, you’ll increase the general ambiance of the image as well!
Another route you could go is with moody lighting. What you’ll want to do is place the subject somewhere there are both shadows and clear highlights. The end result should be that it’s impossible to evenly expose your entire subject in one frame. Now, you’re going to have to pick one highlight area to properly expose while letting the remainder be underexposed.
Framing the Shot Correctly
It’s weird, but in photography, the most straightforward things are sometimes forgotten. You can always frame the shot right from the beginning to ensure an isolated subject. When you’re framing your shot, zoom in or out if there are distractions in the background that subtract from the impact you want your subject to make!
Here’s the golden rule in photography: if an element is not providing the value you want in the shot, then remove it. That’s it.
Relying on Your Flash
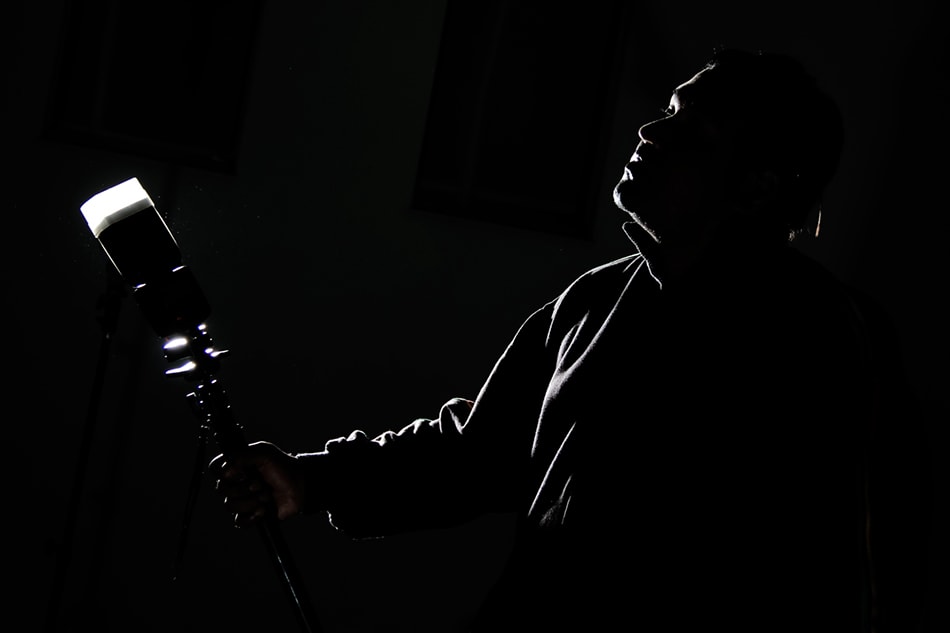
photo by f3nd1
It’s pretty obvious that you can use your flash to make your subject stand out more in some cases, which will have the effect of sort of isolating your subject. This works like a charm when you’re surrounded by weak light.
Another way to get successful isolating effects with your flash is on cloudy days. Use your flash late in the day when it’s cloudy – when there’s a lot of ambient light out that’s bluish. When you use your flash on your subject in these conditions, it’ll give it warmer colors, thereby providing it with much-needed contrast from the rest of the frame. While subtle, this effect helps with getting people to take notice of your subject more.
There’s even another option: place warm-colored gels over the flash, so your subject looks excessively yellow. Then, in RAW editing software (like Lightroom or Iridient), position the color temperature sliders to make your subject look the way it ought to.
While your subject finally begins to look more normal, the background (not tinted yellow by your flash) will start to turn bluish in a very cool way. For certain, some viewers may find this flash effect a bit too much, but it’s just another example of trying a new technique to isolate your subject.
Choosing a Plain Background

In the true epitome of K.I.S.S. (keep it simple, stupid!), going with a plain background is probably the most surefire way to isolate your subject each and every time (provided that you don’t have multiple, competing and distracting elements in the shot, that is). A plain or solid-colored background just naturally directs the viewer’s eye right to your subject, making it a super-convenient way of achieving isolation.
A slightly different version of this is to go with a moderately textured background. Of course, when using a texture background, make sure that the print or effect isn’t too wild or intense that it would have the opposite effect and actually lure the viewer’s eyes away from your subject.
Taking Advantage of Point of View

Just move around a bit in your physical space when you’re framing the shot, and you’ll be surprised at how that can help to eliminate unwanted elements in the background. You control what you want to appear in the shot based on the point of view that you take, based on your location and where you position your camera.
Look for a situation where a basic change in your position will succeed in getting rid of that undesirable element in relation to your subject. Sometimes, all it takes is a move to the right or left, lying on your stomach, or getting up on a ladder or other raised object; the undesirable element should eventually get out of the shot.
To help you determine what should be in your shot or not, do something as fundamental as walking around your subject in a circle, so you can appreciate all the varying points of view that can help to isolate your subject in the frame.
When Isolation Is Good
The subject is the start of your snapshot. Accordingly, he, she or it should have the full attention of your viewers and not any distracting elements that are in the same shot. Isolating your subject is a successful technique to help you ensure that your subject doesn’t get overshadowed by anything else that shouldn’t be the main focus.
It can take a bit of time and practice to figure out how to intuitively isolate your subject. Much of it comes down to understanding composition, point of view, and framing. So take your time when you shoot. Look around. Look at your subject in context of its environment. All these approaches will help you learn to isolate with more ease.
About the Author: Marc Schenker
 Marc is a copywriter and content marketer who covered photography. These days, he runs The Glorious Company, a content marketing agency.