10 Tips for Improving Your Outdoor Portraits

For most of us, portrait photography is a challenging – yet important – photography technique to master.
You’re out with friends, or on a day-trip to a special location and the perfect photo opportunity presents itself. Or maybe you’re on vacation and want to capture some photos that are a step above the standard tourist snapshots. Portraits, especially outdoor portraits, are an excellent way to capture unique and powerful images. Photographs with a human element rank as some of the most powerful images of all time, and it’s worth investing some time into learning how to capture effective portraits.
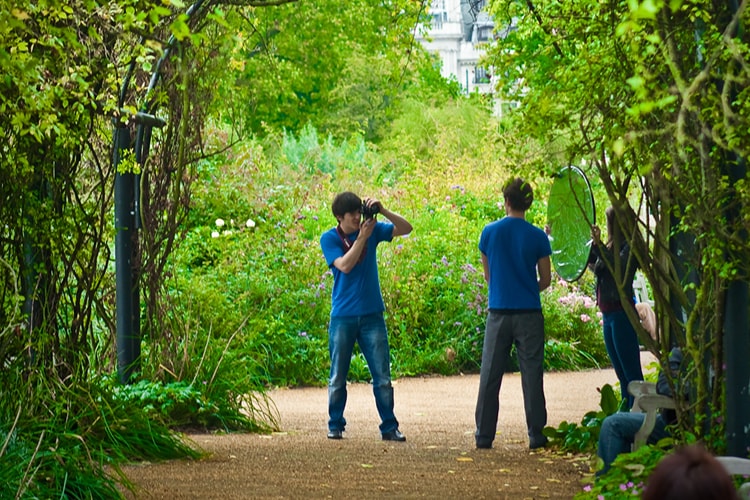
photo by Garry Knight
Here are a few tips to get you started with outdoor portrait photography. Read on to see how you can create powerful and striking portraits in a few easy steps.
Focus on the Eyes
The eyes are the ideal focal point for most portraits. One of the best ways to ensure that the eyes are clear and in-focus is to use a wide aperture and focus on the eyes. This will help to soften your subject’s other features and draw attention to the eyes –an excellent way to create some amazing images!
Make the Most of Natural Light
This is a tricky – yet essential part of portrait photography. While some photographers advocate waiting until an ideal time of day for portraits, most of us don’t have this luxury. Photo opportunities always present themselves at different times of day and having a few tricks up your sleeve can help you master even difficult lighting situations.
Three basic lighting conditions for outdoor portraits include full sun, shade, and no sun. Let’s look at each one…
-
Full Sun
Shooting in full sun can be a challenge; harsh shadows, washed out images, squinting subjects – but full sun also presents an excellent opportunity for bold and daring photos. One way to work with the sun is to move your subject into the shade, or use a diffuser to filter the light, and a flash or reflector to fill in any dark shadows. The “Sunny 16” rule is another great place to start.
This rule says to set your aperture to f/16 in bright conditions, and your ISO and shutter speed at the inverse of one another. Start at with an ISO of 100 and a shutter speed of 1/100, and increase your shutter speed for less light, or slow it down for more light. Experiment with shooting your subjects at different angles; shooting with the sun behind them or to their side can yield better results with fewer harsh shadows.
-
Shade/Partial Sun
Shade is a great lighting condition for outdoor portraits since the clouds act as a diffuser; creating soft, even lighting. The challenge with shade is boring, and flat images. To combat this, try using a reflector to help bounce light back into your subject’s face to give them that picture-perfect glow.
-
No Sun
Overcast conditions are obviously not as bright as full sun, so they will require slower shutter speeds, wider apertures, and/or higher ISO settings. Make the most of what light you have, use a fill flash and silver reflector to add some light back in, and take advantage of pockets of sun that come your way.
Your Lens Matters
For portraits, long focal lengths are usually best. A longer focal length will increase the sharpness of your subject, and can even add a nice touch of bokeh in the background. Lenses with a focal length of 70mm or less can cause your subject’s face to look distorted. Most portraits are done between about 120mm and 200mm. Since telephoto lenses have a shallow depth of field, they also work great for blurring the background and pulling your subject into focus.
Bring a Reflector
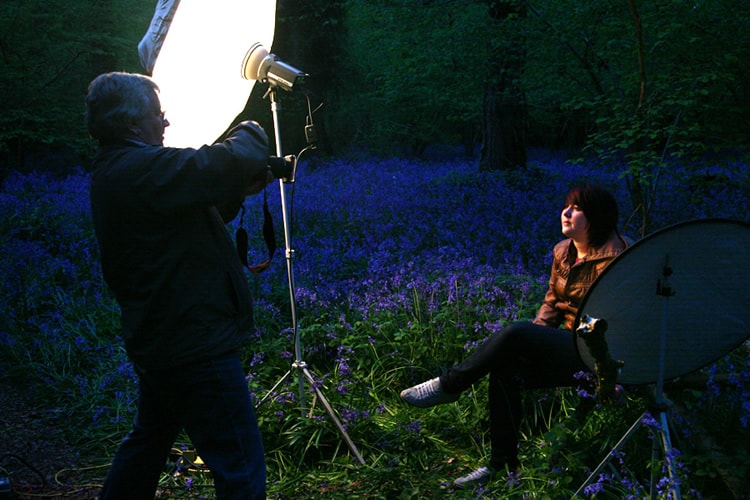
photo by uncle keith
You don’t have to bring along an entire studio to get excellent results, but a reflector is one tool that can make a real difference in outdoor portraits. A reflector will help to bounce the light back onto your subject’s face, giving them a beautiful glow and helping them to stand out from the background. Reflectors are available in a range of different colors; white is a great color for harsh lighting conditions, silver is ideal for shade where you will want to get the most light out of your situation.
Consider a Flash
A flash? Outdoors? In the sun? Yes, definitely! A fill flash can help to get rid of dark shadows that are often found in bright lighting conditions. Use a fill flash to help light up dark shadows on your subject’s face, or bounce the light off a reflector in poor lighting conditions. A flash can also be used to create better subject/background separation.
Check Your Settings
Outdoor portraits require close attention to your settings. The most popular setting for outdoor portraits is using a wide aperture to throw the background out of focus while keeping the subject clear, but your settings will vary depending on which photos you are going for, the lighting conditions, and your visual style. If you are composing a shot with multiple people in one composition, you will want to use a smaller aperture to ensure that everyone is in focus.
Location, Location, Location
Chose a location where there is plenty of natural light, and try to find a place with lots of visual interest. This could mean a busy urban scene with a lot going on, or a field with an old, rustic fence. Just remember to choose a place that is well suited to your subjects.
Composition
For great portraits, composition is essential. Be sure to incorporate plenty of your surroundings into your images to help set the scene and add interest to your photos. Incorporating interesting background and foreground elements can help to add depth and interest to your compositions. Look for leading lines, interesting objects, colors, or textures; bright blue sky and green fields, or the dappled overhead light filtering through trees. Change your perspective to create new, dramatic compositions. Get down low and incorporate trees or blades of grass to help frame your subject. For urban scenes, look for interesting architecture, textures, or statues to use in your images.
Watch the Background
While it may sound obvious, keeping an eye on the background is important. After all, nothing ruins an image faster than rogue telephone poles! Look for interesting backgrounds that are suited to your subject. Textures also make excellent backgrounds –think old buildings or interesting architecture. Or use a wide aperture and place your subject a distance away from the background to create an out of focus background.
Posing
Most people don’t know how to pose themselves, and if you don’t offer some guidance, you could end up with a collection of staged and awkward photos. Put your subjects at ease, and work to create a fun and relaxed atmosphere. Offer encouragement and learn to work with them. If a certain pose isn’t working, then don’t force it. Be clear in your requests, and remember to keep it fun.
Do you have any tips for outdoor portraits? Share with us via Twitter or Facebook!
About the Author: Christina Harman
 Christina is a part time blogger and full time photography enthusiast living in Southeast Alaska. She enjoys travel photography and has taken pictures in countries such as Mexico, England, France, and China. She likes sunny days, new lenses and drinking good coffee. You can visit her at Tangled Thoughts.