Taking Shots of a Lunar Eclipse Like It’s the Easiest Thing Ever

Photographing a lunar eclipse is probably one of the more special things you can do as a photographer, simply because these events don’t come around all too often.
The great news with an event like this is that it doesn’t take much effort or technical skill to successfully pull off. For instance, you won’t even need any special filters to guard either your eyes or your camera.
As you may already know, lunar eclipses aren’t as potentially hazardous as solar eclipses, so you’ve got that going for you.
Another benefit is the length of time that a lunar eclipse lasts: Normally, progressing at a relaxing pace, this type of eclipse begins with a tiny shadow suddenly appearing at one side of the moon. Over the next hour or so (that’s right: hour), the moon will continue to proceed farther into the umbral shadow of the Earth. That’s how much time you generally have to work with.
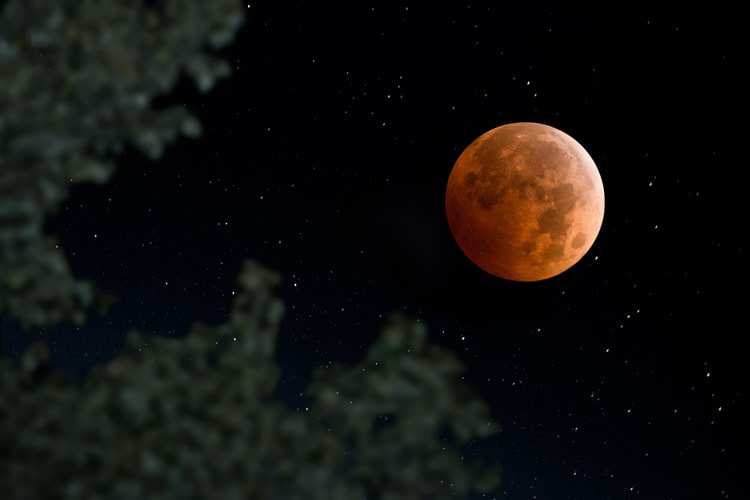
photograph by Bill Young
To get the most stellar results photographing a lunar eclipse, here’s what you should do.
Suitable Cameras
Lack of light is the biggest issue when tackling a lunar eclipse. Remember that the moon’s going to be quite dark since it’s in the Earth’s shadow. Therefore, we recommend a good DSLR camera that’s capable of handling high-ISO noise levels. The reason is that you’re going to reduce your shutter speed somewhat while boosting your ISO to greater levels.
This is especially true if you’re utilizing 300mm lenses (or longer) for the job.
As for lenses, go with the longest lens you have, as longer lenses tend to magnify the moon more effectively as well as infuse shots with finer detail. Of course, relying on a longer lens means having to increase your shutter speed a bit, just the same, simply to avoid blurry images.
Setting Your Camera
A good rule of thumb for shooting a brighter lunar eclipse is an exposure of 1/125th to 1/250th of a second with an f-stop of f/11 and an ISO of 100 to 200. This setting is really helpful as the eclipse is just getting underway since it’ll make it easier to expose the brighter part of the moon. The darker side of the moon isn’t visible at this point, so it’s a non-factor. Inevitably, your exposure must change to accommodate shooting at an appropriate exposure for the moon’s dark side while actually overexposing the brighter side of the moon.
Many a seasoned photographer has found out that the difference between shooting for the moon’s brighter and darker sides amounts to approximately eight full stops. Therefore, to succeed at getting great shots of the moon’s darker side (read: moon in Earth’s shadow), you’ll have to keep the same ISO while essentially doubling your stops in succession until you reach eight stops.
Basically 1/250th, 1/125th, 1/60th, 1/30th and so on and so forth! Needless to say, you should also get a sturdy tripod should you attempt to photography the moon.
Getting Sharp Shots
Here’s something unorthodox but effective: turn off autofocus! Instead, use LiveView (assuming your camera has that feature) to get an accurate picture of the moon; then, snap a picture of the moon just prior to the eclipse. Use your camera’s LCD screen to check how sharp the moon really is by simply zooming in all the way. If it’s not adequately sharp, just return to LiveView and repeat the process until the moon looks really sharp on the LCD screen.
You can also try to get a sharp view of the moon by manually focusing as you’re zoomed in to the max with LiveView.
The great news is that you won’t have to bother with your focus until the eclipse’s end if you succeed at obtaining a sharp focus before the eclipse starts.
What About Composition?
Composition is also important. You’re in luck, though: It actually doesn’t matter where in the frame you put the moon, just because you’ll be able to crop the moon out when you edit the shot afterwards in post-processing. The only exception is if you have a foreground object that you want to keep in the shot.
If you want to get a bit fancier and include stars in the shot with your lunar eclipse, then photograph them separately from the moon. Put the two images together in post-processing.
Post-Processing Considerations
When it comes time for editing your image(s), things get pretty straightforward. In an accessible tool such as Photoshop, go ahead and manipulate the curves so that they obtain medium contrast. It may also be a good idea to put in an unsharp mask filter at amount 150%, radius 1.0 and a threshold of 0.
If you have composite images you’re dealing with, first “sharpen” the moon with the Magic Wand tool. Continue using the Magic Wand option after opening your lunar eclipse shots. Open up other photos that feature dark skies or backgrounds. Grab the whole moon, copy it and then paste it into the suitable image that has a dark background.
Lunar Eclipse Photography Simplified
Congrats! By following the pointers in this how-to, you’re now able to tackle a lunar eclipse with your camera very handily. Shooting one of them doesn’t have to be an intimidating experience when you’re well-prepared.
Just make sure that you–obviously!–know what day of the month the eclipse occurs, get your proper equipment (camera, lenses, etc.) in order, and then watch the moon for the fateful occurrence. Before you know it, you’ll have a slew of captivating eclipse images that will only get better once you run them through post-processing.
If it’s your first time shooting an eclipse, understand that it’s advantageous to try your hand at a lunar eclipse just because it’s nowhere as intense as a solar one. If you want to go and eventually shoot solar eclipses, it’s in your best bet to get acquainted with lunar ones first.
Other than that, have at it! Shots of a lunar eclipse won’t just impress your viewers, but they’ll also help to build up your portfolio very nicely.
About the Author: Marc Schenker
 Marc is a copywriter and content marketer who covered photography. These days, he runs The Glorious Company, a content marketing agency.