My First Exhibition – How To Hold Your Own Exhibition (Part III)
 by
Cissi Tsang
by
Cissi Tsang

You have found a gallery who is willing to hold your exhibition. You are now one step closer to showing your work to the public. Here comes the final stretch – it will involve lots of running around, but will introduce you to the world of event management and media promotion. Get set: you are almost there.
The Floor Plan
After you have been accepted by the gallery, one of the first things you should do is look at their floor plan. The floor plan will give you the exact dimensions of the gallery space, and show you what areas are available for use. Some galleries have a link on their website, or you may need to ask. The floor plan is important because it allows you to plan how many works you can put into the space, and their size.
This is particularly important if you are showing as a group. Everyone needs to be aware of size constraints. This is a major area of potential butt-hurt because someone might attempt to claim a large amount of space at the expense of others, so tread carefully and try to divide the space as fairly as possible.
Another advantage of having the floor plan is you can see which areas would be best for certain pieces. For instance, some pieces might work with plenty of natural lighting, so you might want to put them closer to the windows.
Promotion
An important part in organizing an exhibition is promotion. If you don’t promote, then people won’t know about the show. The first thing to do is to make a Facebook page. It is free and easy to maintain. You can post regular updates to keep in touch with people and you can use Facebook to create an event page.
You will also need to make some flyers and posters. This will be easy if you are a graphics wiz, because you can use a program like InDesign. If you’re not then you may need to pay someone for the work. After the design is done, you will need to find a printing company. Go for a company who uses good quality ink and paper. Check out their samples and previous work. Don’t just select according to price, because this flyer is going to publicly represent your event, so it has to look good and be durable. Your flyers can and do end up in the strangest of places, depending on the whim of the taker. Aim for a run of a couple of hundred so you can distribute them far and wide.
Once you have made your flyers and posters, it is time to disseminate them. Cafe strips are great starting points. The owners usually don’t mind if you drop some flyers, but you should ask first. It is very embarrassing to be chased out of a cafe because you didn’t spend an extra few seconds asking for permission.
If you have some posters to stick up, you can either pay a company to do it or do it yourself. There are companies who will stick posters up in many public places, and it is a good option if you have lots of posters. If you are doing it yourself, be courteous and don’t tear down other people’s posters or cover them up with yours. Other people will retaliate by tearing down your poster or decorating it with giant flying genitals.
Another way to promote your event is to write a press release. You can send them out to local papers, local community radio stations and local arts sites to let them know about the event. Be positive without using hyperbolic statements, keep it concise, remember to add contact details and have it show at least one piece of work. You may get some interviews which are great in raising the show’s profile.
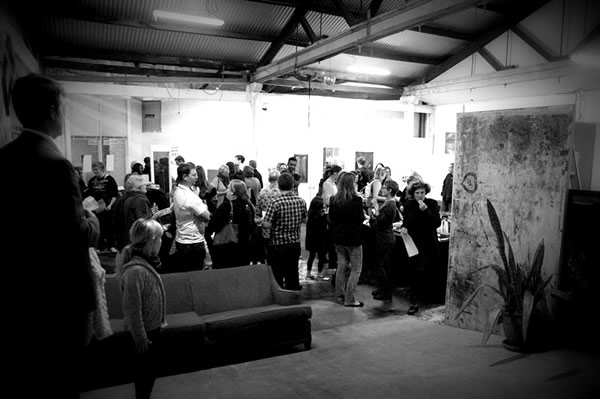
Entertaining Your Guests
The opening night is important – it is when you get the biggest chance to show off the exhibition and hopefully get some sales. Remember, this is an event, and in order to keep guests at an event, you will need to do some entertaining.
[Pro-tip to art world newbies: if you’re looking for a cheap night out, hit a local art exhibition for free food and drink.]
You should offer food and drink on opening night. People love to eat, and they really love to drink – just look at the sheer delight at the words “open bar”. You can either buy some finger food from a store a night or so before the event, or you can make your own. Making your own is cheaper, but it depends on your culinary skills. It doesn’t have to be anything fancy – dips with crackers can go a long way, as can olives and a fruit basket.
Common choices for drinks on opening nights are beer, red wine, white wine, orange juice and water. You can either rent out wine glasses or buy your own – aim at having at least 60 glasses for the event. Renting is not expensive, but be careful not to break any during transport because you will have to pay penalties. Buying your own is a good long-term investment but boxes of wine glasses takes up a of space.
Music is a good way to add some ambience to the event. The easiest way is to play music in the background. You can also invite some musicians to play live music, but it’s best that they are acoustic. You want the music to compliment your event, not overshadow it. Also, remember to feed and water your musicians to keep them happy.
Preparing Your Work
The standard option is to have it framed. Some places can print and frame your photos for you, which saves a lot of hassle. As a rough guide, I’ve found 20×30 to be a good size for most exhibitions, as it’s fairly cheap and large enough to make a visual impact. Of course, this all depends on your work.
Canvas prints are very popular at the moment. I don’t know why, but apparently there’s a big market for them. I find them crass but to each their own. They can be pricey though, so unless you are sure that your work will sell and/or you have money to burn, save it for later.
There are also more ways of preparing your work. If you don’t want to frame it or want to offer unframed options, you can stick the work on the back of acid-free paper. Make sure your tape is also acid-free and the borders are symmetrical. Feel free to explore your options because there’s many ways of presenting your work. If you are thinking of alternative methods, consult an arts shop because they can help you with the most suitable materials. You don’t want materials that eats away at your photo over time.
Always sign your work with your name. You can sign wherever you want, as long as it’s readily readable. This shows that the work is a genuine piece by you. If you are planning to sell several of the same print, it becomes a series. You can denote if it is a limited run showing a number like “1/10” [meaning “first photo of ten”].
Pricing
If you are planning to sell your work, pricing can be challenging [if you’re not selling, then mark your work with “NFS” – not for sale]. As an emerging artist, the general rule of thumb is to look to cover your costs. The main costs you want to cover are printing and framing. Most galleries charge a commission on sales – 10-30% is not uncommon – so you need to factor that in as well.
Hanging
You should give yourself at least a day to hang your works. It can be surprisingly time-consuming.
The best height is “gallery height” – which is when the centre of your piece is about 57 inches / 145cm from the height. That is eye-level for most people, meaning that your work will be at a comfortable position for the majority of people (unless you are in Holland, land of giants – in which case you can raise the height). Spaces between works is up to you, and it can vary according to size and the wall space.
If you are exhibiting in a group and there are works on plinths, the middle of the room is a good place as it gives viewers a 360-degree view.
Have some dot stickers and mark each work with a number. This will identify the work on the gallery guide sheet, which is a small sheet listing all the works, the artist(s) and their prices. You should have a nice stack of them to present to visitors as they enter. Have some coloured dots as well to mark off work that has been sold.
Show Time
It’s the big day!
Remember to arrive early so you can set up the kitchen. Make sure you know who is going to man the bar. If you are exhibiting in a group, everyone should take turns pouring drinks and washing glasses. If you are doing a solo exhibition, ask/bribe/blackmail a friend so you can mingle with the crowd.
You or someone from your group will be expected to give a speech. The speech doesn’t have to be long or convoluted, but it should explain the theme and goal of the exhibition, and is also an opportunity to thank those who offered help along the way.
Have a clipboard and pen ready, in case people purchase work on the night because you’ll need to note their name and contact details. The more options you have for payment [cash, direct deposit, paypal, etc.], the easier it is to close in on a sale. They can take the work home at the end of the exhibition.
For the other days of the exhibition – if you are in a group, you should roster gallery sitting. If you are solo, then expect to spend a lot of time at the gallery unless you have kind friends or if the gallery offers to help you out [rarely]. Gallery sitting is not particularly interesting and you will probably end up counting how many nails are in the floorboards or the amount of stitches in the curtains. However, you do need a presence in the gallery during opening hours to ensure the safety of the works and you might even make a sale or two.
Post Exhibition
After the exhibition comes the pulling down. Be careful with this process, so you don’t damage the works. This is especially pertinent if you are handling a sold work. Clean and vacuum the gallery and return the keys to the owners once you are done.
Then – celebrate. You deserve it after all that stress. Maybe you’ll decide to do it all over again, in which case I recommend having an extra stiff drink.
About the Author: Cissi Tsang
Cissi Tsang is a photographer and writer from Perth, Western Australia. She is an experienced live music photographer who has taken photographs for multiple publications. She also has experience as an artistic photographer and has exhibited around Australia. You can also find Cissi on Google+.