So You Want To Be A Rockstar Photographer? (Part II)
 by
Cissi Tsang
by
Cissi Tsang

You’ve got the gear. You’ve practiced taking photographs at live shows. You are confident enough in your abilities that you believe you can put your photos out for public consumption (beyond Facebook, Twitter and Tumblr). You have applied to a local publication and was signed up as a photographer. Now, you are ready to start talking photos around the local traps.
Along the way, you will develop an appreciation (or frustration) at local venues. You will get to listen to lots of local bands. You might be able to strike up friendships with some bands who recognise you after a few gigs. Do enough, and you will develop a profile in the local music industry.
Part 1 – Getting The Gigs
Since we now live in the technology age, publications will email a weekly listing of available live gigs. They’ll be a motley mix of local bands, national acts and the occasional music festival or international act. The editors run a type of hierarchy when it comes to allocating gigs – this is for two main reasons. Firstly, longer-term photographers have shown reliability, and secondly, it acts as an incentive to those who have been taking photographs for longer.
When the editor doesn’t know you from a bar of soap – then skip the major acts for now, and pick the local acts.
Once you’ve picked out your gig, have notified your editor and received the confirmation – then it’s time to hit the venue.
Remember to make the gig your priority for that night. Don’t even think about skipping the gig unless there is an emergency or if you are unwell to the point where leaving the house would be hazardous (if you are stuck on the toilet…just stay there). Give as much notice to the editor as possible so they can call a replacement. Editors hate it when people don’t turn up to a gig as expected.
As a photographer for a publication, you are representing them for the night. Not turning up makes the publication seem unreliable. Bands and promoters are generous towards music publications due to the extra publicity, which is why they offer free entry. Not turning up costs them one ticket, plus any additional benefits from having publicity. Therefore, bands and promoters will be upset and may not grant the publication the opportunity to work with them again. Which means the editor will be upset at you. Which means you get a bad reputation. So – don’t do that.
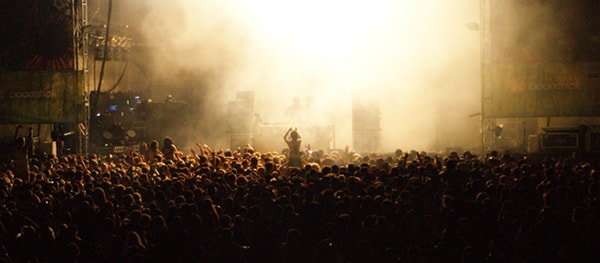
Part 2 – On The Night
Since you are taking photos for the event, make sure that you are actually there for the whole night. That means turning up when the doors first open, and watching all the bands. There are benefits of turning up early. The bar is empty, so getting drinks is no problem.
Live music photography is all about reflexes. It’s about having to think quickly on your feet to frame the best shots on the fly. You have to move and react to the performer.
Therefore, it is also good to turn up and start doing some preparations so that when it’s time to take photos, then you can do it straight away. The first thing that you should do is check the lighting of the venue, and the required settings on your camera. Most live venues tend to be fairly dark so you will most likely be using an ISO of 800 – 1600 at the widest aperture available on your lens. Lots of venues also like using red lighting, which is the bane of photographers.
Do not, under any circumstances, use flash when you are photographing performers. It is highly distracting for them, so be courteous. Leave your flash unit at home, or if you have to do social shots, then take it out only for those times.
Check out the various angles of the stage, and see how far the venue allows people to stand. Sometimes you might be able to stand almost behind the stage, which can give some great shots of the band and the crowd.
Speaking of social shots – some publications will require that you take shots of the crowd as well as the bands. Social shots can be from portrait shots of crowd members, to atmospheric shots that document the show as a whole. It can feel awkward approaching people for social shots, but if you tell them that you are from a publication, then the majority of people will agree.
Or sometimes you’ll be lucky and see someone dressed in a costume, who will be more than happy to pose for you.
When it’s time to photograph the bands, get right up to the front. If there is a crowd at the front of the stage, don’t be shy and barge through. Taking photos of the band is your job, so do whatever it takes to get to the front. Sometimes it’s enough to simply flash the camera at people’s faces, who will move when they see you’re holding a “serious” camera. Other times, they won’t care so you’ll have to shove them out of the way.
If there are several photographers that night, be careful about where you stand. It’s best practice to move behind someone, or if you can’t, then to duck down as low as possible so you don’t impede another’s view. Keep your elbows as close to your body as possible so you don’t accidentally jostle someone else. Don’t hog one spot. The photographer circles are small, and if you act like a jerk, then people will remember that.
It is okay – and expected – of you to stick your camera in a performer’s face. Performers won’t mind that. If you get a great shot, it’s something they can use for their publicity later on.
Try to avoid “microphone face”. That is, taking a photo of the singer when their microphone is directly over their mouth. It makes them look like they are eating the microphone. Related to that is “microphone shadow”, where the shadow makes it look as though the performer has a hole in their face. Neither are a good look. Always stand to the side of a performer instead.
Have your camera on continuous drive. If a performer is on the move, you can fire off several shots and most times, you will get at least one usable shot.
Keep your eye on the stage at all times, and don’t go through your photos until after the band has finished. Performers can sometimes be predictable and having your eye on the stage means you can predict when something is about to happen. For instance, if someone approaches the drum riser, it means there is a good chance they might try to jump which makes for a dynamic and exciting shot.
Play with zooming and tilting your camera. You can get some interesting shots out of titling your camera in one direction, or zooming in on a particular detail.
If no-one claims a setlist at the end, feel free to take it home as a souvenir.
Part 3 – Processing
After a night out, it’s time to head home and go through the photos. Don’t be surprised to find yourself home in the early hours of the morning, your stomach full of kebab.
Be very aware of the submission requirements. If you are working with an online publication, the usual turn-around is 2-3 days, maximum. Always aim to meet those deadlines at the very least. Even better, beat the deadlines. If you can beat the deadlines, the editor will like you, and being friends with the editor is quite beneficial.
Quality is always over quantity. Expect to chuck out most of the photos that you have taken. Personally, I might take around 500 photos in a night and use 50. However, they are the 50 best shots of the night. So, don’t be precious with your photos – make your selection of photos tight and engaging and avoid repetition.
Play with cropping, contrast and effects. This is why programs like GIMP, Photoshop and Picasa exist. A simple crop can entirely change the perspective of a photo, as can something like using black and white. It can turn an average-looking photograph into a great one.
If you can do a gig regularly for a publication and your shots do well, then people will start noticing you. Sometimes bands will approach you after their set and will tell you how much they appreciate your photos. Or they might ask you for copies of your photos so they can use it for their own site or posters.
After getting a reputation around town and the admiration of your editor, you will be ready for the big shows.
About the Author: Cissi Tsang
Cissi Tsang is a photographer and writer from Perth, Western Australia. She is an experienced live music photographer who has taken photographs for multiple publications. She also has experience as an artistic photographer and has exhibited around Australia. You can also find Cissi on Google+.