Understanding How Aperture & Shutter Speed Work
 by
Sparkle Hill
by
Sparkle Hill

There are three settings that make up the exposure triangle on your camera. ISO, Aperture, and Shutter Speed.
ISO is the easiest to understand because it only controls the amount of light that your sensor picks up on. The lower the ISO, the less light you get on your images. The higher the ISO, the more sensitive your camera’s sensor is to light, and the more digital noise will be present in your images.
But what about the other two settings? While they also both control the amount of light you let in, they also control other aspects of your image as well.
Understanding Aperture
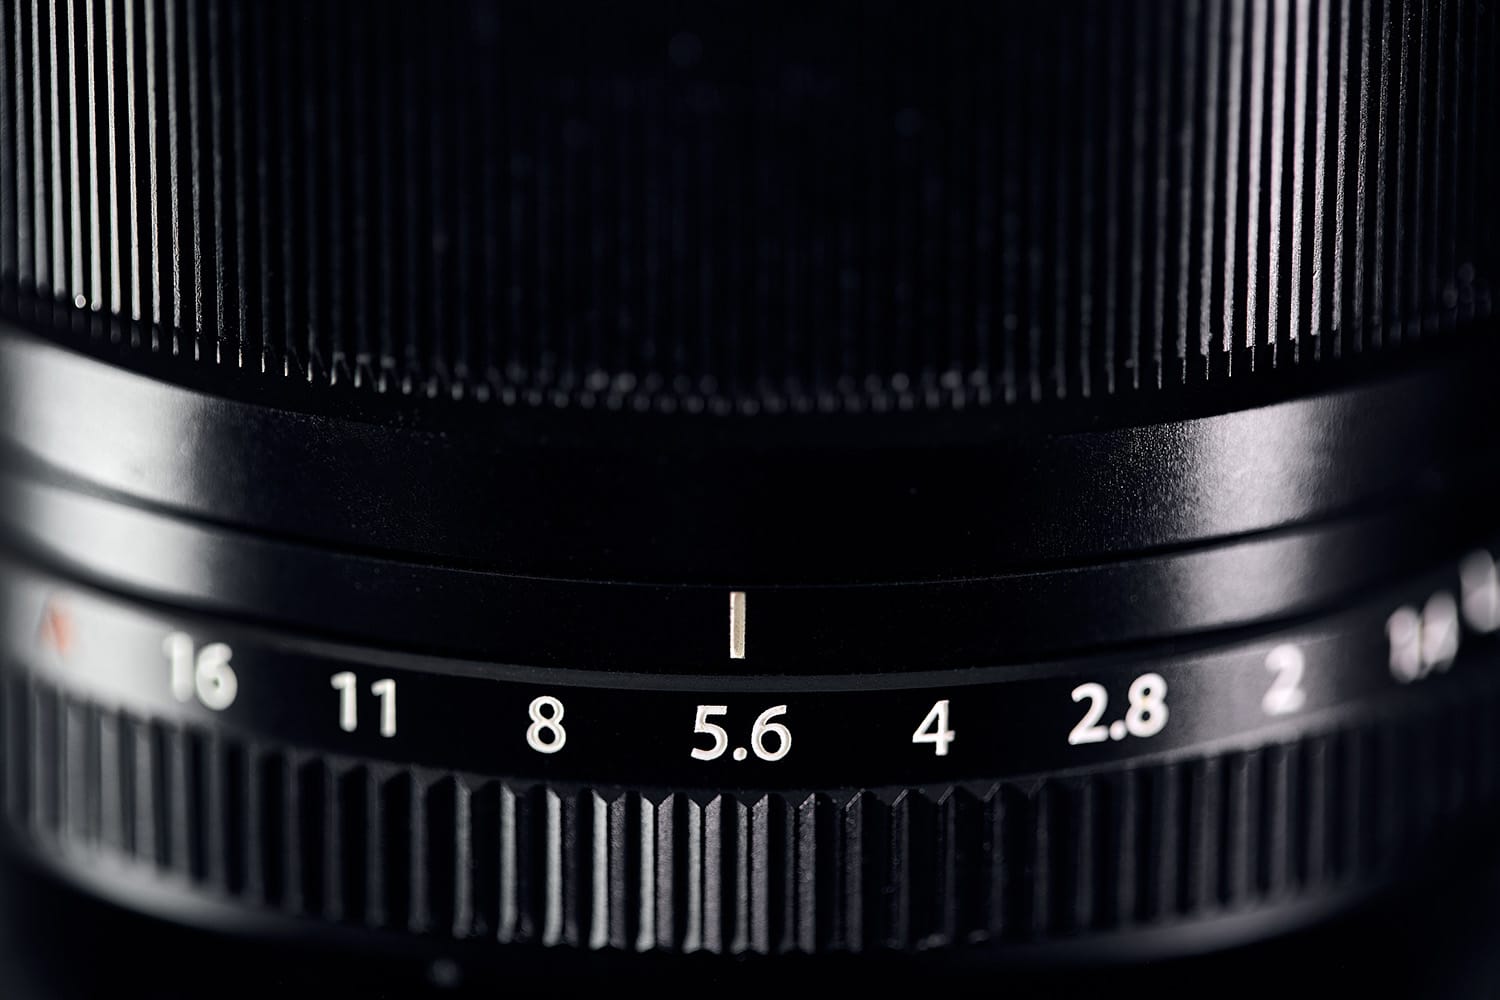
Aperture is a setting that controls how large the blade opening is at the front of your lens. It is measured in f/stops such as f/2.8, f/5.6, f/16, etc.
Smaller numbers, such as f/2.8, are considered wide or large. Larger numbers, such as f/16, are considered small. This seems a bit backwards and can be confusing when learning your settings. When shooting with the smallest number that your lens is capable of, this is known as shooting wide-open. This is because the smaller the number, the wider the opening is.
Changing the size of the opening on your lens controls how much light you are letting in. The larger the opening, the more light you are allowing in. Shooting at f/2.8 means that the opening is large and wide, therefore a lot of light will come through your lens. However, shooting at f/16 will cause the opening to be much smaller, meaning less light gets in.
Aperture also affects your depth of field. Wide apertures (small numbers) give you a shallow depth of field. This means the area of the plane of focus is smaller. Many photographers like to shoot with wide apertures to get a blurry background and foreground leaving their subject the only thing sharp and in focus.
If you are working with large groups of people, or any situation you want most, if not all, of the scene sharp and in focus, you will need to adjust your aperture to a higher number. This gives you a deeper depth of field.
Just keep in mind that adjusting this does affect the amount of light coming in, so you may need to adjust the other settings accordingly to compensate.
Understanding Shutter Speed
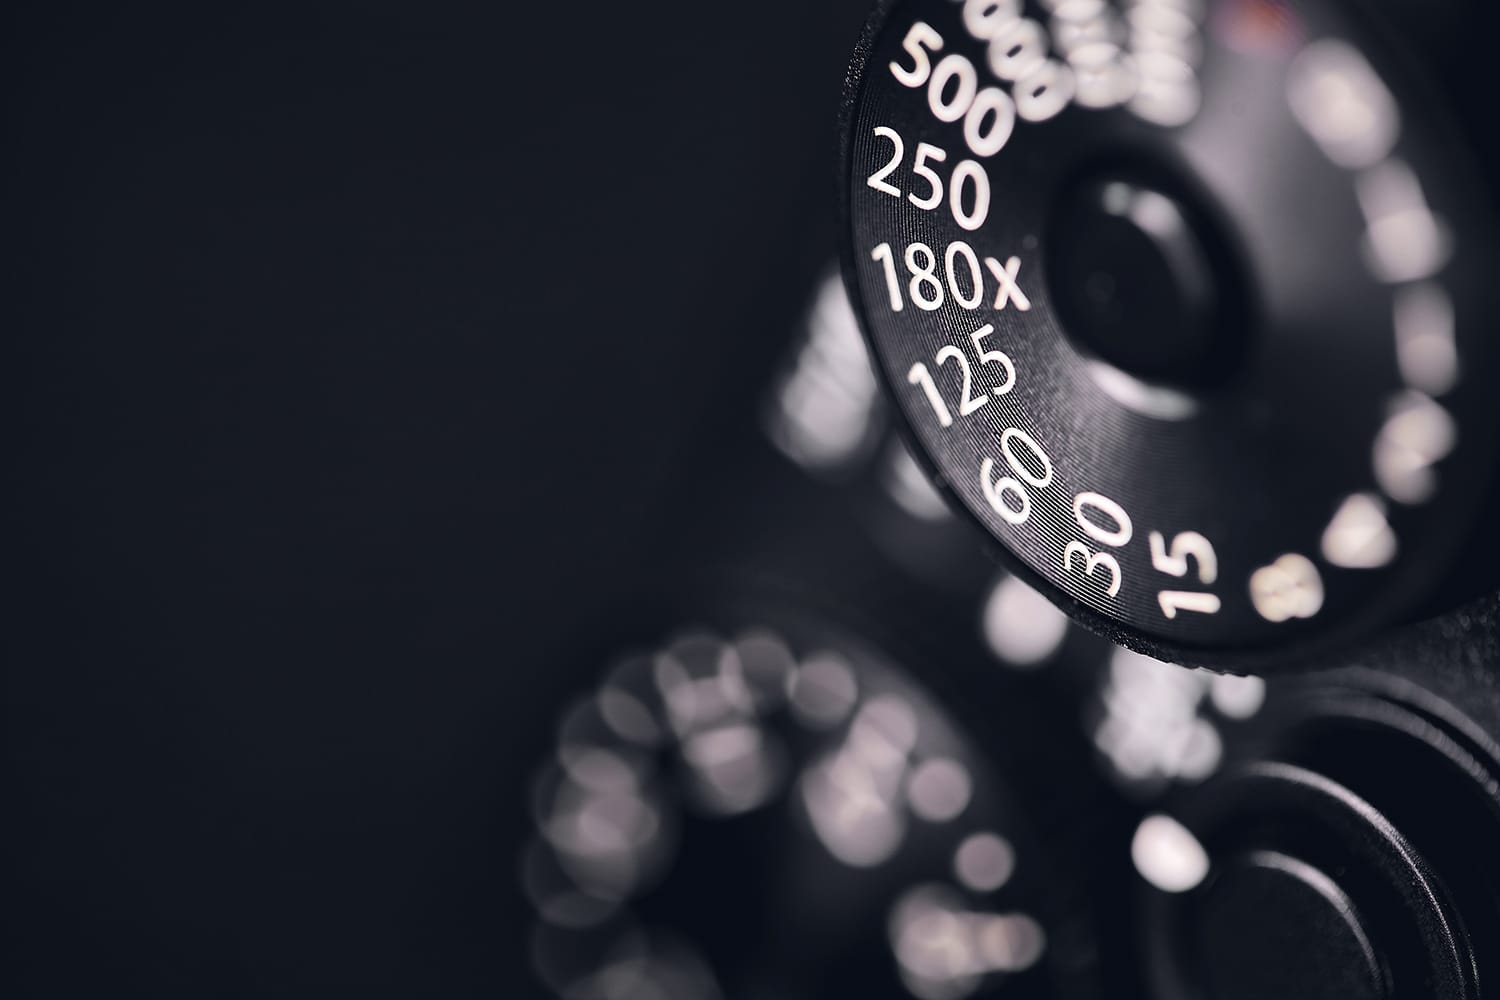
Shutter speed does exactly what it says, it controls the speed of your shutter. When you click the button to take a photo, the shutter opens and closes. Adjusting your shutter speed tells the camera how long to keep the shutter open to capture an image before closing.
Shutter speeds are measured in fractions of a second and seconds. 1/250, 1/60, 1/8, etc. The faster the shutter speed, the less time light has to get in. The slower the shutter speed, the more time light has to get in.
As you can see, just like aperture, shutter speed does affect the amount of light coming in your camera. However, shutter speed also controls how your camera captures motion. Shooting with fast shutter speeds freezes motion. This is the best option when photographing busy children or any situation where things may be moving and you want to freeze the motion.
Shooting with slower shutter speeds allows more motion or movement in your photos. This means that you will get motion blur in your images. While some photos benefit from motion blur and that is the intention of the photographer for creative purposes, typically you want to avoid it in regular day to day photos.
You may also want to use a tripod when shooting with slower shutter speeds to avoid camera shake. Camera shake is completely different than motion blur. It occurs when the camera moves while taking the shot. This can completely cause your entire image to be out of focus. So if you are forced to shoot with slower shutter speeds, make sure you stabilize your camera with either a tripod or place it on something steady.
To Sum It All Up
As you can see, your Shutter Speed and Aperture settings both control the amount of light that you allow into your camera. When shooting in full manual mode, adjusting one of these settings may require you to adjust the other to compensate for the light (exposure).
These settings will vary depending on the light you are working with and the creative outcome you are looking for when it comes to depth of field and freezing or capturing motion.
The exposure triangle is all about finding the balance between ISO, Aperture and Shutter Speed. It takes time, practice, and patience to get comfortable with how they all work together. The best way to master this is by learning each setting first individually.
One great way to do this is by using priority modes: set your camera to either Aperture or Shutter Speed Priority and take images in different scenarios. The camera will shoot all images at one setting and the camera will automatically adjust the other settings to compensate for exposure. Take note of how different lighting situations affect the other settings.
The more you practice and become familiar with the settings and how they control different aspects of your images, the easier it will get. Do your research, learn from others, but most importantly, get us much hands on practice as you can. Do not expect to master manual mode over night. Be patient with yourself and you will have these settings mastered before you know it!
About the Author: Sparkle Hill
Sparkle Hill has been in the photography and blogging industry for over 6 years. Her niche turned out to be natural light/on location photography. Her primary focus has always been families, children, and high school seniors. Her love for photography led her into blogging so that she could share the knowledge she has obtained over the years with other photographers. You can find her on Facebook.