Your Guide to Blue Hour Photography

Twilight, blue hour, dusk. No matter what you call it; it’s a beautiful time of day for photographers to capture some unique and almost otherworldly images.
Characterized by beautiful, silky skies where the remaining light takes on a faint blue-colored tone, blue hour is that often-overlooked, yet spectacularly mysterious time of day that occurs just before sunrise, and again just after sunset. Generally this time of day lasts between 20 and 40 minutes, weather and latitude-dependent.
If you’d like to join the elite ranks of photographers who have managed to capture, and successfully photograph beautiful images during this time of day, this guide’s for you. In it, we’ll uncover what you can do to create amazing blue hour images – ones that are brimming with beauty!
Plan Ahead
The first step in capturing amazing blue hour images is knowing when to go. Since the timeframe for these images is relatively short, you’ll want to plan ahead and be on-location before it happens. Consider using an app like Golden Hour to find out when blue hour will be in your location. Also, keep in mind that the sky will appear blue to your camera before it looks blue to you! Be sure to fire off some test shots after the sun goes down to check for that blue tint.

Bring Along a Tripod
When using a slow shutter speed, a tripod will help you to create sharper images, without the risk of camera shake. Don’t forget to bring along a tripod, or you’ll have to look for a steady surface to place your camera on when capturing your shots. For best results, you’ll also want to use your camera’s timer or a cable release to further avoid camera shake.
Consider Using Shutter Priority Mode
When it comes to capturing amazing images during blue hour, having full mastery over your camera settings is key. In most cases, switching your camera to shutter priority mode is ideal. This mode will allow you to set a slow shutter speed, enabling you to create those beautiful long-exposures that will render the sky as soft and silky, and create light trails from moving sources of light.

Shoot in RAW
Shooting in RAW will give you the highest quality blue hour images, and the most options when editing. For example, if your images are a bit too light or dark, you can easily adjust the exposure compensation later on.
If you’re not too sure whether you should shoot in RAW or JPG, read this article.
Consider Using Manual Focus
While autofocus works fine when there’s plenty of light, once the sun’s gone down your camera may have a hard time focusing where you want it to. Consider switching to manual focus to gain more control over your focus points.
Try Auto Exposure Bracketing (AEB)
Consider using auto exposure bracketing (AEB) when shooting during blue hour. With this option, your camera will take three, or more, shots using slightly different exposures. This will help you to salvage those images later, allowing you to create a composite image using different exposures. For instance, if your light areas are overexposed, you can blend different exposures together, helping to salvage images with overexposed areas.
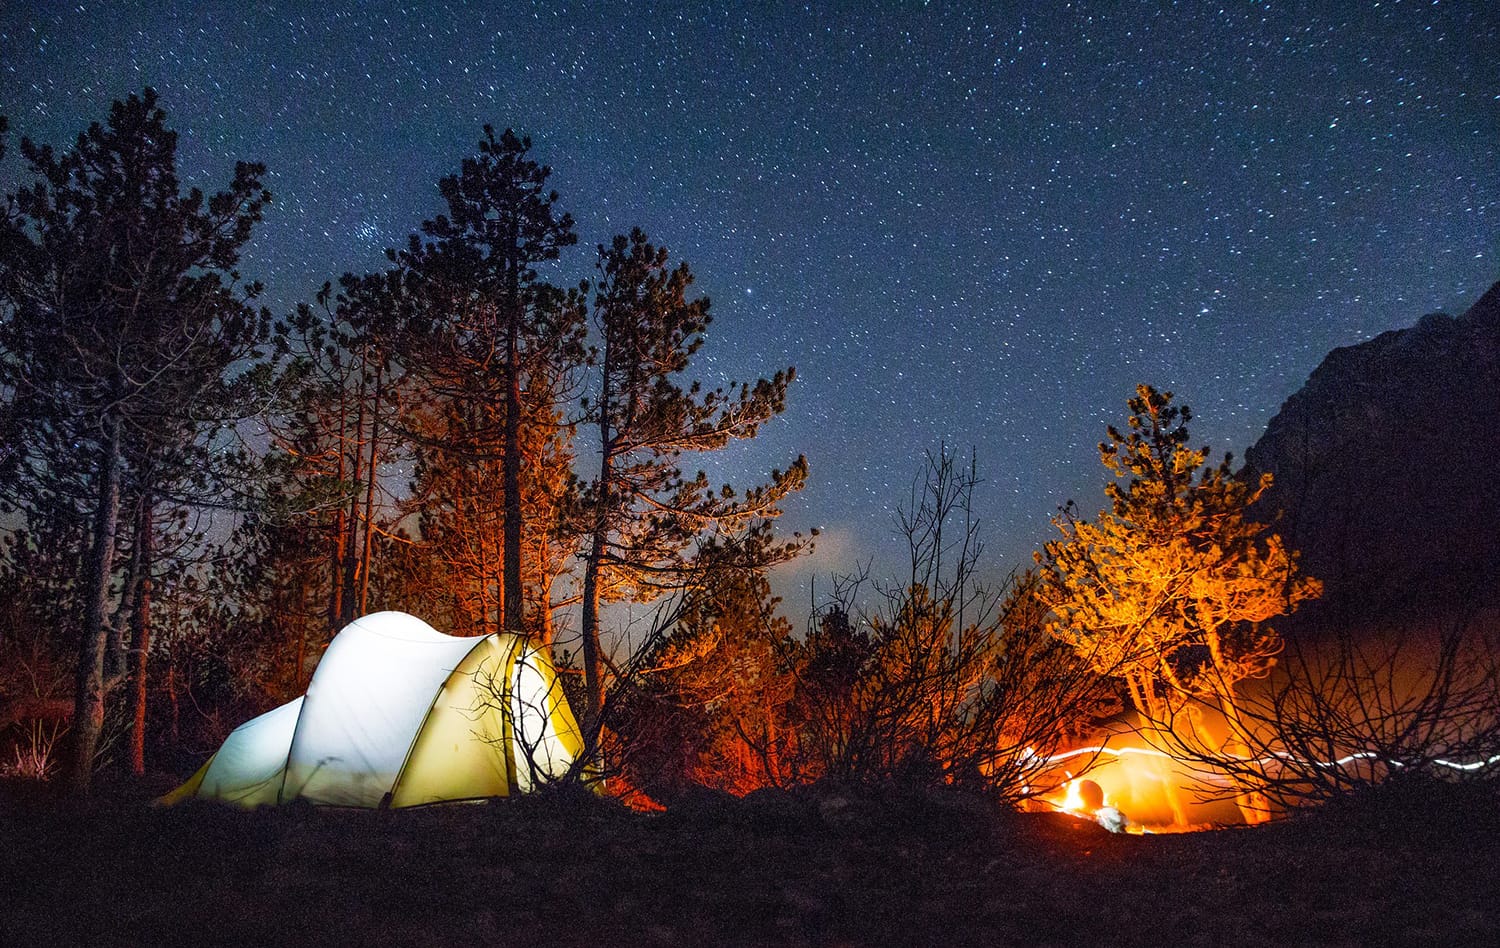
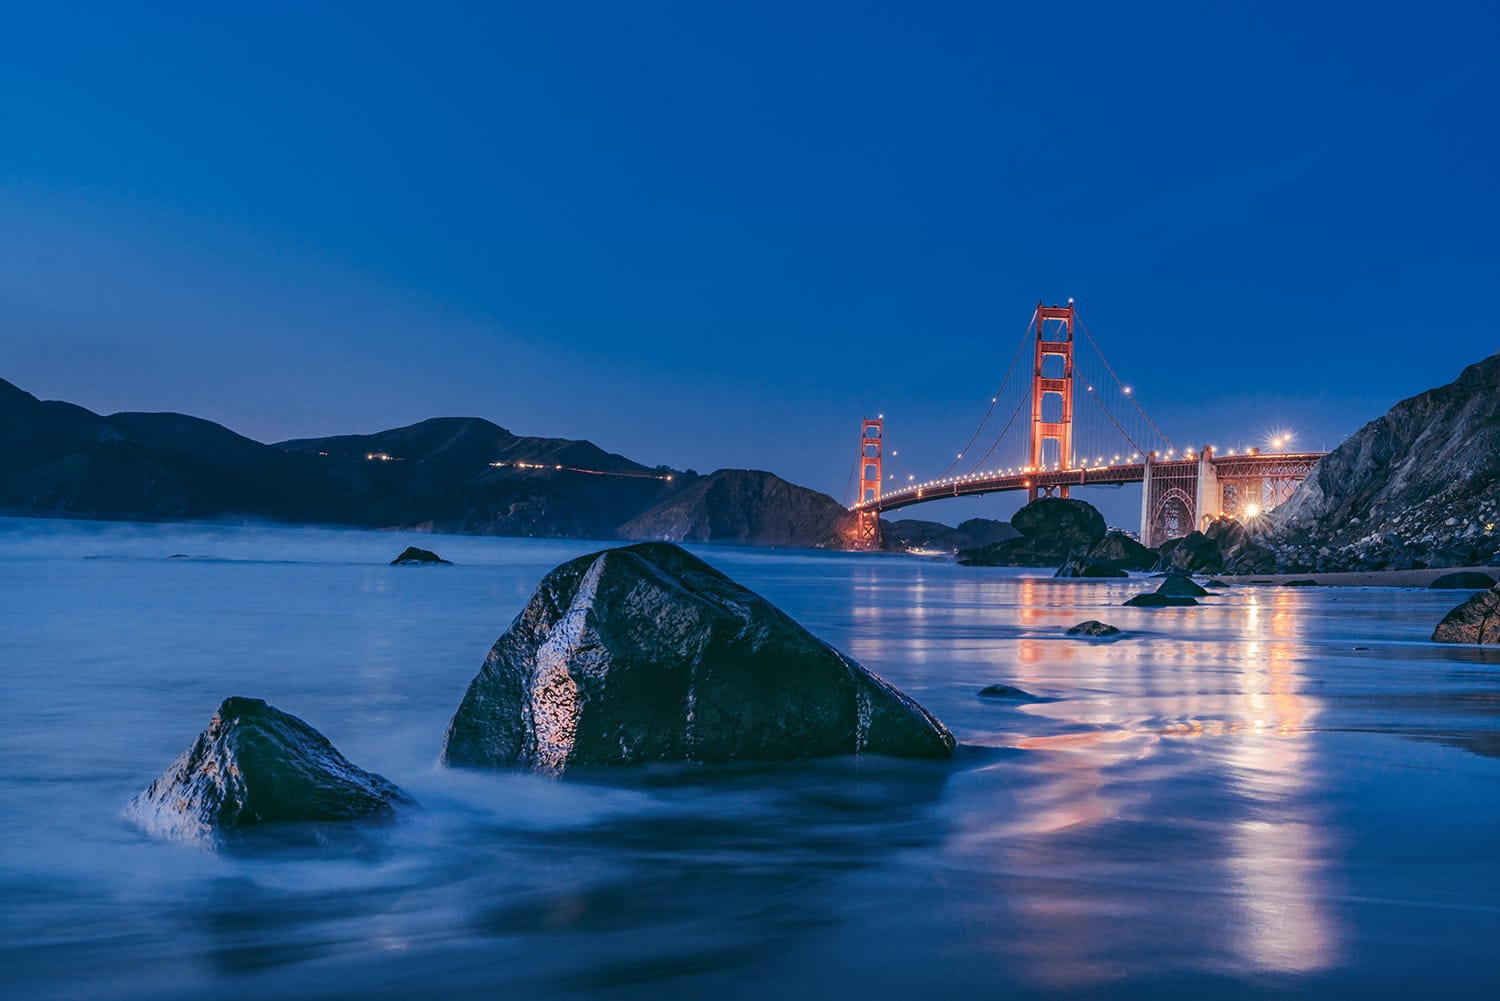
Look for a Light Source
Successful blue hour photography almost always requires a light source. Whether that’s a bright, full moon, a distant city skyline reflecting on the water, an illuminated bridge, the steady flow of traffic, or even a campfire or a tent that’s lit from the inside with a flashlight!
Of course, if you’re shooting the horizon itself, there may be enough light from the setting sun that you don’t need any additional light source. Be creative, look for opportunities to incorporate light, or try to find a vantage point that benefits from light when planning your shoot.
Use a Narrow Aperture for Starbursts
If you’d like to capture starbursts in your blue hour images, you’ll want to use a narrow aperture, like f/16. Streetlights are the easiest and most prevalent subject to render as starbursts, but even lights on a bridge or headlights can work as well. You may also want to consider adjusting your ISO slightly higher as the night gets darker, to compensate for the darker lighting conditions.
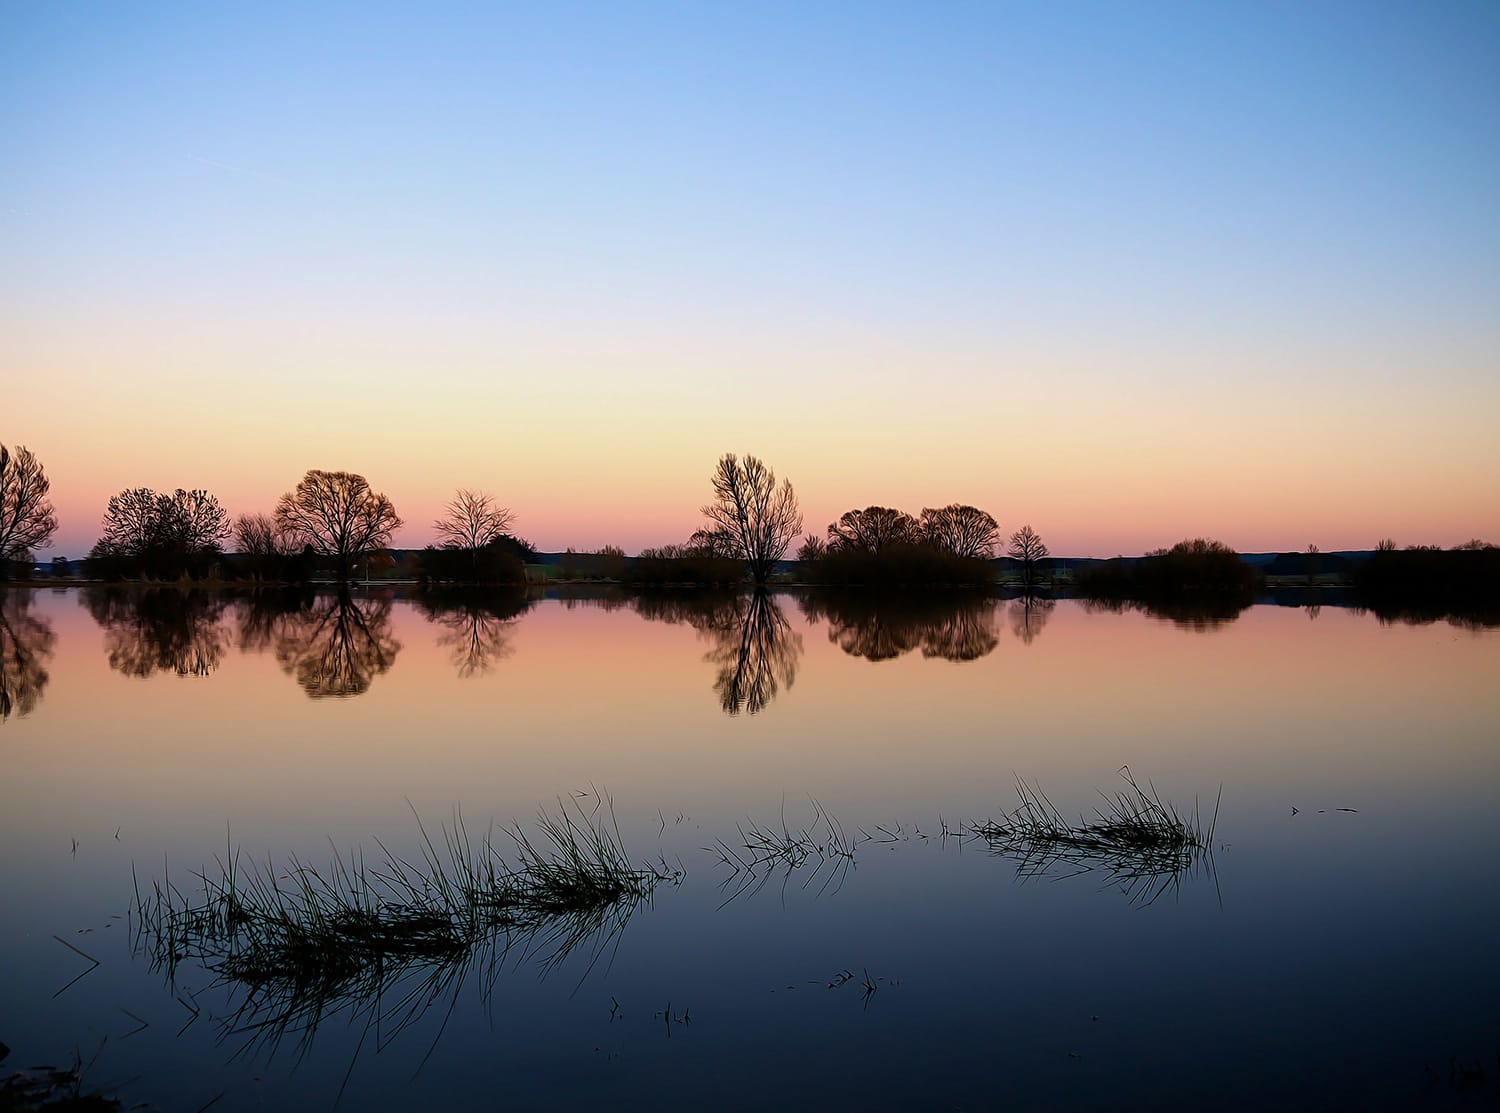
Capture Tranquility
Blue hour is the perfect time of day for creating shots that showcase the beauty of tranquility found in nature. Once the sun dips below the horizon, the beautiful, creamy sky makes for a perfect peaceful backdrop; especially when it’s gently illuminating a pond, river, or the sea. A beautiful encapsulation of tranquility!
Showcase Excitement
Conversely, you could go a bit urban with your landscapes and look to create blue hour images that perfectly capture the excitement of a city that never sleeps. Blue hour is the perfect time to capture images of skylines, bridges, and light trails from traffic. Convey excitement!

Follow the Storm
The cloud formations that form just as a storm’s breaking can be truly spectacular. When this happens during blue hour, you’re in for a real treat! The excitement and drama of the dark, brooding clouds contrasted against the pale glow of the sky can make for a beautiful photo opportunity.
Get Creative in Post Processing
Blue hour images lend themselves beautifully to some fun post processing tricks! Consider playing up the dark colors, or adding a touch of warmth to your blue hour images. You could even make the white balance warmer, adding just a touch of gold to your images. Your options are limitless!
The above tips should help to get you off to a great start with your blue hour photography. Don’t forget to plan ahead, scout out a location, and consider a light source. Then grab your camera and tripod, and have fun experimenting with the dreamlike-quality of images that are captured during this spectacular, yet fleeting, time of day.
Have you tried your hand at blue hour photography? Let us know on Facebook or Twitter!
About the Author: Christina Harman
 Christina is a part time blogger and full time photography enthusiast living in Southeast Alaska. She enjoys travel photography and has taken pictures in countries such as Mexico, England, France, and China. She likes sunny days, new lenses and drinking good coffee. You can visit her at Tangled Thoughts.