Microscopic Photography: An Introduction

The best photographers have an eye for detail – even the tiniest, simplest detail. Droplets of water from a faucet, the tiny thorns of a red rose, and even the snowflakes. These tiny details are captured by the photographer’s lens, and they each tell a story – or a purpose.
There are even photographers who concentrate on taking pictures of these tiny subjects. Some photographers use the art of micrography or microscopy in creating these images.
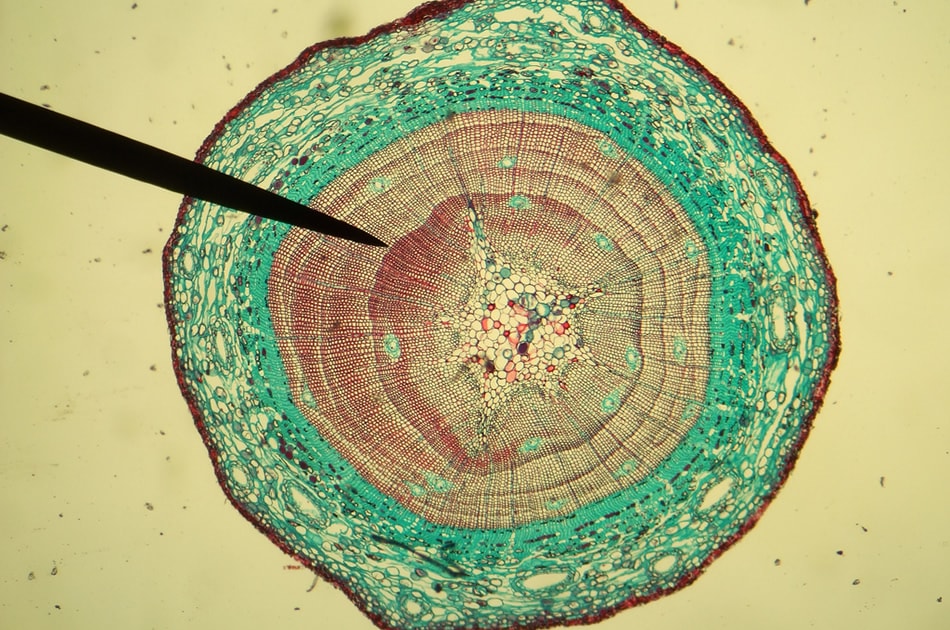
Microscopic shot: stem of first-year Pinus taiwanensis, cross section. Photo by 石川 Shihchuan
Microscopy refers to the art of creating photographs using a microscope. The microscope creates an image called a micrograph. It produces an artistic rendering of the subject. Producing artistic images with the help of a microscope has long been practiced, particularly in the 70s. Nowadays, the microscope is more than just a device used for scientific and medical reasons; it has become a new avenue for expressing artistic impressions across a variety of platforms.
How To Create A Micrograph
Generally, an optical microscope is used in creating a micrograph or a photomicrograph. Most photographers, however, simply connect their digital camera to a microscope so that they can tale highly magnified photos of small-sized subjects. To create significant, interesting and good images, it is important for a photographer to know not only how to connect a microscope to a digital camera, but also what needs to be done in terms of techniques, style and camera dynamics.
As such, it is essential for first time micrograph photographers to follow a guide.
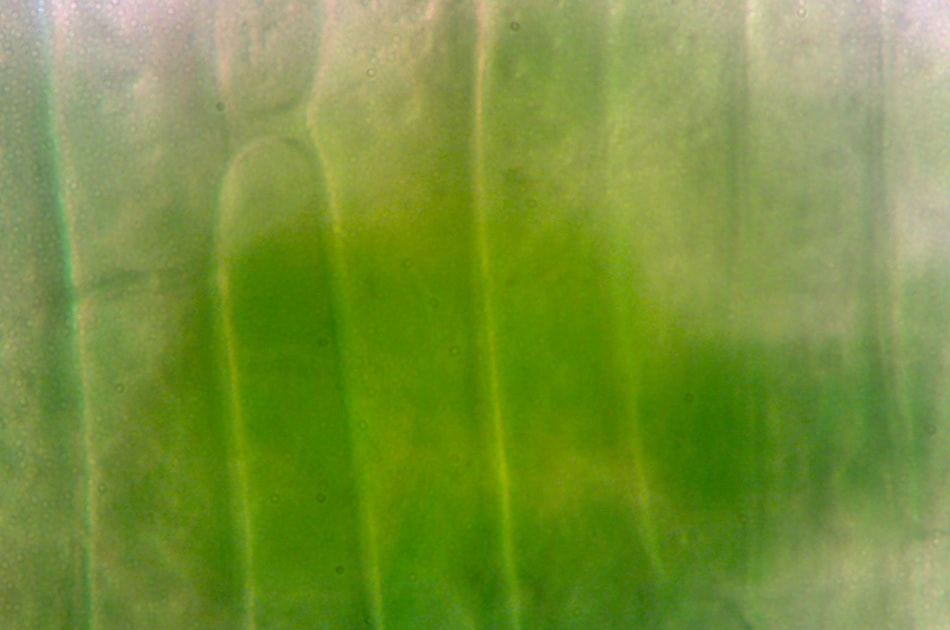
Leaf cell structure, 600x. Photo by smaller.pathological.ca
Guide To Microscopy / Micrography
First off, you need to have the right gear if you want to create good micrographs. Your most essential gear should include:
- Microscopes
- DSLR camera (body)
- Fiber optic light
- Extension tubes
- Macro lens
- Tripod
- Bellows
Other important items include extra microscope slides (clean, of course!), cotton buds or cotton-tipped stick for moving the tiny objects, and a cloth that you can use as background (black is always the best option).
For the DSLR, a camera with an APS-C sensor is recommended because it can magnify the image size to x 1.6 (when compared to full frame bodies). Be sure to hang the camera’s body over the eyepiece of the microscope with the help of your tripod.
To get a good ambient lighting, use the bellows and extension tubes. Primarily, the built-in lighting of the microscope is used. It is, however, better to add extra lighting. This is where fiber optic lighting comes in. It will help if you experiment and do some test shots first before doing any serious work.
Once you have all your gear ready, you can now proceed to choosing a good subject. You can find inspiration in practically everything that you see – or don’t see. If, for example, you find out that your living room carpet has accumulated some “unwelcome” particles, try to do a little Einstein act and pick up a small amount of these using a tong. You just might be surprised with what you’ll find! A tiny splatter on the wall or a flower blooming can be really interesting subjects, too. As always, allow yourself to dwell on the extraordinary out-of-the-box possibilities.
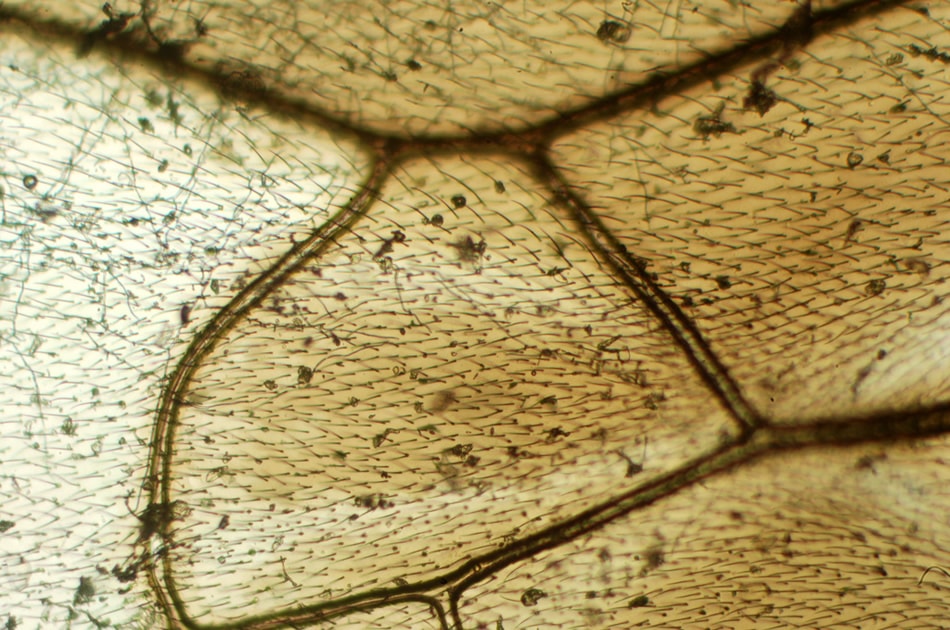
Microscopy – fly wing. Photo by BobMacInnes
The third tip involves focus. Magnifying a tiny image is difficult because you have to be extra careful with your controls. One useful technique is narrowing your camera’s lens so that the image you are trying to capture will be projected directly into the camera’s body. This way, you won’t have to worry too much about adjusting your camera’s focus; instead, you use only the microscope’s focus controls. This needs a lot of practice, though, as the image will appear different on your camera’s viewfinder and under the microscope.
Tip number four is to make your subjects appear as natural as possible. They should not appear perfect, choreographed, or unblemished; otherwise, people might get the impression that the images were photoshopped, highly edited, or computer-generated.
More lighting information
When photographing tiny subjects, lighting is everything. So, even if you’re just starting out, it is essential for you to have at least basic information about the different styles of lighting you can use for your microscopy shots.
- Darkfield Style of Lighting: If you want to achieve a dramatic effect, go with the Darkfield style. With your object positioned against a black background, you’ll create a “glare”.
- Kohler Style of Lighting: If you prefer backlighting with a neutral effect, Kohler illumination should be your style. Lighting is even, which is perfect if you want your tiny subjects to achieve a “portrait look”.
- Polarized Lighting: If you want your tiny subjects to project rainbow-like colors, Polarized lighting is the way to go. Even a strand of hair will come out with a rainbow of colors. This style of lighting is best if you want to reveal “invisible” aspects of your subjects.
These beginners’ tips may sound quite simple to you, but they’re proven to be really useful. The best thing for you to do is practice, and practice, and practice before you go out and focus your camera on the tiniest bits of subjects.
Resources for additional information
The art of microscopy or micrography is one that needs to be continuously practiced and learned. As such, it is important to allow yourself to continue improving. Here are some online resources (including contests) that might prove helpful:
Online resources:
- Olympus Microscopy Resource Center
- Nikon MicroscopyU
- Microscopes and Digital Photography
- Nikon Small World
Offline / Published Resources:
- Practical Photo-Micrography: By the Latest Methods – Andrew Pringle
- The ABC of Photomicrography: A Practical Handbook for Beginners – by William Henry Walmsley
- Microcosmos: Discovering The World Through Microscopic Images From 20 X to Over 22 Million X Magnification – Brandon Broll
With all these tips and resources, you’re ready to step out of your comfort zone and try microscopy photography. It’s unique, interesting and can definitely hold viewer attention. As previously mentioned, it is important to practice; even the masters find time to practice. Additionally, you should not forget to experiment with your shots.
Experimenting will give you more options to come out with your most creative works. Remember, photos are supposed to tell a story. Use your creativity to exploit this.
About the Author: Michael Gabriel
 Michael Gabriel L. Sumastre is an experienced writer who loves to take pictures of the countryside as well as aerial photographs. He maintains his professional writing portfolio at TheFinestWriter, and you can visit his photography portfolio at Sumastre Photography. Michael was hired by Booking.com to photograph 10 of the most beautiful beaches in Palawan, Philippines.